
Payment Form Types: Embedded vs. Overlay vs. Stripe Checkout
Last updated on

Have you been wanting to learn more about the different payment form types?
Payment forms are one of the most important elements on your eCommerce site. They are the last point your visitors reach before they turn into customers. While well-designed payment forms will provide a frictionless checkout experience and ultimately increase conversion rates, poorly-designed payment forms will confuse visitors and lead to high checkout abandonment rates.
When it comes to displaying payment forms on your WordPress site, you have a few options.
- Embedded Forms: Forms that are displayed directly on a page on your site.
- Overlay Modal: Forms that are displayed as a popup overlay on your site.
- Hosted Payment Pages: Off-site forms that are displayed on a hosted checkout page.
In this article, we’ll go over the advantages and disadvantages of each form type to help you decide which is best for your site.
Payment Form Display Options
If you use WP Simple Pay, the #1 Stripe payments plugin for WordPress, to accept payments on your site, you can select your preferred form type in the General tab of the payment form builder.
You can choose On-site payment form, Off-site Stripe Checkout form, or check the box for Open in an overlay modal.
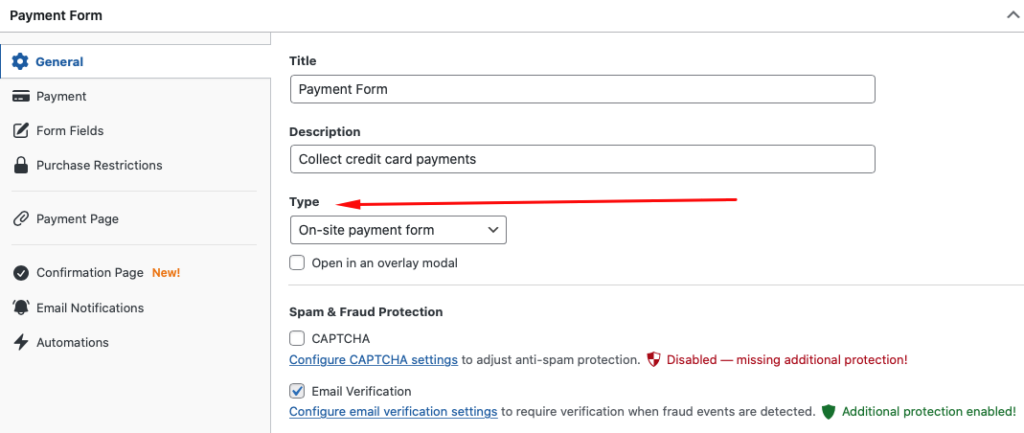
Keep in mind that these settings apply to each form. You can have multiple payment forms on your site that display differently. WP Simple Pay makes it easy for you to adjust the form Type for individual payment forms in the form builder.
Embedded Payment Form
An embedded form is part of a web page. It displays all fields on the page itself. Users don’t have to click anything to make the form appear or navigate to it because it’s always apparent.
Here’s an example:
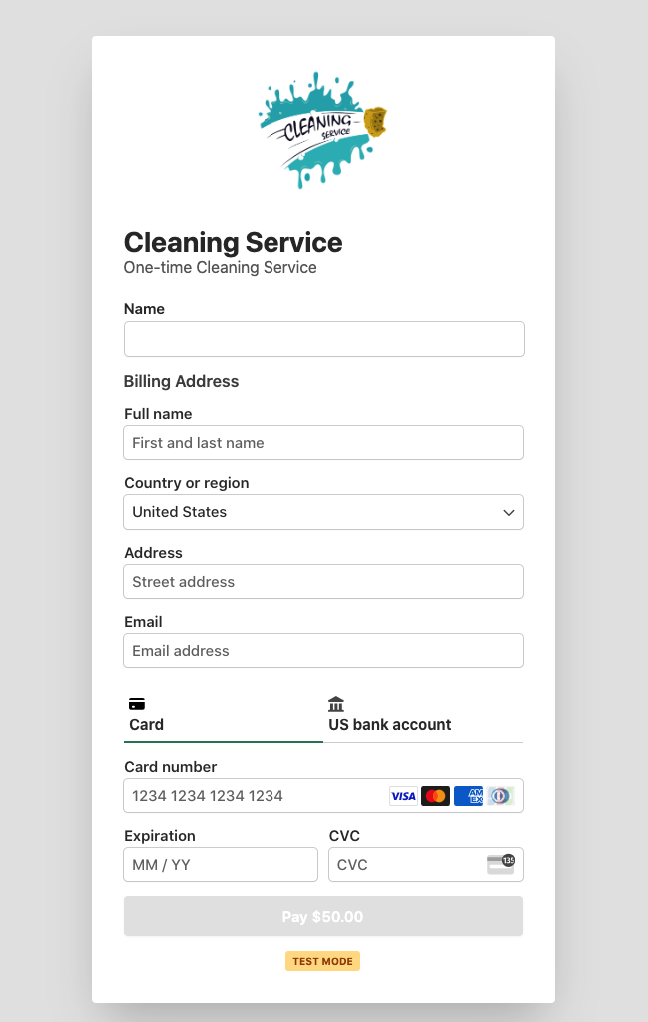
You can embed a payment form anywhere you like on a page. You might decide to float it to the side of your page’s copy, place it on top of a compelling image, or drop it in your sidebar.
Advantages of Embedded Forms
- Users can find them quickly because they’re right on the page.
- Users don’t have to take any extra steps to access them.
- They can be styled or rearranged however you like.
- In WP Simple Pay, they utilize Stripe Payment Element to provide real-time validation and securely collect payment details.
Disadvantages of Embedded Forms
- They take up space on the page you might want to use for other elements.
- They load immediately, which could slow down your page load time.
- They’re possible to miss if you have a lot of things happening on the page.
- Users may grow distracted and navigate away before using the form.
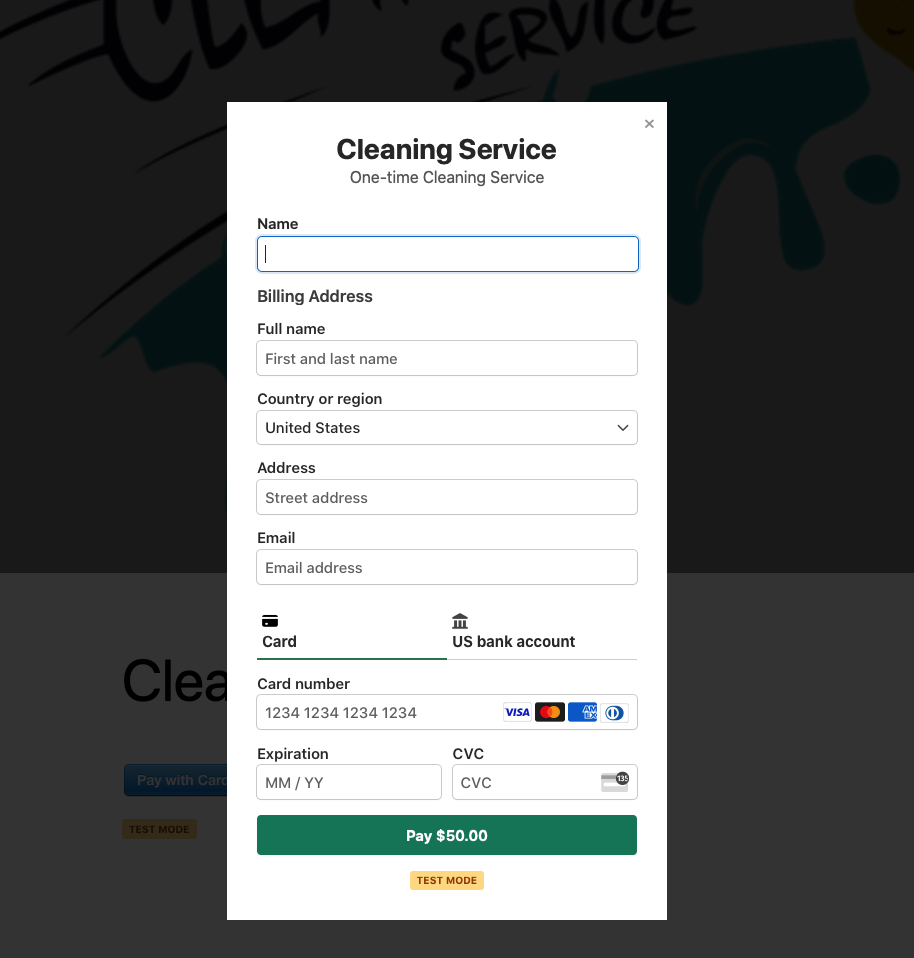
Overlay Payment Form
Overlay payment forms appear when a user clicks on a call-to-action button on a page on your site, usually it says something like, “Buy Now” or “Checkout Now.”
Once the form is active, everything else on the page is inaccessible unless they close the form.
Notice how the rest of the page is darkened, allowing you to focus on the payment form.
Advantages of Overlay Forms
- It’s impossible to miss because they appear front-and-center. The rest of the page goes dark to indicate that it’s unavailable.
- They can be styled or rearranged however you like.
- In WP Simple Pay, they utilize Stripe Payment Element to provide real-time validation and securely collect payment details.
Disadvantages of Overlay Forms
- Some users just don’t like popups of any kind and will close it immediately.
- Users have to click a button to make the overlay appear.
- Users may not notice the payment button if it’s not made obvious enough.
- They create an additional step where users might abandon the checkout process.
Stripe Checkout Payment Form
Stripe Checkout is a page hosted by Stripe’s Checkout service. Users are taken to a new page on Stripe’s domain. Their order information is shown on the left. A typical payment form appears on the right.
You can see a live demo here. The Stripe Checkout page cannot be customized further than seen on this page as it’s controlled by Stripe. If you need a higher level of customization, you’ll need to opt for an embedded or overlay form.

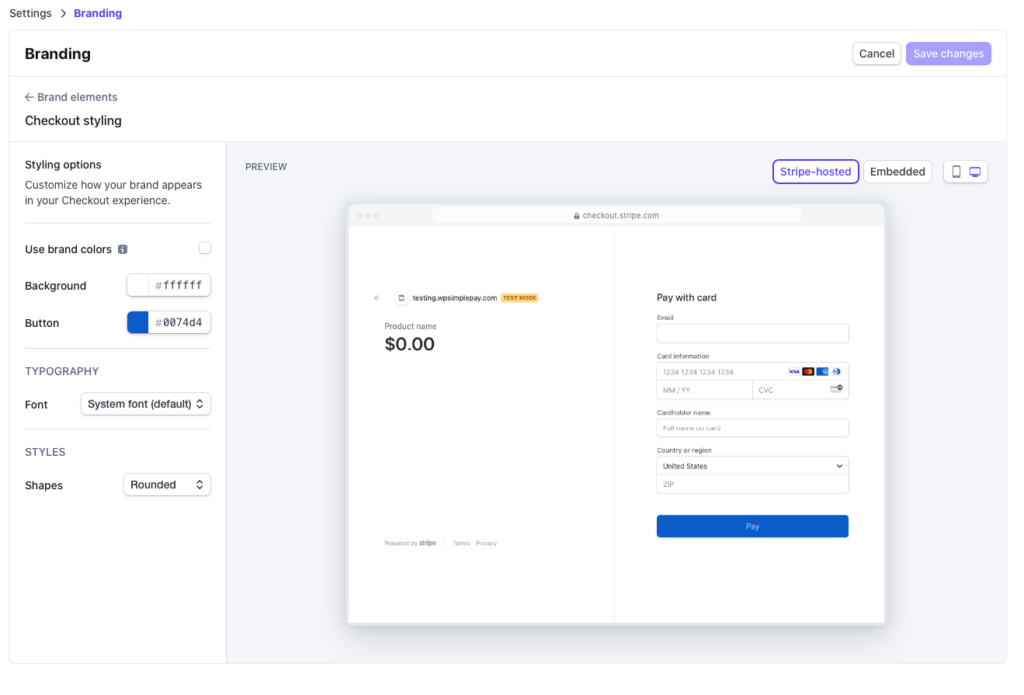
To customize this form, you can easily do so by navigating to the Stripe Checkout tab in WP Simple Pay. Here is where you can configure all options available for Stripe-hosted checkout pages.
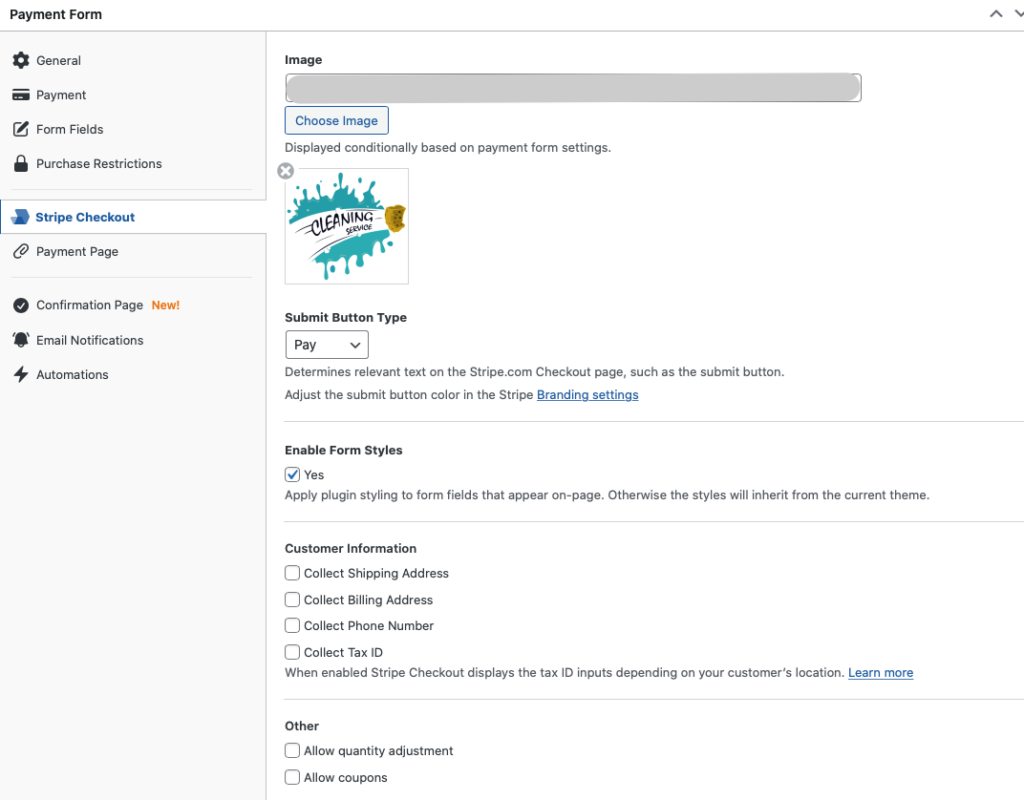
If you want to change the color of the Stripe Checkout background and the payment button, you’ll need to change the color in the Branding section of your Stripe Dashboard. You can easily access this page directly from the Stripe Checkout tab by simply clicking on the Branding settings link.
Advantages of Stripe Checkout
- A lot of people trust Stripe, which improves conversions when they see the Stripe logo.
- Stripe’s page is clean and simple. There’s nothing to distract users from purchasing.
- Users are redirected back to your site after completing their purchase.
- Apple Pay and Google Pay are enabled by default, so users can pay with their preferred payment method.
Disadvantages of Stripe Checkout
- Users are sent to a new page, which can be confusing.
- Users may not notice the payment button if it’s not made obvious.
Which Payment Form Type Is Right for You?
Now that you understand the three different payment form display options, you’ll need to decide which is right for your site.
Functionally, there’s no difference between the embedded form and overlay form. The overlay form is simply embedded into an element that only appears when the user clicks on a button. Same form, different location.
Stripe Checkout functions a bit differently because it appears on another page. But ultimately, they all do the same thing: Accept funds from the customer and put it in your account.
So, when you choose a payment form display option, you’ll need to consider two factors:
1. Your Site’s Design
Which type of form looks best on your site? Do you have room to embed a form on one of your landing pages, or would that clutter the page? If you have an existing landing page without space for a payment form, adding an overlay is usually cleaner.
Keep in mind that you can add your payment form to any spot on your site, not just the content area of a page or a post. You can also include it in your footer, sidebar, or header.
For instance, many nonprofits and charities add a donation button to their header, allowing visitors to donate from any page.
2. Conversion Optimization
Next, consider which type of form will encourage the most conversions. Ask yourself which type of form your customers are most likely to interact with. You may have to do some customer research.
Truthfully, the best way to determine which type of form will maximize conversions is to test them against each other. You can install an A/B testing plugin to show one version of your landing page to half your traffic and a second version to the other half. Each page should have a different payment form display type. If you have a lot of traffic, you can test all three versions at once. Then, review the results after 30-60 days.
Final Thoughts
Now that you understand the three different types of payment forms that you can use on your site, choose the one that’s right for your business and your customers.
Think carefully about this decision. It may just be a form, but it represents a significant point in your relationship with your customers.
If you liked this article, you might also want to check out our guides on how to optimize your product pages to boost sales and how to create perfect payment forms in WordPress.
What are you waiting for? Get started with WP Simple Pay today!
To read more articles like this, follow us on X.
Disclosure: Our content is reader-supported. This means if you click on some of our links, then we may earn a commission. We only recommend products that we believe will add value to our readers.

