How to Accept Google Pay / Apple Pay / Microsoft Pay in WordPress
Last updated on

Do you want to enable digital wallets on your WordPress site?
With WP Simple Pay, you can create a payment form that integrates with digital wallets like Apple Pay, Google Pay, and even Microsoft Pay with ease.
In this article, we’ll show you how to enable different digital payment wallets in WordPress (step by step).
Enabling Digital Payment Wallets in WordPress
Digital wallets are the future of payments and compared to credit cards, it comes with a lot of benefits. For example, paying with digital wallets is super easy and offers better security than most other forms of payments.
That doesn’t mean that credit cards are going away. In fact, if you’re using a payment plugin like WP Simple Pay to create your payment form, you can easily offer both payment methods – credit cards and digital wallets.
Step by Step Guide on Enabling Apple Pay / Google Pay / Microsoft Pay
Using WP Simple Pay is the easiest way to enable Apple Pay, Google Pay and Microsoft Pay on your WordPress site.
WP Simple Pay is the best Stripe payments plugin for WordPress that lets you easily accept online payments on your site without having to set up a shopping cart. The plugin also lets you accept Apple Pay / Google Pay / Microsoft Pay in addition to several additional payment methods.
With WP Simple Pay, you can also:
- Remove the additional 3% Stripe processing fee to receive the full amount.
- Create a payment form in minutes using tons of different pre-made payment form templates.
- Accept multiple payment methods, including ACH Direct Debit, traditional debit/credit cards, Cash App Pay, Buy Now, Pay Later services, Alipay, and more.
- Easily set up subscriptions and installment plans to ensure long-term funding and increase average order values.
- And more…
Remove the additional 3% fee!
Most Stripe plugins charge an additional 3% fee for EVERY transaction
…not WP Simple Pay Pro!
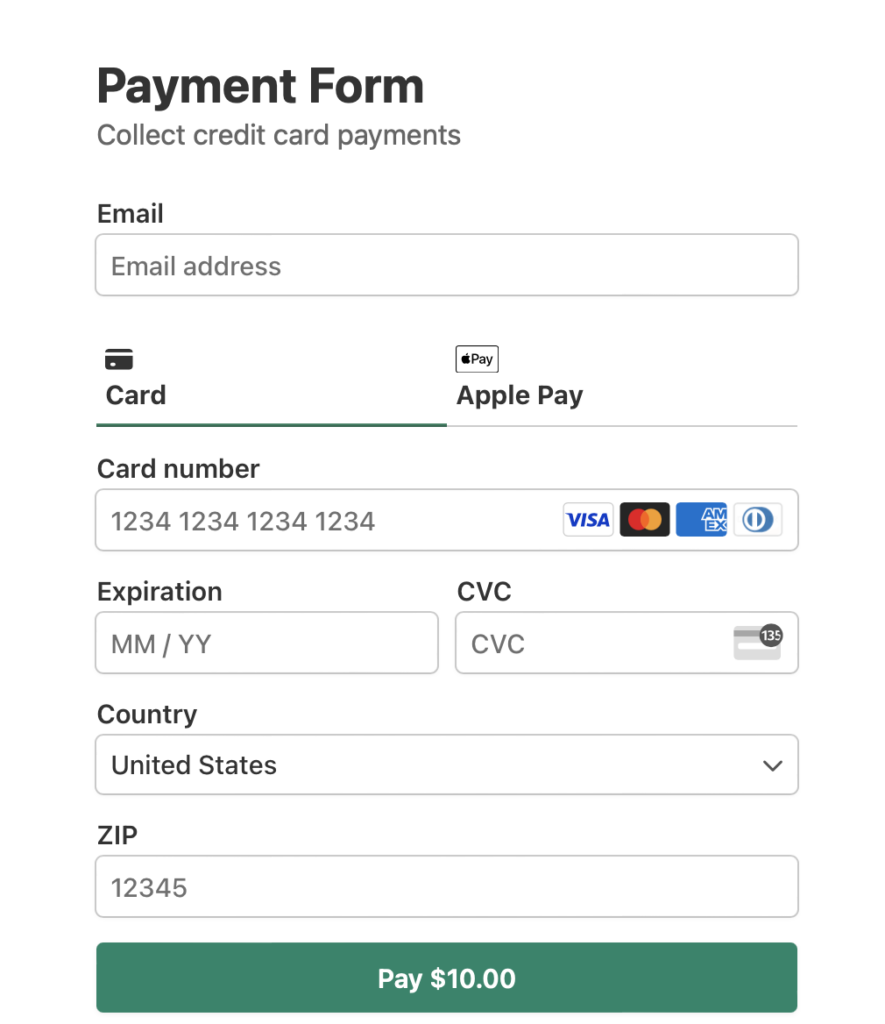
In this tutorial, we’re going to create the following payment form:
Before we begin, please note that to accept Stripe payments on your site, Stripe requires your site to use SSL/HTTPS encryption. Don’t worry if you don’t have an SSL certificate yet, we’ve created a simple step-by-step guide on how to add SSL in WordPress.
Let’s get started!
Step 1: Install and Activate WP Simple Pay
First things first. In order to activate payment wallets like Apple Pay, Google Pay, and Microsoft Pay on your site, you’ll need to install and activate the WP Simple Pay plugin.
All you need to do is visit the pricing page and choose the best plan for your needs.
Next, head over to the WordPress dashboard and upload the .zip file that you received in your purchase confirmation email. You can also find the file by logging into your WP Simple Pay account.
If you need help installing WP Simple Pay, don’t worry! We’ve put together a detailed guide on how to install the plugin.
Once you’ve installed and activated the plugin, its setup wizard will prompt you to connect your Stripe account. If you don’t have a Stripe account yet, you can create one now.

If you didn’t see the setup wizard, simply head over to WP Simple Pay » Settings » Advanced tab and click the Launch Setup Wizard button.
2: Connect WordPress to Stripe
To connect your WordPress site to Stripe, click on Connect with Stripe.

Next up, enter the email address you use for your Stripe account and connect it to your site. If you don’t have a Stripe account, you can easily create one by entering your email address and completing the registration.
Upon completing this process, you’ll be shown a success page that says, “Setup Complete.” Next, click on Create a Payment Form.

Step 3: Accepting Payments via Apple Pay / Google Pay / Microsoft Pay
So far, you’ve connected your site to Stripe and you’re all set to create a payment form that accepts payments via all the available payment wallets.
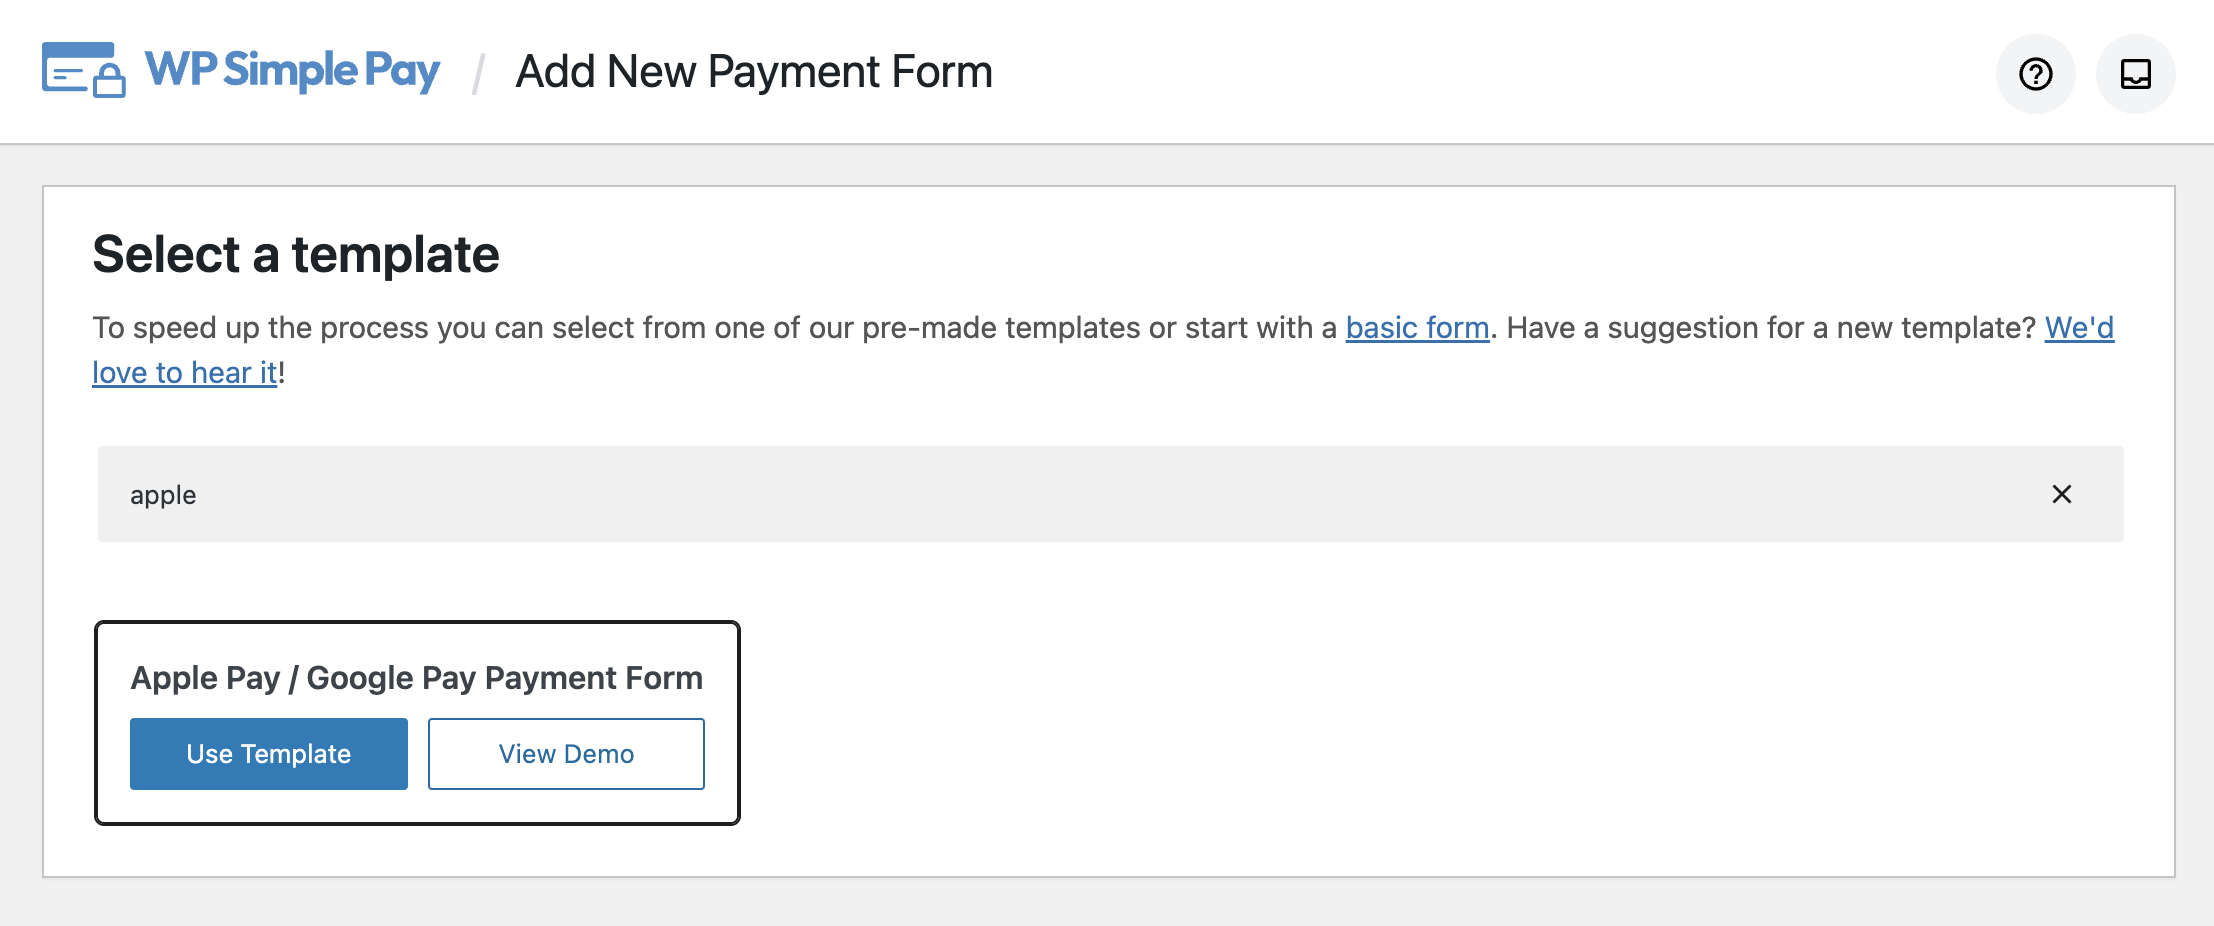
To create a payment form, you’ll need to choose a form template. In this step, you can see different payment form templates. If you’re not on this page yet, you can navigate to WP Simple Pay » Add New to start creating a payment form.
Let’s click Apple Pay / Google Pay Form.
Next, you’ll be asked to provide a title, description, and choose a type for your payment form.
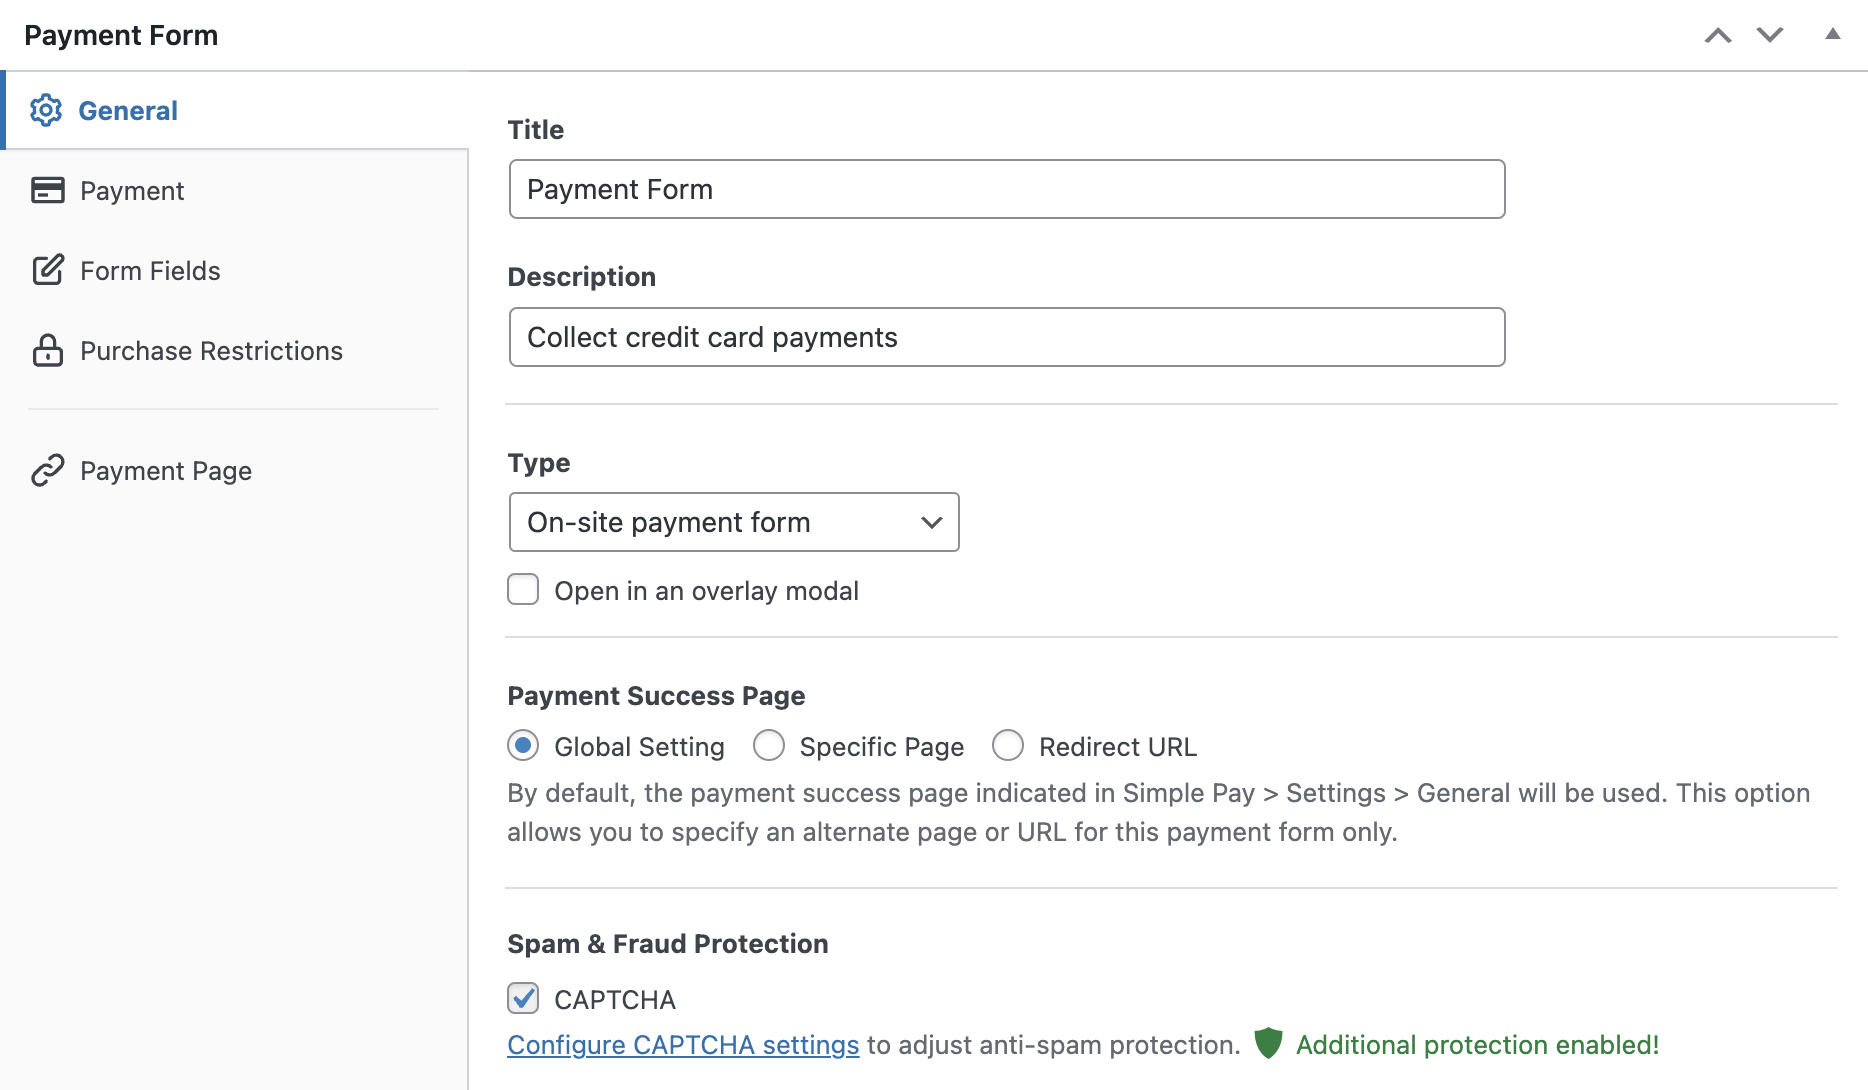
To customize the payment success page, choose either Specific Page by which you can redirect users to one of your existing pages on your site after completing the payment or choose Redirect URL if you want to redirect users to a third-party URL.
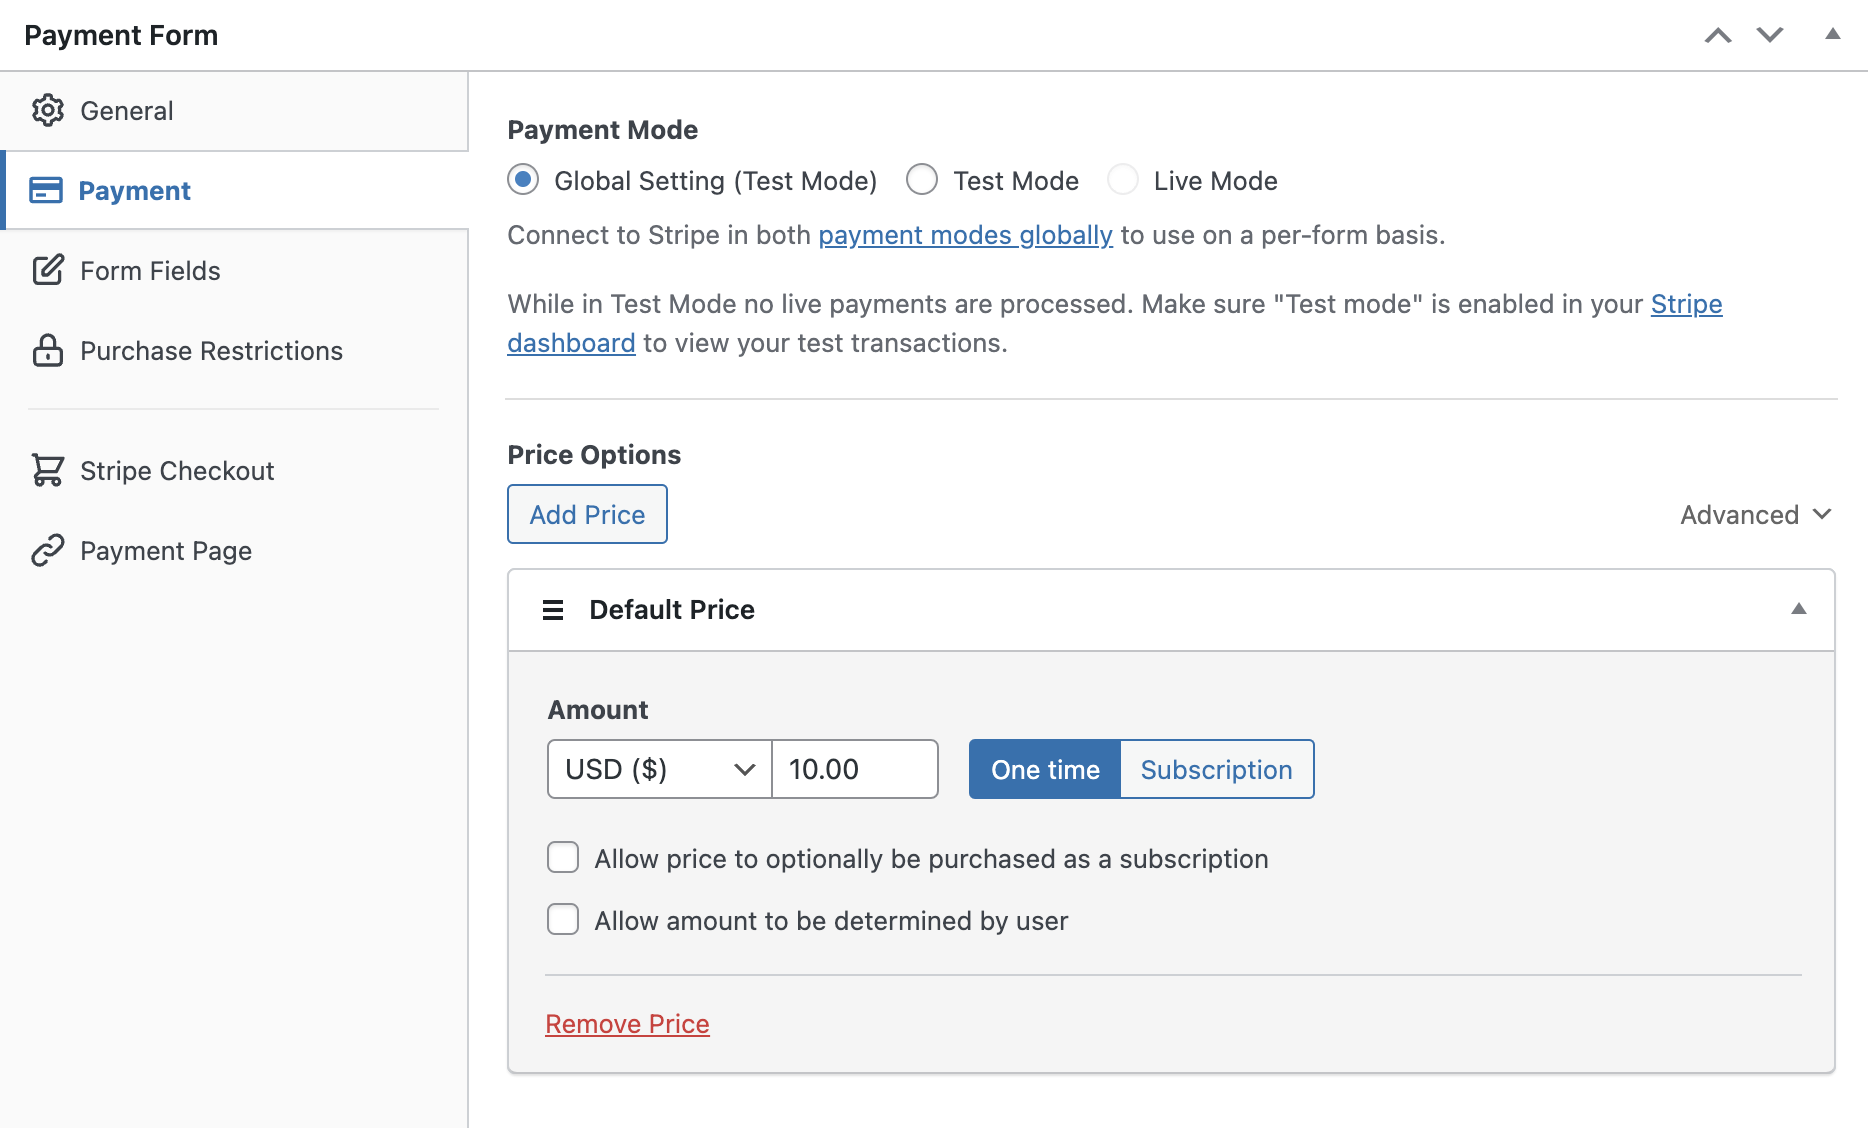
Next, click on the Payment option from the left and you can edit the currency, amount, and even choose between a one-time and subscription payment.
You’ll notice a list of available payment method options. Go ahead and check the box for Cards and then click on Configure.
Next, check the box next to Enable Apple Pay, Google Pay, and Microsoft Pay mobile wallets and click Update.
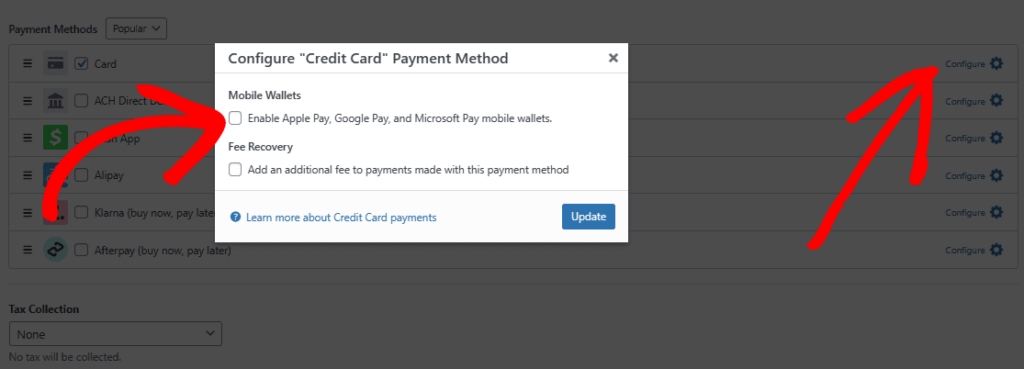
If you want to recover the additional Stripe processing fee, be sure to check the box for Fee Recovery and enter the amount.
In the Form Fields option, you can add or customize any existing form fields.
To customize the button for your payment form, click on the Stripe Checkout option and choose a Button Type and Form Style based on your needs.
This works if you chose Stripe Checkout for your form Type rather than On-Site. Stripe Checkout forms are hosted on a secure page by Stripe, while on-site payment forms allow your users to complete their transactions directly on your site.
Google Pay and Apple Pay are enabled by default when using Stripe checkout. However, to accept Apple Pay, your site must be connected to your Stripe account in Live Mode.
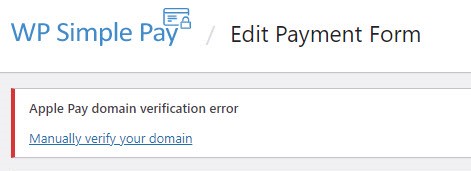
You’ll also need to register your web domain with Apple. WP Simple Pay will automatically register your domain with Apple the first time you save the form. However, if you see a domain verification error like the screenshot below, you’ll need to manually verify your domain name as follows.
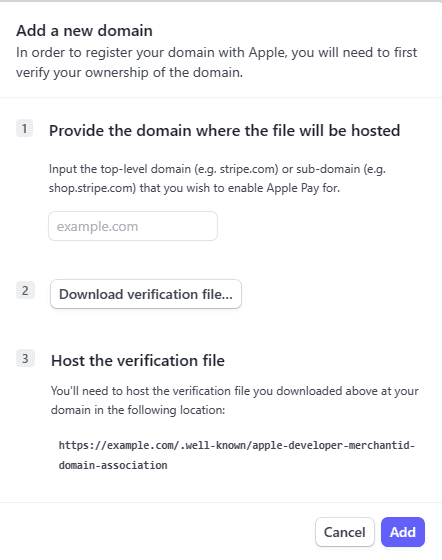
First off, you’ll need to tell Stripe to register your domain with Apple. This can be done by simply navigating to the Apple Pay tab in the Account Settings of your Stripe Dashboard and clicking Add new domain.

On the next screen, you’ll need to enter your domain, download the verification file, and host the file on your domain.
For further information, see Stripe’s instructions on how to verify your domain with Apple Pay.
After the registration, your customers can make payments on your site. Once everything is set up, you’ll need to publish your form.
Step 4: Publish Your Form
Now that you’re ready, it’s time to publish and embed your form on your website. Click Publish on the right.
Make sure you test the form first before your form goes live. You can toggle your entire site or individual payment forms between test and live modes (read more about Test mode).
To embed the form, go to the post or page where you want to publish it. Then click on the + icon to add the WP Simple Pay block. Then choose the form you just created and click Publish or Update.

That’s it!
We hope you learned how to enable Google Pay / Apple Pay / Mircosoft Pay wallets on your WordPress site.
If you liked this article, you might also want to check out how to reassure your customers their payment data is safe.
To read more articles like this, follow us on Facebook and Twitter.
Disclosure: Our content is reader-supported. This means if you click on some of our links, then we may earn a commission. We only recommend products that we believe will add value to our readers.


Leave a Reply