
How to Accept ACH Payments in WordPress (Step-By-Step Guide)
Last updated on

Are you wanting to accept ACH Direct Debit payments on your WordPress site?
If your business is located in the United States and you regularly charge customers large amounts, you can significantly reduce your transaction fees by accepting ACH payments.
In this article, we’ll show you how to create a payment form that allows you to accept ACH payments with Stripe on your WordPress site.
When Should You Accept ACH Payments?
ACH payments are a way of charging your customers’ bank accounts directly. The main advantage of accepting ACH payments over credit card, debit card, or digital wallet payments is the lower fees.
The Stripe fee for accepting ACH payments is 0.8% per transaction with the cap set at $5.00. There’s also a $1.50 charge per transaction for instant account verification.
Compared to the typical 2.9% + $0.30 USD per transaction fee for card and digital wallet payments, you can see that ACH payments make more sense at higher amounts. Here’s a quick comparison:
| Payment Amount | Card or Wallet Fee 2.9% + $0.30 | ACH Debit Fee 0.8% (max $5) + $1.50 |
|---|---|---|
| $200.00 | $6.10 | $3.10 |
| $500.00 | $14.80 | $5.50 |
| $2,000.00 | $58.30 | $6.50 |
Accepting ACH payments works for many US-based sites, but keep in mind that many U.S. customers are probably more accustomed to paying by credit card or digital wallets like Apple Pay and Google Pay to complete their transactions faster.
With WP Simple Pay, you can easily provide a single payment method, or multiple, depending on your needs.
How to Accept ACH Payments in WordPress
The easiest way to create a payment form that accepts ACH payments is to use WP Simple Pay, the best Stripe payments plugin for WordPress. It lets you create several different types of payment forms and accept online payments without having to write any code or set up a shopping cart.
Some additional features and benefits include:
- Location-Based Tax Collection: Automatically collect the correct tax amount based on your customer’s location.
- Multiple Payment Methods: Offer your customers their preferred payment methods, including credit/debit cards, Apple Pay / Google Pay / Microsoft Pay, Buy Now, Pay Later services, Alipay, Giropay, Cash App Pay, and more.
- Custom Form Fields: Collect additional data from your customers with checkboxes, drop downs, and text fields.
- Fee Recovery: Receive the full amount by removing the 3% Stripe processing fee.
- And so much more…
Remove the additional 3% fee!
Most Stripe plugins charge an additional 3% fee for EVERY transaction
…not WP Simple Pay Pro!
For ACH payments, the plugin conveniently supports Stripe’s instant account verification, which lets customers securely share their financial data and instantly connect to an account by logging in to their financial institution.
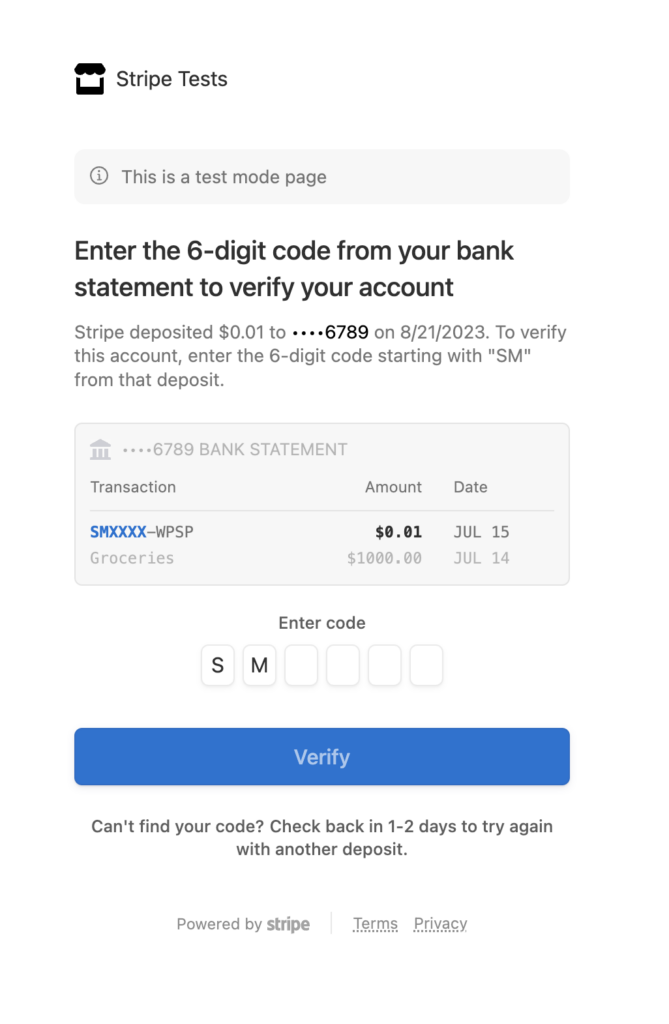
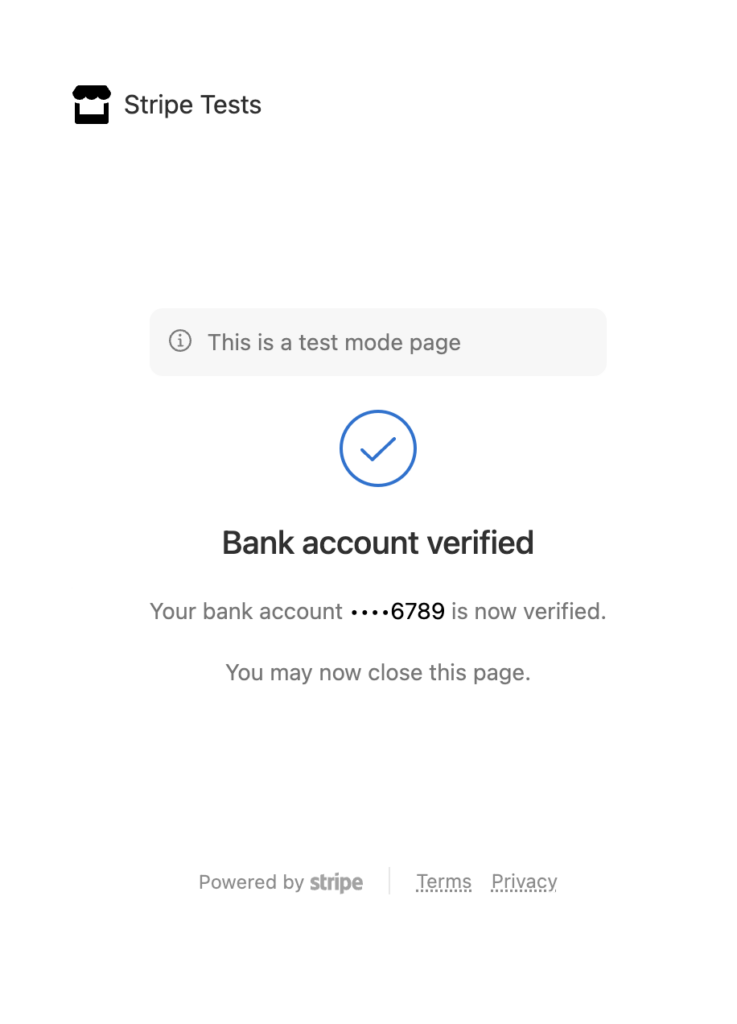
While instant verification is great for merchants and customers alike, not all financial institutions support it. Thankfully, WP Simple Pay offers manual account verification in these instances. Customers who opt-in for manual verification will get 1-2 micro-deposits delivered to their bank account within 1-2 business days of making their payment. Then, they can simply verify the amounts through an email sent from Stripe. Once verified, payment processing is initiated.
The payment flow for manual verification looks like:
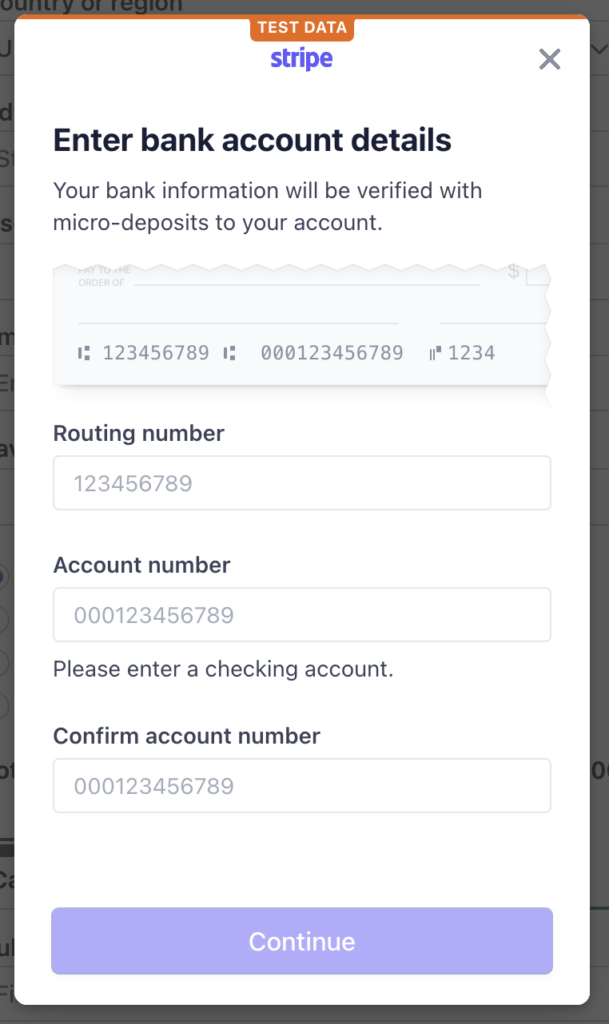
To help you take advantage of lower transaction fees by offering ACH payments, let’s dive right in and create an ACH payment form with WP Simple Pay.
Table of Contents
- Step 1: Install and Activate WP Simple Pay
- Step 2: Connect Your Stripe Account
- Step 3: Create Your ACH Payment Form
- Step 4: Add Your ACH Payment Form to a Page
Step 1: Install and Activate WP Simple Pay
To create a payment form that accepts ACH payments, you’ll need to install the WP Simple Pay plugin.
Next, head over to the WordPress dashboard and upload the .zip file that you received in your purchase confirmation email. You can also find the file by logging into your WP Simple Pay account.
Once you’ve installed and activated WP Simple Pay, its setup wizard will prompt you to connect your Stripe account. If you don’t have a Stripe account yet, you can create one now.
Go ahead and click on Let’s Get Started.

If you didn’t see the setup wizard, simply head over to WP Simple Pay » Settings » Advanced tab and click the Launch Setup Wizard button.
2: Connect WordPress to Stripe
To connect your WordPress site to Stripe, click on Connect with Stripe.

Next up, enter the email address you use for your Stripe account and connect it to your site. If you don’t have a Stripe account, you can easily create one by entering your email address and completing the registration.
Upon completing this process, you’ll be shown a success page that says, “Setup Complete.” Next, click on Create a Payment Form.

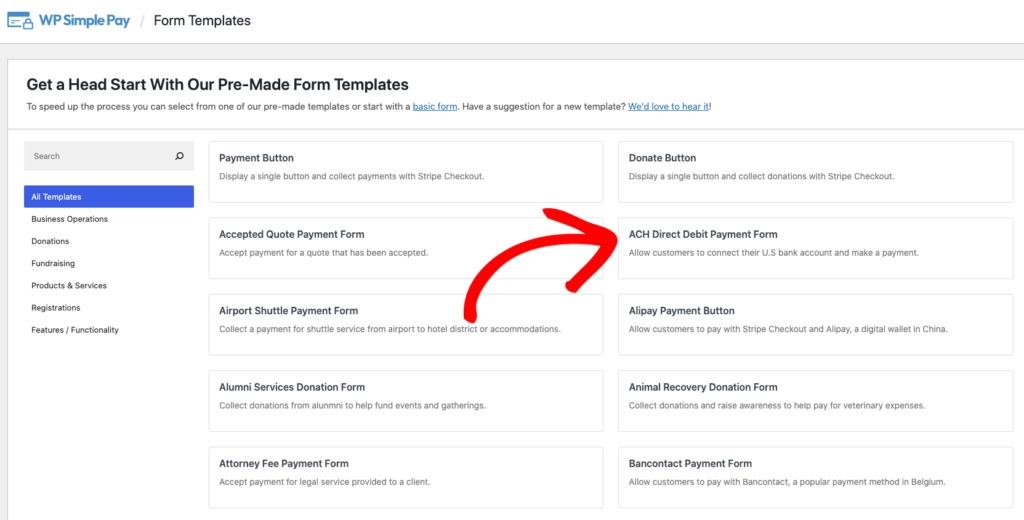
Step 3: Create Your ACH Payment Form
At this point, you should see the Form Templates page. Go ahead and choose the ACH Direct Debit Payment Form template.
Now, you should be in the payment form editor. You can start by giving your form a Title and an optional Description.
You can select any Form Type here as ACH works with all three (Embedded, Overlay and Stripe Checkout). For the purpose of this tutorial, we’re going to select Embedded.
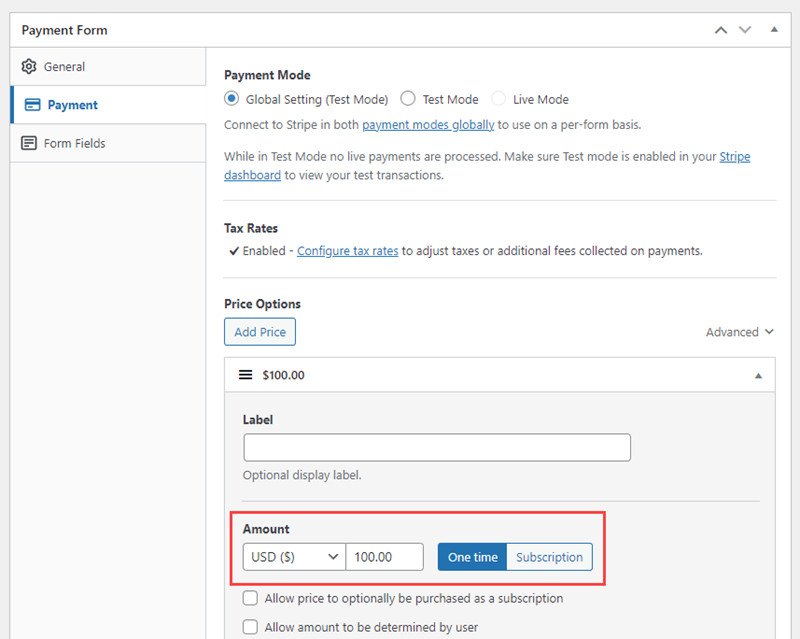
On the Payment tab, go to Price Options and update the amount you’d like to charge.
The One time payment will already be selected by default, but you can switch it to a Subscription payment (recurring payment) if you purchased a Plus or higher license.
To learn more about the different WP Simple Pay plans available, see our detailed guide.
After you’ve made your desired changes and configured your settings, including on the Form Fields tab, be sure to test out the form by clicking Preview.
The ACH payment process test should look something like this:
After you’ve fully configured your payment form, click Publish to have it ready to add to a page.
Step 4: Add Your ACH Payment Form to a Page
We’re almost done! Now’s the easiest part – adding your ACH payment form to a page on your WordPress site.
Before you do that, it’s recommended that you review all your settings. As always, we also recommend leaving the form in Test Mode until a few transactions process as intended. You can toggle your entire site or individual payment forms between test and live modes.
While editing an existing page or after creating a new page, click on the plus + icon at the top left, find the WP Simple Pay block, and select it to add this block to the WordPress block editor.

Finally, select your payment form from the block’s dropdown menu. Now you can preview your form, publish it, and then visit your page to see it in action.
Final Notes
For eligible businesses, funds received via ACH payments can be available within two business days from when the payment is processed. Otherwise, funds can be available within four business days.
If your business is based in the UK and you want to accept direct debit payments similar to ACH, WP Simple Pay allows you to offer your customers Bacs Direct Debit. See our full guide to learn more.
That’s it! Now that you’ve learned the best way to create ACH payment forms in WordPress using WP Simple Pay, you’re well on your way to avoiding higher transaction fees.
If you liked this article, you might also want to check out our guide on How to Pass Stripe Processing Fees on to Your Customers in WordPress.
What are you waiting for? Get started with WP Simple Pay today!
To read more articles like this, follow us on X.
Disclosure: Our content is reader-supported. This means if you click on some of our links, then we may earn a commission. We only recommend products that we believe will add value to our readers.


Leave a Reply