
How to Accept Recurring Payments in WordPress (Step-by-Step)
Last updated on

Do you want to accept recurring payments on your WordPress site?
Whether you have an online business that offers products, services, online courses, or memberships, allowing your customers or members to sign up for recurring payments on a weekly, monthly, or yearly basis lets you collect a steady stream of income without lifting a finger.
Additionally, recurring payments help non-profits and charity organizations draw revenue from a stable donor base.
In this article, we’ll show you how to easily accept recurring payments in WordPress so that you can count on long-term funding and streamline your billing processes.
What Exactly Are Recurring Payments?
Recurring billing is the practice of charging your customers, clients, or donors at a set interval for a period of time or indefinitely. Rather than sending an invoice or calling for payment, the amount is simply charged to your customers’ selected payment method. No one has to do anything manually once the Stripe payment form is set up.
In the past, billing customers on a subscription basis was difficult. You had to send invoices, direct them to individualized payment forms, or punch in their credit card details on every payment date.
But with automatic recurring billing, you can accept repeat payments seamlessly without bothering your customers.
The Advantages of Recurring Billing
Why would you offer recurring billing to your clients, customers, or donors?
- You can automate your billing, which means no more cashing checks, running credit cards, or sending invoices every month. That’s a lot less legwork to manage.
- Since the system is automated, there are fewer late or missing payments.
- Your customer/donor retention goes up due to inertia – the likelihood that customers will stay because they don’t have to make a new buying decision every month.
- Payment information stays secure because there’s less duplication/circulation of sensitive information.
- Fewer awkward conversations with your customers about late or missing payments, which improves your overall relationship.
- Your cash flow becomes more predictable because you don’t wait on anyone to get paid.
- Less money spent on materials like paper, envelopes, and stamps.
Keep in mind that billing is an expense. Every minute you spend pouring over your accounts, entering credit card details, sending payment reminders, and following up is time you can’t spend on more important work, like growing your business.
Your customers will appreciate it too, especially if they plan to work with you or donate to your cause for a long period of time. You’ll save them the hassle of dealing with payments, too.
So, if you charge the same customers regularly, it’s smart to accept recurring payments automatically.
Setting Up Recurring Payments in WordPress
To accept recurring payments, the first thing you’ll need to do is choose a payment gateway. We recommend using Stripe, the best payment gateway that enables you to accept both credit card payments and multiple non-card payment methods.
To learn why we think it’s the best payment processor for WordPress sites, read our detailed guide: 7 Reasons to Use Stripe to Accept Payments on WordPress.
The easiest way to accept Stripe payments on your WordPress is to use WP Simple Pay.
WP Simple Pay is the #1 Stripe payments plugin for WordPress that lets you accept recurring payments with ease. The plugin also lets your customers manage their own recurring renewals to help minimize subscription churn and boost customer retention.
Additional features of WP Simple Pay include:
- Free Trials: Offer customers free trial periods to attract more subscribers.
- Coupons: Set up percentage-based or fixed amount-based discounts that can be redeemed one time or forever.
- Third-Party Integrations: Integrate your payment forms with popular automation plugins to automate post-purchase tasks like adding new subscribers to your e-mail list.
- Per-Form Confirmation E-mails: Customize your payment confirmation e-mails to enhance the communication with your subscribers.
- Advanced Drag-and-Drop Form Builder: Create the perfect payment forms in minutes with zero coding.
- And so much more…
Remove the additional 3% fee!
Most Stripe plugins charge an additional 3% fee for EVERY transaction
…not WP Simple Pay Pro!
How to Accept Recurring Payments
The best way to accept recurring payments on your WordPress site is to use WP Simple Pay.
In this tutorial, we’ll show you how easy it is!
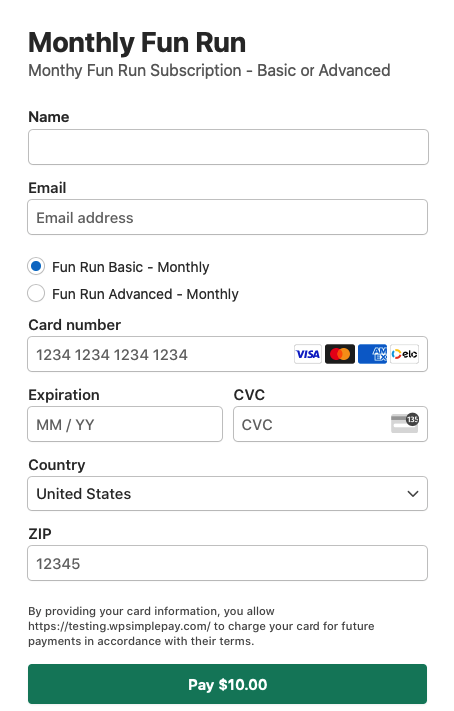
Here’s the form that we’re going to create. Keep in mind that you can easily customize the appearance of the form any way you want.
Step 1: Install and Activate WP Simple Pay
To start accepting recurring payments on your WordPress site, the first thing you’ll need to do is install and activate WP Simple Pay.
First, visit the pricing page and choose the best plan for your needs.
After purchasing the WP Simple Pay plugin, download it from your purchase e-mail receipt or from your WP Simple Pay account.
To install it, go to your WordPress admin dashboard, navigate to Plugins » Add New, and then click on Upload Plugin.
Next, click Choose File and find the WP Simple Pay .zip file on your computer. Click on Install Now. When the upload is complete after a few seconds, click on the Activate Plugin button.
First time installing a plugin in WordPress? No worries! You can follow our detailed instructions in this guide.
Once you’ve activated the plugin, you’ll be directed to the setup wizard. The setup wizard makes it easy to set up a Stripe account and connect it to your site. In the setup wizard, click Let’s Get Started.

If you didn’t see the setup wizard, simply head over to WP Simple Pay » Settings » Advanced tab and click the Launch Setup Wizard button.
2: Connect WordPress to Stripe
To connect your WordPress site to Stripe, click on Connect with Stripe.

Next up, enter the email address you use for your Stripe account and connect it to your site. If you don’t have a Stripe account, you can easily create one by entering your email address and completing the registration.
Upon completing this process, you’ll be shown a success page that says, “Setup Complete.” Next, click on Create a Payment Form.

Step 3: Create a Recurring Payment Form
Now that you’ve connected your site to Stripe, let’s start creating a payment form.
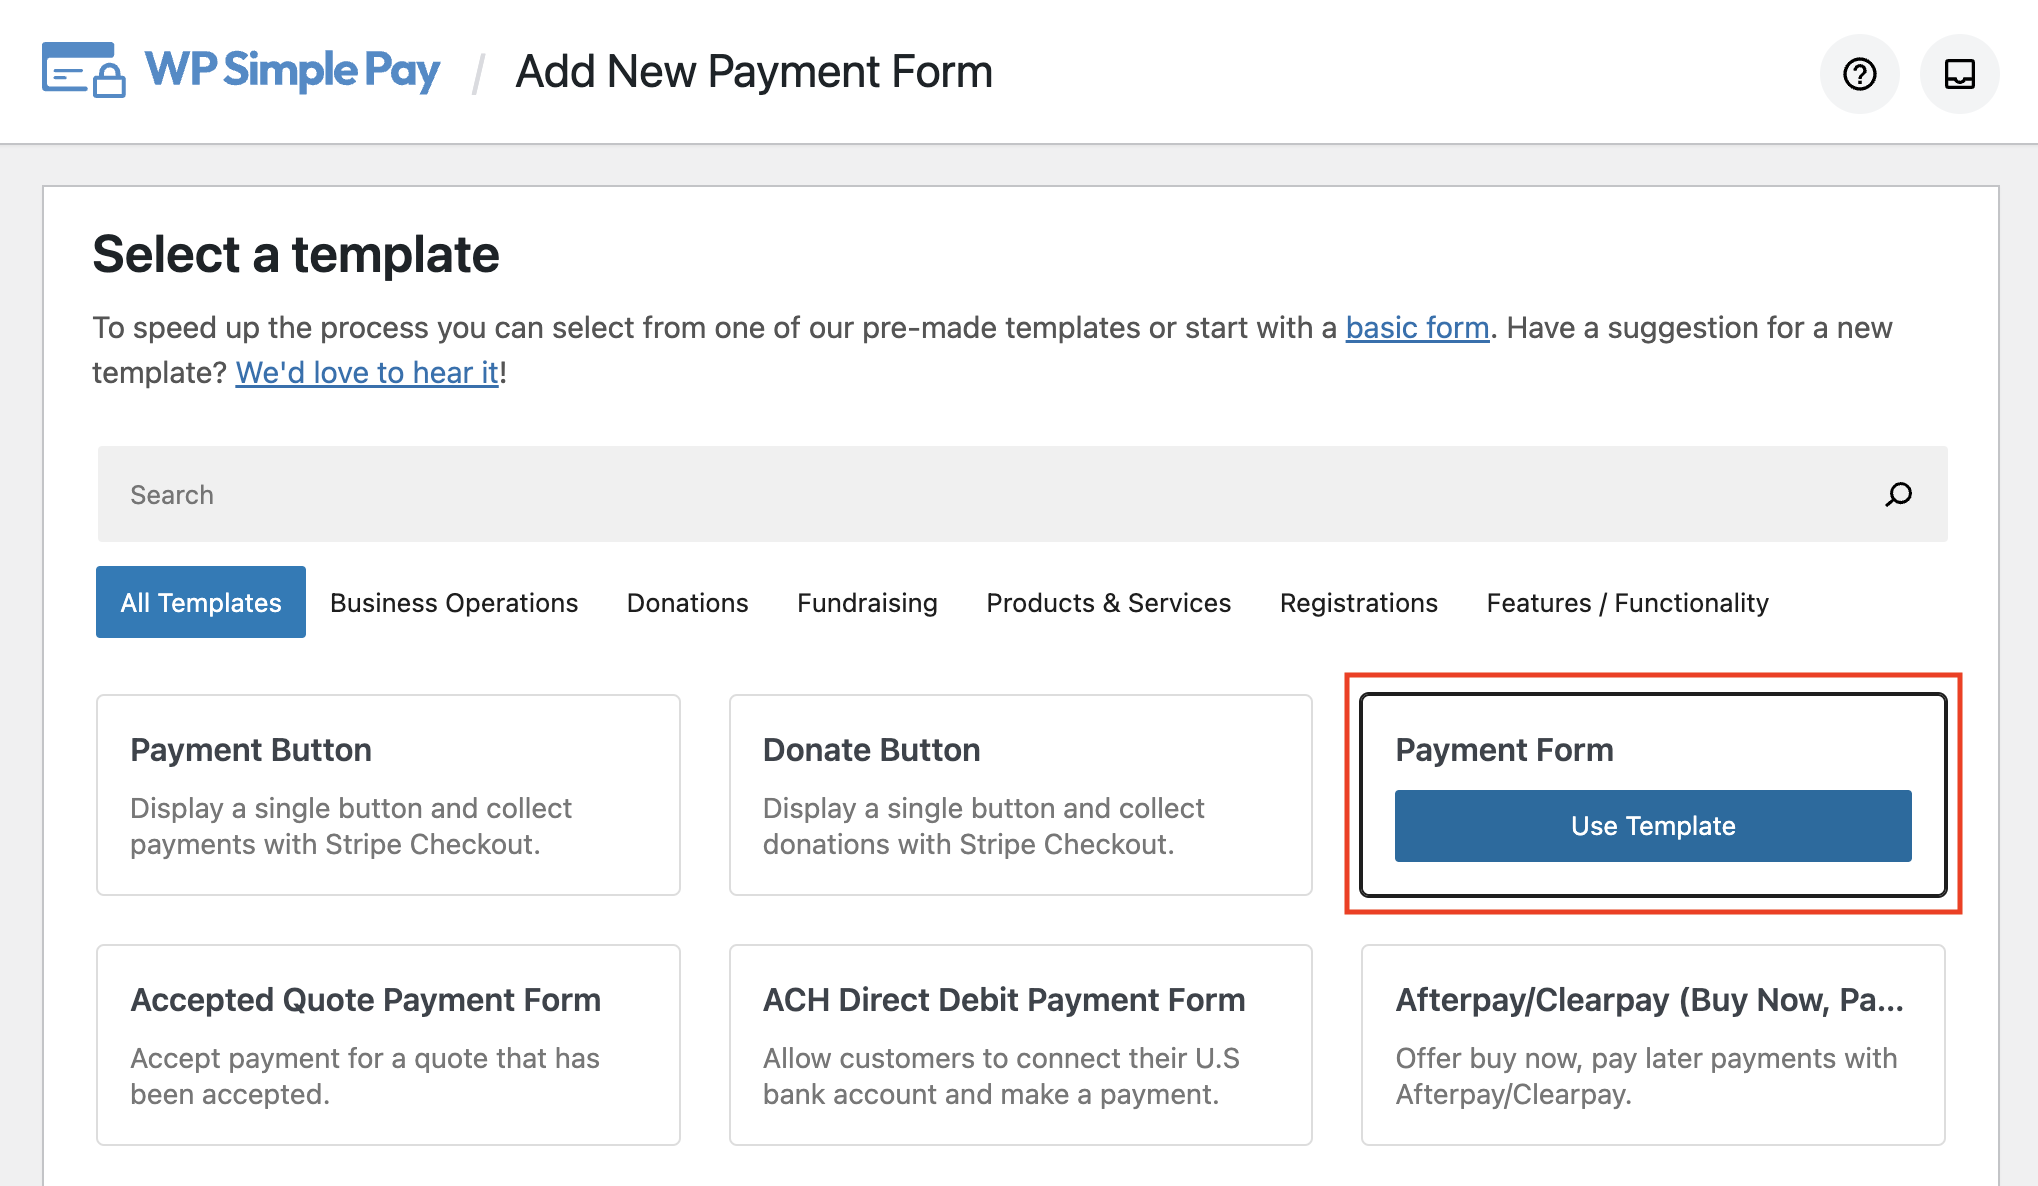
There are several different payment form templates that let you accept payments, so you don’t always have to start a payment form from scratch. If you’re not on this page yet, you can navigate to WP Simple Pay » Add New to create a payment form.
For the purpose of this tutorial, let’s go ahead and choose the basic Payment Form template.
Step 4: Configure the Form to Accept Recurring Payments
After selecting the Payment Form template, you’ll be directed to the payment form builder page, where you can choose different configuration settings.
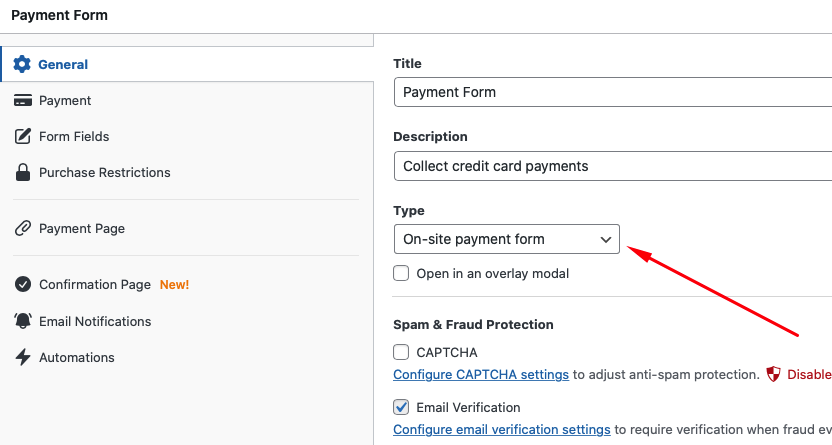
In the General tab, you can change the title, description, and form type based on your needs. To know more, check out this post on selecting the right payment form types.
Go ahead and leave the form Type set to On-site payment form to ensure that your subscribers complete the checkout process without ever leaving your site.
Next, click on Payment. You’ll be able to customize the price and pricing options and even choose between one-time and subscription payment options.
When you click one of the price amounts, you can see that the checkbox Allow price to optionally be purchased as a subscription is available. With this option selected, your customers can make payments either one-time or as a subscription.
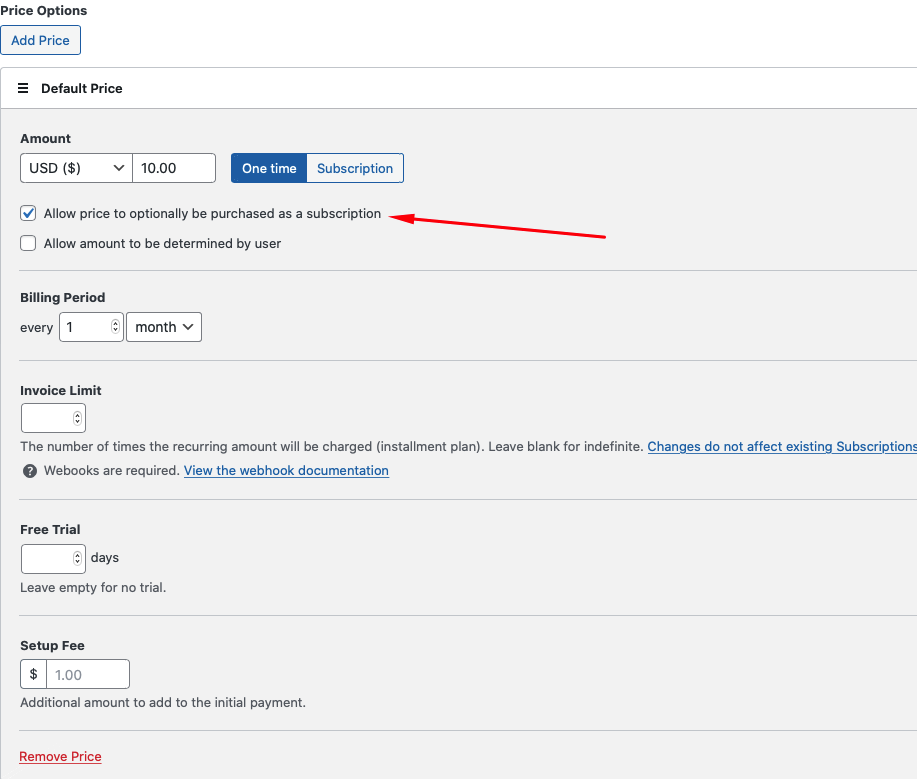
Alternatively, if you only want to accept recurring payments and disallow one-time payments, you can toggle on the button Subscription instead of One time.
Feel free to change the billing period and add a free trial if you wish. You can also offer your customers multiple pricing options if you offer different pricing packages. Simply click on the Add Price button and customize the price and billing period. Be sure to label your pricing options so your customers can quickly identify the subscription they want.
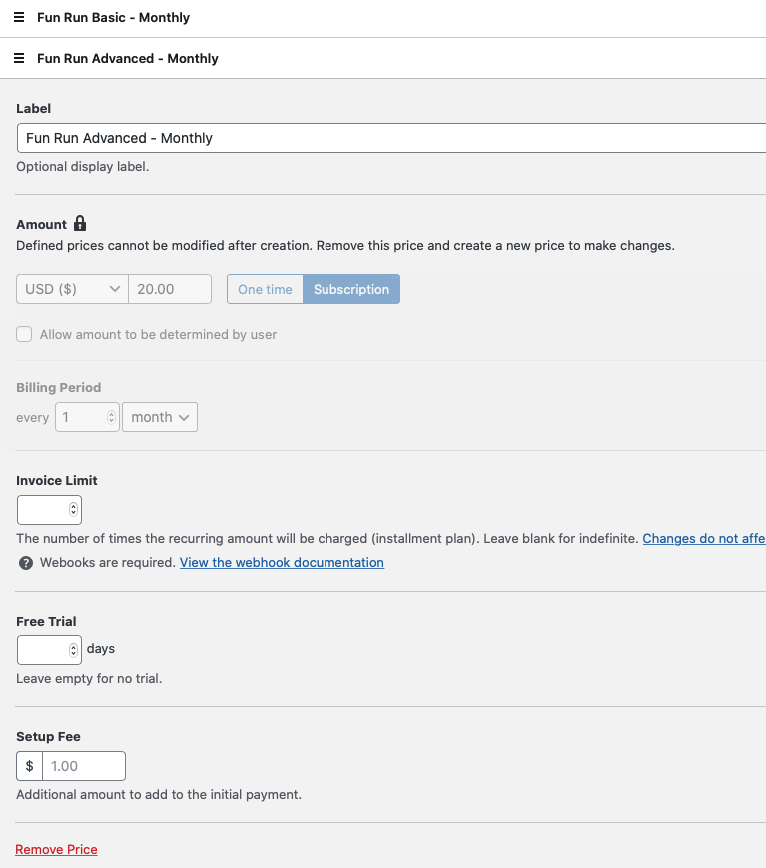
In this tutorial, let’s use the default values for the billing period – that is, billed every month.
You can even customize how the subscription is managed by navigating to WP Simple Pay » Settings and then clicking on the Subscription Management tab in your WordPress dashboard.
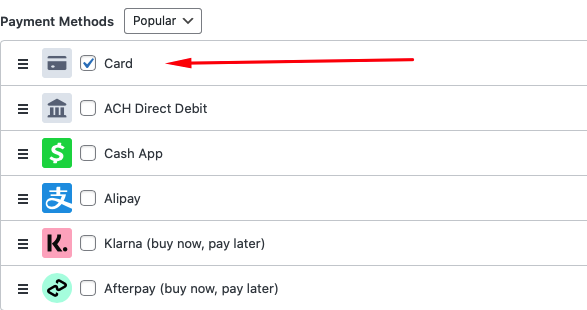
For the Payment Methods, you’ll notice a list of available options. Go ahead and leave Card selected. This will ensure that your customer’s credit card is charged automatically every month.
Next, click on the Form Fields option. Here is where you can add, edit, or remove custom fields to your form. Let’s go ahead and add Name so your subscribers are required to fill out their name during the checkout process.
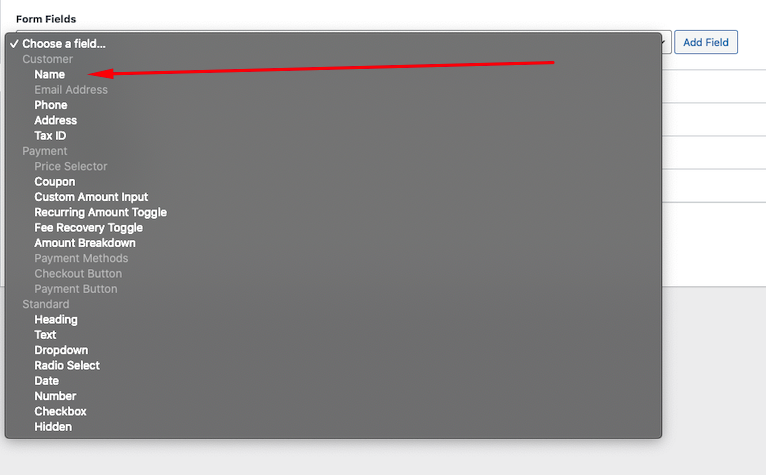
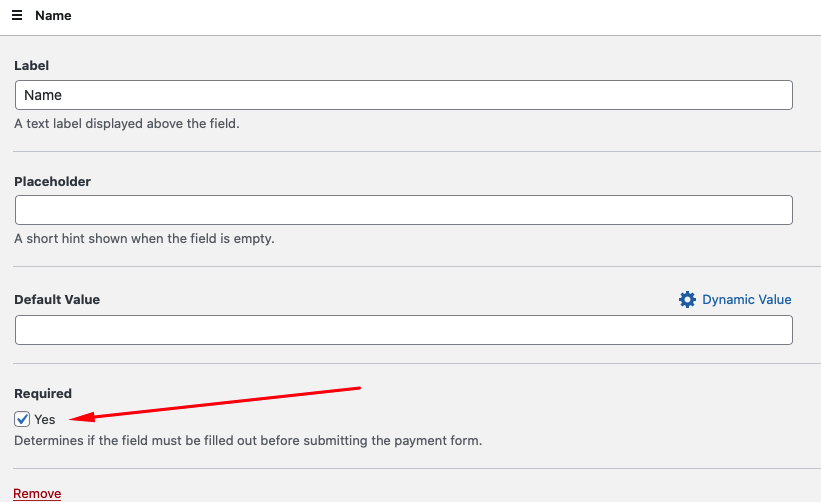
Once you’ve clicked on the Add Field button, click on the Name option from the list of fields and check the box for Required.
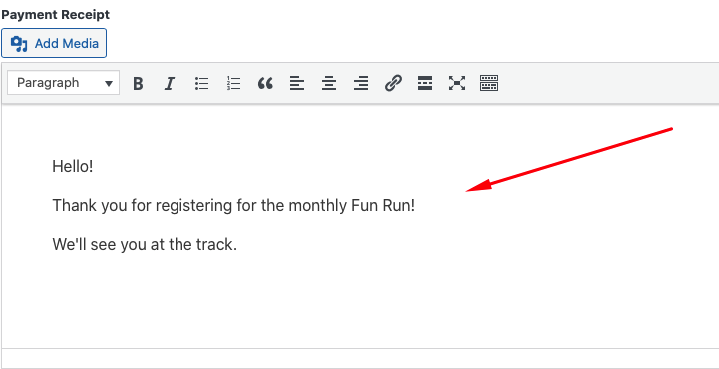
Next, go ahead and click on the Save Draft button and then click on the Email Notifications option. It’s always a good idea to customize your e-mail confirmation message with additional information about the event, products, or services.
Simply type your message in the field.
Don’t forget to publish your form when you’re finished.
Step 5: Add the Recurring Payment Form to a Page
Make sure you test the form first before it goes live. You can toggle your entire site or individual payment forms between test and live modes (read more about Test mode).
Once you’re ready, your final step is to put it on a page.
Navigate to an existing WordPress page/post or create a new one. Then click on the + icon to add the WP Simple Pay block. Then choose the form you just created and click Publish or Update.

That’s it!
We hope this guide helped you learn how to accept recurring payments in WordPress.
If you liked this article, you might also want to check out our guide on how to create a WordPress user account after payment.
What are you waiting for? Get started with WP Simple Pay today!
To read more articles like this, follow us on X.
Disclosure: Our content is reader-supported. This means if you click on some of our links, then we may earn a commission. We only recommend products that we believe will add value to our readers.


Leave a Reply