
How to Use Payment Form Templates in WordPress to Boost Sales
Last updated on

Are you wanting to use high-converting payment form templates on your WordPress site to boost sales and begin accepting payments quickly and easily?
It can be intimidating creating your first payment forms. Using pre-made form templates removes a lot of the work for you, while still giving you complete control over the customization and funtionalities of your live payment forms.
In this article, we’ll share a few crafty ways to use payment form templates in WordPress to increase sales and save you a ton of time.
Creating a Good Payment Form
Good payment forms usually have a few key elements in common. First, most customers have come to expect their online transactions to be as quick as possible. You should consider keeping your payment forms simple and straightfoward by avoiding unnecessary fields and questions.
Next, being transparent about the price and additional fees helps build trust in your business and lets your customers know exactly what they’re paying for. Be sure to provide itemized details and specific information about any varying options you might be offering.
And finally, it’s important to use a payment form design and elements that align with your product, service, event, or fundraiser. For example, you wouldn’t want to use a donations payment form if you’re a consultant selling business coaching courses.
Using Payment Form Templates
Using pre-made payment form templates is a great idea if you want to save time and avoid starting from scratch. Templates come with default settings that provide the best checkout experience for your customers depending on what they are purchasing.
For example, if you’re wanting to accept payments on your site for online courses, you should use a payment form template that already has a recurring renewal option built-in. This not only ensures that your customers will be charged on a weekly, monthly, or yearly basis, but it also saves you from having to go back in later to update their information.
Additionally, many pre-made templates have customizable price options and amounts already configured so you can get a good idea of what is possible on your form without having to spend a lot of time guessing and testing.
How to Use Payment Form Templates
Before we share some ideas on how to use payment form templates, you’ll need to install a plugin that allows you to accept payments on your site and offers payment form templates.
WP Simple Pay is the #1 Stripe payments plugin for WordPress that lets you easilly collect payments directly on your site without having to set up a shopping cart. One of the best parts about the plugin is that it offers tons of payment form templates that have been designed specifically for fundraisers, products, and services. You can use them to create high-converting payment forms in minutes for just about anything you can think of.
With WP Simple Pay, you can also:
- Accept recurring renewals automatically without having to ask for payment details each time your customers get charged.
- Accept 10+ payment methods, including Cash App Pay, credit and debit cards, ACH Direct Debit, Buy Now, Pay Later services, Alipay, and more.
- Edit, add, or remove custom fields to collect information from your customers.
- Send customized purchase confirmation emails and messages for individual payment forms.
- Create distraction-free, branded landing pages for your payment forms.
- And so much more…
Remove the additional 3% fee!
Most Stripe plugins charge an additional 3% fee for EVERY transaction
…not WP Simple Pay Pro!
To get started with pre-made payment form templates, the first thing you’ll need to do is install and activate WP Simple Pay. It’s super easy and will allow you to access a full library of payment form templates that you can customize.
Step 1: Install and Activate WP Simple Pay in WordPress
First, simply visit the pricing page and choose a plan.
Next, you’ll need to download the plugin from your purchase receipt email or from your WP Simple Pay account.
After you’ve downloaded the plugin, go to your WordPress dashboard, navigate to Add New under Plugins, and then Upload Plugin.
Click Choose File and find the WP Simple Pay .zip file on your computer. Then, click Install Now. When the installation is complete after a few seconds, press the Activate Plugin button.
If you need help with this step, see our detailed guide on how to install the plugin.
Go ahead and click on Let’s Get Started.

If you didn’t see the setup wizard, simply head over to WP Simple Pay » Settings » Advanced tab and click the Launch Setup Wizard button.
2: Connect WordPress to Stripe
To connect your WordPress site to Stripe, click on Connect with Stripe.

Next up, enter the email address you use for your Stripe account and connect it to your site. If you don’t have a Stripe account, you can easily create one by entering your email address and completing the registration.
Upon completing this process, you’ll be shown a success page that says, “Setup Complete.” Next, click on Create a Payment Form.

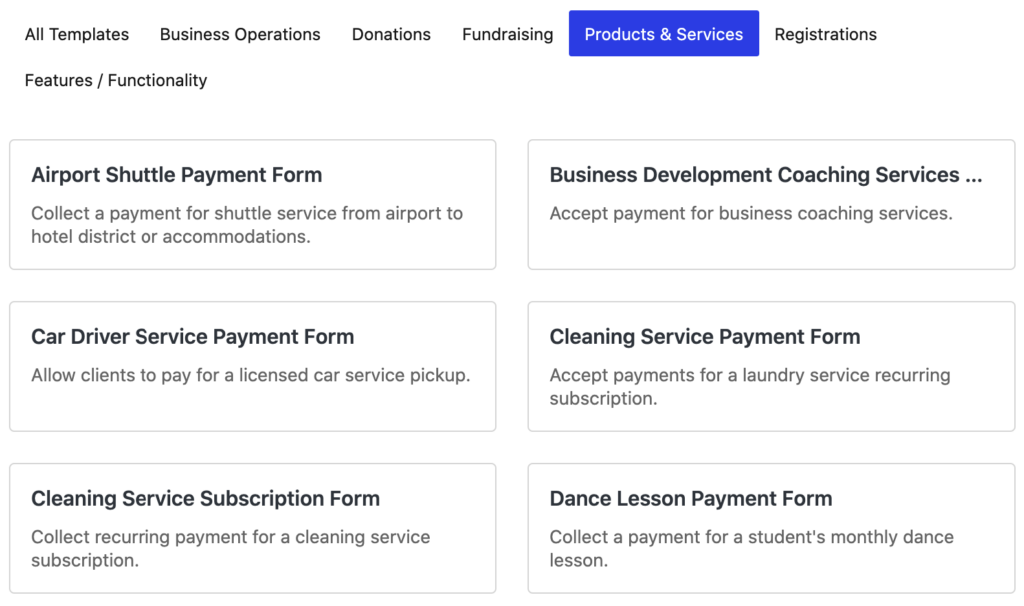
Now that you’ve installed and activated WP Simple Pay on your WordPress site and clicked on the Create a Payment Form button in the setup wizard, you should have automatically been redirected to the templates library page.
As you can see, the plugin provides an extensive list of available pre-made templates for you to choose from.
Creating a Form with Packaged Pricing
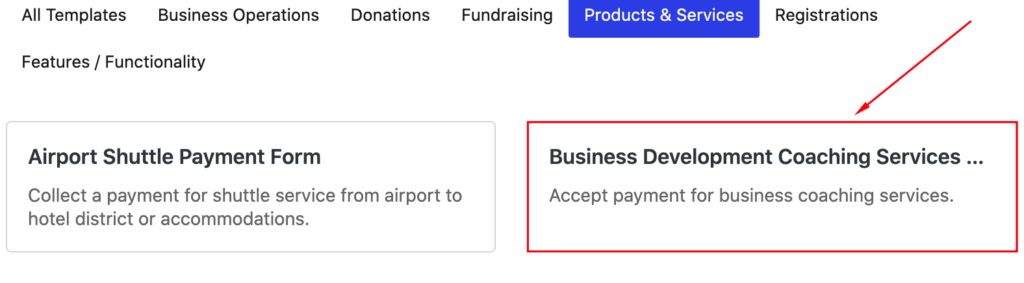
Go ahead and click on the Products & Services tab to begin creating a payment form with packaged pricing options already configured in the template.
While there are several pre-made payment form templates for many types of products and services, let’s use the Business Development Coaching Services template first.
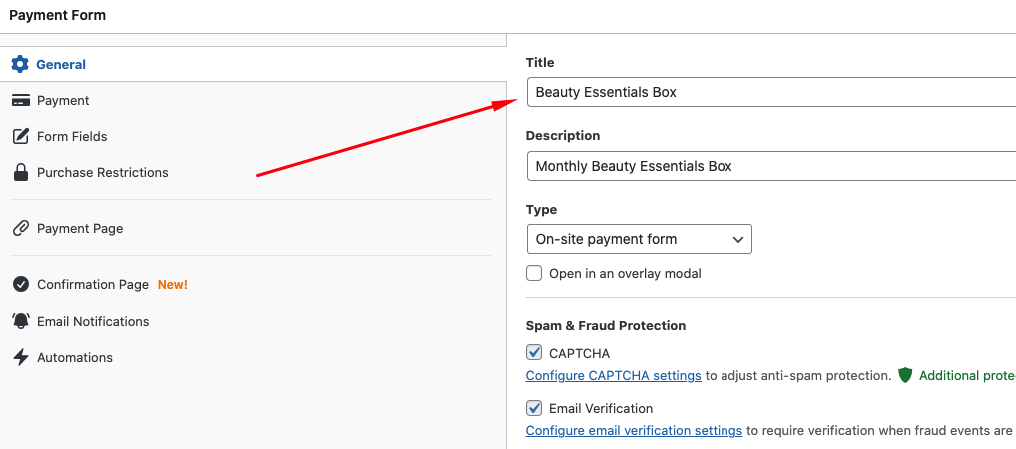
First, you can customize the title and the description for your form. Since this template is used for Business Development Coaching, it’s a good idea to be as specific as possible.
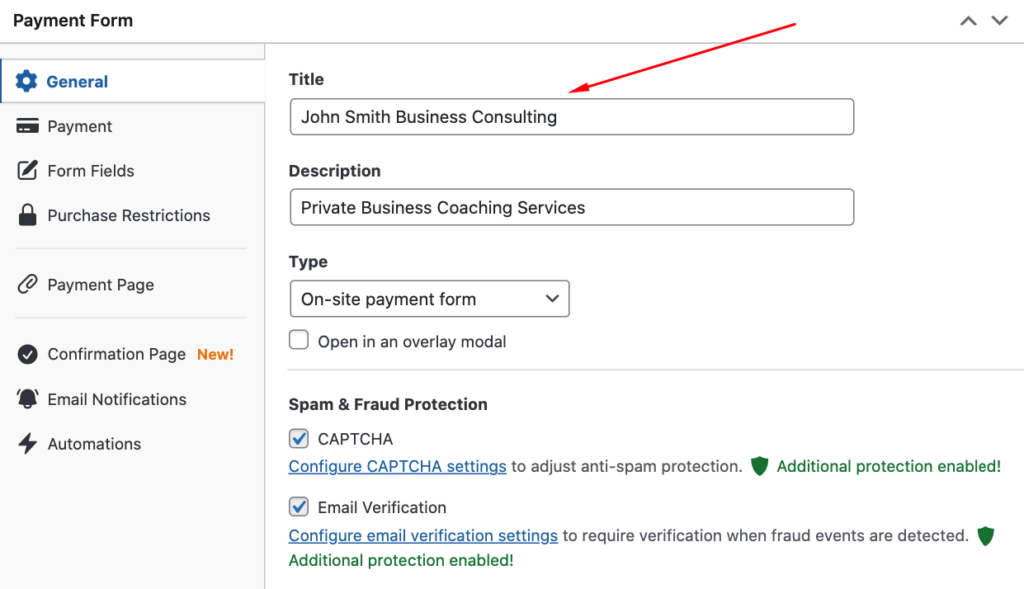
To keep your visitors on your site throughout the entire checkout process, keep On-site payment form selected for the form Type.
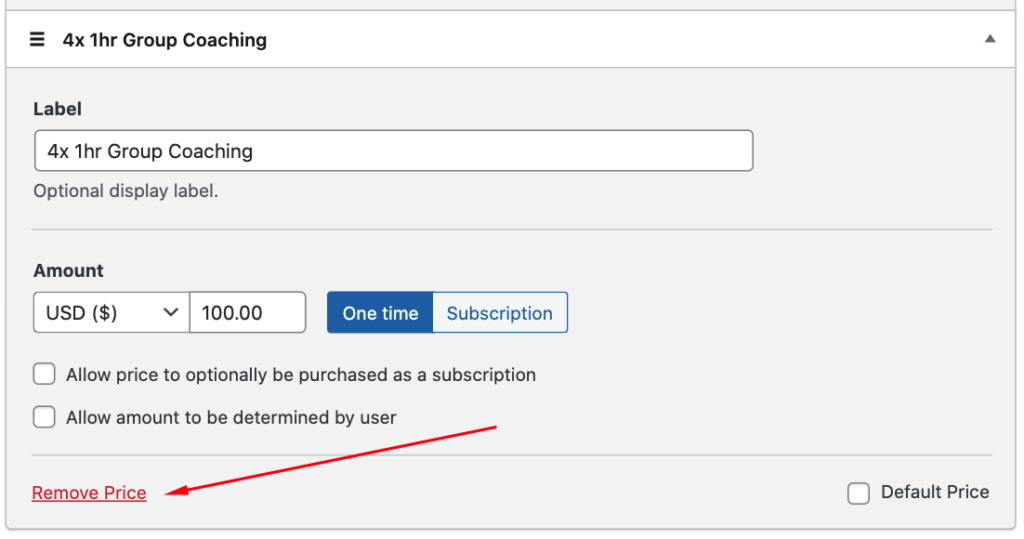
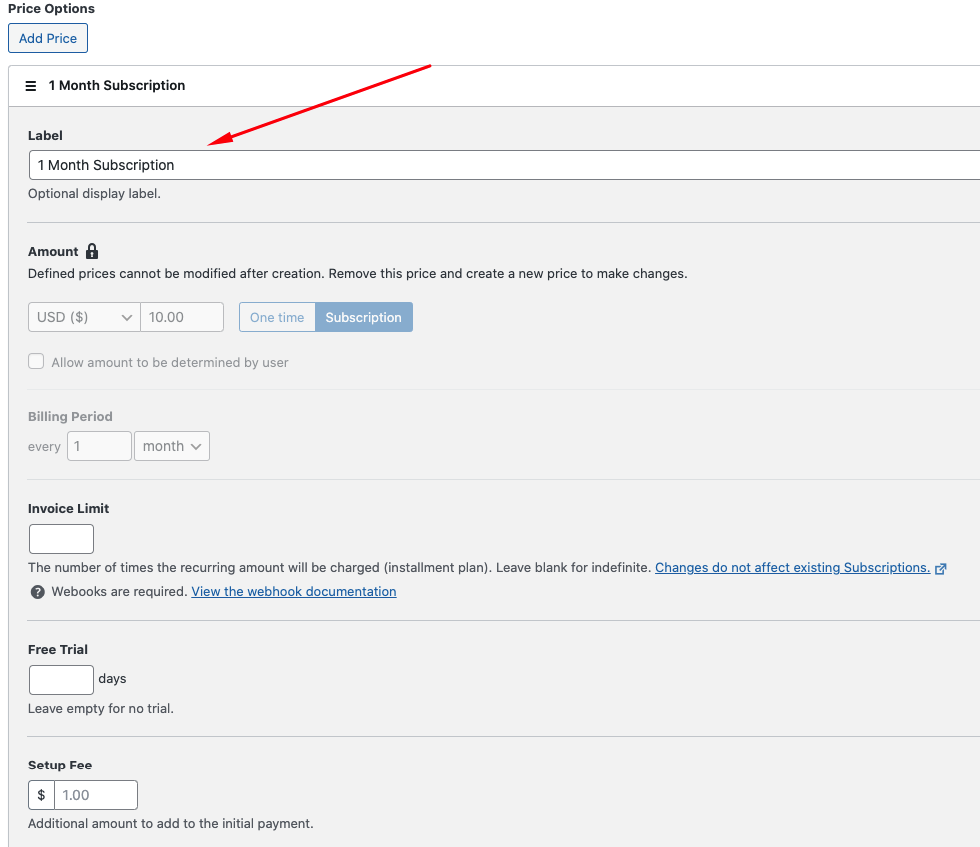
Next, in the Payment tab, you can see that there are three different pricing options configured for you already. You can click on each of them to edit the description, change the price, and even choose whether you want to offer the price options as a subscription.
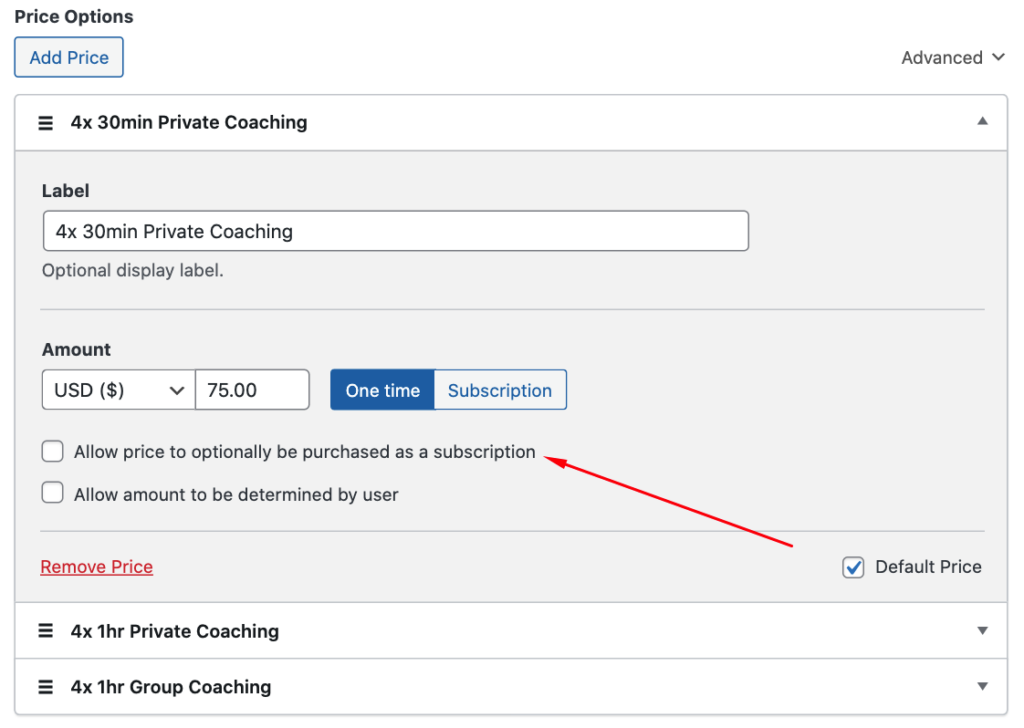
If you don’t want to offer a third package, simply remove it by clicking on Remove Price.
Perhaps you want to add a package for just one or two private coaching sessions. You can easily do this by clicking on the Add Price button and entering your Label and price amount.
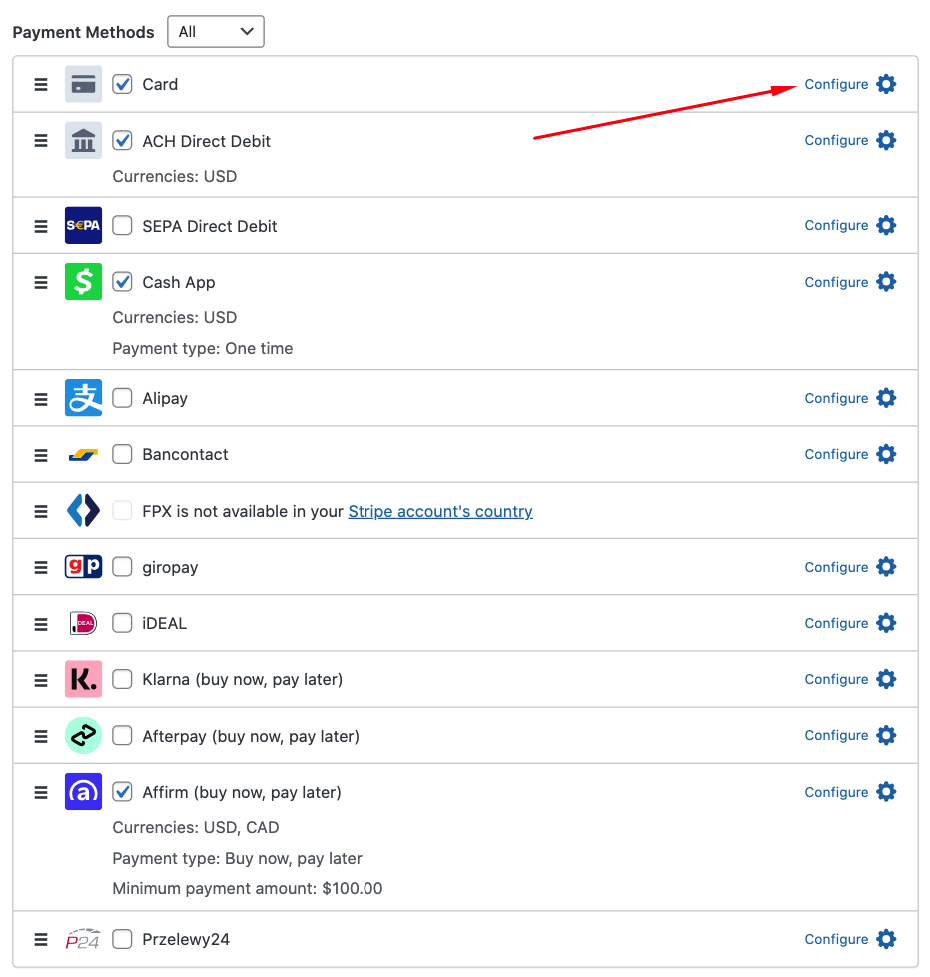
Now, for the payment methods, you’ll see a list of all of the available options. Remember that to increase conversions and extend your business’s reach, it’s a good idea to offer multiple payment options.
Simply check the boxes next to the methods you want to accept.
For the purpose of this tutorial, let’s go ahead and choose Card, ACH Direct Debit, Cash App, and Affirm. These will allow you to accept a wide-range of payment methods. In addition, accepting Apple Pay / Google Pay / Microsoft Pay is also recommended. Simply click on Configure in the Card option.
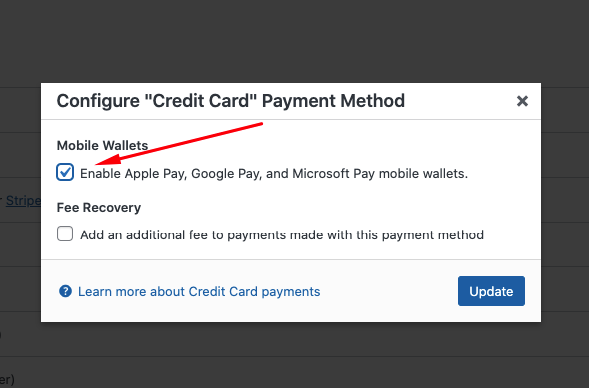
Next, check the box for Enable Apple Pay, Google Pay, and Microsoft Pay mobile wallets.
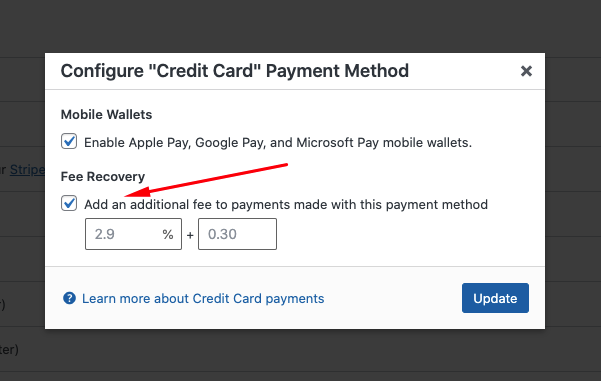
To remove the additional 3% Stripe processing fee, go ahead and check the box for Add an additional fee to payments made with this payment method and enter the percentage. This will ensure that you receive the full price amount by requiring your customers to cover it.
Next, in the Form Fields tab, you’ll notice that several fields have already been set up for you.
To provide your customers with complete transparency, it’s always helpful to add the Amount Breakdown field. This will itemize the price and fees on the payment form.
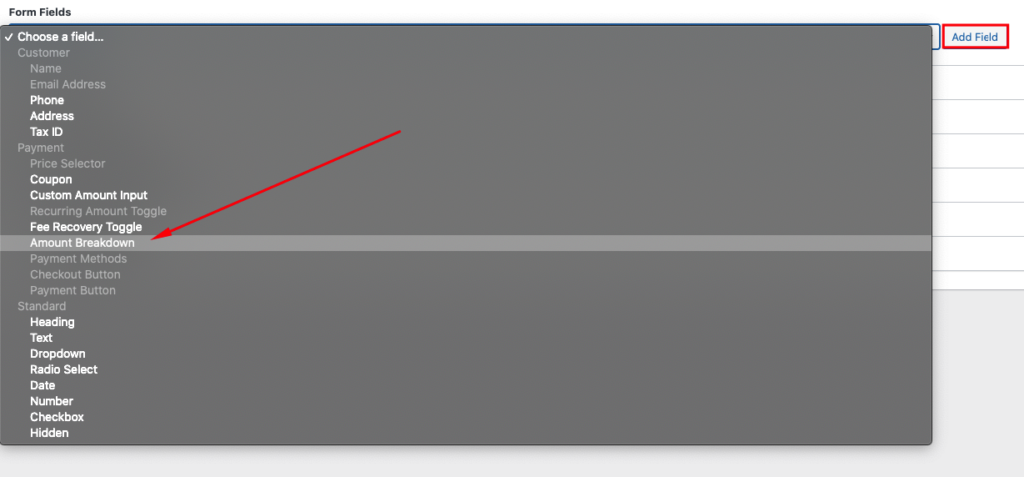
Once you’ve customized your Form Fields, be sure to click on Publish.
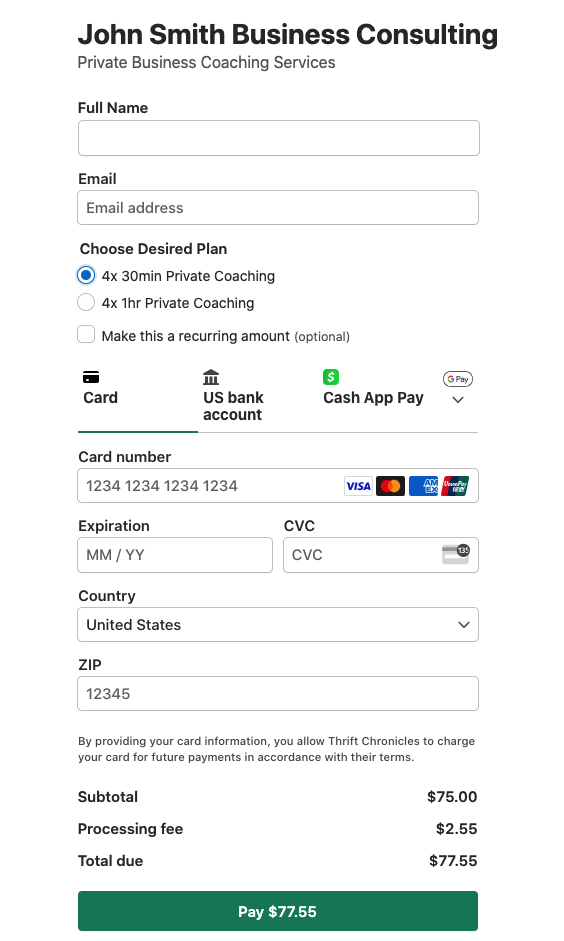
Your completed form should look like the one below. You’ll notice how the two pricing options are displayed near the top of the form, making it easy for customers to choose exactly which one they want. The recurring payment option is also displayed clearly for them to see.
Additionally, the amount breakdown is listed at the bottom just above the Pay button, making what customers are being charged for clear and easy to understand.
Creating a Subscription Payment Form
Now that you’ve seen how quickly and easily you can make a payment form using a Products and Services pre-made template, let’s take a look at how easy it is to create a subscription payment form using the pre-made template provided.
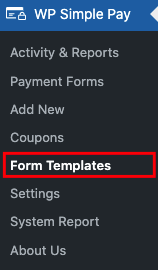
First, from the WordPress admin dashboard, go to WP Simple Pay → Form Templates.
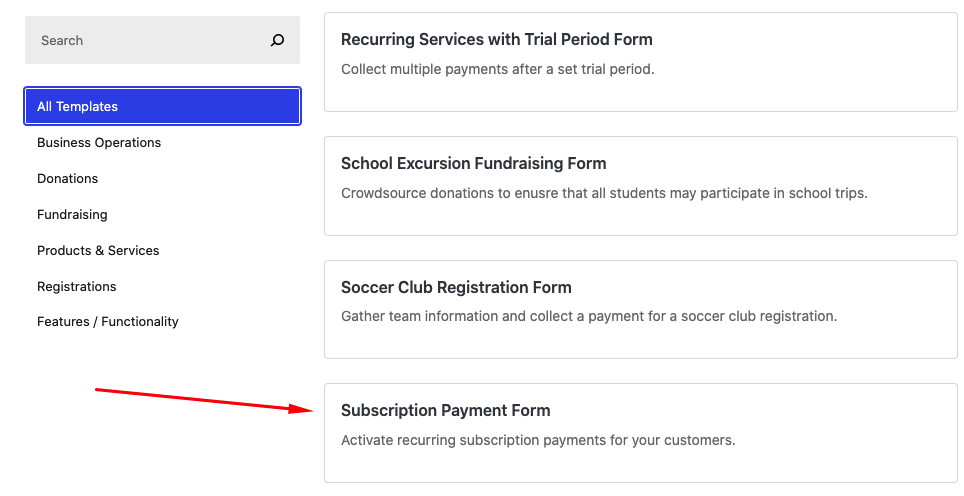
Next, scroll down until you see the Subscription Payment form and click on the Use Template button.
In the General tab, simply add a title and description for your product. For the form Type, keep On-site payment form selected in the dropdown menu to ensure that your visitors stay on your site during the checkout process.
Next, in the Payment tab, to save you time, two subscription plan amounts and frequencies have already been added for you. Go ahead and enter the Labels for both price options so your customers know exactly which plans are being offered.
You can also add a third subscription option by clicking on the Add Price button.
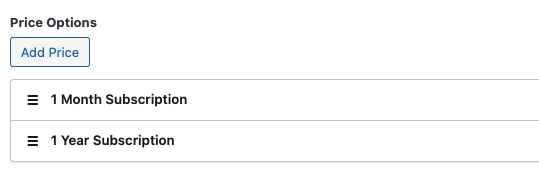
When you’re finished updating your Labels, your price options should look like this:
Now that you’ve set up your subscription options, go ahead and check the boxes next to the payment methods you want to accept. Cards have already been selected by default.
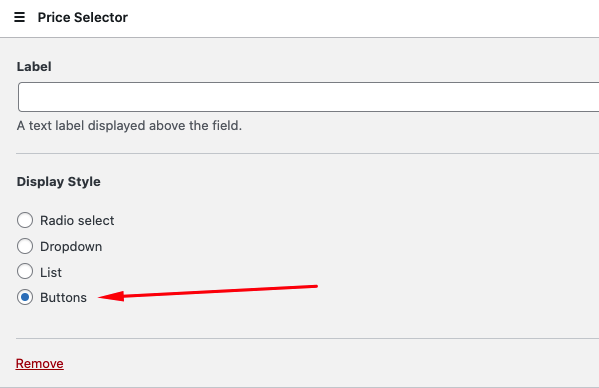
Next, in the Form Fields tab, the Price Selector feature allows you to choose how you want the subcription options displayed on your form. Go ahead and choose Buttons so your customers aren’t required to click on a dropdown menu to find the plan they want.
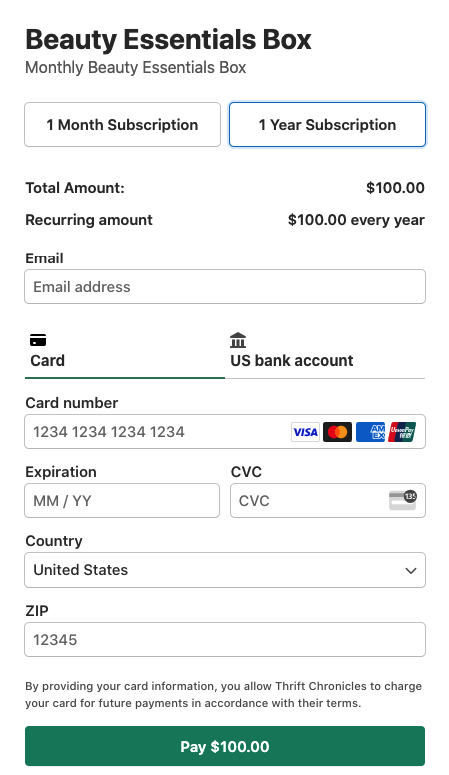
Be sure to click on Publish and then preview your form. It should look like the one below.
You’ll notice that the different subscription plan options and total amounts for each of them are displayed right at the top of your form, making it easy for your customers to choose the one that works best for them.
There you have it! While we’ve shown you a couple of different ways to use pre-made form templates, there are limitless options for customizations and functionalities available using pre-made templates depending on your specific needs and use cases.
If you liked this article, you might also want to check out our helpful guide on how to add a setup fee to a subscription plan in WordPress.
What are you waiting for? Get started with WP Simple Pay today!
To read more articles like this, follow us on X.
Disclosure: Our content is reader-supported. This means if you click on some of our links, then we may earn a commission. We only recommend products that we believe will add value to our readers.


Leave a Reply