How to Accept Cash App Payments in WordPress
Last updated on
Looking to accept Cash App payments on your WordPress site?
With two-thirds of Cash App’s monthly transactions coming from the millennial and Gen Z demographics, the mobile payment service allows you to tap into previously untapped markets.
In this article, we’ll show you how to easily accept Cash App payments in WordPress.
What is Cash App Pay?
Cash App is a mobile payment service that allows users to transfer money to one another using a mobile phone app. The app is available in the United States and the United Kingdom.
Because 55% of Cash App users don’t own a credit card, Cash App is invaluable in facilitating payments made with a linked debit card or stored balance.
It is completely free to send and receive money. In addition, all users have to do is download the app to get started. Once users have selected Cash App Pay as their preferred payment method, they can scan the QR code on their desktop or redirect to Cash App from the merchant’s checkout.
How to Accept Cash App Pay in WordPress
The easiest way to begin accepting Cash App payments is to use a Stripe payments plugin for WordPress that supports Cash App Pay.
WP Simple Pay is the #1 Stripe payments plugin for WordPress that lets you easily collect payments directly on your site without having to set up a complicated eCommerce solution or even a shopping cart.
One of the best parts about the plugin is that it allows your users to choose from multiple payment methods, including Cash App Pay, ACH direct debit, credit and debit cards, Apple Pay / Google Pay, Buy Now, Pay Later (BNPL) services like Affirm, and more.
Additional features of WP Simple Pay include:
- Advanced Drag & Drop Form Builder: Create attractive, professional looking payment forms in minutes.
- Fee Recovery: Collect the full payment or donation amount by passing the Stripe processing fee onto your customers.
- Custom Form Fields: Collect additional information from your customers during checkout.
- And more…
Remove the additional 3% fee!
Most Stripe plugins charge an additional 3% fee for EVERY transaction
…not WP Simple Pay Pro!
Step 1: Install and Activate WP Simple Pay
To begin offering Cash App Pay as a payment method to your customers, the first thing you’ll need to do is install and activate WP Simple Pay in WordPress.
All you need to do is go to the pricing page and choose the plan that best suits your business.
Once your purchase is complete, you can download the plugin from your email purchase receipt or from your WP Simple Pay account. Then, simply upload the plugin from your WordPress dashboard.
For detailed instructions on how to install WP Simple Pay, see our step-by-step instructions.

If you didn’t see the setup wizard, simply head over to WP Simple Pay » Settings » Advanced tab and click the Launch Setup Wizard button.
2: Connect WordPress to Stripe
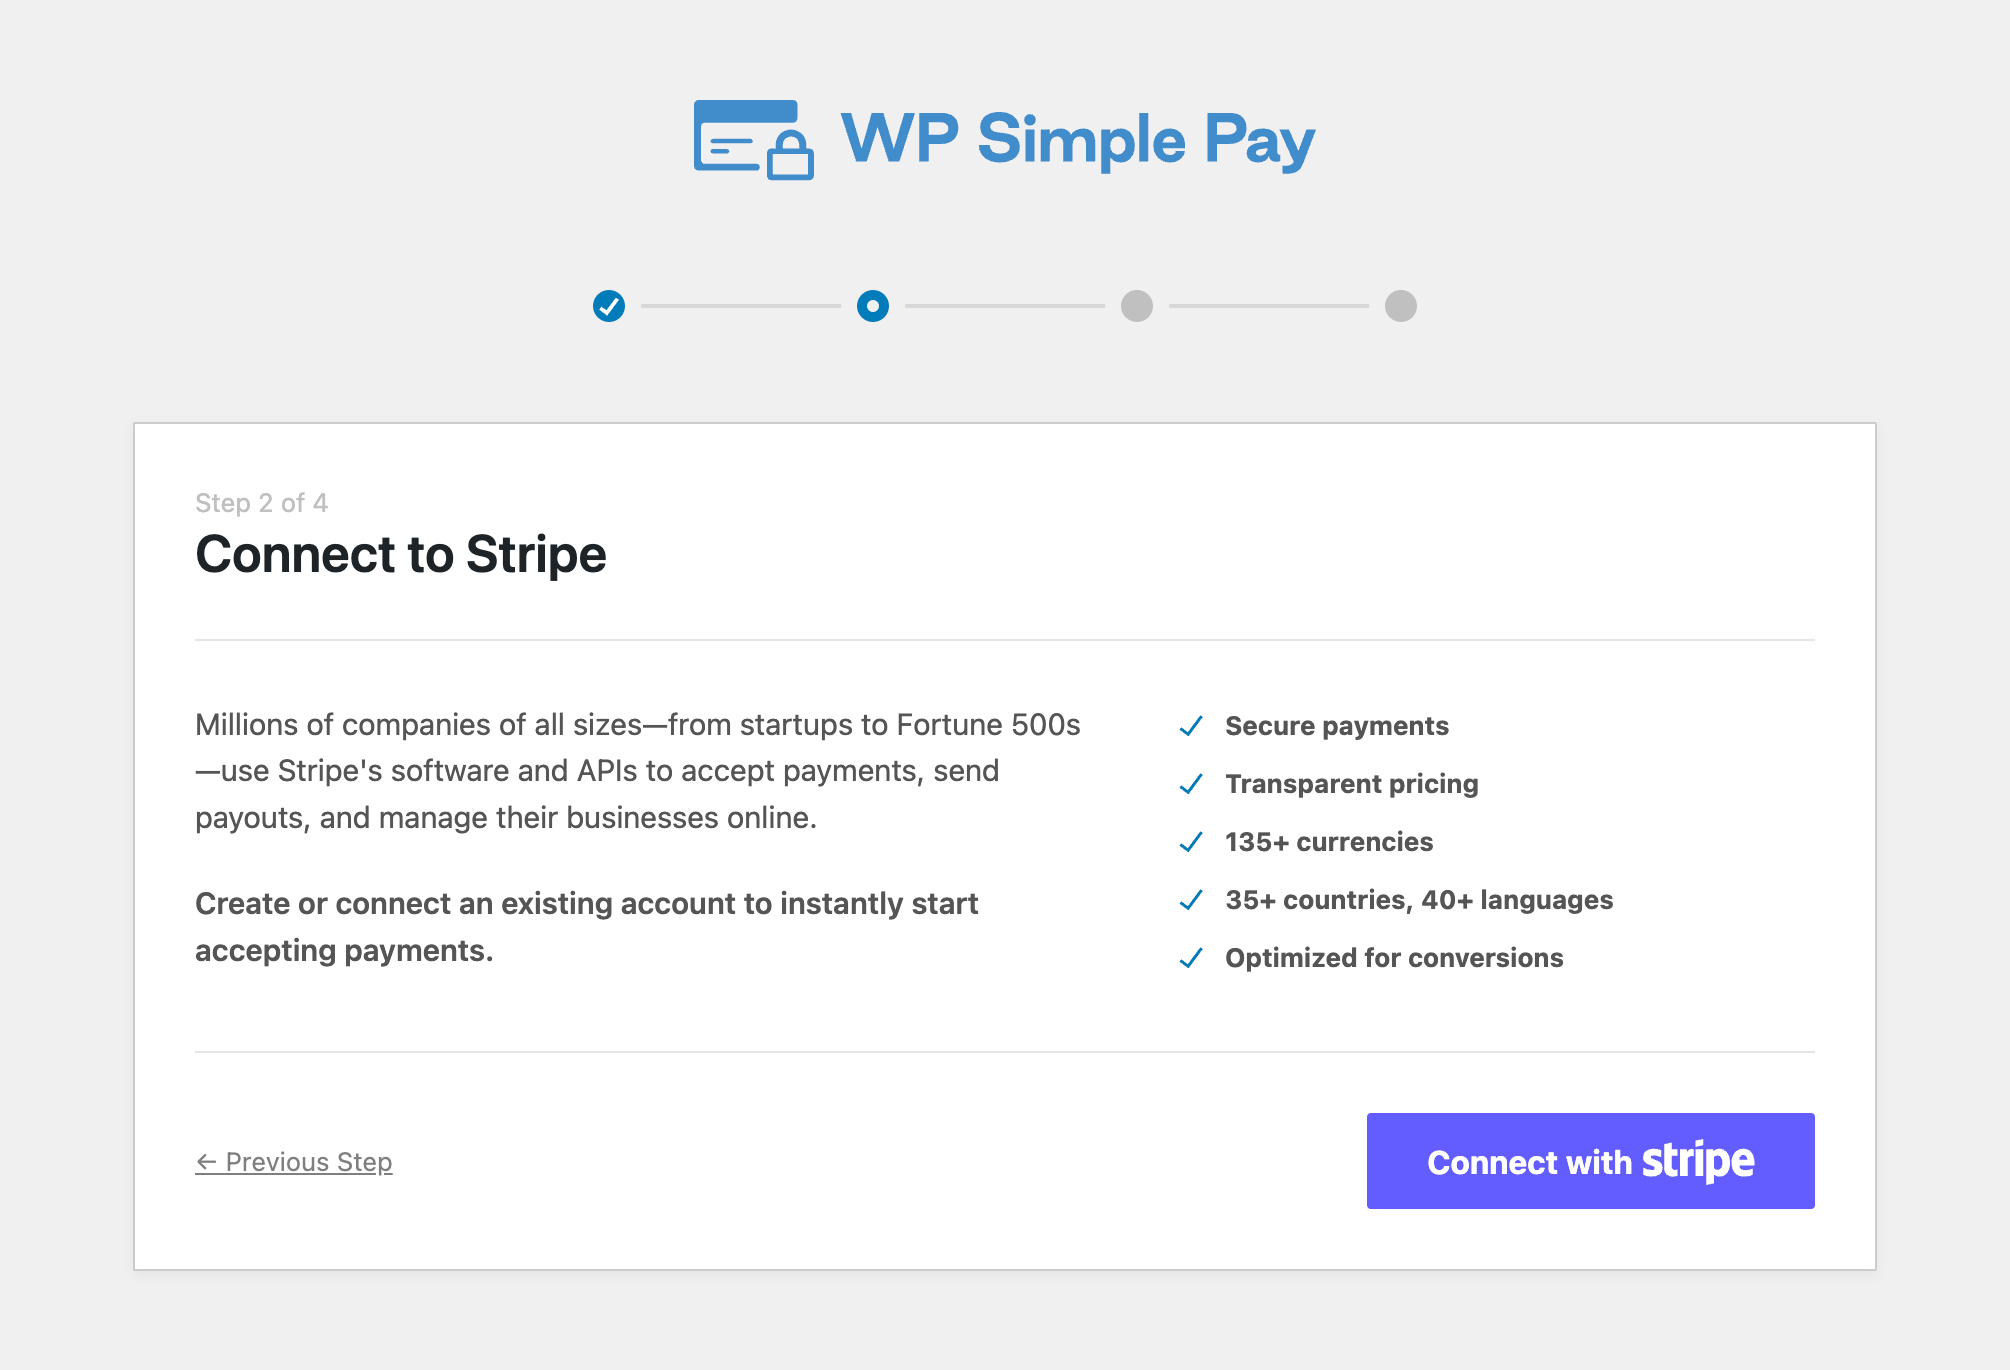
To connect your WordPress site to Stripe, click Connect with Stripe.
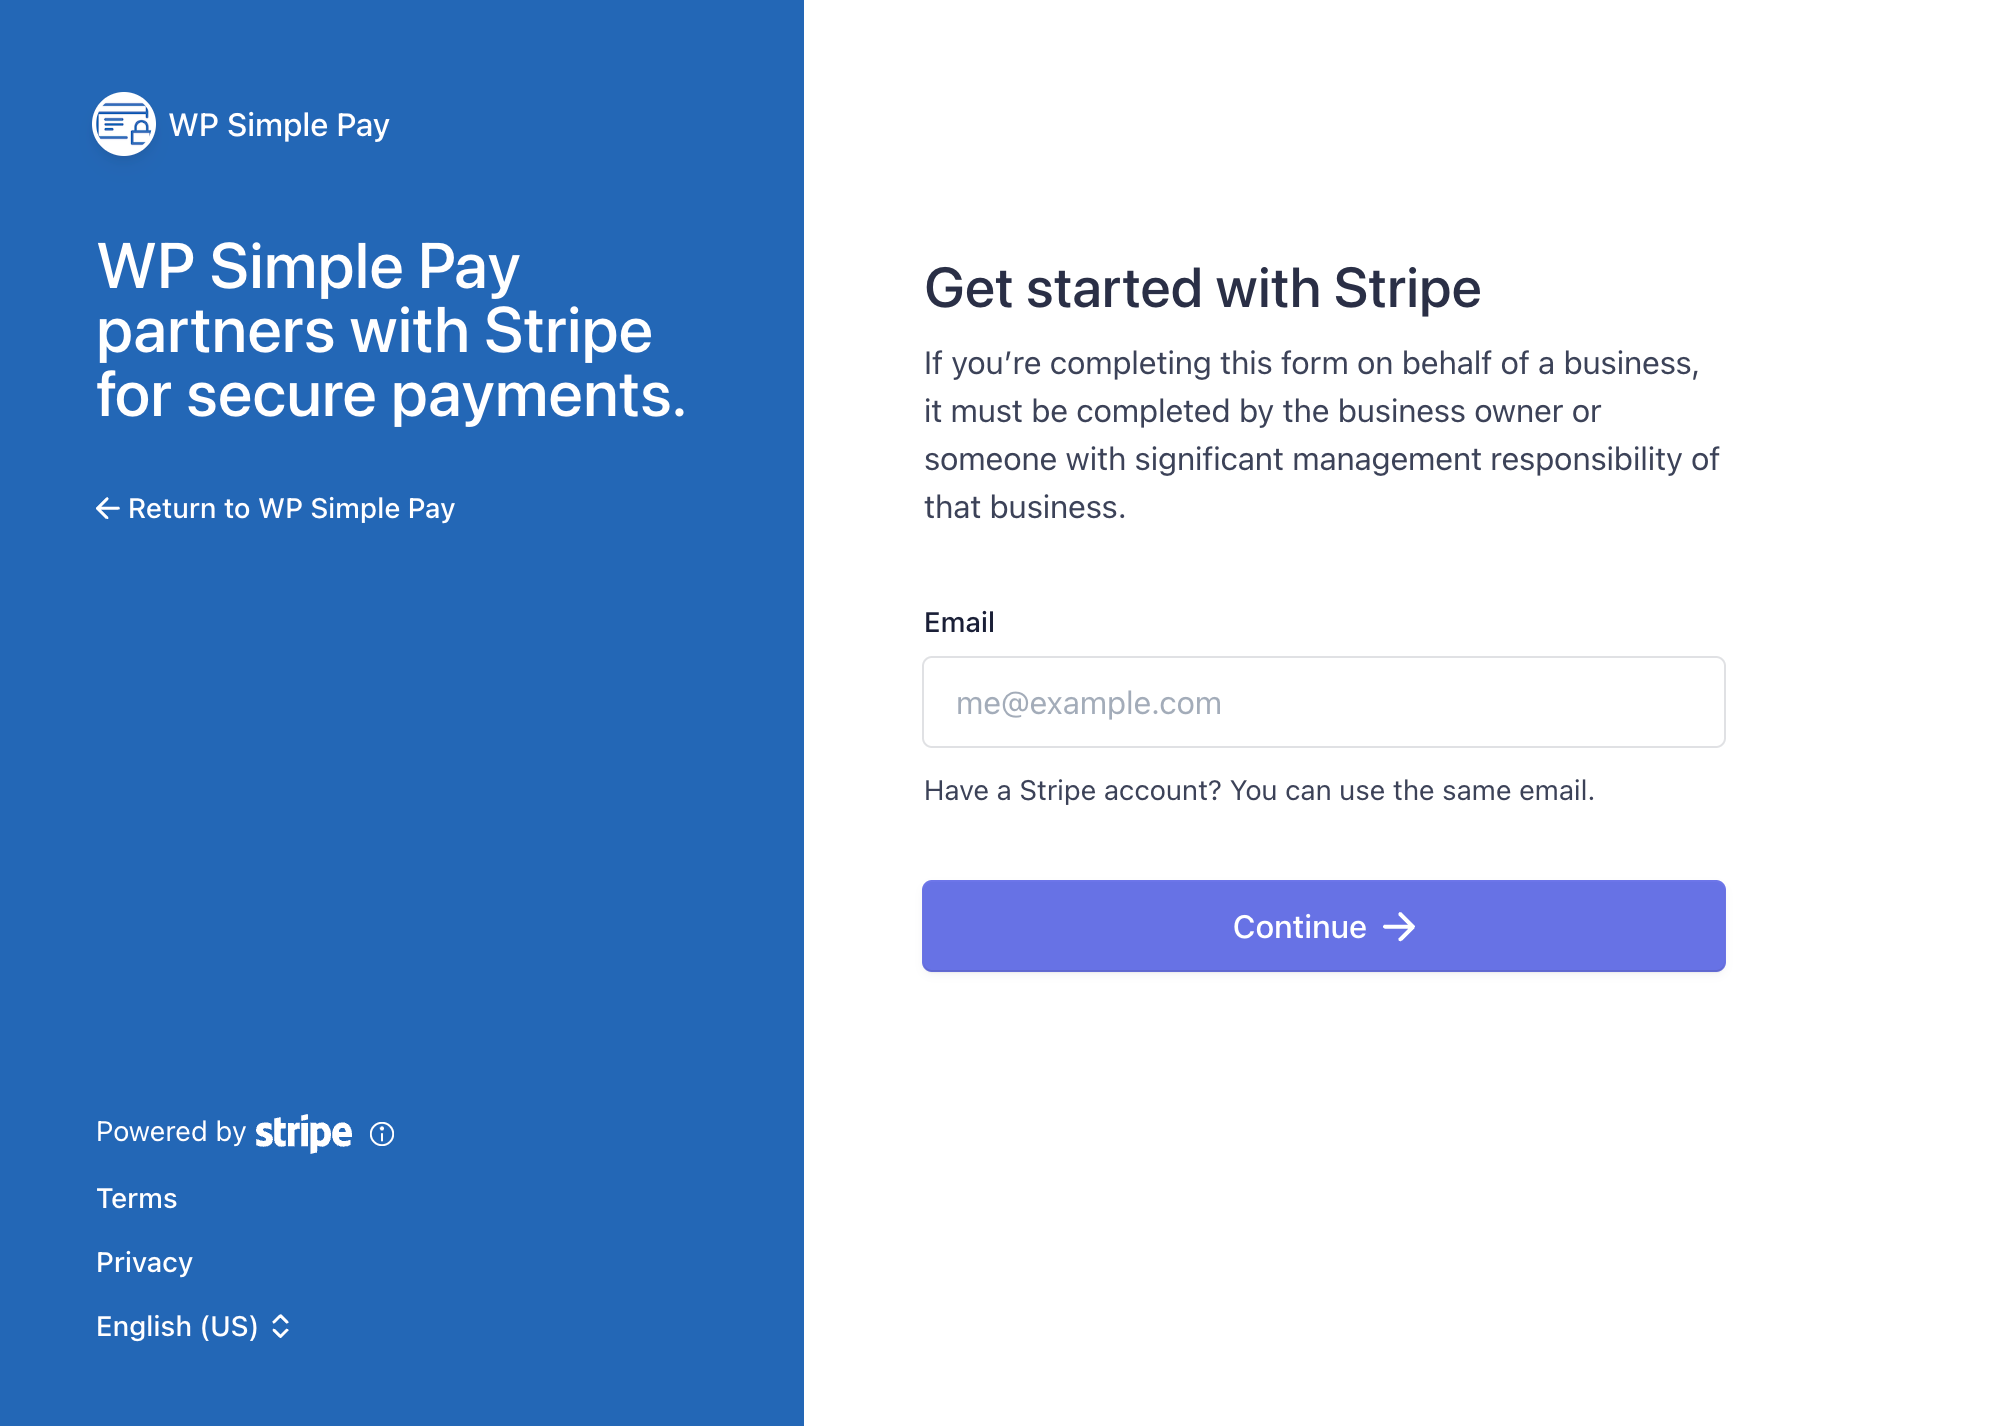
Next up, enter the email address you use for your Stripe account and connect it with your site. If you don’t have a Stripe account, you can easily create one by entering your email address and completing registration.
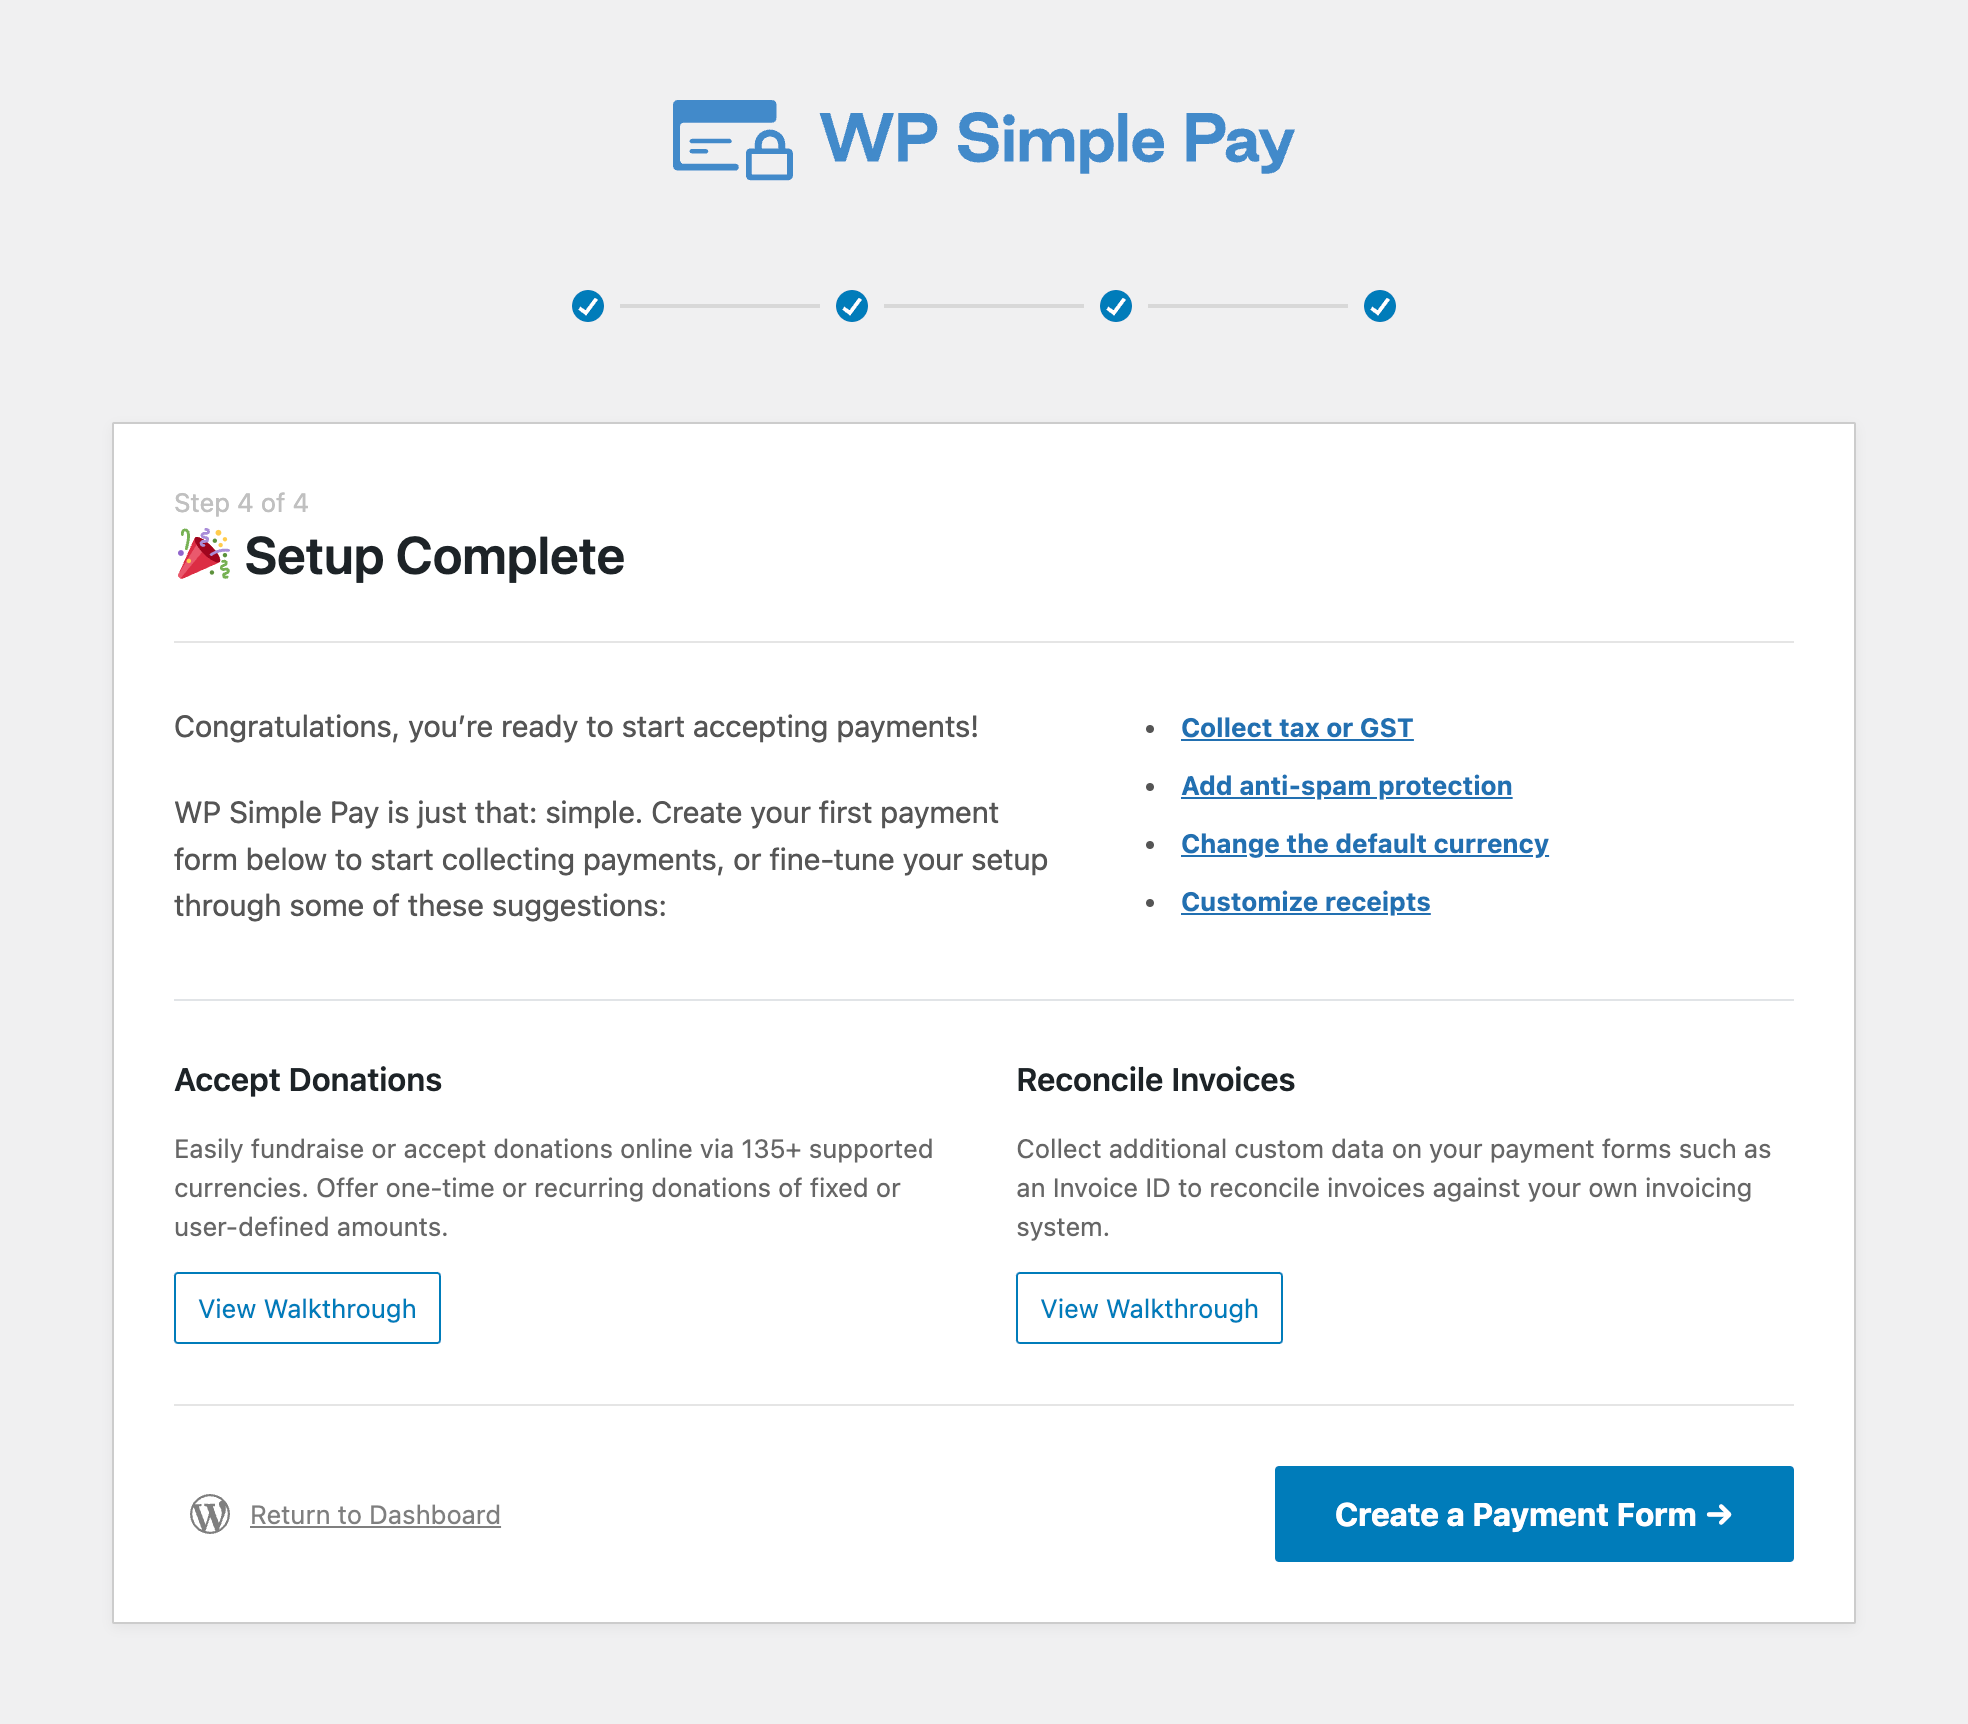
Upon completing this process, you’ll be shown a success page that says Setup Complete. Next, to create a payment form, click on the Create a Payment Form button.
Step 3: Create a Payment Form that Accepts Cash App
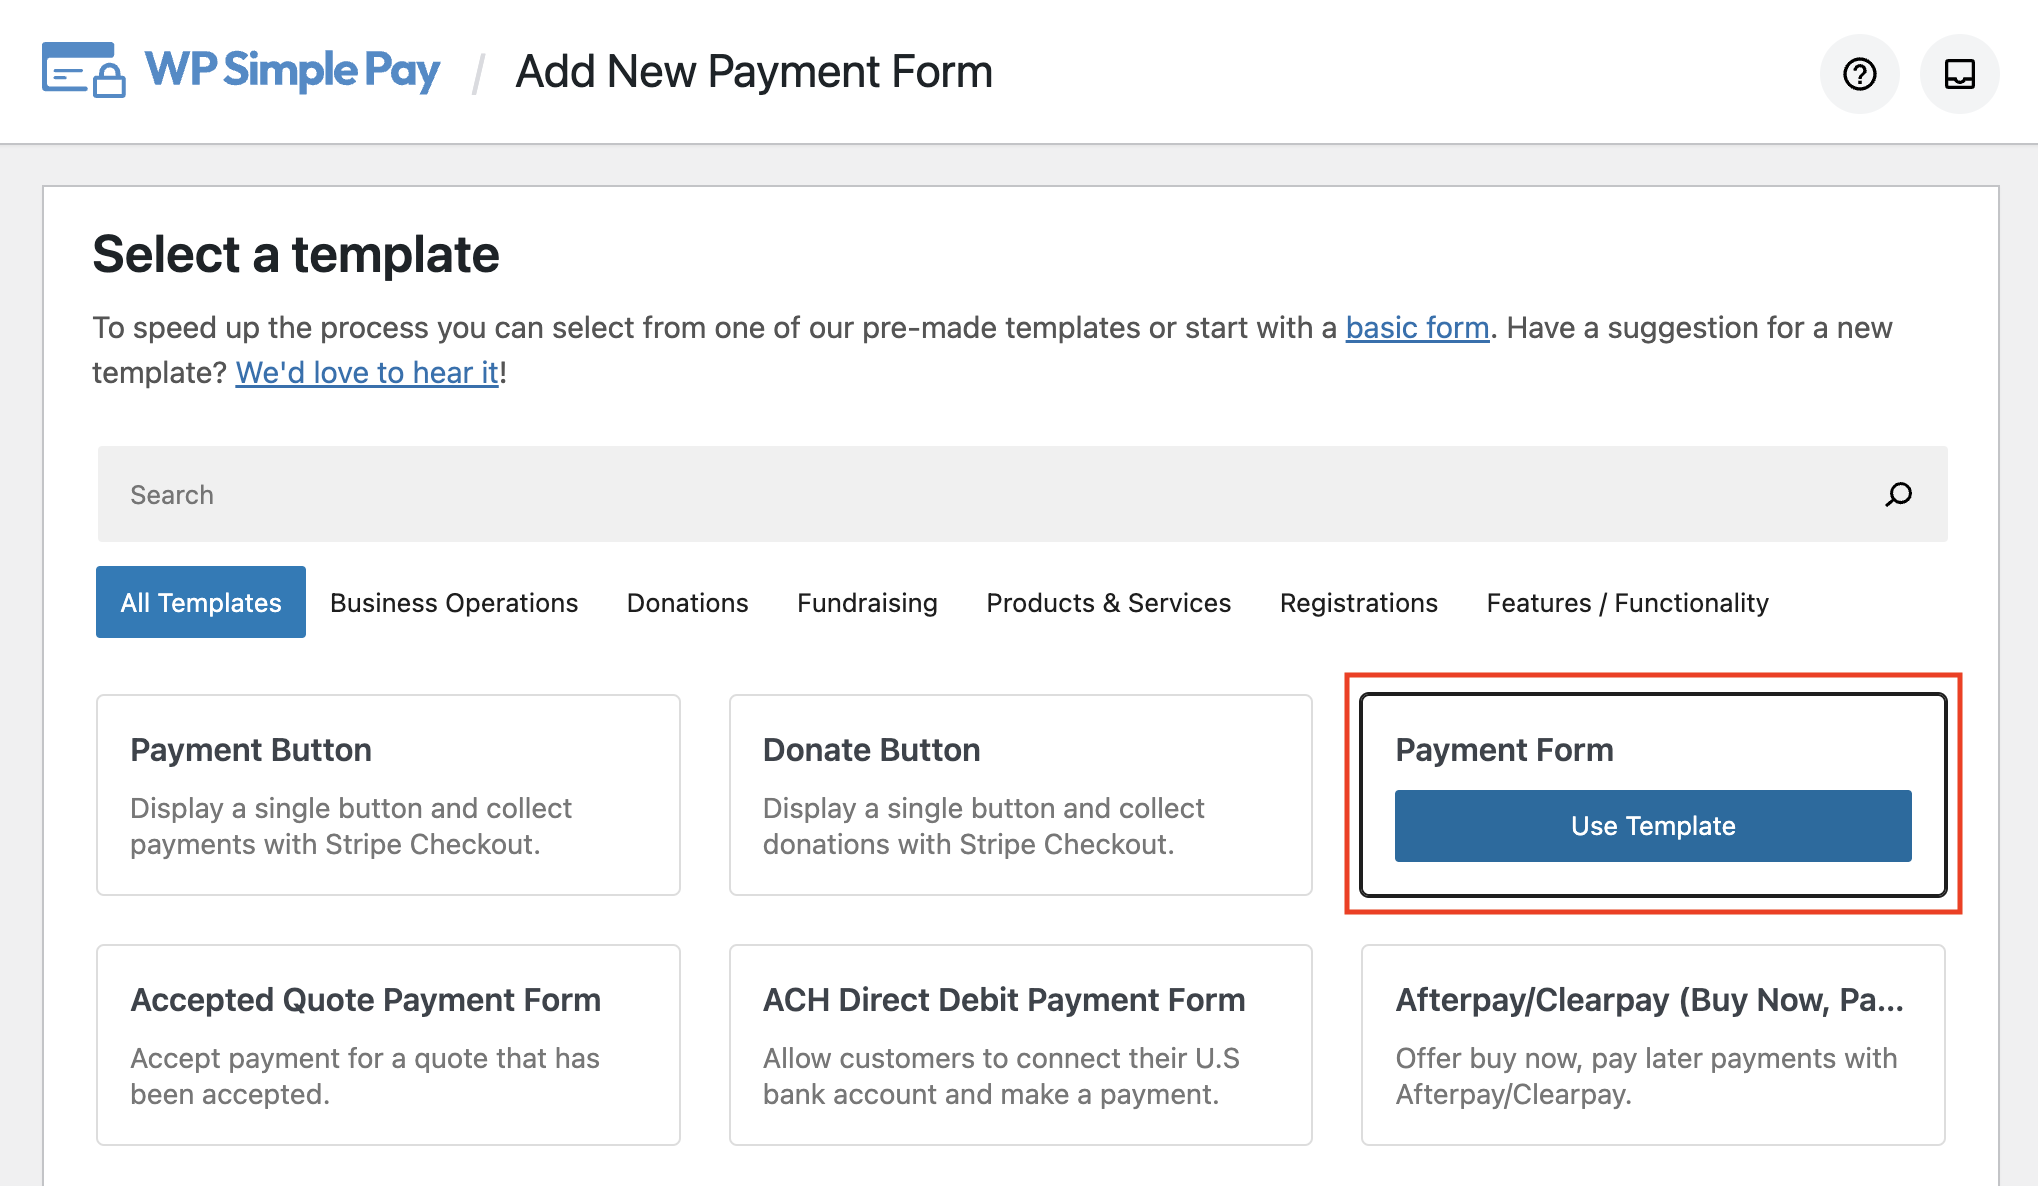
Once you click on Create a Payment Form, you’ll be taken to the payment form template options.
For the purpose of this tutorial, let’s go ahead and choose the basic Payment Form.
Next, you’ll land on the payment form’s General tab. This is where you can add the title and description of your form.
You can also choose between an on-site payment form that will keep your visitors on your site throughout the entire checkout process or a checkout page that is hosted by Stripe for your form Type.
For the sake of this tutorial, let’s choose On-site payment form.
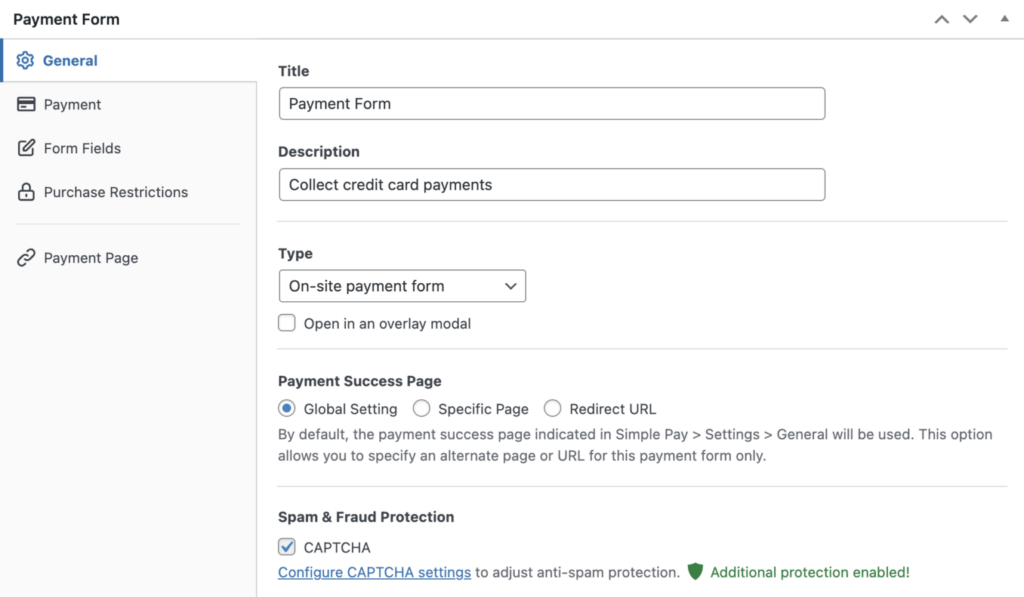
You’ll notice there’s a Spam & Fraud Protection box that lets you choose your CAPTCHA settings. When you’ve finished making your desired changes to the form, click on the Payment tab next.
Here is where you can add your amount and choose between a one time or recurring payment (subscription). Go ahead and toggle the One-time payment.
Next, select Cash App from the list of available payment methods from the dropdown menu. If you wish to pass the Stripe processing fee onto your customers, click on Configure, check the Fee Recovery box, and enter the percentage and amount.
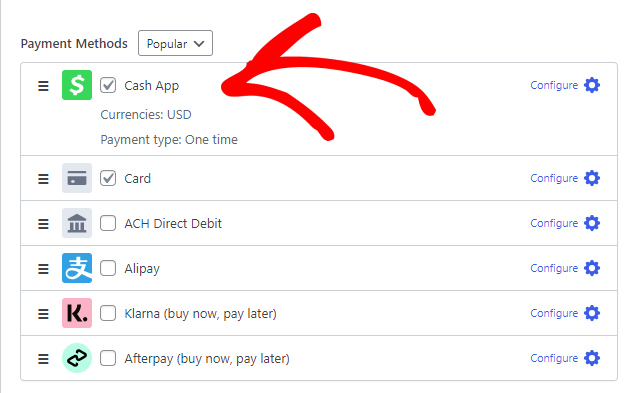
Now that you’ve enabled Cash App payments on your form, click Form Fields to easily add or remove custom fields to your form. For example, you can require your customers to enter their name and shipping address during checkout.
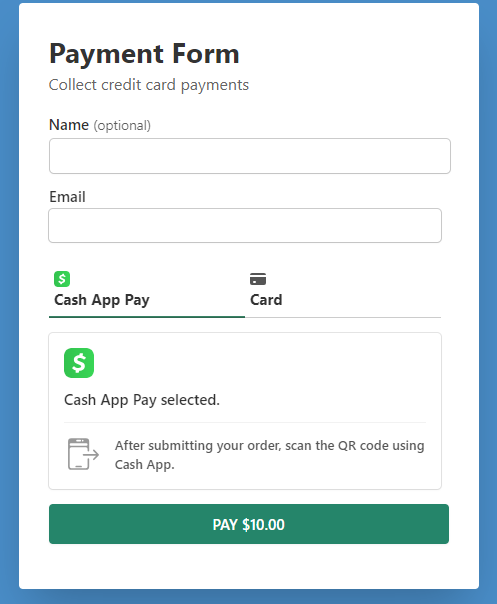
Once you’re finished setting up the fields, be sure to save or update your changes and preview the form. It should look something like the one below.
Step 4: Publish Your Payment Form
Now that you’ve created a payment form that allows you to accept Cash App payments directly on your site, all you need to do is embed your form.
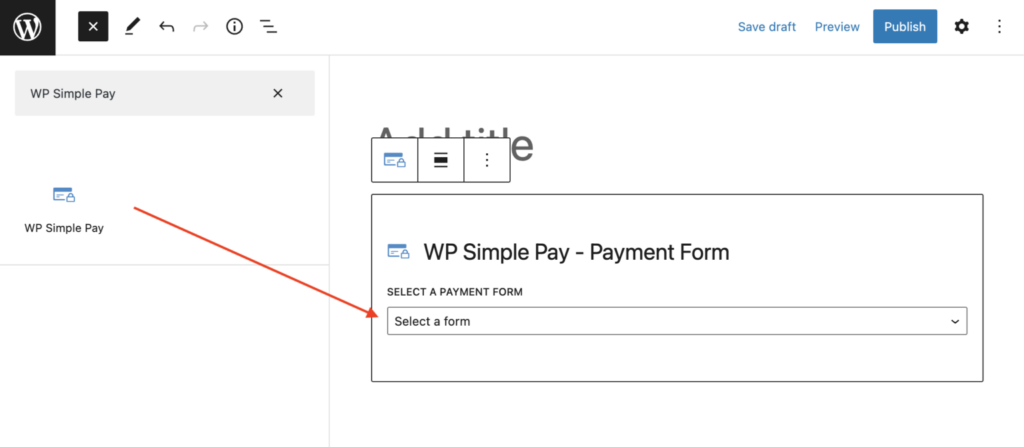
To embed the form, go to the post or page where you want it published. Click on the + icon to add the WP Simple Pay block. Then simply choose the form you just created and click Publish or Update.
That’s it! We hope this article has helped you learn how to accept Cash App payments on your WordPress site.
Related Articles
For additional information, be sure to read these helpful guides:
- How to Accept Additional Payment Methods in Stripe for Free
- How to Accept Payments During a Specific Date Range in WordPress
- How to Accept Google Pay / Apple Pay / Microsoft Pay in WordPress
- How to Accept Affirm Payments in WordPress
What are you waiting for? Get started with WP Simple Pay today!
To read more articles like this, follow us on Facebook and Twitter.
Disclosure: Our content is reader-supported. This means if you click on some of our links, then we may earn a commission. We only recommend products that we believe will add value to our readers.


Leave a Reply