
How to Allow Customers to Manage Subscriptions in WordPress
Last updated on

 Spencer Finnell
Looking for an easy way to let your customers manage their own subscriptions whenever they’d like?
Allowing customers to manage their subscriptions anytime significantly reduces subscription churn and keeps them happy. It also helps cut down on failed recurring payments so you can keep a steady stream of income flowing.
In this article, we’ll show you how to allow subscribers to access their subscription details easily from your site.
Allowing Customers to Manage Subscriptions
Using a Stripe payments plugin that offers support for recurring payments and provides customers easy access to their subscription details is the best way to allow your customers to manage their subscriptions anytime.
WP Simple Pay is the #1 Stripe payments plugin for WordPress. It lets you easily accept one-time or recurring payments directly on your site without code or needing additional plugins.
It also offers several subscription features to help you grow your subscriber base, including free trial offers, setup fees, and installment plans.
On top of all that, you can use the plugin to easily add a “manage subscription” form to your site that lets your customers access their subscriptions to accomplish things like updating their payment method or canceling before the next upcoming charge.
With WP Simple Pay, you also get the following features and benefits:
- Accept Multiple Payment Methods: Increase conversions by offering your customers their preferred payment method options, including traditional credit and debit cards, ACH Direct Debit, digital wallets (Apple Pay / Google Pay / Microsoft Pay, Cash App Pay), Alipay, Buy Now, Pay Later services, and more.
- On-Site Payment Forms: Keep your visitors on your site longer and easily create professional payment forms for one-time or subscription payments.
- Custom Fields: Collect the necessary information from your customers by adding, editing, or removing custom fields to your payment forms.
- Discounts: Offer custom discount codes to encourage customer loyalty.
- Free Trials: Boost signups with free trial offers.
- And more…
Remove the additional 3% fee!
Most Stripe plugins charge an additional 3% fee for EVERY transaction
…not WP Simple Pay Pro!
How to Allow Customers to Manage Subscriptions
For the purpose of this tutorial, we’ll show you how to quickly create a subscription payment form for your site and add a “Manage Subscription” form so that your subscribers can access their accounts anytime.
As mentioned before, letting your customers update their payment details whenever they’d like greatly reduces failed recurring payments.
The “Manage Subscription” form will look like the one below. The best part is you can add it to any page or post on your site without a single line of code. To receive their personal subscription details, all your customers have to do is enter their email address.

Without further ado, let’s get started. Follow the steps below!
Step 1: Install and Activate WP Simple Pay
To begin accepting subscription payments and add a “Manage Subscriptions” form to your site, you’ll first need to install and activate WP Simple Pay in WordPress.
Simply visit the pricing page and choose the best plan for your needs. If you need help deciding on a plan, see our guide: WP Simple Pay Lite vs. Pro: Is Pro Worth the Price (2024 Update).
If your business offers subscription-based products or services, we recommend using the Pro plan to unlock all subscription features like setup fees, installment plans, free trial offers, and more.
Once you’ve purchased WP Simple Pay, you can download the plugin from your purchase receipt email or your WP Simple Pay account.
Then, you’ll need to upload the .zip file to WordPress. If you need help, follow our detailed guide on how to install WP Simple Pay.
Once you’ve finished installing WP Simple Pay and activating it in WordPress, its advanced setup wizard will automatically open. Go ahead and click on the Let’s Get Started button.

If you didn’t see the setup wizard, simply head over to WP Simple Pay » Settings » Advanced tab and click the Launch Setup Wizard button.
2: Connect WordPress to Stripe
To connect your WordPress site to Stripe, click on Connect with Stripe.

Next up, enter the email address you use for your Stripe account and connect it to your site. If you don’t have a Stripe account, you can easily create one by entering your email address and completing the registration.
Upon completing this process, you’ll be shown a success page that says, “Setup Complete.” Next, click on Create a Payment Form.

Step 3: Create a Subscription Form
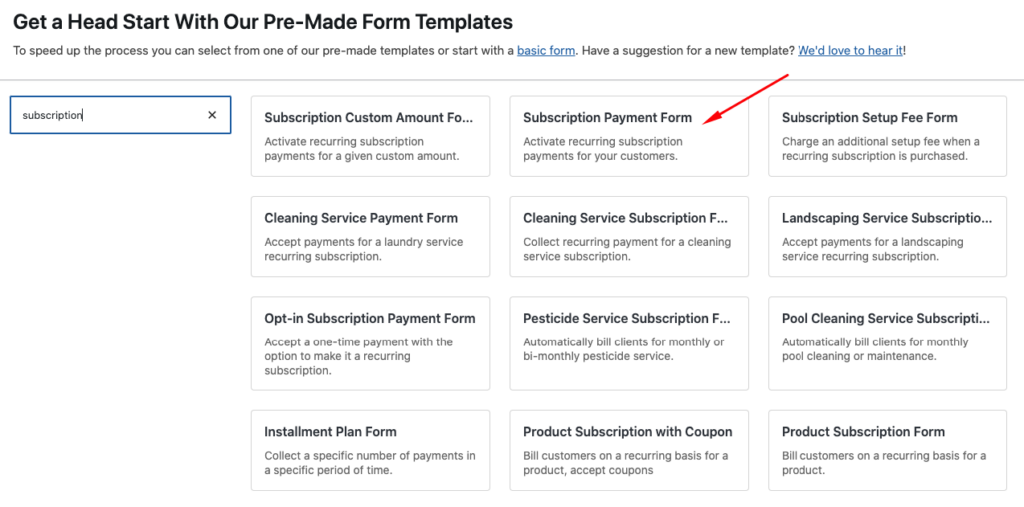
Now that you’ve installed WP Simple Pay and your Stripe account is connected to your site, you’ll need to create a subscription payment form. After clicking the Create a Payment Form button, you should have landed on the payment form templates library page.
First, search for “subscription” and choose the Subscription Payment Form template.
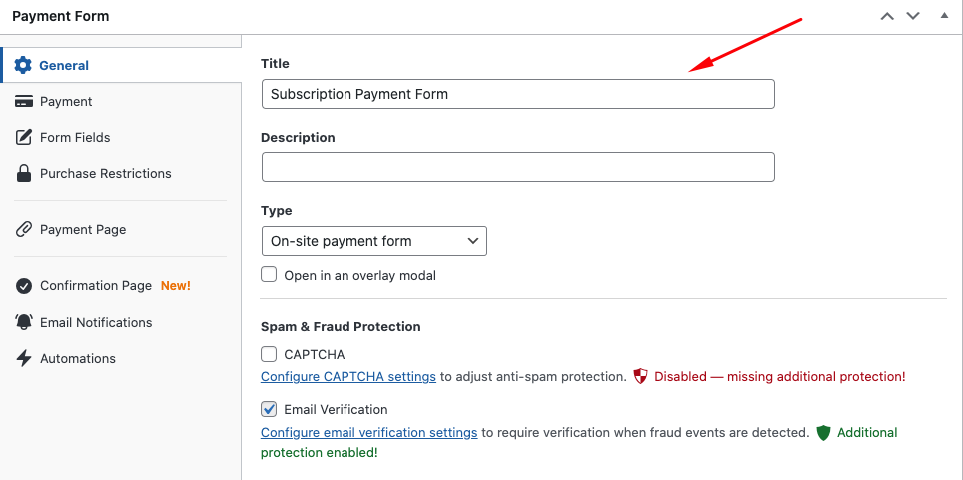
Add the Title and Description of your payment form in the General tab.
Next, you’ll notice two subscription payment plans have already been added by default in the Payment tab. Feel free to edit your pricing and plan options. Then, choose the payment method options you’d like to offer.
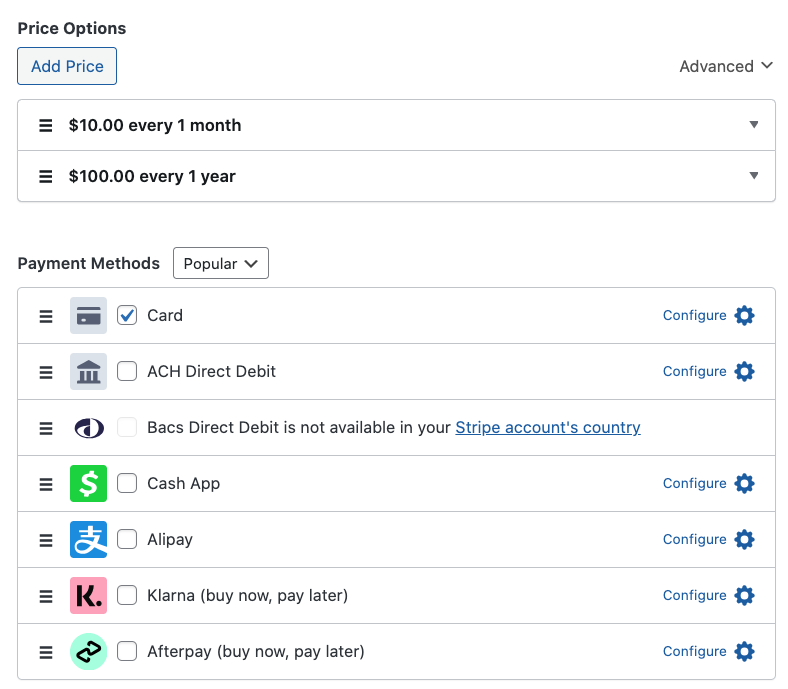
Be sure to click Save Draft and then modify your fields using the Custom Fields tab. You can use dropdowns, text boxes, and check boxes for your form.
Once you’re happy with your subscription form, you can preview it. Publishing it on your site is the last step if it looks good.
Step 4: Publish Your Subscription Form
To publish your form, go to the page or post you want it on and click on the + icon to generate the WP Simple Pay – Payment Form block. From the dropdown menu, select the form you just created.
Be sure to click on Publish.
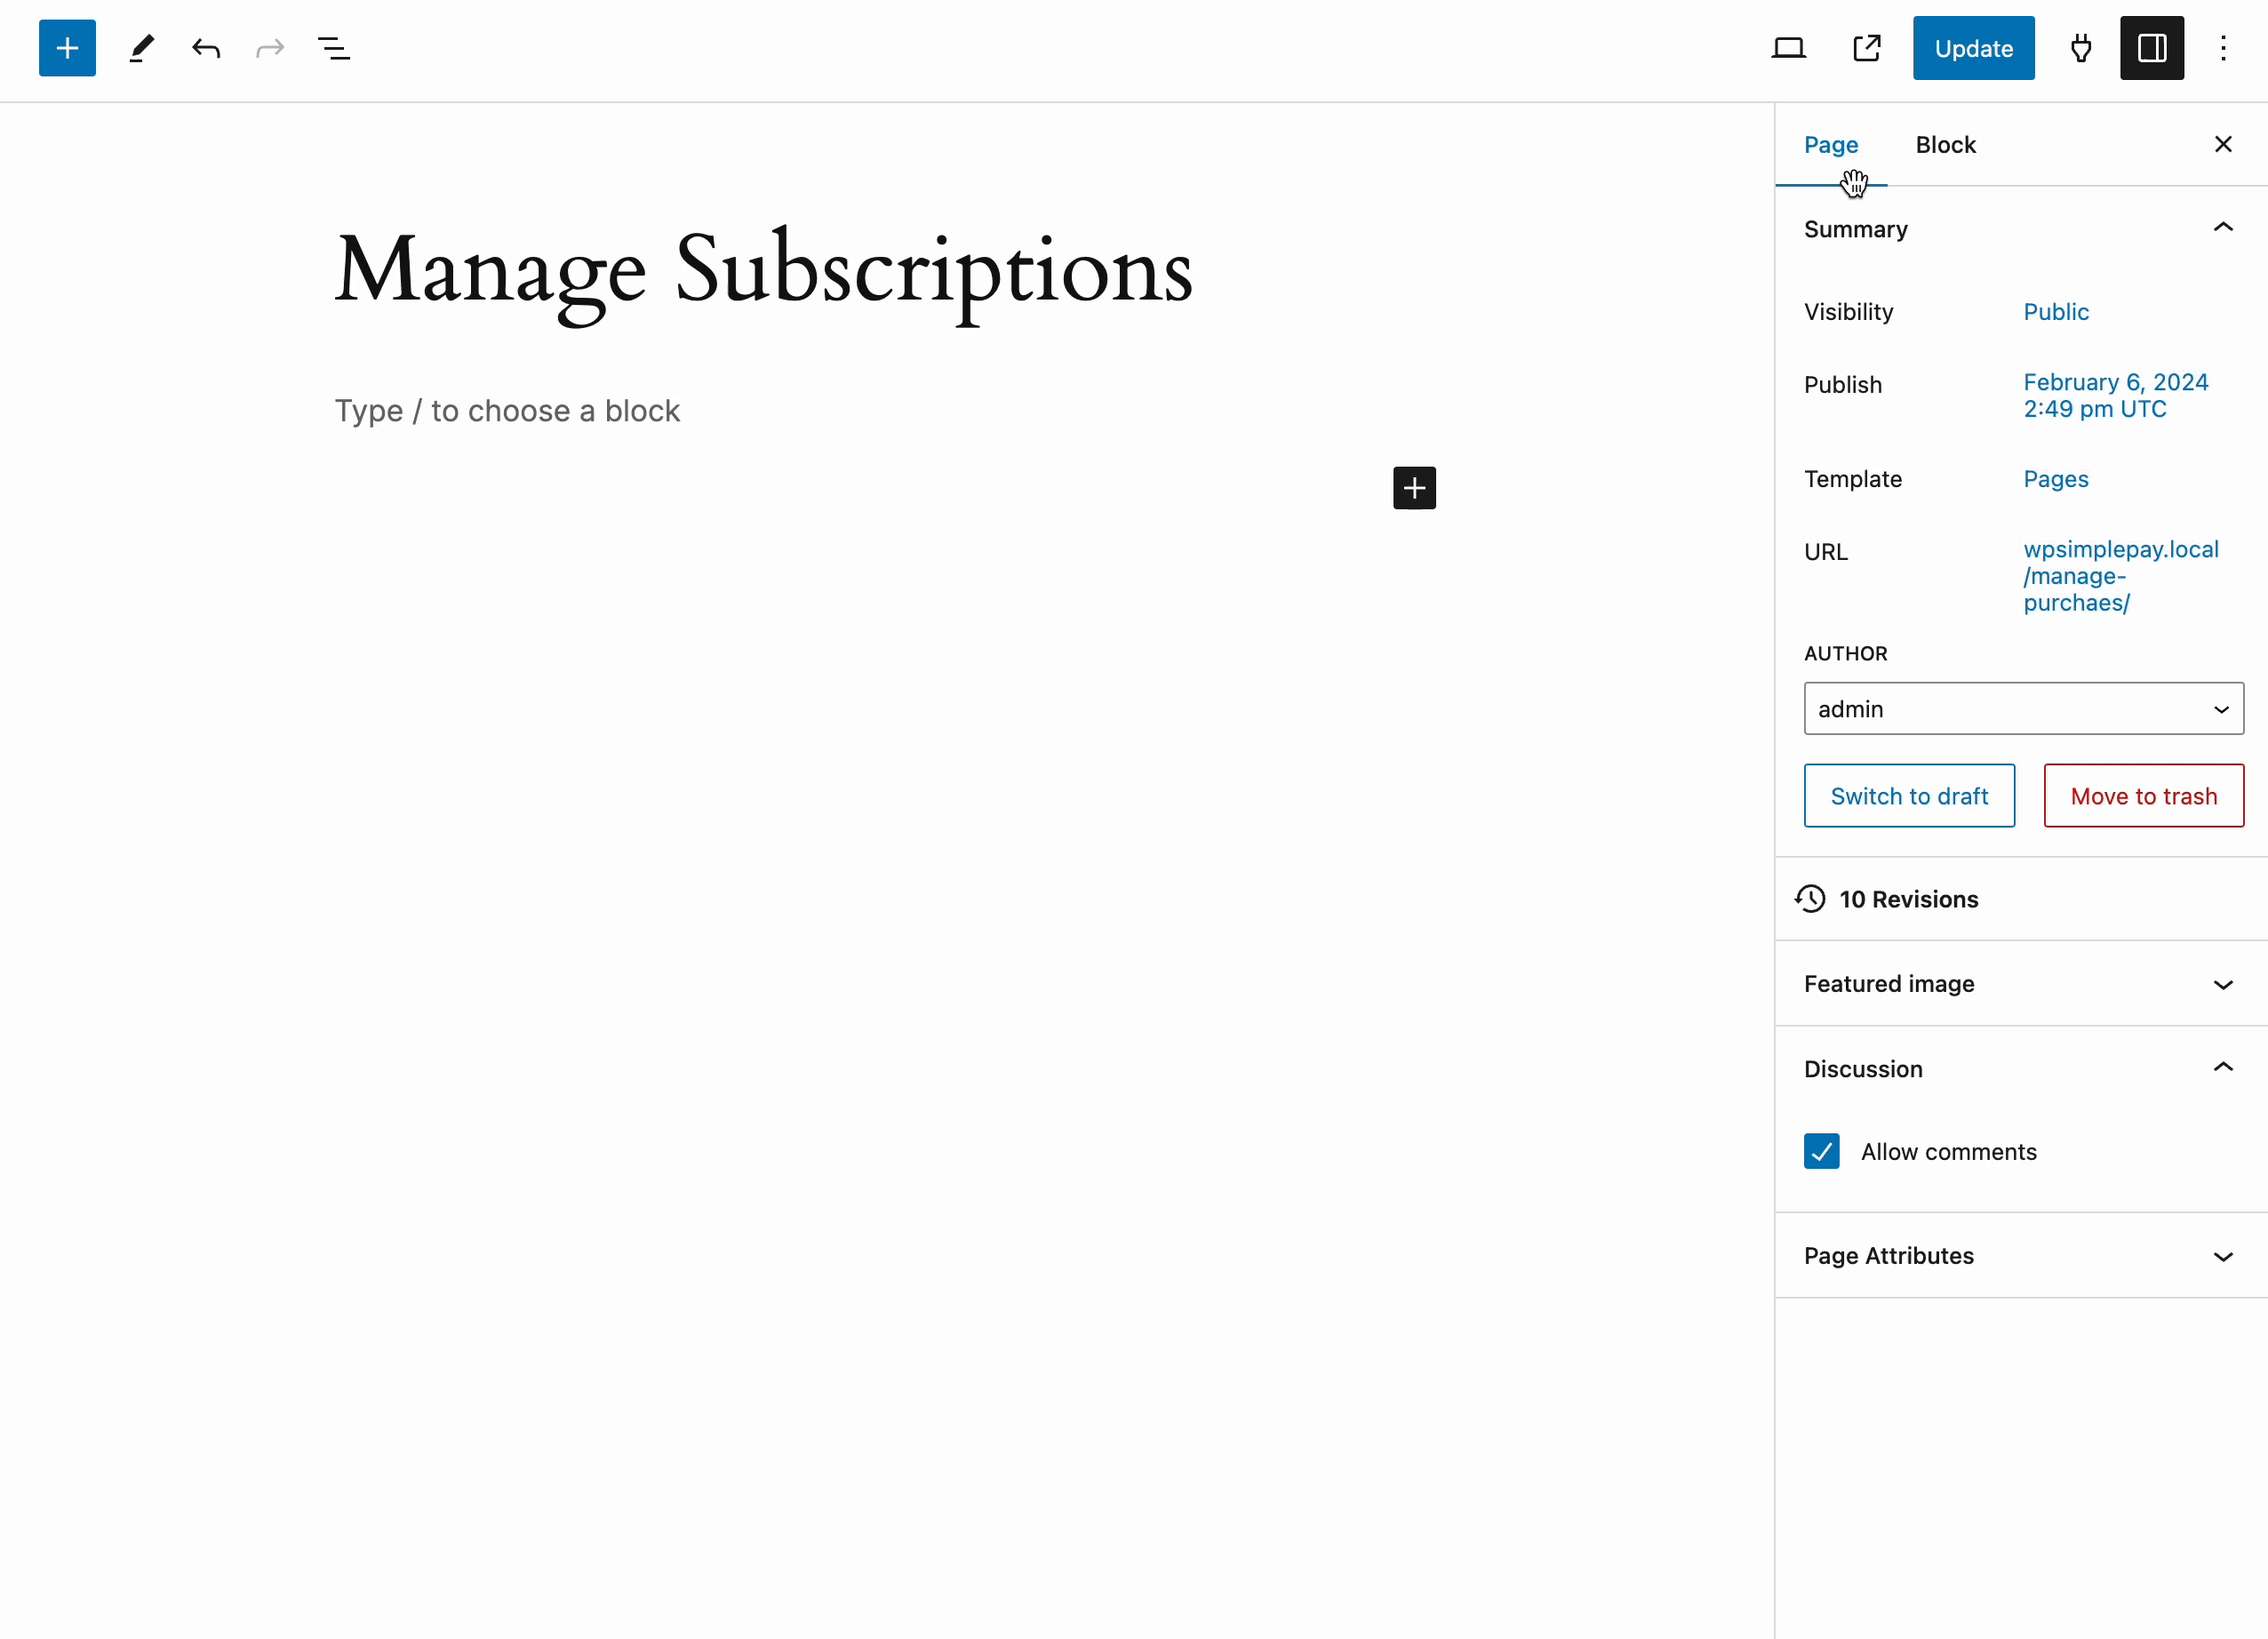
Step 5: Embed “Manage Subscription” Form
So far, you’ve created and added your subscription payment form to your site.
The next thing you’ll need to do to give your subscribers on-demand access to their subscription details is add the “Manage Subscription” form to your site.
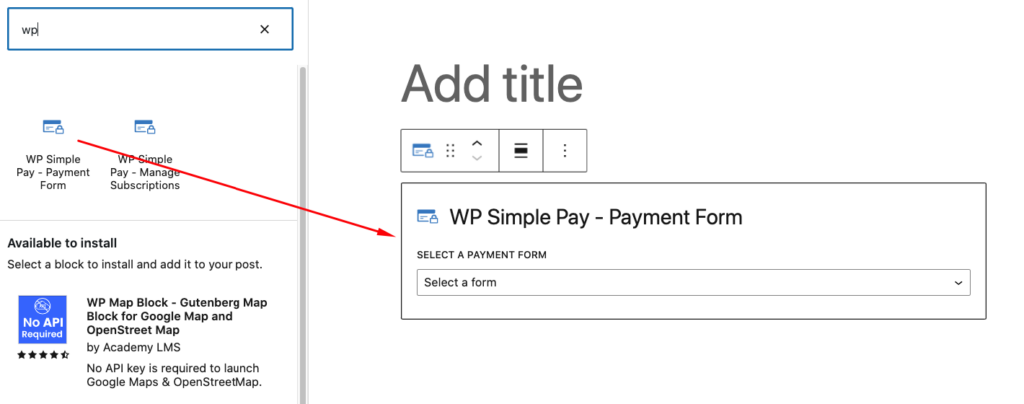
Like embedding your payment form, all you need to do is go to the page you want your form on, click the + icon, and type “WP” in the search field.
Next, choose the WP Simple Pay – Manage Subscriptions block.
Another way to embed the form is to simply type “/manage” to bring up the block as shown below.
Be sure to click on Publish or Update.
That’s it! We hope this article has helped you learn how to let customers manage their subscriptions directly from your WordPress site.
If you liked this article, you might also want to check out our guide on 6 Tips to Boost Subscription Signups with Free Trial Offers.
What are you waiting for? Get started with WP Simple Pay today!
To read more articles like this, follow us on X.
Disclosure: Our content is reader-supported. This means if you click on some of our links, then we may earn a commission. We only recommend products that we believe will add value to our readers.


Leave a Reply