
How to Offer 100% Discounts on Subscription Signups in WordPress
Last updated on

 Spencer Finnell
Do you want to offer a 100% discount on new subscription activations on your WordPress site?
For businesses that sell subscription-based products or services, offering a 100% discount to new subscribers is an effective way to attract more customers and boost sales.
In this article, we’ll show you how to easily add a 100% discount on subscription signups in WordPress.
Offering 100% Discounts on Subscription Signups
Offering new subscribers a 100% discount on their initial subscription activation lowers the barrier to entry, giving them an opportunity to try out your products or services without an upfront charge.
On top of all that, a 100% discount on new subscription signups helps you receive more actionable feedback regarding your products or services.
How to Offer 100% Discounts on Subscriptions
The best way to offer a 100% discount to new subscribers is to use a Stripe payments plugin that lets you create payment forms for recurring payments and discount codes.
WP Simple Pay is the #1 Stripe payments plugin for WordPress that lets you easily accept recurring payments directly on your site without setting up a shopping cart system. The standalone plugin also enables you to create payment forms in minutes without coding.
Additional features of the plugin include:
- Free Trials: Boost subscription signups by offering free trial periods for subscriptions.
- Multiple Payment Methods: Accept 10+ payment method options, including traditional debit and credit cards, ACH Direct Debit, digital wallets (Apple Pay / Google Pay / Microsoft Pay, Cash App Pay), Buy Now, Pay Later, and more.
- Discounts: Easily create unique discount codes and apply them to individual payment forms.
- Drag & Drop Form Builder: Use the plugin’s advanced drag & drop payment form builder to create payment forms for one-time or recurring payments.
- Custom Fields: Collect additional customer information using drop downs, text fields, and checkboxes.
- And more…
Remove the additional 3% fee!
Most Stripe plugins charge an additional 3% fee for EVERY transaction
…not WP Simple Pay Pro!
WP Simple Pay lets you create payment forms for products, services, event registrations, fundraisers, and more. With all that being said, for the purpose of this tutorial, we’ll be creating a subscription payment form that offers a 100% discount for new subscribers.
1. Install & Activate WP Simple Pay in WordPress
The first thing you’ll need to do to begin offering a 100% discount on subscription activations is install and activate WP Simple Pay in WordPress.
Simply visit the pricing page and choose the best plan for your specific needs. To get all the plugin’s subscription features like free trial offers and setup fees, we recommend going with the Pro plan.
Once you’ve purchased WP Simple Pay, simply download the plugin from your purchase receipt email or your WP Simple Pay account.
Then, you’ll need to upload the .zip file to WordPress. If you need help, follow our detailed guide on how to install WP Simple Pay.
Once you’ve finished installing WP Simple Pay and activating it in WordPress, its advanced setup wizard will automatically open. Go ahead and click on the Let’s Get Started button.

If you didn’t see the setup wizard, simply head over to WP Simple Pay » Settings » Advanced tab and click the Launch Setup Wizard button.
2: Connect WordPress to Stripe
To connect your WordPress site to Stripe, click on Connect with Stripe.

Next up, enter the email address you use for your Stripe account and connect it to your site. If you don’t have a Stripe account, you can easily create one by entering your email address and completing the registration.
Upon completing this process, you’ll be shown a success page that says, “Setup Complete.” Next, click on Create a Payment Form.

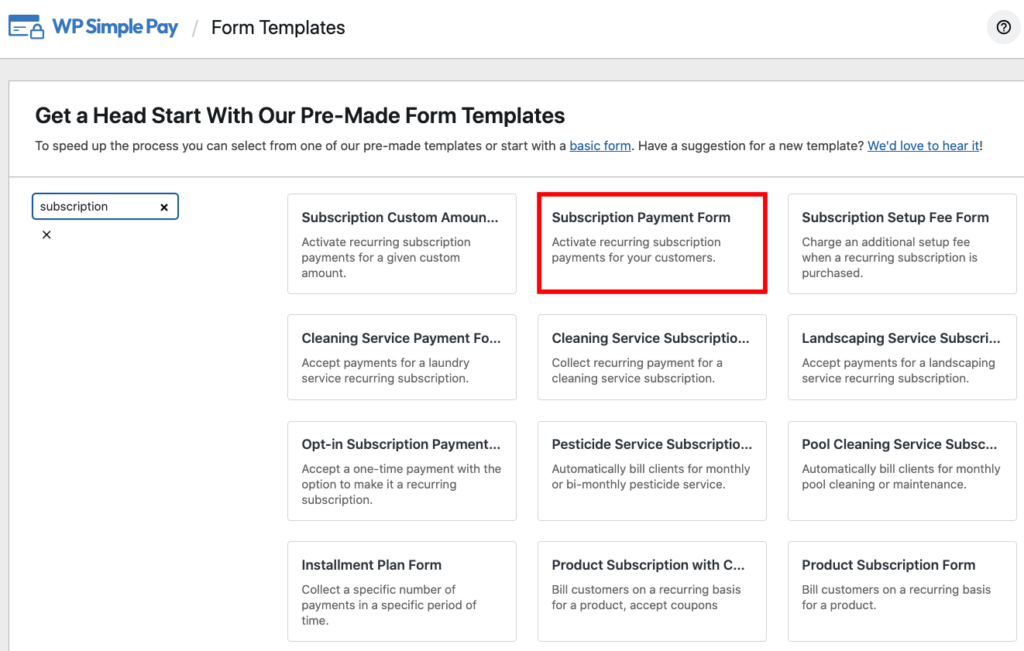
3. Create a Subscription Payment Form
So far, you’ve installed and activated WP Simple Pay in WordPress. The next thing you’ll need to do is create a subscription payment form.
You should have been redirected to the pre-built form templates page, where you will see several options. Go ahead and choose the Subscription Payment Form template.
Next, in the General tab, add the title and description of your form in the provided fields.
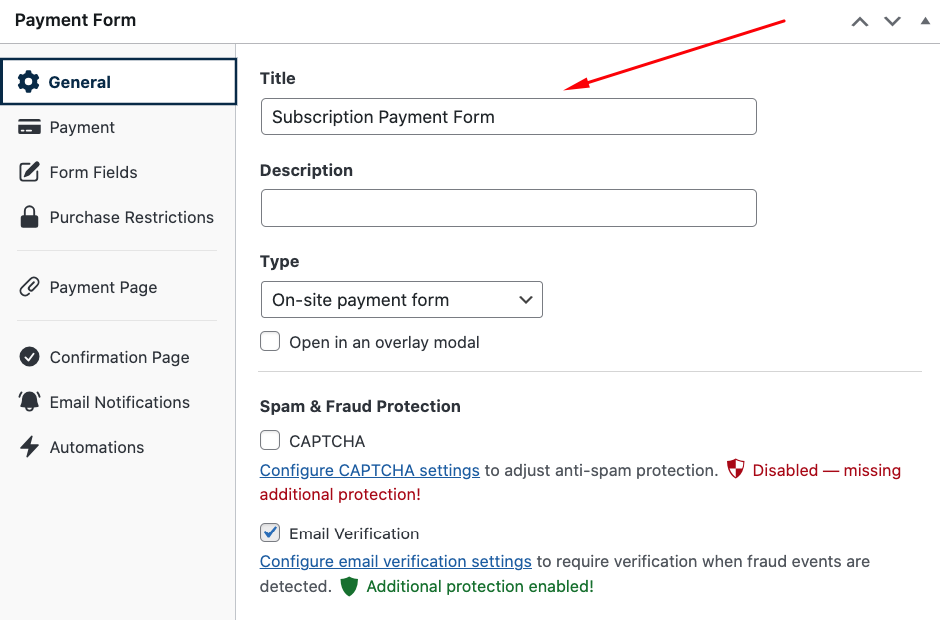
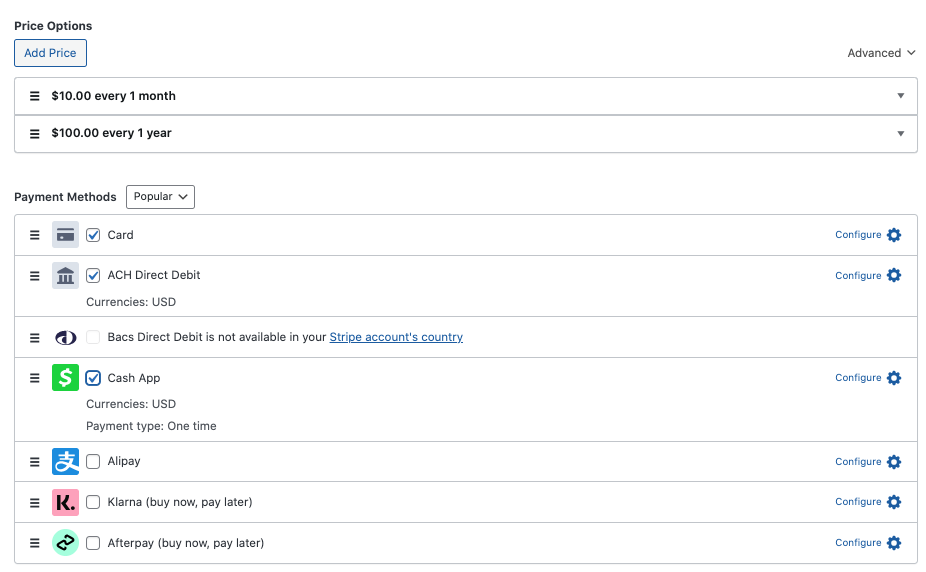
Then, click on the Payment tab. Here is where you can change your price amounts and plan options.
You can also choose which payment method options you want to offer your subscribers.
Once you’ve finished, be sure to click on Save Draft.
4. Create a 100% Discount Code
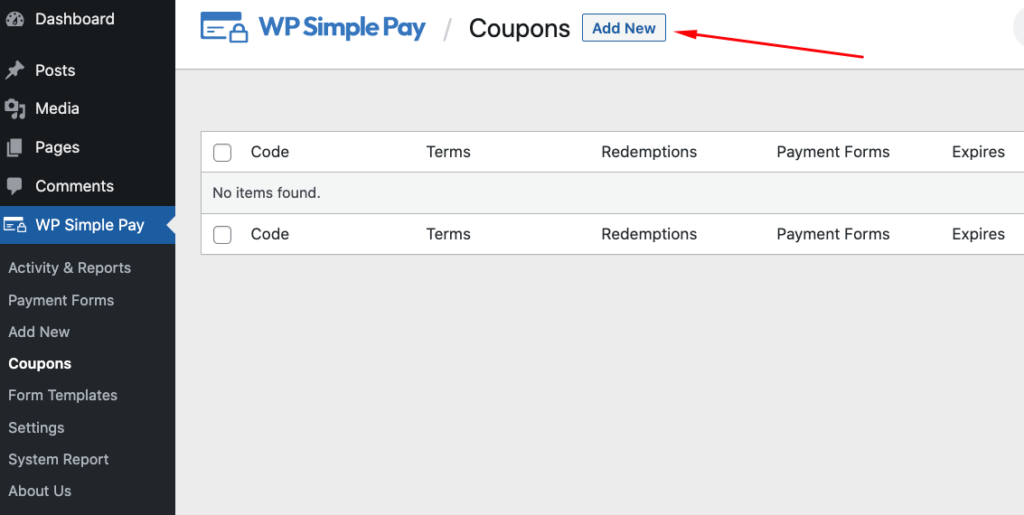
Before we move on to the Form Fields tab in the payment form builder, let’s go ahead and create the discount code that we’ll be adding to the payment form.
Simply navigate to the WP Simple Pay Coupons tab in your WordPress dashboard and click on Add New.
Next, name your coupon code and set your Type, Percentage Off and the Duration.
Be sure to choose the subscription payment form we created from the Redemption Restrictions dropdown menu.
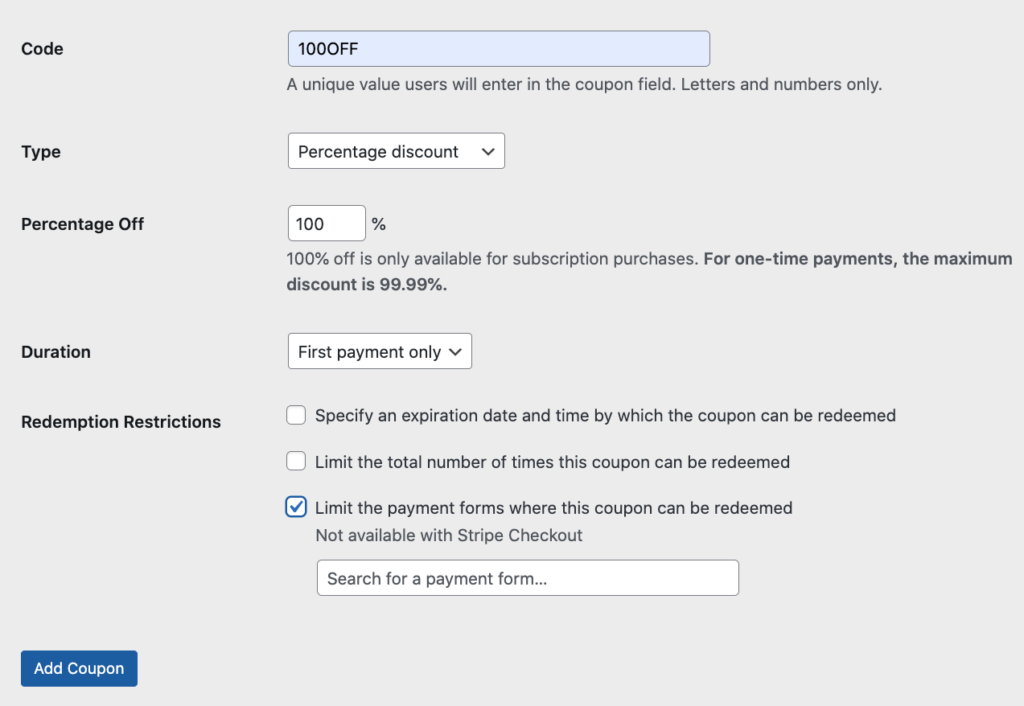
When your form is ready, go ahead and click Add Coupon.
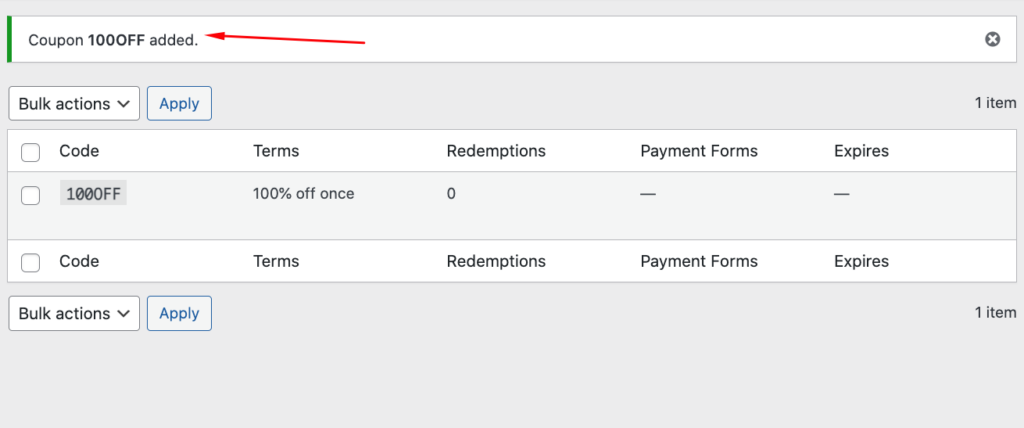
You’ll be redirected to a success page upon completion.
5. Add 100% Discount Code to Subscription Payment Form
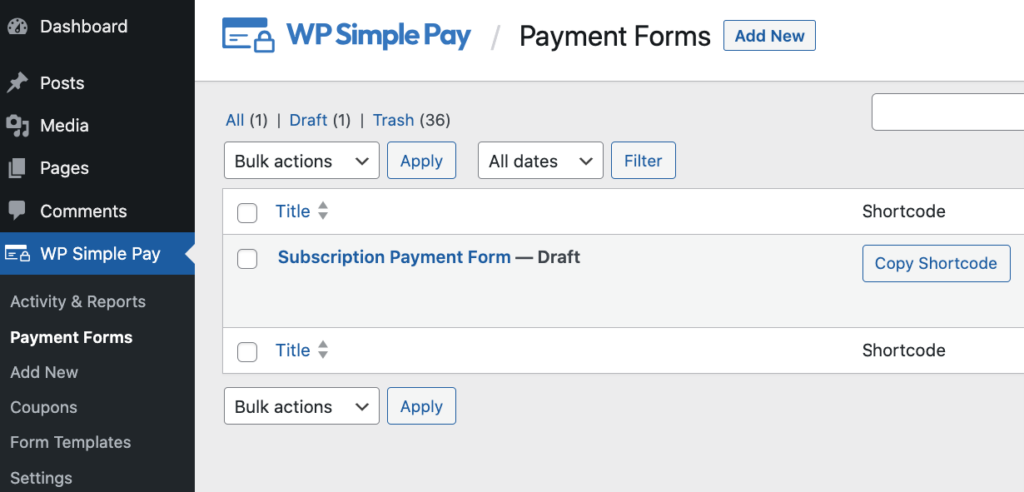
Now that you’ve created your 100% discount code, you’ll need to add it to your subscription payment form.
First, navigate to the subscription payment form we’ve already created from your WordPress dashboard. Then, simply click on the Payment Forms tab and choose the subscription payment form from the list of options.
Now that you’re back in the payment form builder, click on the Form Fields tab and select Coupon from the drop down menu.
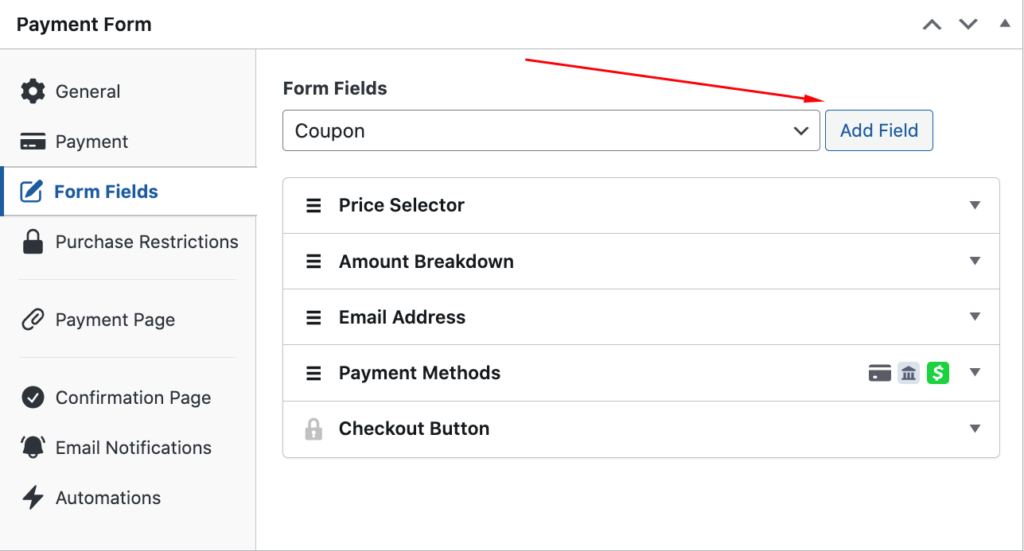
Next, add the label and placeholder text for your coupon field. You can also choose Stripe blue or Default for your button display style.

When you’re ready, go ahead and click on Save Draft. Previewing your form to make sure it all looks good is a smart idea.
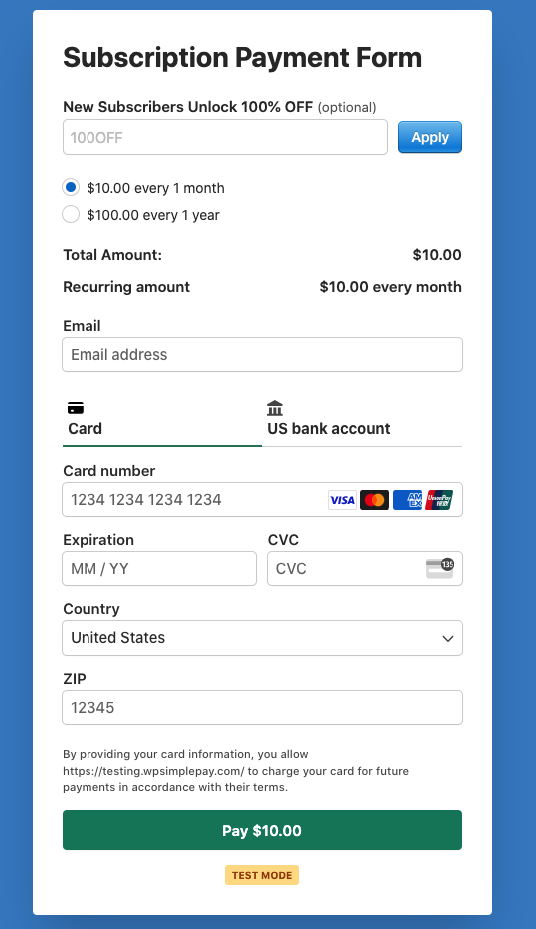
Your subscription form should look like this:
Now that you’ve added the 100% discount code to your subscription payment form, feel free to configure Purchase Restrictions, a Payment Page, and customized payment confirmation messages.
6. Publish the Subscription Payment Form
The last step to offering a 100% discount for new subscription activations is to publish your payment form on your site.
First, go to the page you want your form on, click the + icon, and type “WP” in the search field to bring up the WP Simple Pay payment form block.
Next, choose the payment form you just created from the drop down menu.

That’s it! We hope this article has helped you learn how to offer a 100% discount on subscription signups.
If you liked this article, you might also want to check out our guide on how to allow customers to manage subscriptions in WordPress.
What are you waiting for? Get started with WP Simple Pay today!
To read more articles like this, follow us on X.
Disclosure: Our content is reader-supported. This means if you click on some of our links, then we may earn a commission. We only recommend products that we believe will add value to our readers.


Leave a Reply