
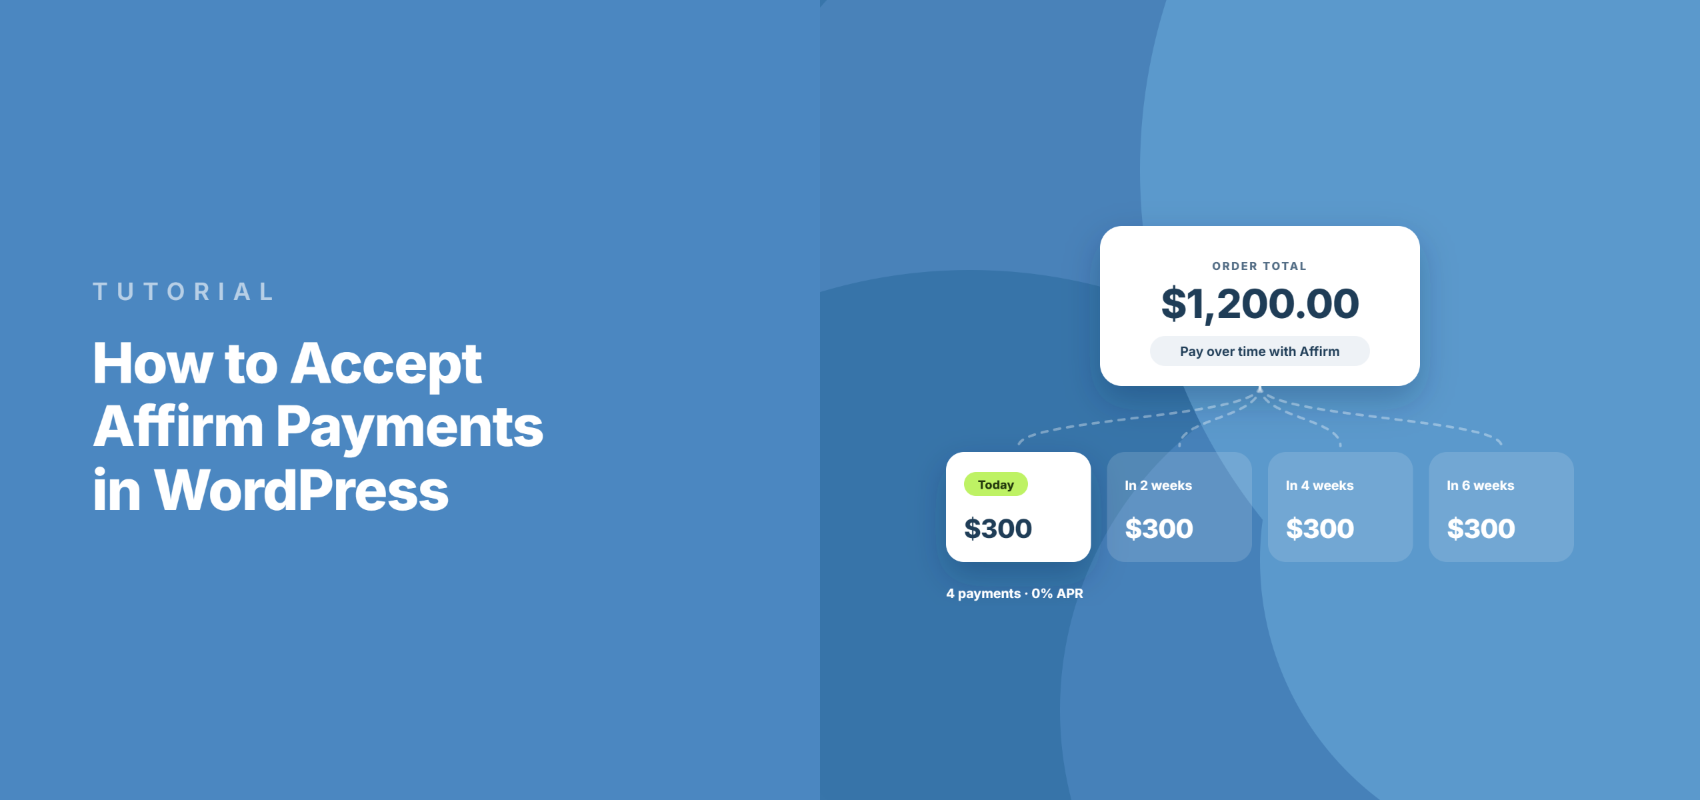
How to Accept Affirm Payments in WordPress
Last updated on

Do you want to accept Affirm payments on your WordPress site? Offering flexible financing options is a great way to attract customers and boost average order values.
Affirm is one of the few ways to stop losing higher-priced sales without waiting on your money. You get paid the full amount at the time of sale, minus Stripe’s fee, and Affirm takes on the job of collecting the installments.
I’ve spent over a decade testing payment plugins on WordPress, and this one hides more tripwires than most. In this article, I will show you how to easily accept Affirm payments in WordPress.
What Is Affirm and How Do Customers Pay?
Affirm is a lender, and you can think of it as a Buy Now, Pay Later (BNPL) platform that allows your customers to split up their payments for purchases into installment payments that can be made over time without fees.
When a customer picks Affirm at checkout, they get redirected to Affirm’s site or app, log into their account, and then choose a repayment plan that they have 12 hours to accept.
Which plans they see depends on how much they’re spending. In the United States, Stripe documents three tiers: Pay in 30 for purchases between $35 and $50, Pay in 4 interest-free biweekly payments between $50 and $500, and monthly installments of 3 to 36 months from $100 up to $30,000.
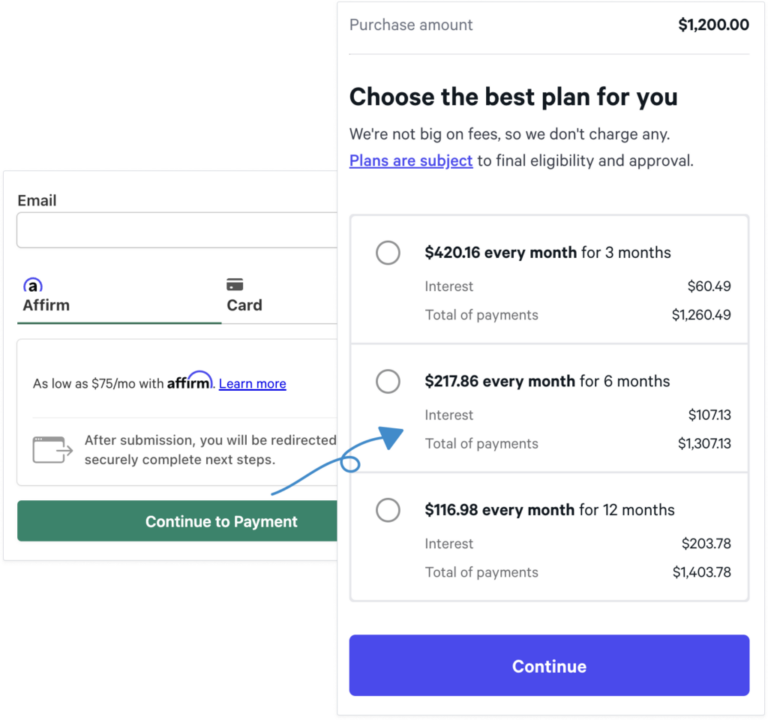
One thing worth noting is that only some of those plans are interest-free. Pay in 30 and Pay in 4 are 0% APR, but the longer monthly plans are interest-bearing, with rates ranging from 10% to 36% APR depending on the customer’s eligibility.
Besides that, you don’t get to choose which plan the customer sees. Affirm decides that algorithmically based on the cart size and the customer’s profile, so the same form can show different terms to different people.
Where Affirm Actually Works
This is the first thing to check, because it rules Affirm out for a lot of sites before any setup begins.
Your Stripe account has to be based in the United States or Canada, and you can only charge in USD or CAD. Affirm is in private preview for the United Kingdom, but it isn’t generally available there yet.
Affirm is also domestic-only. You can sell to customers in the same country as your business and nowhere else, so a US business can’t use Affirm to sell to a Canadian customer even though both countries are supported.
Then there’s the business category restriction, which catches people out. Stripe lists Affirm as prohibited for business-to-business services, professional services such as legal, consulting, and accounting, most software merchant category codes, colleges and universities, membership organizations, religious organizations, and charitable fundraising.
That last group matters for a lot of WP Simple Pay users. If you run a nonprofit and you’re collecting donations, Affirm isn’t an option, so you’ll want to look at the other payment methods Stripe supports instead.
Should You Enable Affirm?
If you’re eligible, here’s what I’d weigh up before turning it on.
- You get paid upfront, in full. Stripe makes the entire purchase amount available to you minus fees, and Affirm carries the repayment risk from there.
- Settlement takes up to two business days. Affirm settles on a T+2 schedule, so it’s slower than a card payment but not dramatically so.
- The fee is higher than a card. Stripe charges a per-transaction fee for Affirm that differs from its standard card rate, so it’s worth checking Stripe’s local payment methods pricing for the current number before you commit. Bear in mind that Stripe’s processing fee always applies to every payment method. What WP Simple Pay Pro removes is the additional plugin fee that some other Stripe plugins layer on top, not Stripe’s own fee.
- Refunds are slower and one-way. You get 120 days to issue a refund; it takes about two days to process, and once submitted, it can’t be canceled. Affirm cancels the customer’s remaining scheduled payments and returns what they’ve already paid, minus any interest they were charged.
- Disputes work differently. There’s no deadline for a customer to file an Affirm dispute; you get 15 calendar days to submit evidence, and Affirm issues a final decision within 60 days. Affirm covers losses from customer fraud, though Stripe may contact you to pause a shipment first.
- No subscriptions, at all. Affirm doesn’t support recurring payments, which is the single most common reason people find it missing from a form. More on that shortly.
- Stripe Radar doesn’t cover it. If you rely on Radar rules for fraud screening, they won’t apply to Affirm payments.
That said, let’s take a look at how you can accept Affirm payments in WordPress website.
Accept Affirm Payments on Your Site
To accept Affirm payments on your site, all you need to do is choose a WordPress payment plugin that supports Affirm. WP Simple Pay is the #1 Stripe payments plugin for WordPress, letting you accept Affirm payments directly on your site, along with several other payment methods.
The plugin also allows you to easily accept online payments without having to set up a complicated eCommerce store or even a shopping cart. It’s a standalone Stripe payments plugin, so you don’t need to install any other add-ons or extensions to collect payments.
Additional features of WP Simple Pay include:
- On-site Payment Forms: Allow your visitors to check out directly on your site.
- Payment Form Templates: Choose from tons of different payment form templates to create forms for different products, services, and events in minutes.
- Subscriptions: Set up subscription plans that automatically charge subscribers.
- Accept 13+ payment methods, including debit/credit cards, ACH direct debit, Google Pay/Apple Pay, and more.
- And more…
Do note that Affirm isn’t available in every WP Simple Pay plan. It needs the Professional plan or the Elite plan, so if you’re on Personal or Plus, you’ll need to upgrade before Affirm shows up in the payment methods list.
You’ll also need a Stripe account based in the US or Canada, and a WordPress site you can install plugins on.
Step 1: Install and Activate WP Simple Pay
To start, head to the WP Simple Pay pricing page, pick the Professional or Elite plan, and create your account.
Once you’ve bought it, you can download the plugin zip from your account area or your purchase receipt email. Then, in your WordPress admin, upload the plugin. Once that’s done, simply install and activate it.

Once activation finishes, WP Simple Pay takes over the screen with its setup wizard.
That’s the sign the plugin installed cleanly. You can simply follow the instructions in the wizard to setup the plugin.
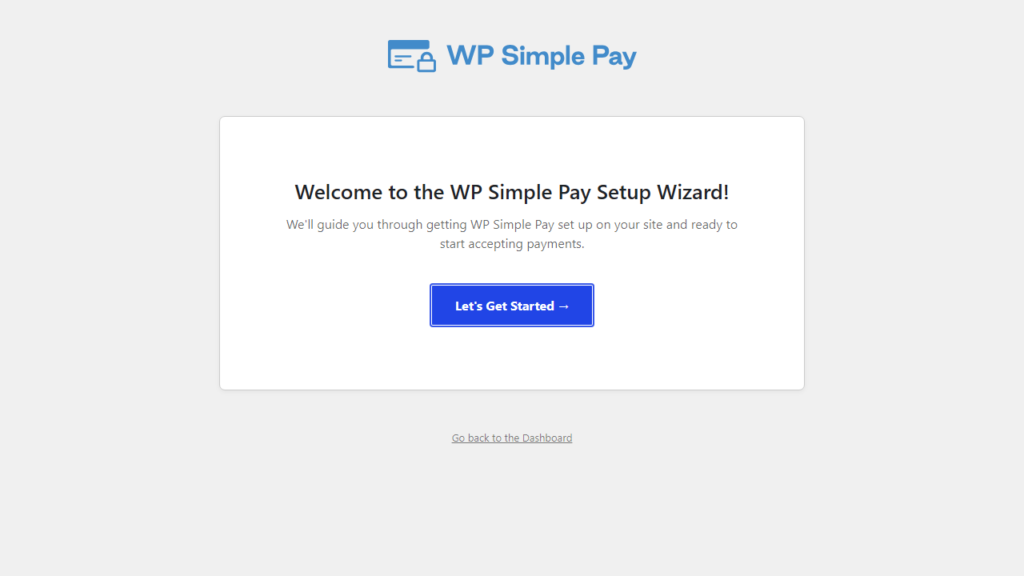
If the wizard didn’t appear, you can launch it manually from WP Simple Pay » Settings » Advanced by clicking the Launch Setup Wizard button. There’s also a full install walkthrough in the docs if you get stuck.
Step 2: Connect WordPress to Stripe
Next, you’ll need to link the plugin to Stripe. Click Connect with Stripe and enter the email address on your Stripe account.
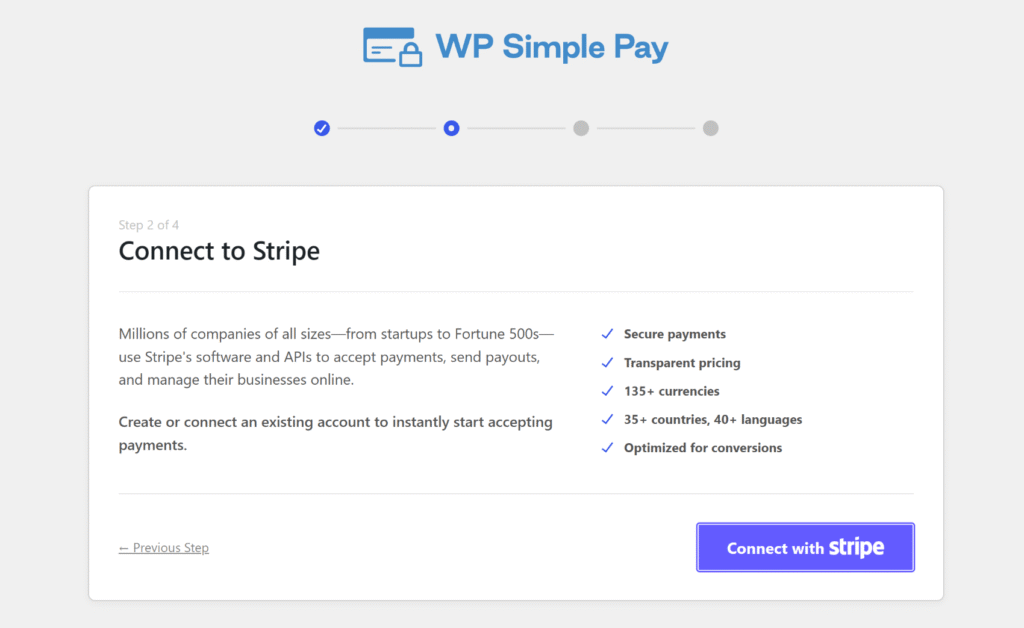
If you don’t have a Stripe account yet, you can create one from that same screen by entering your email and finishing the registration.
Just remember the account country has to be the US or Canada for Affirm to work at all.
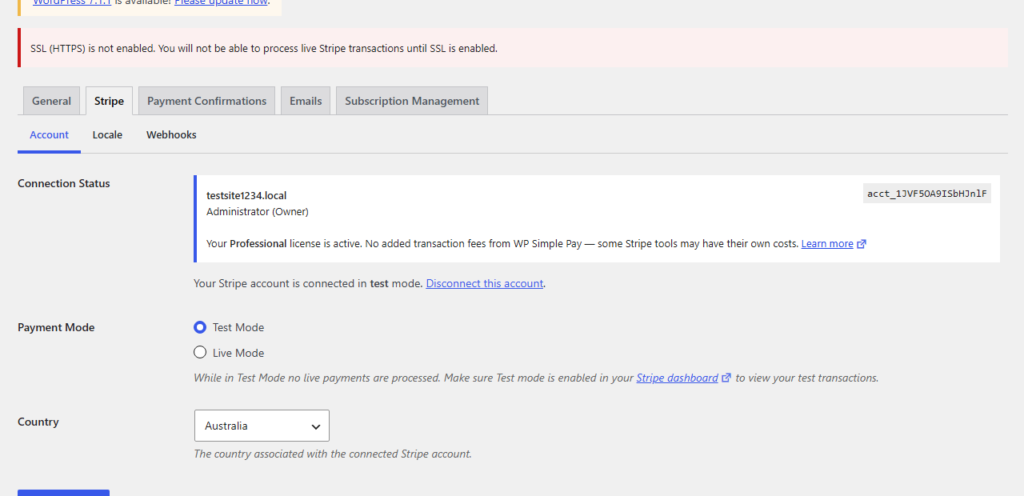
Once the connection succeeds, you’ll land on a Setup Complete page.
Step 3: Activate Affirm in Your Stripe Dashboard
This step is easy to miss, and skipping it is exactly why Affirm often works in test mode and then vanishes when you go live.
Affirm has to be turned on in your Stripe dashboard before it will process live payments. So head to your Stripe dashboard’s payment method settings, find Affirm, and enable it there.
After that, Stripe may review your account to confirm you’re eligible. It also requires your website to be publicly reachable and to display pricing in the customer’s local currency.
Step 4: Create Your Payment Form
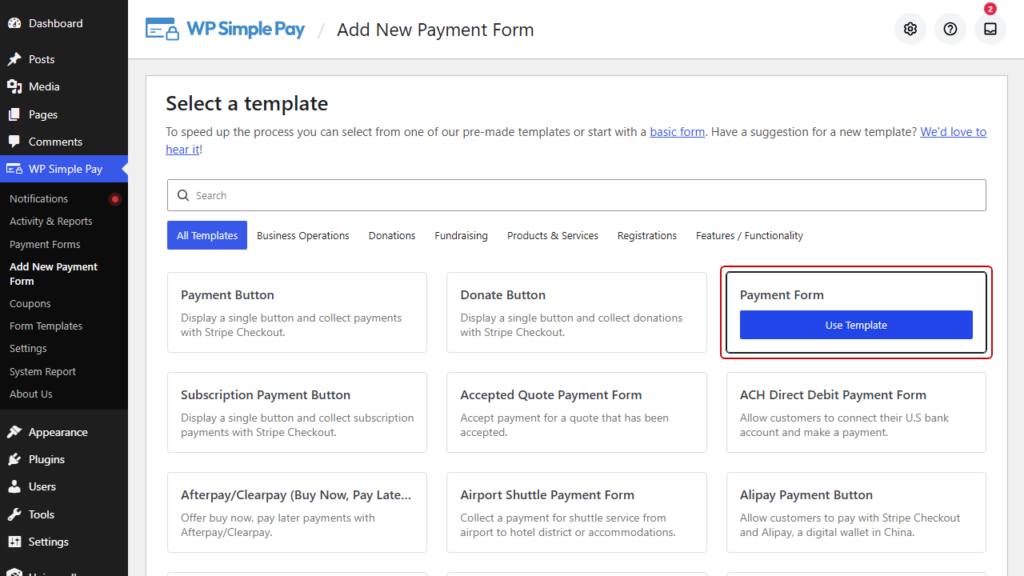
Back in WordPress, go to WP Simple Pay » Add New Payment Form. You’ll see the template library, which has starting points for products, services, donations, and events.
For a straightforward Affirm purchase, you can pick the Payment Form template.
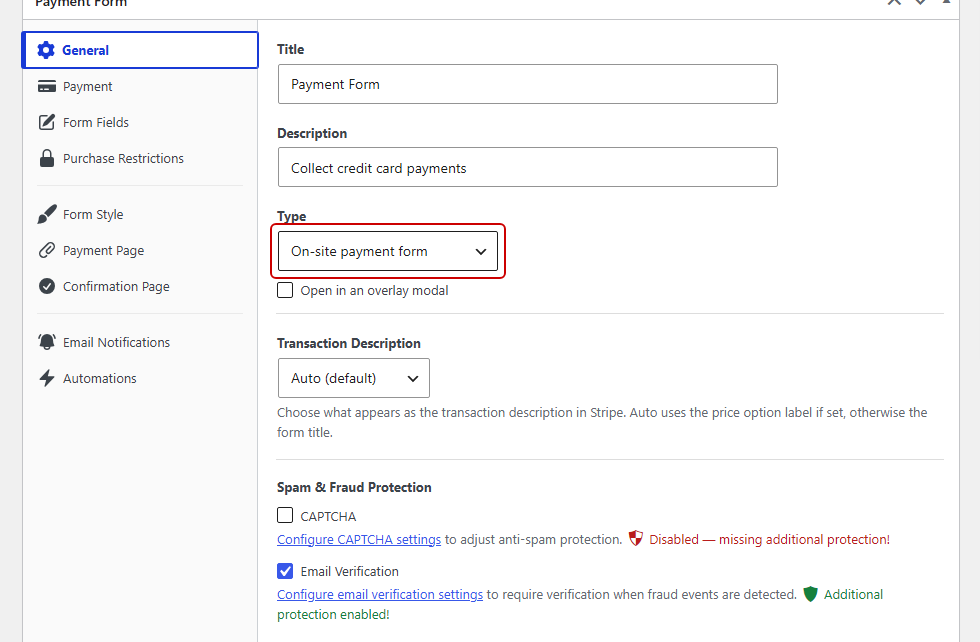
From here, the General tab is where you set your form title and description, and choose your form type.
Select On-site payment form so customers can check out without leaving your site.
Step 5: Add Affirm as a Payment Method
Now click through to the Payment tab. This is where you set the amount and choose which payment methods the form accepts.
Set your price first, and price it at $100 or more, because if the form amount comes in under $100, the plugin silently drops Affirm from what it sends to Stripe.
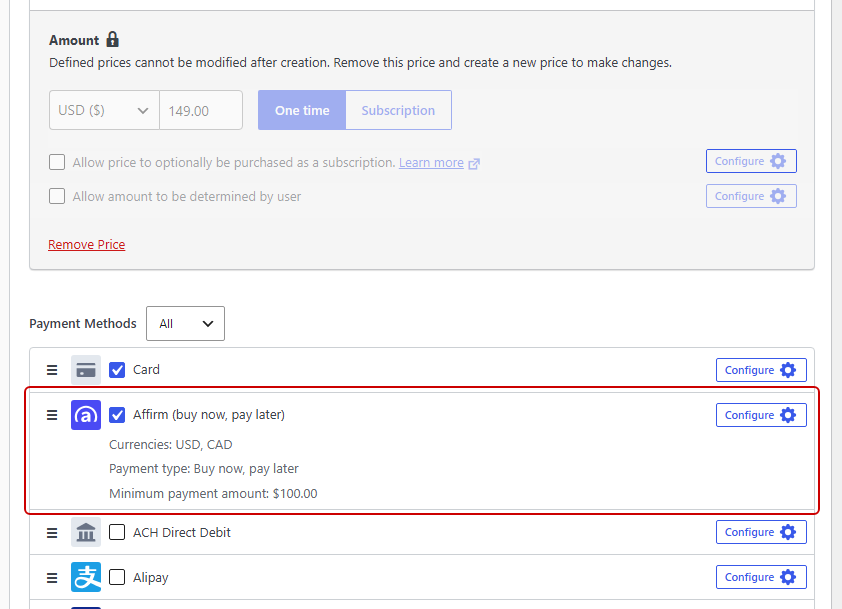
With the amount sorted, enable Affirm (buy now, pay later) from the payment methods list. It’s worth enabling Card alongside it so customers who don’t qualify for Affirm still have a way to pay, and there’s more on offering customers a choice of payment method if you want to add others.
One thing to leave alone: keep the payment type as one-time. Affirm won’t appear at all if you configure the form for recurring payments.
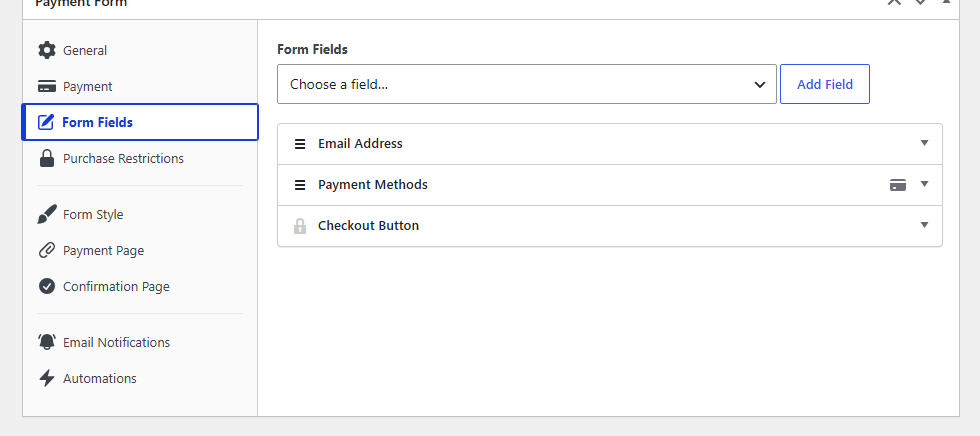
After that, you can open the Form Fields tab to add, remove, or reorder fields such as the customer’s name. When the form looks right, click Publish.
Step 6: Embed the Form on a Page
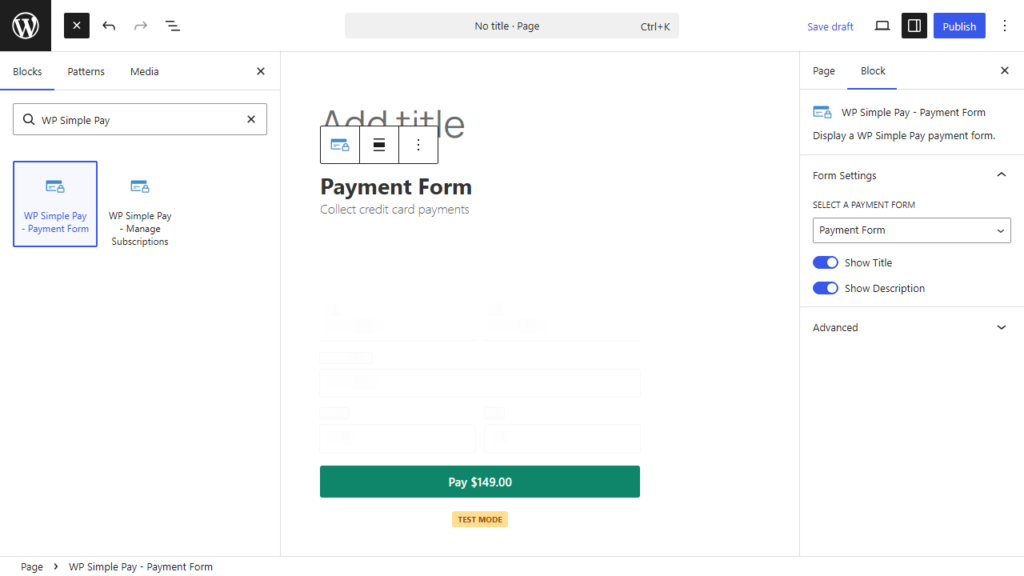
With the form published, open the page or post where you want it to appear. Click the + icon, search for the WP Simple Pay block, and add it.
Then pick your new form from the block’s dropdown and publish the page.
Step 7: Test Affirm Before Going Live
Don’t skip this one. Affirm behaves differently from a card payment, and you’ll want to see the redirect flow yourself before a customer does.
Switch the plugin into test mode first, which you can do from WP Simple Pay » Settings » Stripe by changing the connection mode. There’s a detailed guide to Stripe test mode if you haven’t used it before.
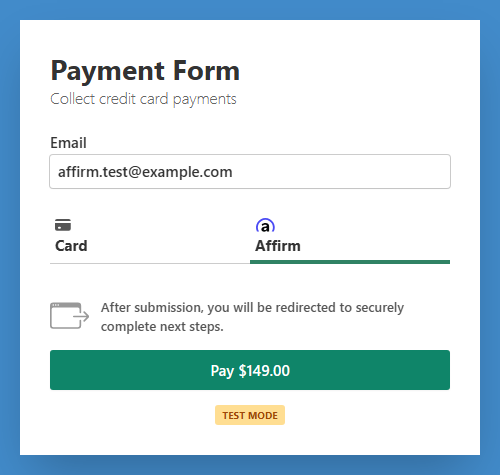
Then load your page, pick Affirm, and follow the redirect. You should land on Affirm’s test environment, see the plan options, and come back to your site once the payment authorizes.

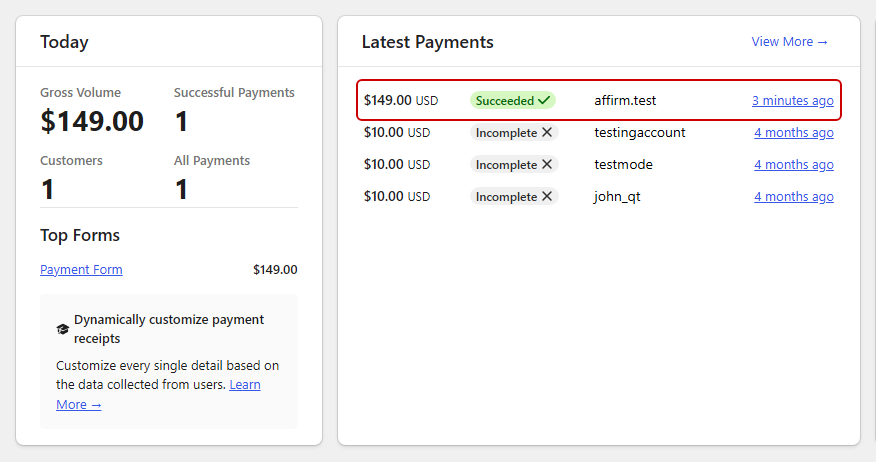
Finally, confirm the payment actually landed by checking WP Simple Pay » Activity & Reports.
If the transaction shows up there, your form works.
Troubleshooting Affirm Payments in WordPress
- Affirm is missing from the payment methods list. Check your license tier first, since Affirm needs the Professional or Elite plan. If your tier is fine, the plugin may be telling you that “Affirm is not available in your Stripe account’s country”, which means your Stripe account isn’t based in the US or Canada.
- Affirm doesn’t show up at checkout. The usual causes are a form amount below $100, a form currency that isn’t USD or CAD, and a form set to recurring rather than one-time. Affirm also only displays to customers whose own country is supported, which Stripe determines from the shipping address first and the customer’s IP address second.
- Affirm disappears when your form sells multiple line items. If you’ve enabled purchasing of multiple line items, WP Simple Pay removes Affirm automatically, along with Klarna, Afterpay, and Alipay. Those methods aren’t supported by the Stripe Invoices API that multi-line-item forms use, so a single-line-item form is the only way to offer Affirm.
- Affirm works in test mode but not live. This is almost always Step 3. Affirm has to be activated separately in your Stripe dashboard for live payments, and Stripe may still be reviewing your account for eligibility.
- Payments fail for a specific type of business. Check the prohibited and restricted category list in Stripe’s Affirm documentation. Software, professional services, B2B, and fundraising are all prohibited, and a number of trade and service categories are restricted and need extra information on the account.
Frequently Asked Questions
1. Does Affirm work for subscriptions or recurring payments?
No. Affirm doesn’t support recurring payments, and WP Simple Pay hides it on any form configured for subscriptions. If you need installment-style recurring billing, use a card-based installment payment plan instead, which charges a saved card on a schedule you define.
2. Is there a fee for accepting Affirm payments?
Yes. Stripe charges a per-transaction fee for Affirm that’s higher than its standard card rate, and you can check the current figure on Stripe’s local payment methods pricing page. WP Simple Pay Pro adds no extra plugin fee of its own, unlike some other Stripe plugins, but Stripe’s own processing fee always applies.
3. Which countries and currencies support Affirm?
Affirm works for businesses based in the United States and Canada, charging in USD or CAD. It’s domestic-only, so you can only sell to customers in your own country. The United Kingdom is in private preview but not generally available.
4. What is the minimum amount for an Affirm payment?
$100. WP Simple Pay enforces that minimum and silently removes Affirm from a form priced below it. Stripe’s own floor is lower, $35 for Pay in 30 and $50 for Pay in 4, but those tiers aren’t reachable through WP Simple Pay. Price your form at $100 or above.
5. Do I get paid upfront, or as the customer pays?
You get paid upfront. Stripe makes the full purchase amount available to you minus fees, and Affirm then collects the installments from your customer directly. Settlement takes up to two business days, and Affirm carries the risk if the customer stops paying.
Final Thoughts
Affirm is a strong addition if you sell higher-priced one-time products to US or Canadian customers and you fall outside Stripe’s prohibited categories. Getting paid in full upfront while the customer spreads the cost is a genuinely good trade.
It isn’t a fit for subscriptions, for nonprofits collecting donations, or for service businesses that Stripe restricts. If that’s you, adding other buy now, pay later options such as Klarna or Afterpay is worth a look, since their eligibility rules differ from Affirm’s.
I hope this article has helped you learn how to easily accept Affirm payments in WordPress. If you liked this article, you might also want to check out how to accept recurring payments in WordPress and how to accept donations in WordPress.
Ready to offer it? Get WP Simple Pay Pro and enable Affirm on your next form.
Disclosure: Our content is reader-supported. This means if you click on some of our links, then we may earn a commission. We only recommend products that we believe will add value to our readers.


Leave a Reply