
The Complete Guide to Setting Up a Stripe Checkout Page in WordPress
Last updated on

 Spencer Finnell
Do you want to set up a Stripe Checkout page on your WordPress site?
Your checkout page is one of the most important pages on your site. It’s the final step before a user becomes a customer. When it’s time to set up your checkout page, most of the Stripe payment plugins for WordPress provide you with two options:
- On-site: Host a custom, distraction-free checkout page on your site
- Off-site: Host your payment form on a Stripe-hosted page
In this article, we’ll provide a head-to-head comparison between Off-site checkout and On-site checkout to help you decide which method is right for your business.
Setting Up a Stripe Checkout Page
Not every Stripe payments plugin for WordPress is created equal.
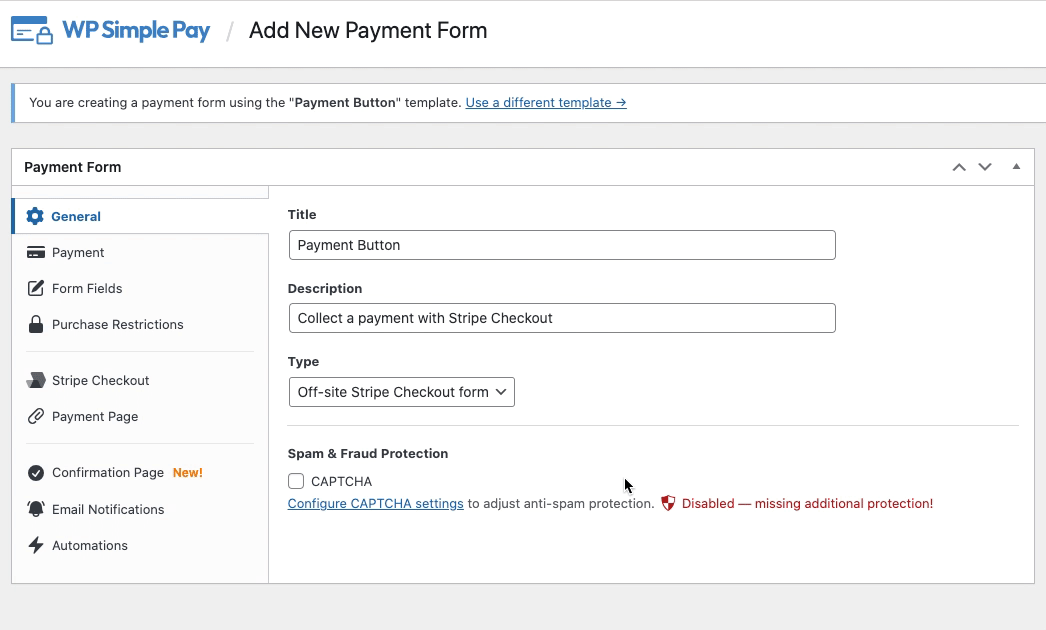
However, with WP Simple Pay, the #1 Stripe payments plugin for WordPress, you can easily set up a checkout page for Stripe payments, regardless of whether you want to host it on your site or on a secure Stripe-hosted page.
Using the plugin’s advanced drag-and-drop payment form builder, all you have to do is click on the form Type dropdown menu to choose between an On-site form and an Off-site Stripe Checkout form.
Here is a quick comparison between Off-site checkout and On-site checkout.
| Hosted Checkout | On-site checkout | |
| How it works | Display a button on your site and redirect to checkout.stripe.com when the button is clicked | On your site, display a button or a form and process the payment. No redirection is needed. |
| Security | It uses Stripe’s PCI-compliant servers for payment processing, so highly secure | It uses Stripe’s PCI-compliant servers for payment processing, so it is highly secure |
| Setup | Easy setup | Easy setup |
| Customization | Limited customizability for checkout pages | Checkout pages are highly customizable |
| Features | Make use of most of the hosted features like 1-click checkout and address autocomplete | Limited features compared to the hosted checkout page |
| Conversion rate | Not well optimized for conversions because of limited customizability | Since you can customize how the page looks and feels, it can be highly optimized for conversions |
How It Works: Hosted Checkout vs. On-site Checkout
Hosted checkout, also known as Off-site checkout, is when your checkout page is located on checkout.stripe.com. When customers click the “Checkout” or “Buy Now” button on your site, they are redirected to Stripe’s site. Their order information and cart total appear on the new page as well. This is where they submit their information and payment details.
Here’s an example of the checkout page Stripe provides.
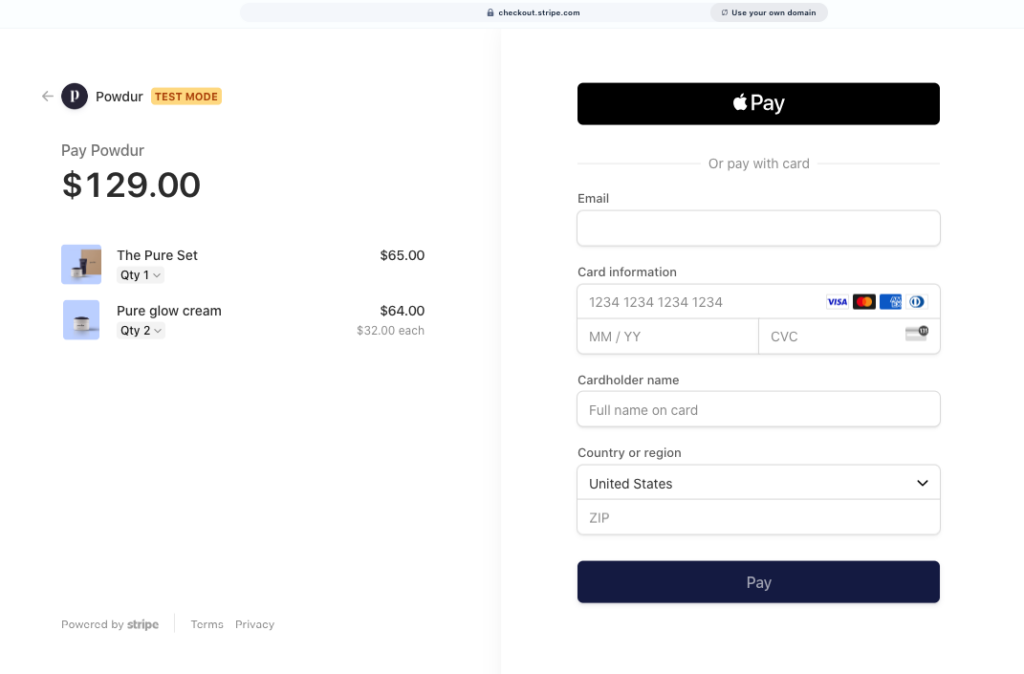
The redirect to the Off-site checkout page is seamless for the customer.
You can even use your custom domain name with Stripe’s Off-site checkout page to provide a consistent payment experience for customers.
Once the customer completes the transaction, the hosted checkout page redirects them to your site. Stripe then generates an email transaction receipt for the customer and an email notification for you.
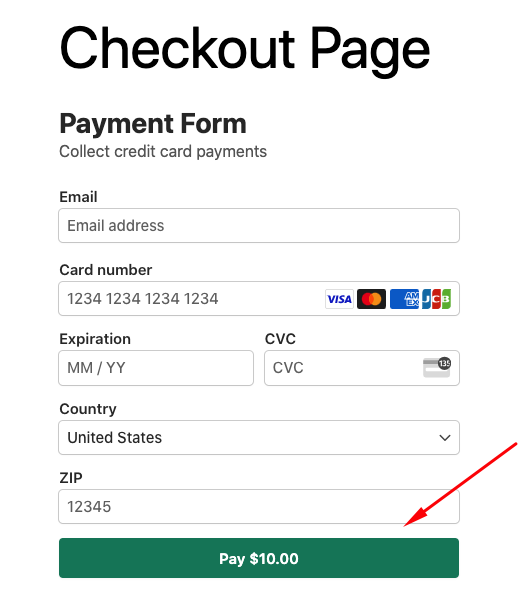
On the other hand, On-site checkout is just what it sounds like. You can either display a “Buy Now” button or embed your payment form itself wherever you want it to be on your site.
Everything looks just like your site because it’s still your site, and Stripe manages the transactions.
Checkout Page Security: Off-site vs. On-site
For all payment processing and storage, whether you choose Off-site checkout or On-site checkout, use Stripe’s Level 1 PCI-compliant servers, not yours, and keep all information safe.
Stripe also forces HTTPS for all services using TLS (SSL), including their public website and the Stripe Dashboard, to ensure secure connections. SSL encrypts incoming and outgoing data to make payments secure. It’s available from your hosting provider and various third-party sellers. Here’s how to set up an SSL certificate on your site.
On top of that, if your business faces a fraudulent dispute, Stripe will cover the disputed amount and waive any dispute fees.
Regardless of where you host the payment form, transactions are processed through Stripe’s PCI-compliant servers, so you can rest assured that your customers’ payment details are in safe hands.
Winner: Tie
How to Set Up a Checkout Form
Setting up a checkout page for both On-site and Off-site forms in WordPress is easy.
All you need to do is install and activate a Stripe payments plugin on your WordPress site. If you’re not sure which plugin is best suited for your needs, check out this guide: Best Stripe Plugins for WordPress (Compared).
If you want to accept one-time or recurring payments for your services, products, or donations online, WP Simple Pay is the best option.
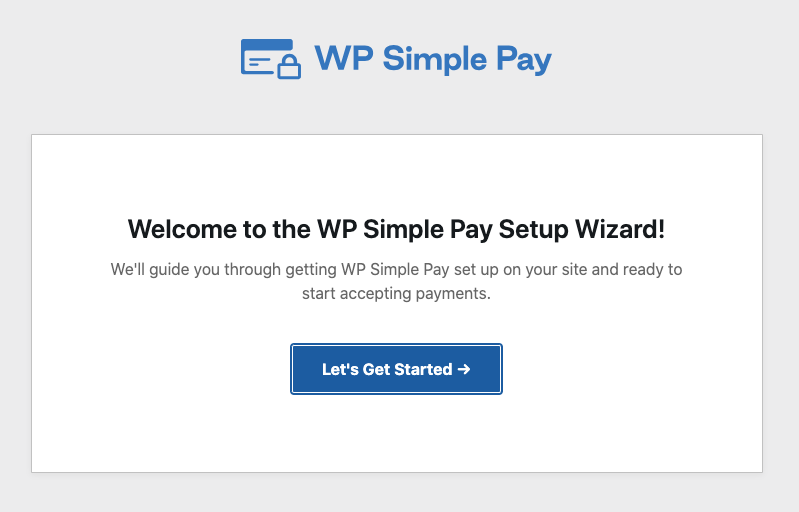
WP Simple Pay comes with an advanced setup wizard that makes Stripe integration effortless. If you don’t have a Stripe account yet, you can easily create one during the setup process.
After installing and activating the plugin, you’ll be prompted to integrate your Stripe account with your site without leaving your WordPress dashboard. Then, you can create your payment form with ease and choose a form Type that fits your needs.
Remove the additional 3% fee!
Most Stripe plugins charge an additional 3% fee for EVERY transaction
…not WP Simple Pay Pro!
Page Customization: On-site vs. Stripe Checkout
With a plugin like WP Simple Pay, customizing your payment forms is a breeze, and the process you’ll need to follow for both On-site and Off-site hosted form Types is almost identical.
WP Simple Pay lets you change the price amounts, choose between one-time or subscription payments, change currency, choose from 13+ payment methods, set up automation, and more from within your WordPress dashboard.

Plus, you can add as many custom fields to your forms as you want to collect all the necessary details from your customers.
The only difference is that you can’t entirely control how the payment page looks using a Stripe-hosted checkout. However, with On-site checkout, you can embed your payment forms or “Buy Now” buttons wherever you want them on your site. WP Simple Pay also offers built-in customization features that allow you to create a dedicated payment page for your form.
Winner: On-site checkout is effective at keeping visitors on your site longer and reducing checkout abandonment because it requires fewer steps for your users to complete the checkout process.
Conversion Rate of Your Payment Forms
If you need a checkout page that’s highly optimized for conversions, then you might want to use On-site checkout. Here’s why On-site checkout can outperform hosted checkout in terms of conversions.
- Customizable: On-site checkout pages are highly customizable, so you can optimize the page to boost conversions. WP Simple Pay integrates with all of the popular WordPress themes.
- Distraction-Free Landing Page: With WP Simple Pay, you can create a distraction-free landing page dedicated solely to hosting your payment forms, resulting in higher conversion rates. Adding your logo and custom color scheme is also super easy with the plugin.
- Minimal Drop-Off: When you redirect users to another page, odds are high that you’ll lose some of your traffic along the way.
Winner: On-site checkout
There you have it!
If you want to boost conversions, reduce checkout abandonment, and need a simple payment form, choosing the On-site form Type would be the best choice for you.
If you’d rather use Stripe’s hosted checkout features, go for the Off-site checkout form Type.
Regardless of which Type you want to use, WP Simple Pay makes it super easy for you to set it up.
We hope this article helped you figure out which Stripe checkout page method is the best for your business.
If you liked this article, check out Top Customer Complaints About Payment Forms.
What are you waiting for? Get started with WP Simple Pay today!
To read more articles like this, follow us on X.
Disclosure: Our content is reader-supported. This means if you click on some of our links, then we may earn a commission. We only recommend products that we believe will add value to our readers.

