How to Add a Coupon Code Field to Your WordPress Payment Forms
Last updated on
Looking to create a payment form? Want to allow users to get a discount by entering a coupon code?
Coupon codes entice customers to make a purchase on your site. Plus, it’s incredibly effective in bringing in new customers.
In this article, we’ll show you how to accept coupon codes in WordPress Stripe payment forms.
Accepting Coupons in Payment Forms
The easiest way to accept coupon codes on your WordPress site is to use WP Simple Pay.
It is one of the best WordPress Stripe plugins that lets you accept discounted payments through valid coupon codes you create.
WP Simple Pay enables you to create any payment form, like donation form, subscription form, installment payment form, order form, and more.
Let’s take a look at how to accept coupons in payment forms, step by step.
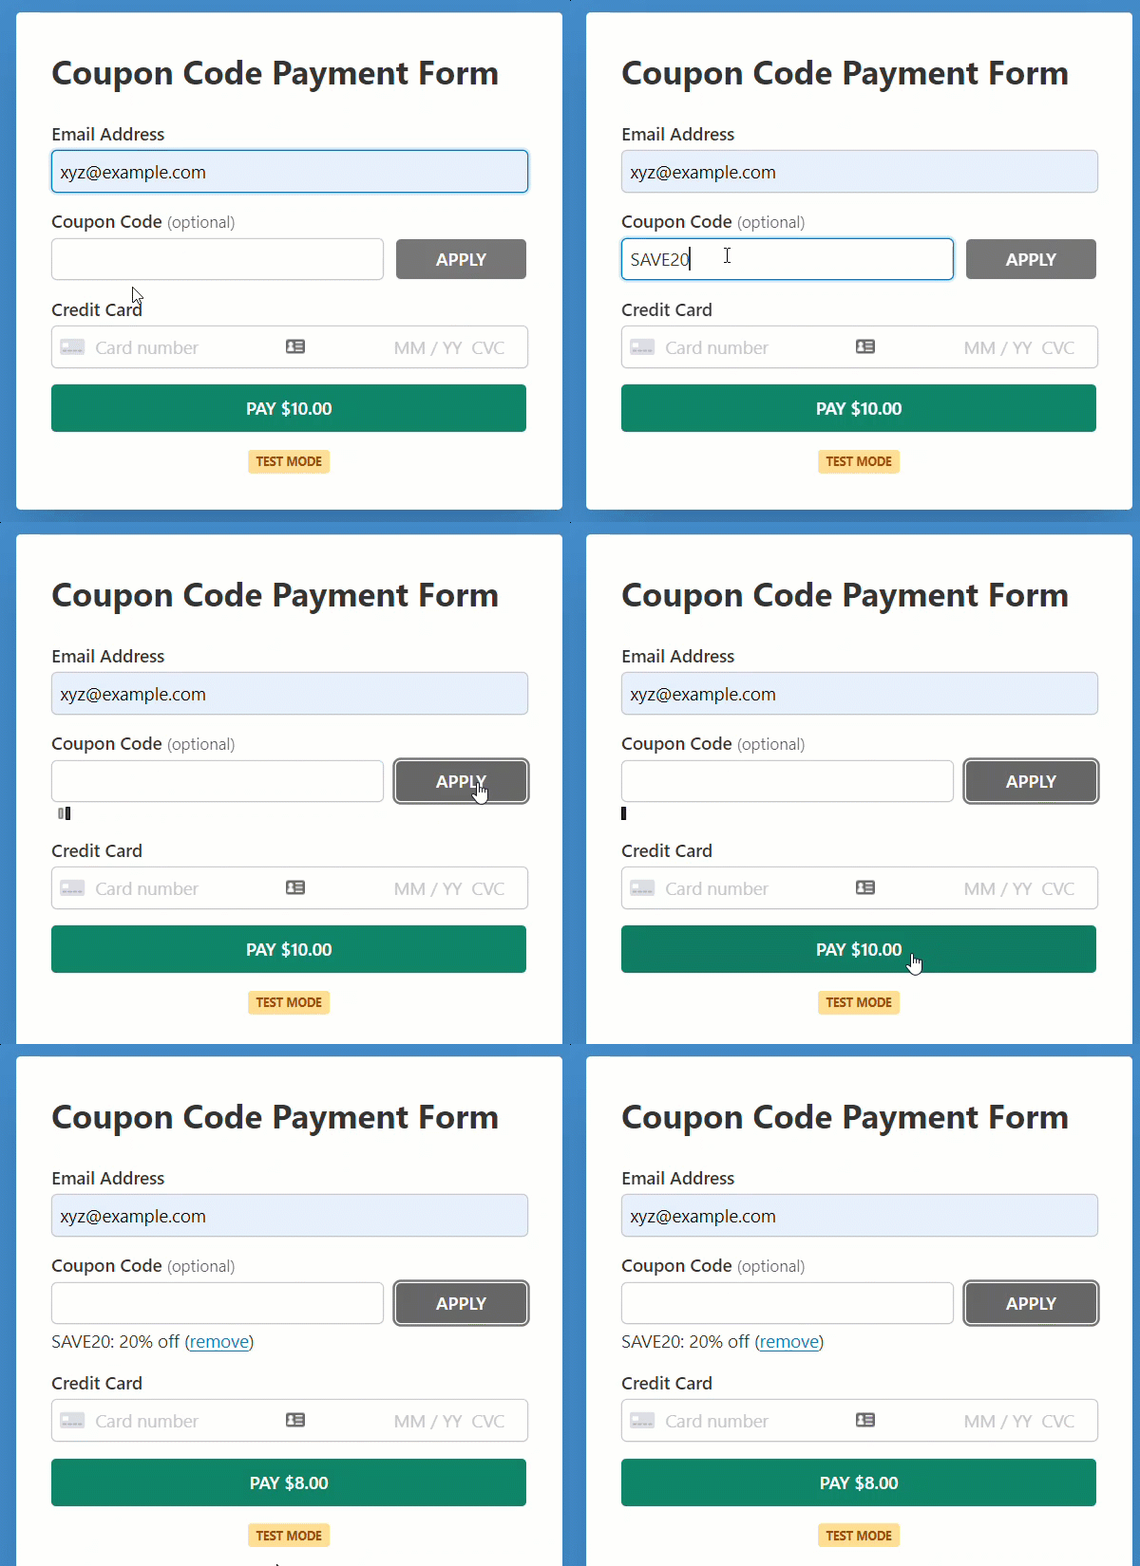
Here’s the form we’re going to create with this tutorial.
Step 1: Install and Activate WP Simple Pay
To offer a discount via a coupon code field on your payment forms, you’ll need WP Simple Pay.
After purchasing WP Simple Pay, you can download it from your purchase email receipt or from your WP Simple Pay account.
To install it, go to your WordPress backend, navigate to Add New under Plugins, and then Upload Plugin. Click Choose File and find the WP Simple Pay .zip file on your computer. Click Install Now. When the upload is complete, press the Activate Plugin button.
If you want to install WP Simple Pay via FTP, follow this guide.
Remove the additional 3% fee!
Most Stripe plugins charge an additional 3% fee for EVERY transaction
…not WP Simple Pay Pro!
After activating the plugin, you’ll be directed to the setup wizard, where you’ll be prompted to connect the plugin to your Stripe account. In the setup wizard, click Let’s Get Started.
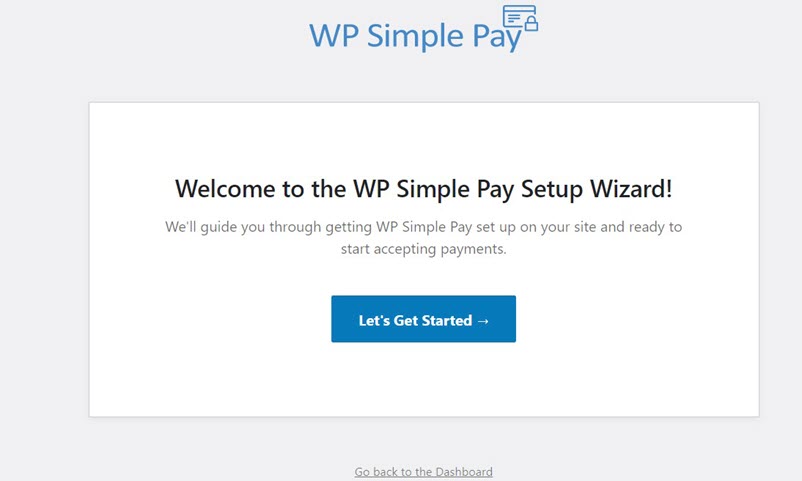
Didn’t see the setup wizard? Just head over to WP Simple Pay » Settings and then click on the Stripe tab to connect the plugin to Stripe.
Step 2: Connect WordPress to Stripe
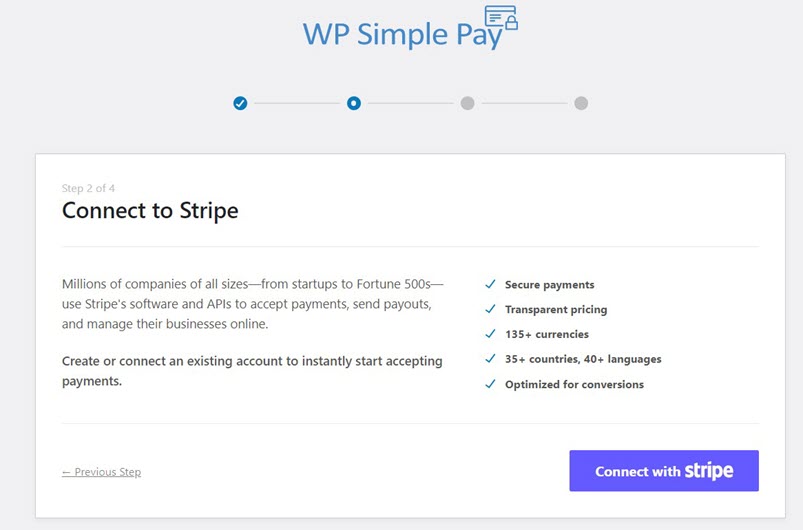
To connect the plugin to Stripe, you’ll be asked to click on Connect with Stripe in the setup wizard.
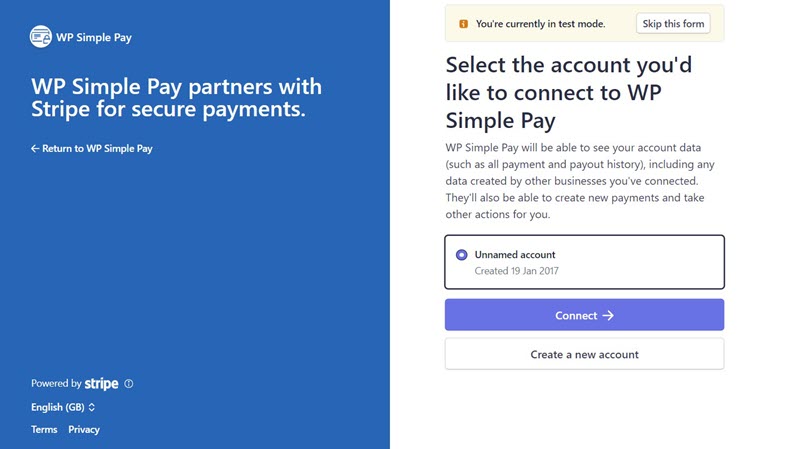
To connect, you can either use an existing Stripe account or create a new one. Let’s NOT use Skip this form as this will create a temporary Stripe account that cannot be recovered or moved to Live Mode.
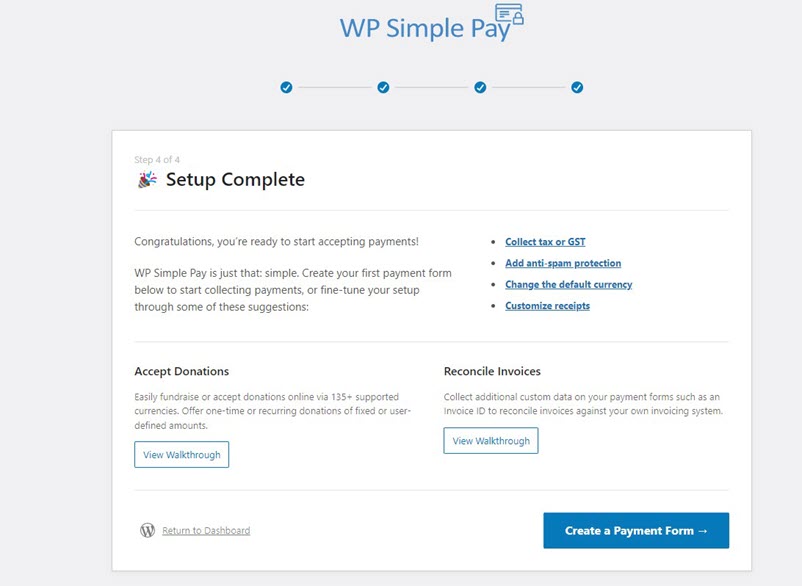
After connecting Stripe with the plugin, you’ll see a success page that says Setup Complete. The next thing you’ll need to do is to start creating a payment form that accepts coupons. Click on the button Create a Payment Form.
Step 3: Create a Payment Form
After integrating the plugin with Stripe, it’s your turn to create a payment form with a coupon code field.
To make it easy to get started, WP Simple Pay offers you tons of pre-built templates to choose from.
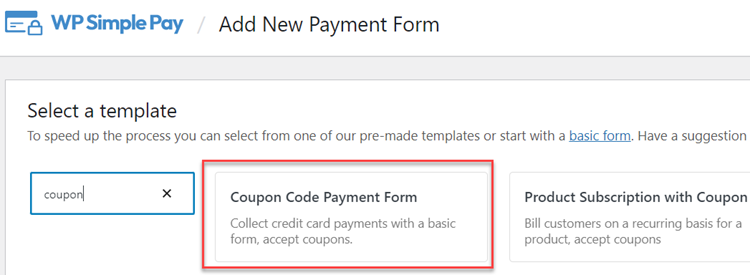
While you can add a coupon field to any form template, let’s choose a template called Coupon Code Payment Form for this tutorial. This template preselects all the essential elements you’ll need to use a coupon code field on your form.
Simply search for coupon in the search bar to easily find this template.
When you hover over the template, you’ll find 2 buttons: Use Template and View Demo. To preview the form, click on View Demo, and you’ll be directed to the templates gallery, where you can preview the form and even make a test payment to see how it works.
Let’s click Use Template.
Step 4: Add the Coupon Code Field
Now that you’ve created a payment form, let’s change the settings to match your needs. You’ll now be landed on the General configuration page.
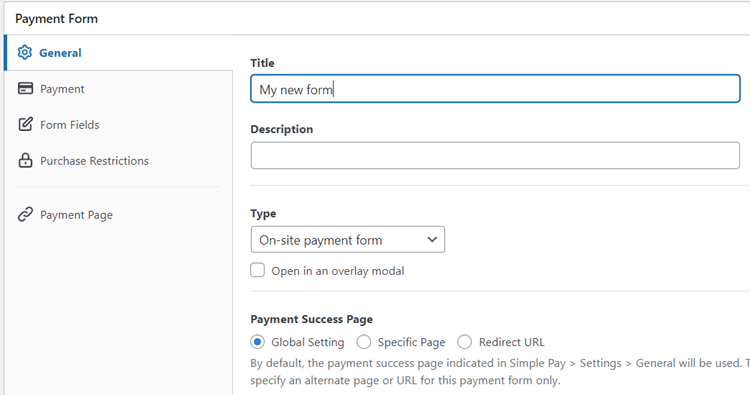
In General, go ahead and change the title, description, and form type based on your needs. With the Type field, you can host the form on your own site or the Stripe checkout page. To know more, check out this post on selecting the right payment form types.
As soon as you install and activate WP Simple Pay, it automatically creates and publish a default payment success page. If you don’t want to use another success page for this form, there is no need to make any changes to Payment Success Page. To show a different success page, choose Specific Page and then select the page you want to use. You can also choose Redirect URL instead if you want to redirect users to an external URL.
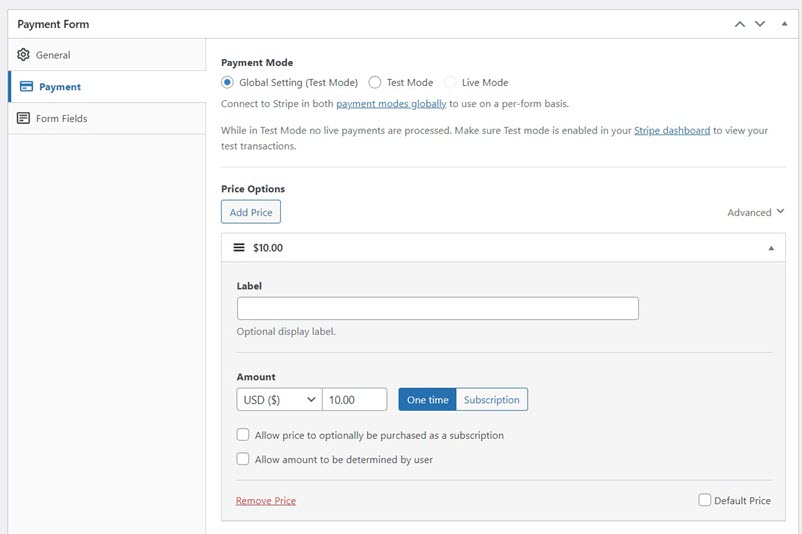
Next, click on the Payment option from the left, and you’ll be able to customize the currency, amount, and even choose between one time and subscription payment.
In the Form Fields option, you can find that a few different form fields have been preselected, including Coupon Code by your template.
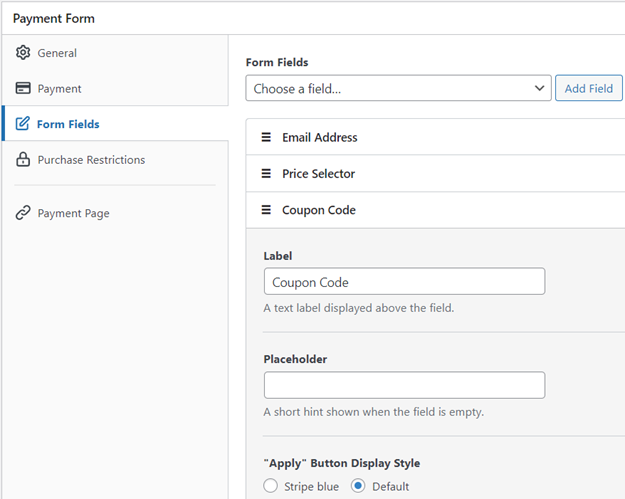
If you haven’t chosen this template, go ahead and add the coupon code field to your form. This field asks users to enter the coupon code. You can change its label, placeholder, and even the display style of its Apply button.
After making the changes as you wish, you can save the form as a draft.
You’ve now successfully created a payment form that accepts coupon entries.
Step 5: Add Coupon Codes
Next up, let’s create coupon codes and specify the discounts you want to offer.
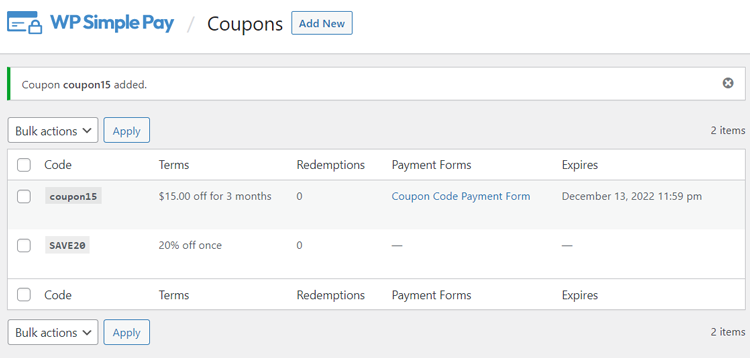
Go to WP Simple Pay » Coupons and then click Add New to create coupon codes.
You’ll now see a few different fields.
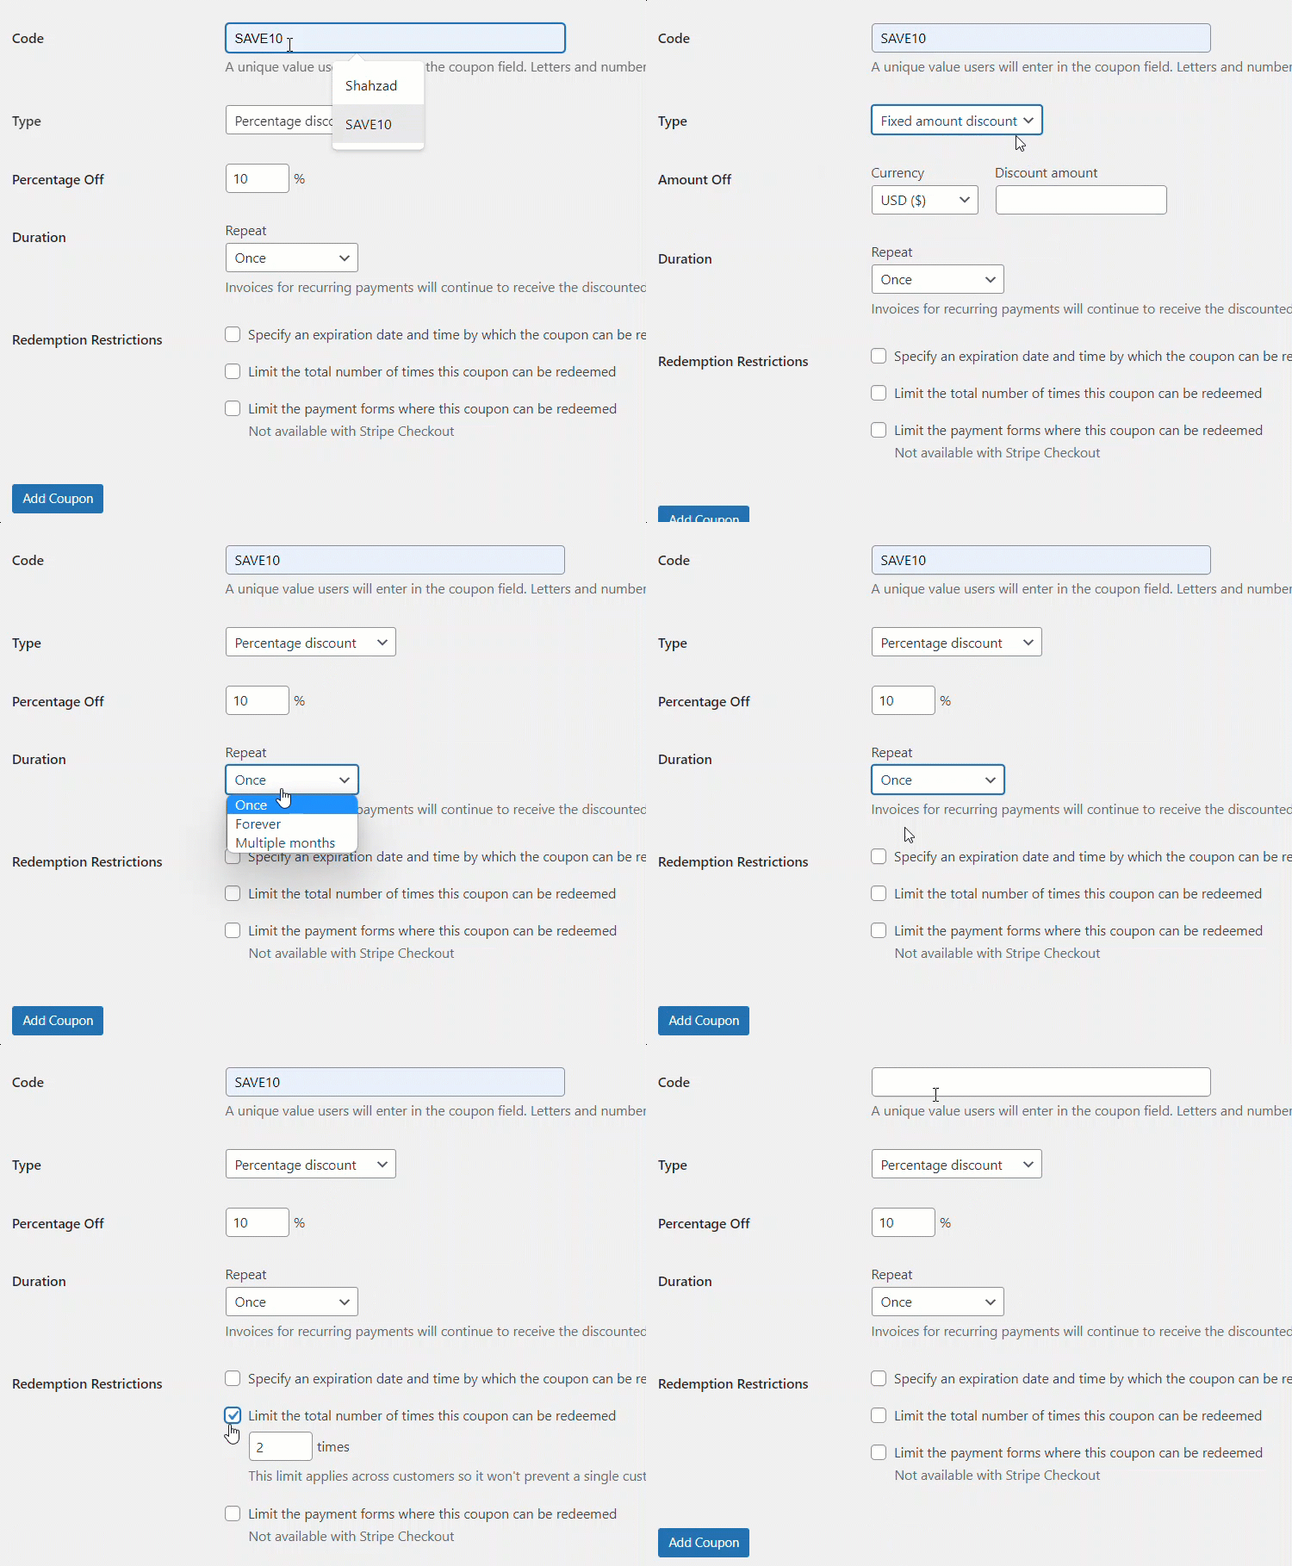
The Code field is where you enter the coupon code you want your users to use on your payment forms. In the Type field, specify whether you want to offer a percentage discount or a fixed amount discount.
The Duration field is for users who accept recurring payments on their site. If you don’t accept recurring payments, you can leave it as it is. Otherwise, you can specify whether you want to offer it only once, for every subscription fee they pay, or a specified number of times.
The Redemption Restrictions fields are made for scheduling the coupon ahead of time, which comes in handy if you want to offer a limited-time discount, especially during the sale season.
You can also limit the number of times the coupon can be redeemed and limit the payment forms where that coupon can be redeemed.
Once you’ve configured everything, click Add Coupon.
Step 5: Add the Payment Form to a Page
If your payment form works as intended, including the coupon code, then go ahead and publish the form.
You can switch your entire site or individual payment forms to live mode.
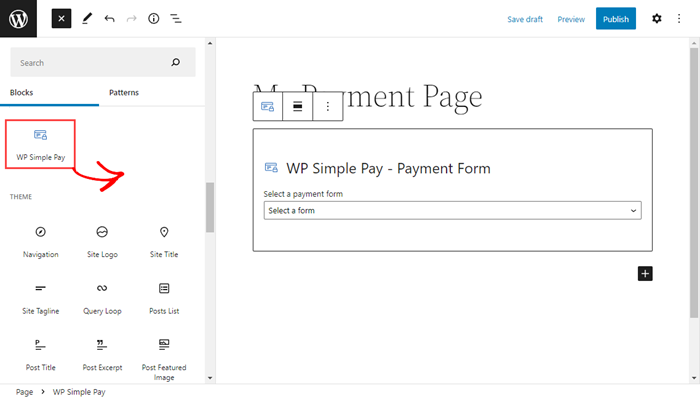
To embed the form, go to the post or page where you want to embed it. Then click on the + icon to add the WP Simple Pay block. Then choose a form you just created. And then, click Publish or Update.
There you have it!
We hope this article helped you learn how to accept coupon discounts in a payment form.
With WP Simple Pay and Stripe, you can enjoy premium Stripe benefits, so grab WP Simple Pay now.
To read more articles like this, follow us on Facebook and Twitter.
Disclosure: Our content is reader-supported. This means if you click on some of our links, then we may earn a commission. We only recommend products that we believe will add value to our readers.


Leave a Reply