
How to Accept Stripe Payments on Your WordPress Site (Without Code)
Last updated on

 Spencer Finnell
Do you want to accept Stripe payments on your WordPress site?
No matter what business you’re in, enabling Stripe payments on your site allows you to accept online payments via credit cards, digital wallets, ACH Direct Debit, Alipay, Buy Now, Pay Later, and more. In fact, Stripe allows you to accept 10+ payment methods.
In this article, we’ll explain how to accept Stripe payments on WordPress effortlessly.
Why Choose Stripe to Accept Online Payments?
Using Stripe is one of the easiest ways to accept online payments on your site. Whether you’re a freelancer, a self-employed individual, a non-profit, or a small business owner, you can easily accept one-time or recurring payments with Stripe.
Unlike PayPal, Stripe is a developer-friendly product that lets you customize every process of the online payment experience. However, it requires a bit more development knowledge and can sometimes be intimidating to set up for non-technical users.
Fortunately, with a Stipe payment plugin like WP Simple Pay, anyone can easily enable Stripe payments on a WordPress site without having to hire a developer.
Enabling Payments With Stripe in WordPress
Let’s take a look at how to enable payments with Stripe in WordPress using WP Simple Pay.
At the end of this tutorial, you’ll learn how to create a Stripe payment button or a payment form on your site quickly and easily without code.
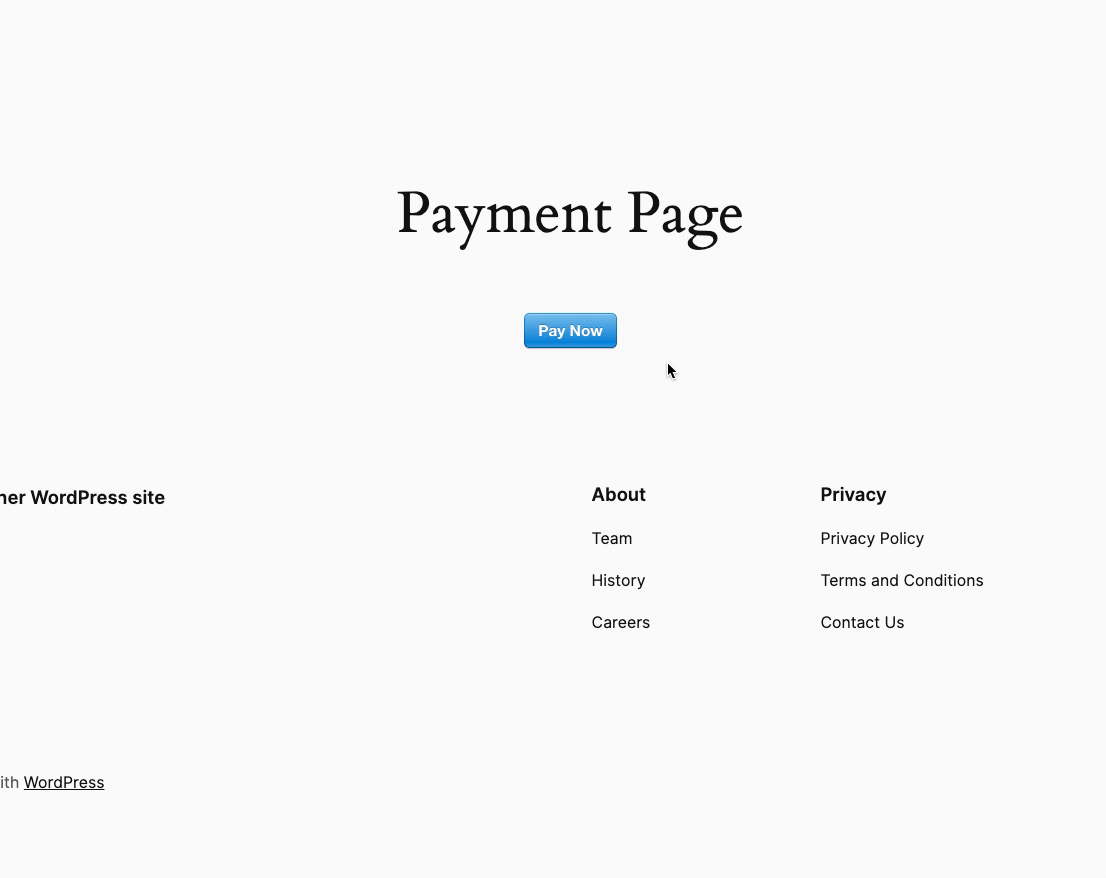
Here’s what a Stripe payment button looks like.
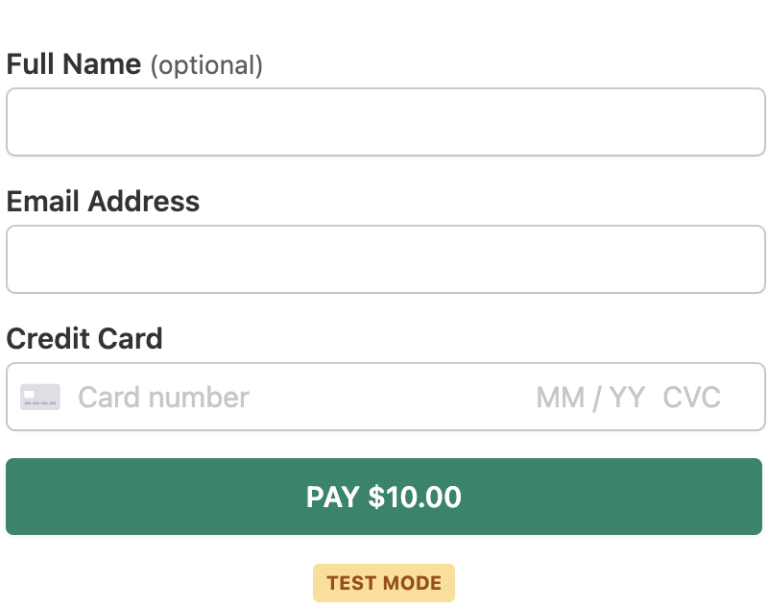
Here’s what a Stripe payment form looks like. WP Simple Pay also allows you to add custom fields and offer multiple payment method options on a single form.
Step 1: Install and Activate WP Simple Pay
First off, you’ll need to install and activate the WP Simple Pay plugin. For more details, see this step-by-step guide on how to install a WordPress plugin.
Once you’ve finished purchasing your WP Simple Pay premium plan, you’ll need to upload the .zip file from your WordPress admin dashboard.
The plugin’s advanced setup wizard will then walk you through setting up your account and connecting your Stripe account.
To begin, simply click on Let’s Get Started.

If you didn’t see the setup wizard, simply head over to WP Simple Pay » Settings » Advanced tab and click the Launch Setup Wizard button.
2: Connect WordPress to Stripe
To connect your WordPress site to Stripe, click on Connect with Stripe.

Next up, enter the email address you use for your Stripe account and connect it to your site. If you don’t have a Stripe account, you can easily create one by entering your email address and completing the registration.
Upon completing this process, you’ll be shown a success page that says, “Setup Complete.” Next, click on Create a Payment Form.

Step 3: Accepting Payments With Stripe
Now that you’ve connected your site to Stripe, let’s start creating a payment form.
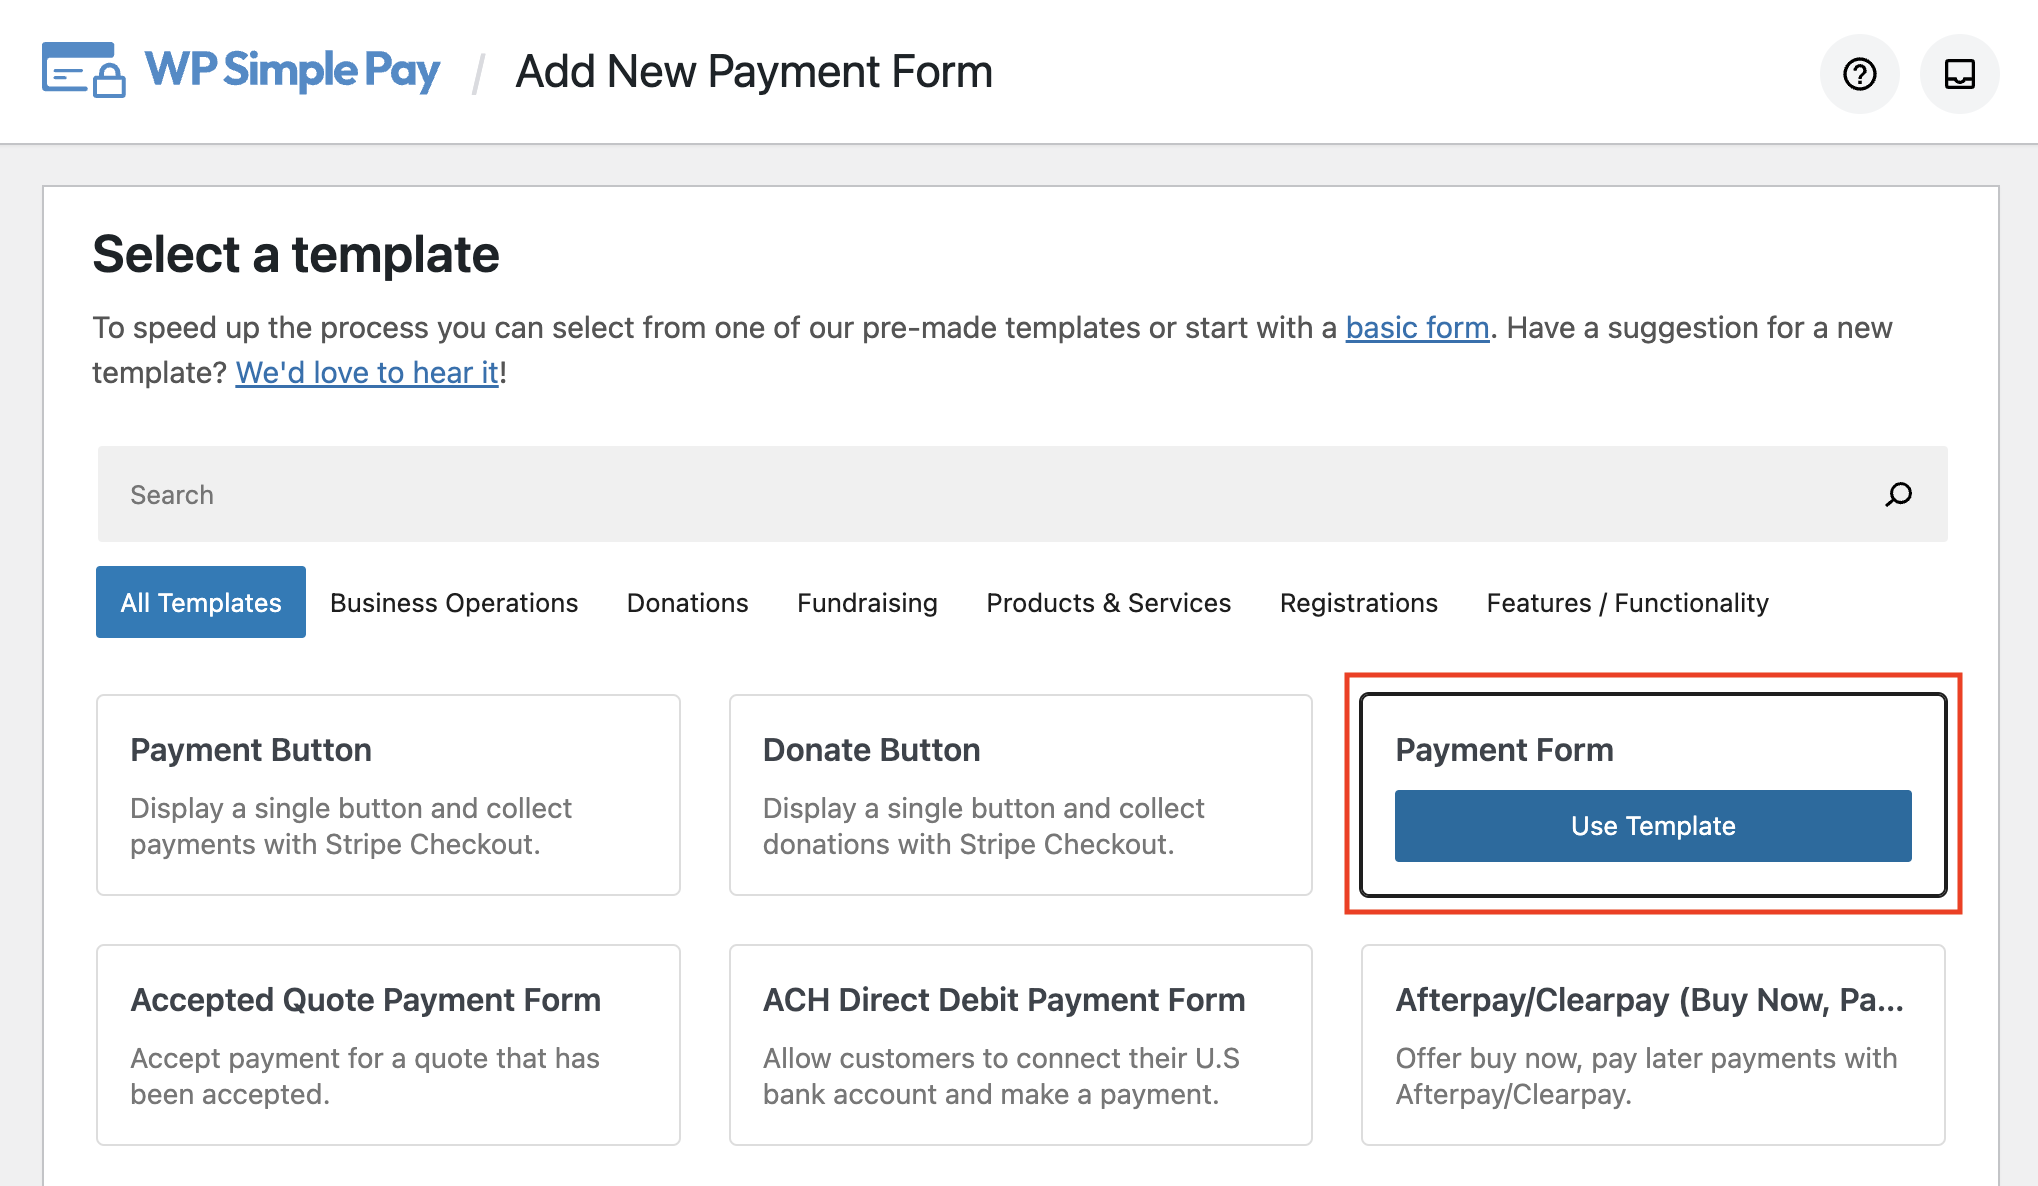
You can see a few different templates that allow you to accept payments on your site. If you’re not on this page yet, you can navigate to WP Simple Pay » Add New to start creating a payment form.
If you want to create a payment button, click on Payment Button.

Alternatively, if you need a payment form, click on Payment Form instead.
Step 4: Creating a Payment Button vs. Payment Form
If you clicked on the Payment Button template in Step 3, you’ll see a page like the one below.
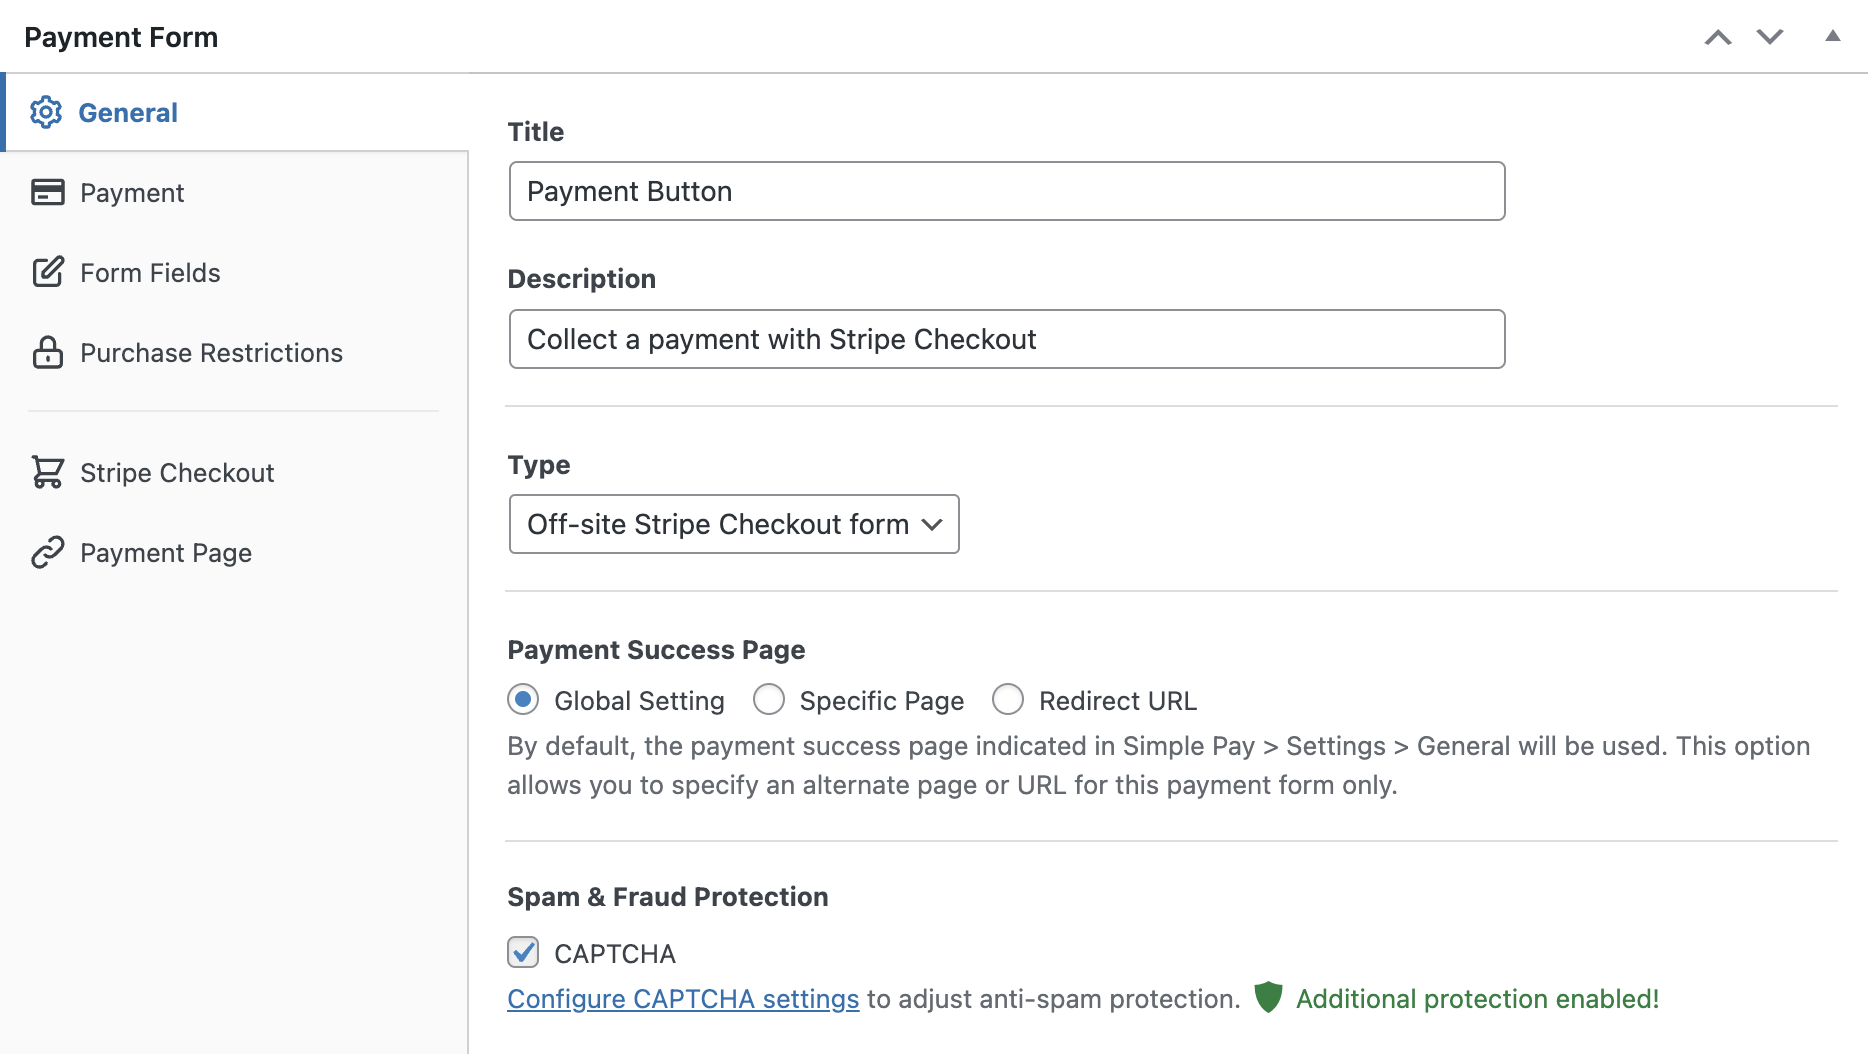
You’ll now be asked to configure your Payment Button form. You can change its title and description.
By default, the Type option chooses the Off-site Stripe Checkout form.
You can change it to an On-site payment form or configure it to open the form in an overlay method.
Now, go ahead and select the Payment tab on the left. You’ll see an option to change the default price.
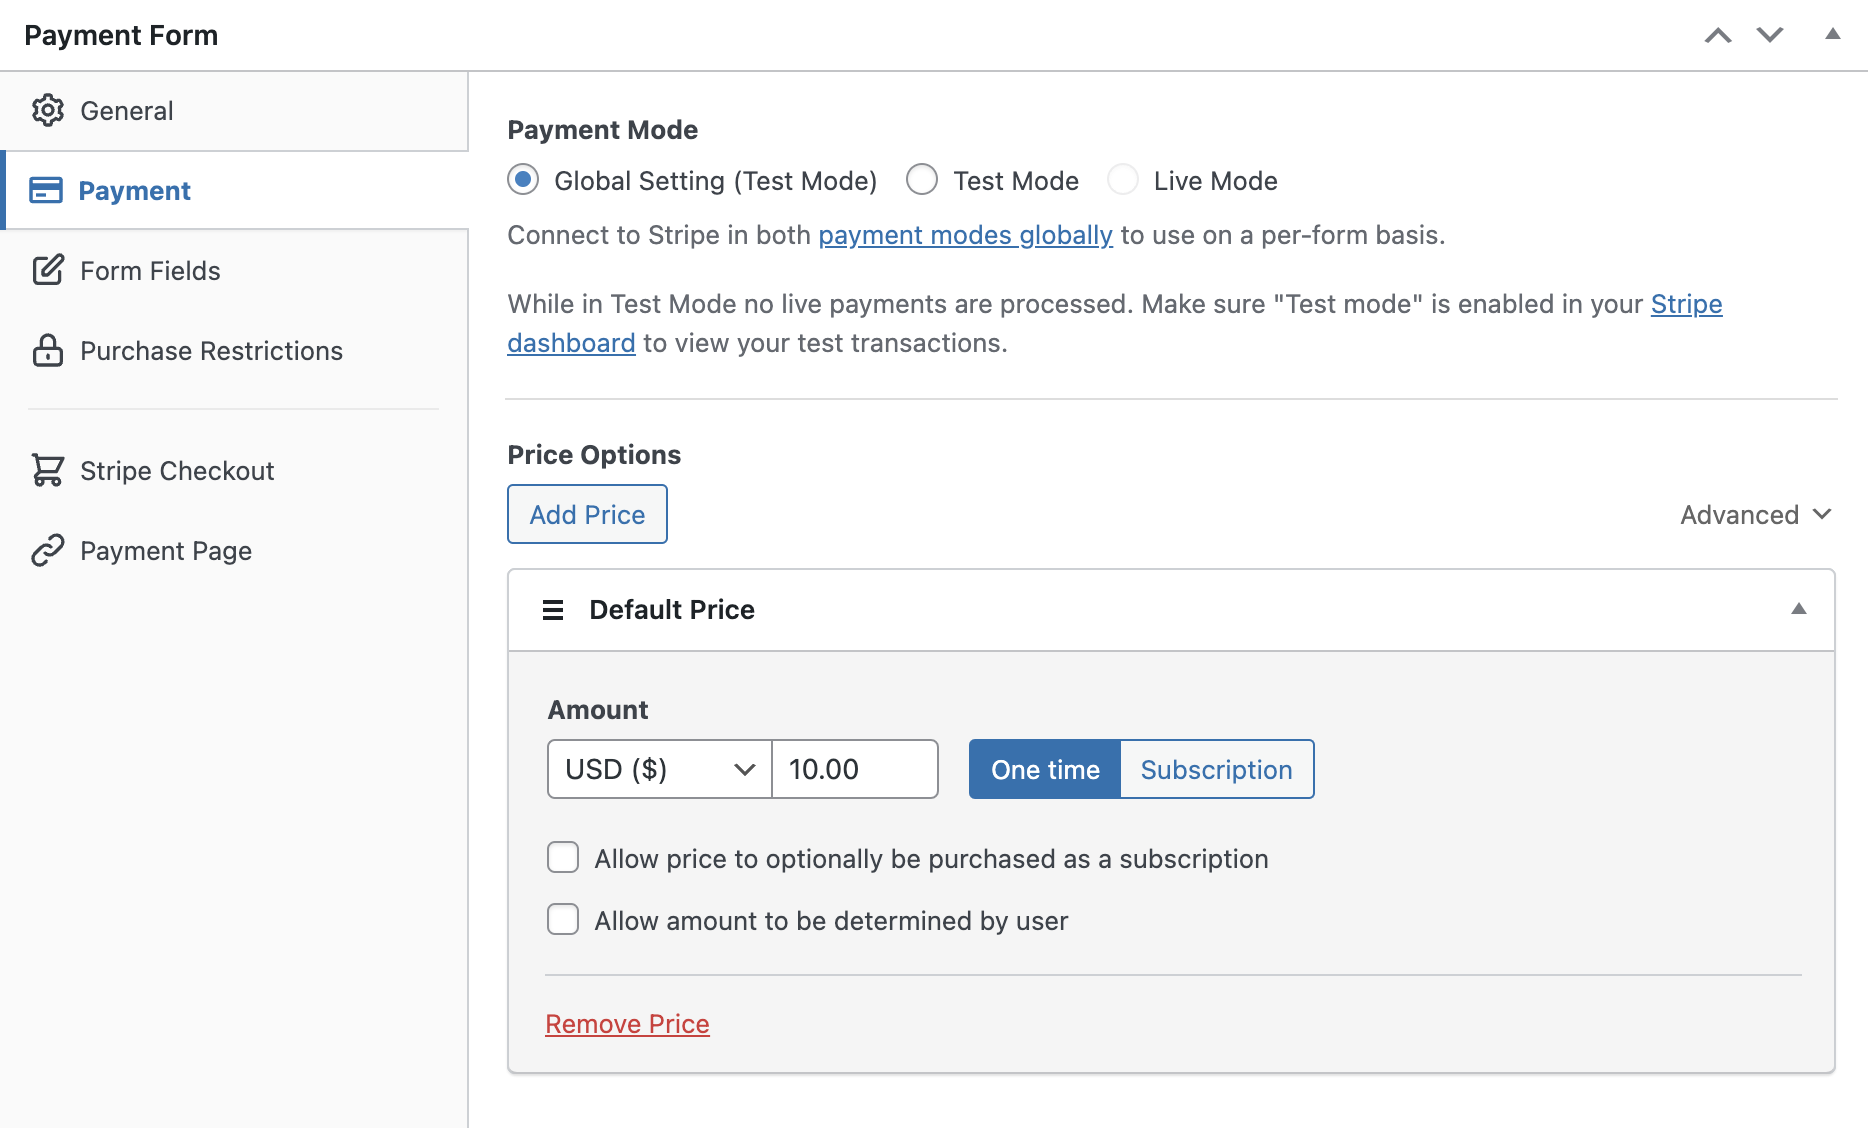
For now, let’s NOT change the payment mode to Live Mode
Here, you can change the currency and amount and even choose between a one-time or recurring payment.
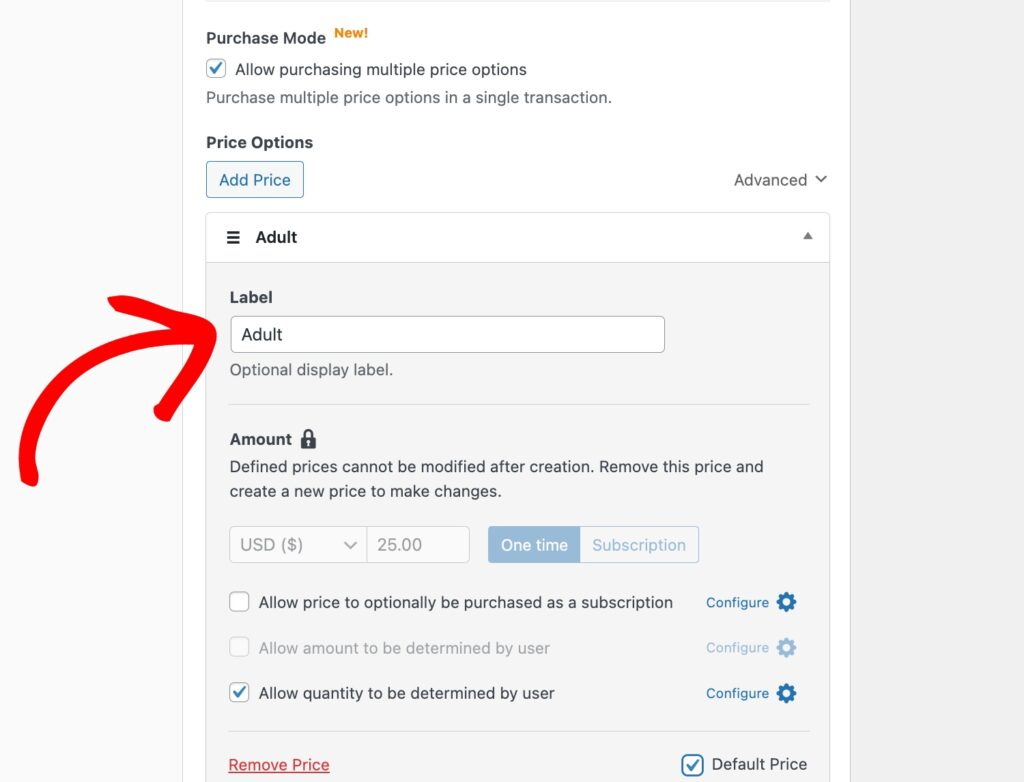
You can also sell multiple items in one transaction. To do so, check the box next to Allow purchasing multiple price options and add your prices.
Next, click on the Form Fields tab, and feel free to add, remove, and edit your form fields using options from the dropdown menu. This allows you to collect additional information from your customers.
You can also continue to set up purchase restrictions, create a dedicated payment page to host your form, and customize a payment confirmation page.
Step 5: Publish Your Form
Now that your payment form is ready, it’s time to embed it on your site.
First, navigate back over to the Publish module on the right-hand side of the page and click on Copy Block.

Then, go to the page or post where you want the form and paste it into the Block editor. Your form will be displayed!
That’s it!
We hope this article helped you learn how to accept payments with Stripe in WordPress.
If you liked this article, you might also want to check out the following articles:
- 9 things you didn’t know about Stripe
- How to reassure your users their payment data is safe
- Is Stripe Atlas worth the money?
Get started with WP Simple Pay today!
To read more articles like this, follow us on Facebook and Twitter.
Disclosure: Our content is reader-supported. This means if you click on some of our links, then we may earn a commission. We only recommend products that we believe will add value to our readers.


Leave a Reply