
How to Accept Payments for Photography Services in WordPress (Easy Way)
Last updated on

 Spencer Finnell
Are you a photographer who wants to accept online payments for your services? Perhaps you also teach a class and want to earn additional income?
Whether you operate a full-service photography business or offer your services as a freelancer, providing customers with a seamless checkout experience is essential to your success.
In this article, we’ll show you the easiest way to accept payments in WordPress for your photography services as well as your classes and additional offerings.
The Basics of a Photography Services Website
When it comes to creating a site for your photography business, there are a few key elements to consider:
- Custom or Standard Packages: Be sure to outline your offerings and choose a pricing strategy that fits your business. You should create high-converting pricing tables and use price anchoring to maximize conversions.
- Payment Method Options: To expand your reach, you’ll need to offer multiple payment method options, including digital wallets.
- Consultation Fee: You’ll want to have a seperate easily-accessable payment form for new clients to pay you for an initial consultation. Your fee should be determined based on several factors, including your experience, location, type of photography, length of consultation, etc.
- Installment Plans: For higher-priced photography services and photo packages, it’s a good idea to offer installment plans to increase average order value and keep your clients satisfied.
Additionally, online or in-person classes are a great way to leverage your valuable skills and knowledge to earn more income.
This can all seem daunting if you’re not a WordPress expert or a website developer. However, with the right plugins and tools, you can create a branded portfolio site that showcases your work and converts with little effort.
See our guide 13 Essential WordPress Plugins for Business Websites to learn more.
How to Accept Payments for Photography Services
Once they’ve created their branded portfolio site, one of the biggest challenges for professional photographers is deciding how to collect payments for their services.
It can become even more complicated if the photographer wants to sell course memberships, custom packages, or even access to paid content on their site.
Now, let’s dive right in and explore a few ways to set up your site’s payment processing for success.
First off, the best way to accept payments for your photography services is to use a Stripe payments plugin for WordPress that allows you to create custom forms for one-time or recurring payments that you can host directly on your site.
This is where WP Simple Pay comes in. It’s the #1 Stripe payments plugin that doesn’t rely on additional plugins or creating a complicated eCommerce store to collect payments.
It also lets you accept 10+ payment methods, including digital wallets, ACH Direct Debit, traditional credit and debit cards, and more. You can use the plugin to offer discounts, set up subscriptions that automatically bill the client, create a branded checkout page, and more.
The best part is that you can begin collecting payments for your photography services in minutes because the plugin’s advanced drag-and-drop payment form builder doesn’t require coding.
Accepting One-time Payments for Photography Services
You can create the perfect payment form for your photography services using WP Simple Pay. Let’s look at how to use the plugin to accept a one-time payment.
Step 1: Install and Activate WP Simple Pay
The first thing you’ll need to do to collect one-time payments on your site is install and activate WP Simple Pay in WordPress. Visit the pricing page and choose the best plan for your needs.
Not sure how to install a plugin? See our detailed guide on how to install WP Simple Pay.
Once you’ve installed and activated the plugin, the setup wizard will walk you through how to connect your Stripe account to your site.

If you didn’t see the setup wizard, simply head over to WP Simple Pay » Settings » Advanced tab and click the Launch Setup Wizard button.
2: Connect WordPress to Stripe
To connect your WordPress site to Stripe, click on Connect with Stripe.

Next up, enter the email address you use for your Stripe account and connect it to your site. If you don’t have a Stripe account, you can easily create one by entering your email address and completing the registration.
Upon completing this process, you’ll be shown a success page that says, “Setup Complete.” Next, click on Create a Payment Form.

Step 3: Create a One-time Payment Form
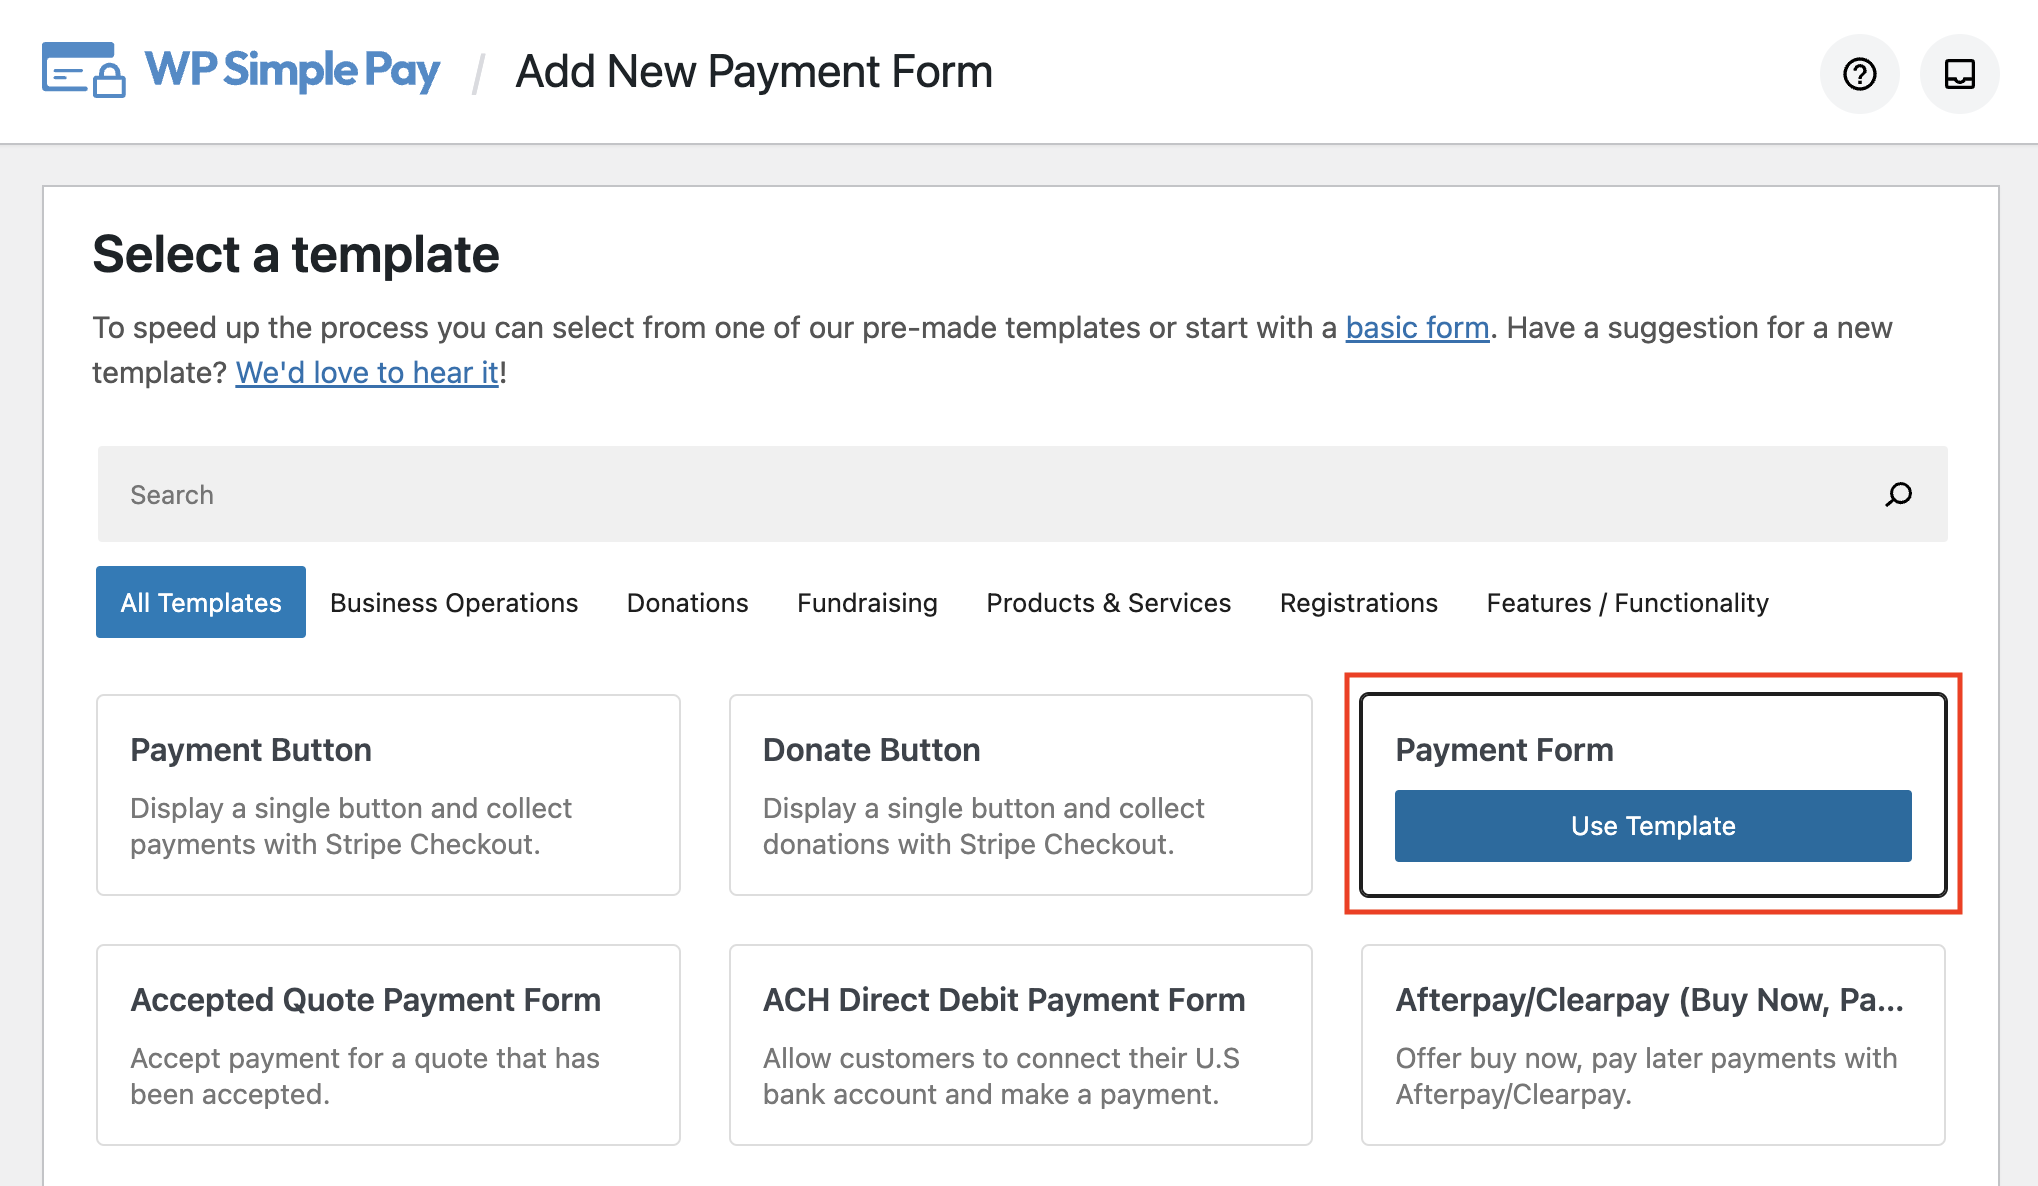
Now that you’ve installed and activated the plugin and clicked on the Create a Payment Form button, you’ll be taken to the pre-built payment form templates library page.
While WP Simple Pay offers several templates for services, let’s go ahead and choose Payment Form.
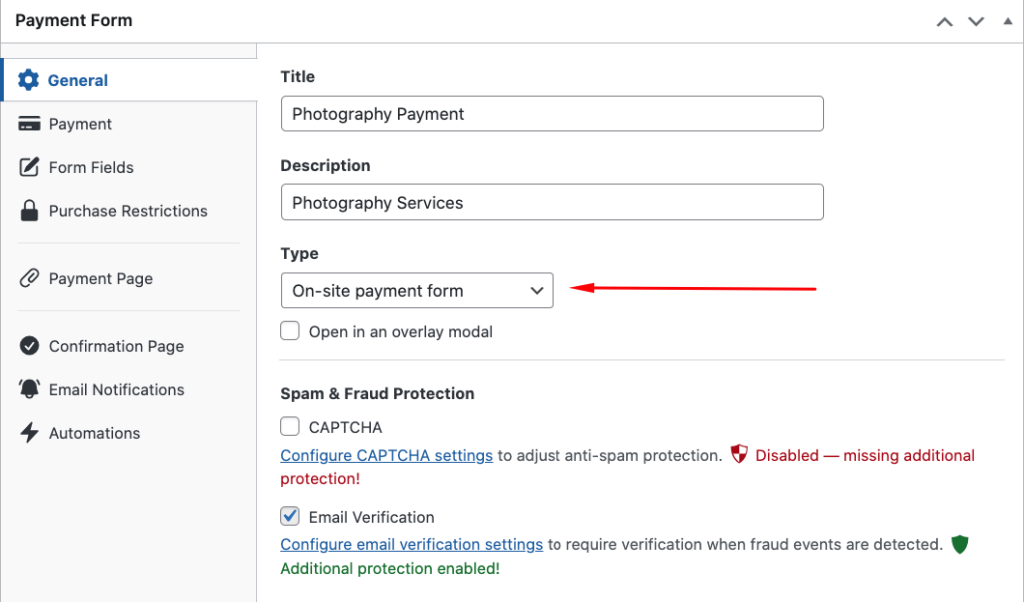
Next, in the General tab, enter the title and description of your form. You’ll also need to choose between an On-site form and an Off-site Stripe Checkout form.
To provide your clients with the most seamless checkout experience, we recommend selecting On-site. However, if you want to redirect your clients to a secure checkout form hosted by Stripe.com, you can choose Off-site.
See our detailed guide to learn more about Stripe Checkout pages.
For the purpose of this tutorial, leave your form Type set to On-site. This will allow you to embed your payment form on any page or post on your site.
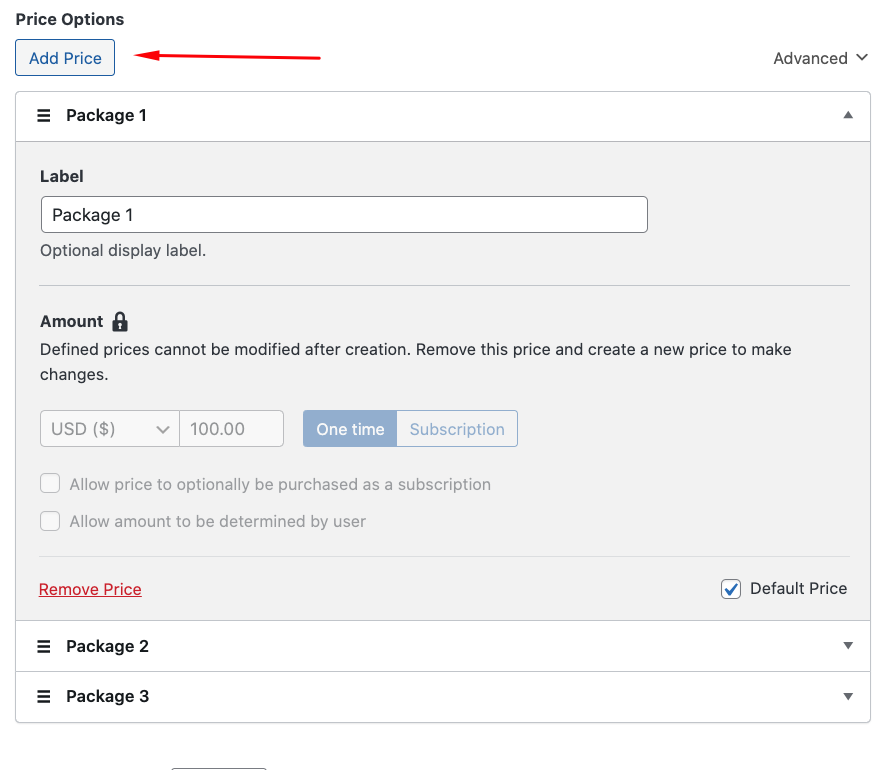
Next, you can add your pricing options and amounts in the Payment tab. For example, by clicking the Add Price button, you can create different options for your services.
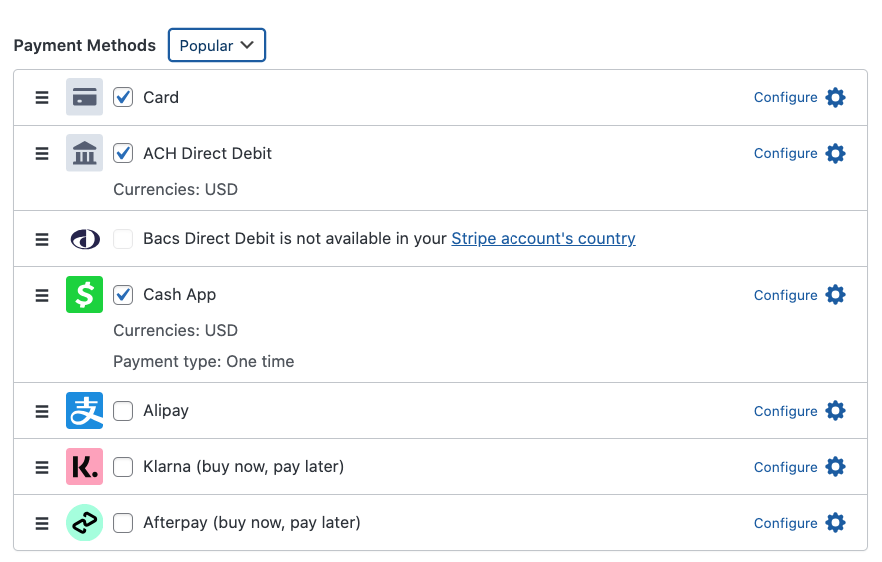
To help increase conversions, it’s a smart idea to offer several different payment method options. Go ahead and choose the ones you want to offer from the list.
Now that you’ve created your pricing options and amounts and selected the payment method options for your form, navigate to the Form Fields tab.
Here, you can add, edit, or remove custom fields from the dropdown menu. If you wish to display your different pricing options as a dropdown or as buttons, simply click the Price Selector option to configure it.
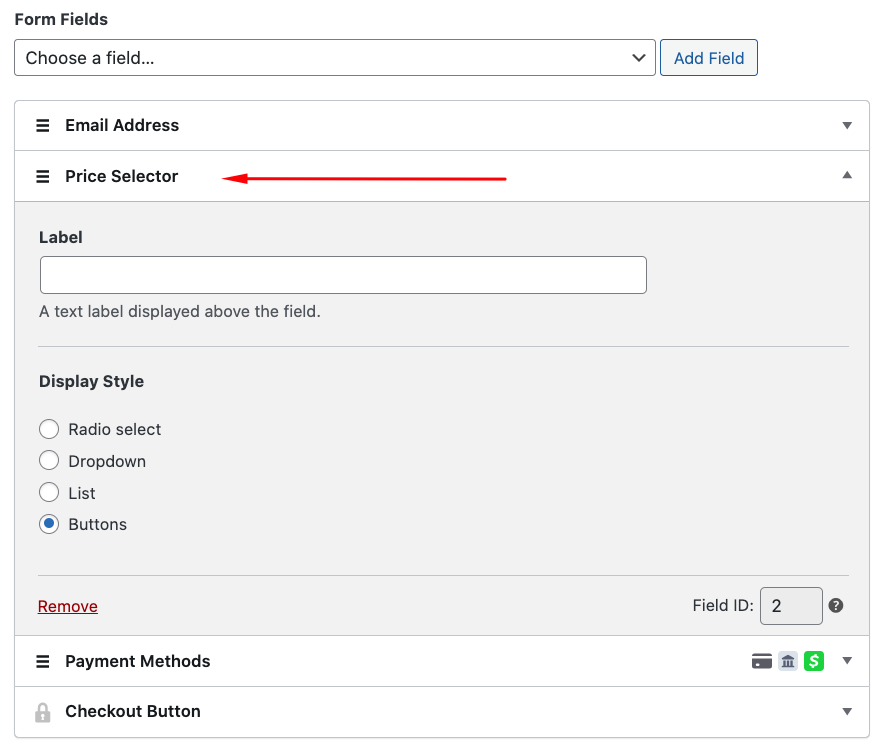
For example, we’ve chosen Buttons for the Display Style. It looks like this:
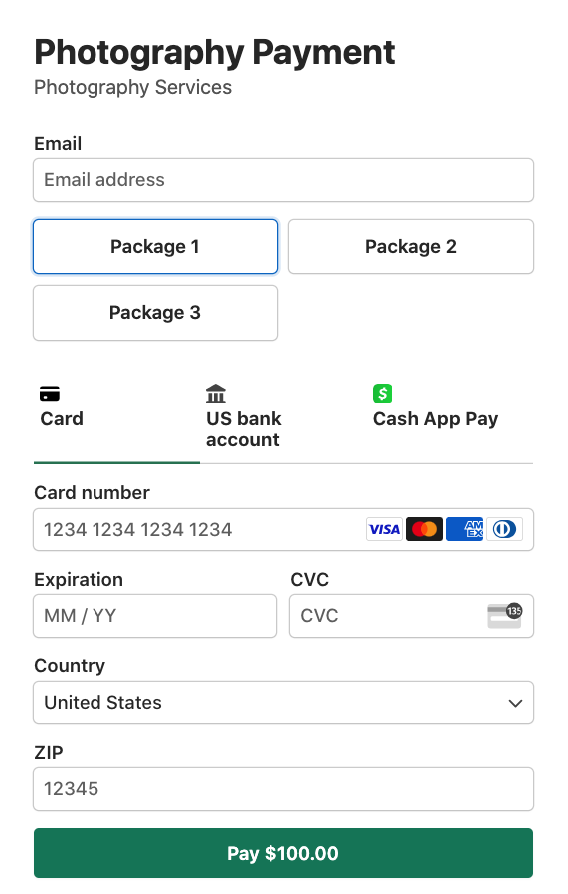
Once you’re happy with your form fields, you can preview your form to ensure it looks good.
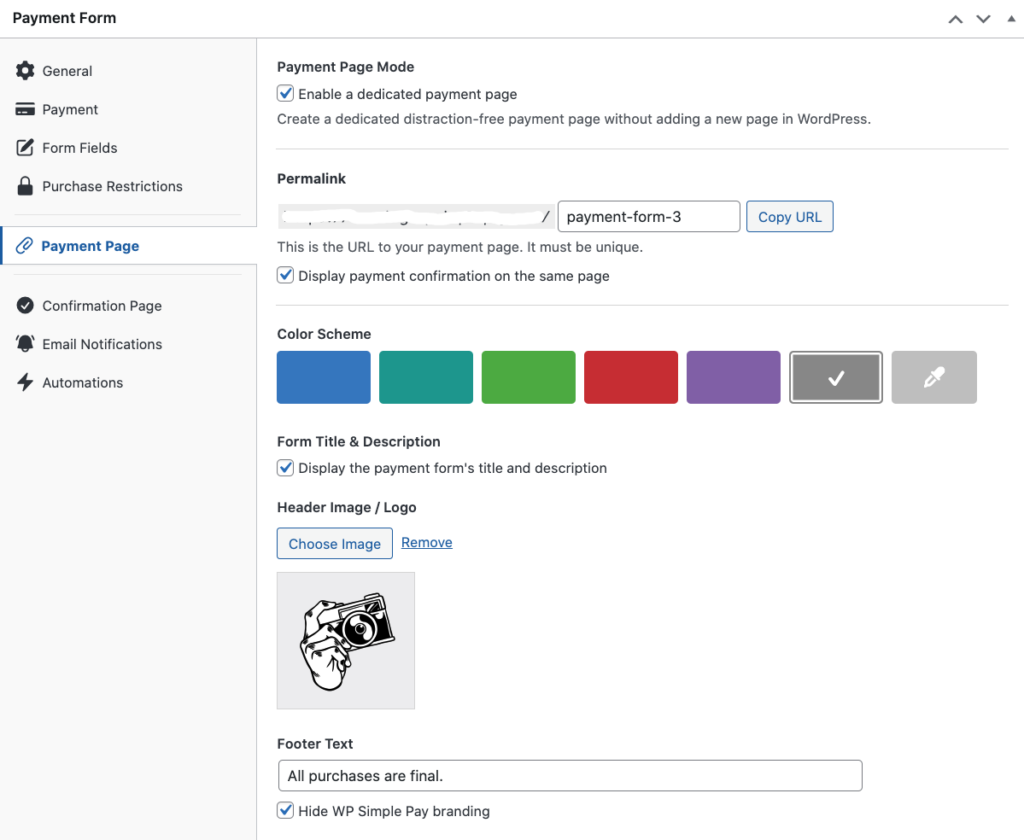
Next, to create a distraction-free landing page for your payment form, navigate to the Payment Page tab.
Here is where you can upload your logo and choose a color scheme that aligns with your brand.
You can also add any policies or refund details to the footer.
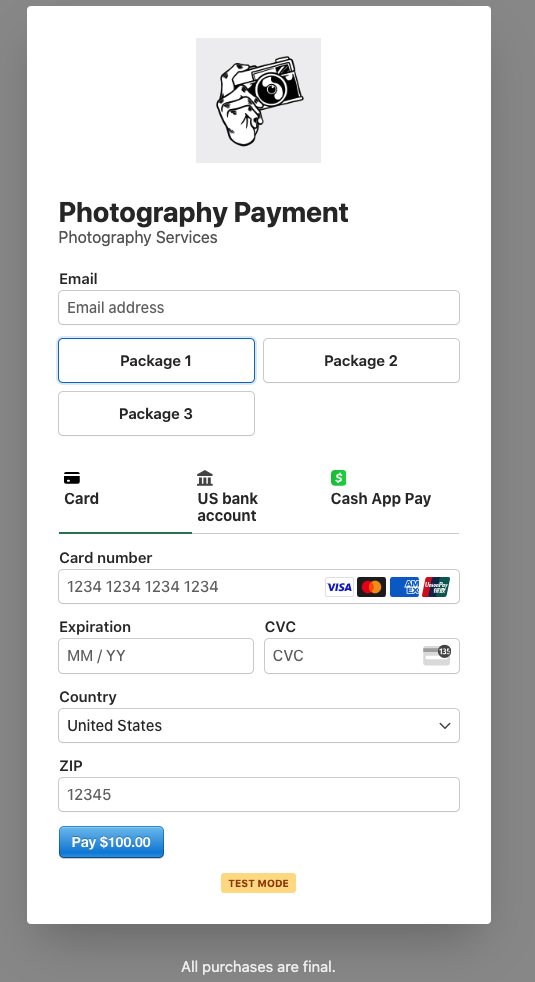
When you’ve finished, your payment page should look something like the one below:
Accepting Payments for a Photography Class
Now that you’ve learned how to create a one-time payment form for your photography services, let’s look at how you can accept payments for a photography class registration.
WP Simple Pay makes creating payment forms for events, registrations, products, and services easy.
Here’s an example below. This photography studio teaches a one-day camera class and charges a one-time fee of $295. A simple payment form was added to a page on the studio’s site.
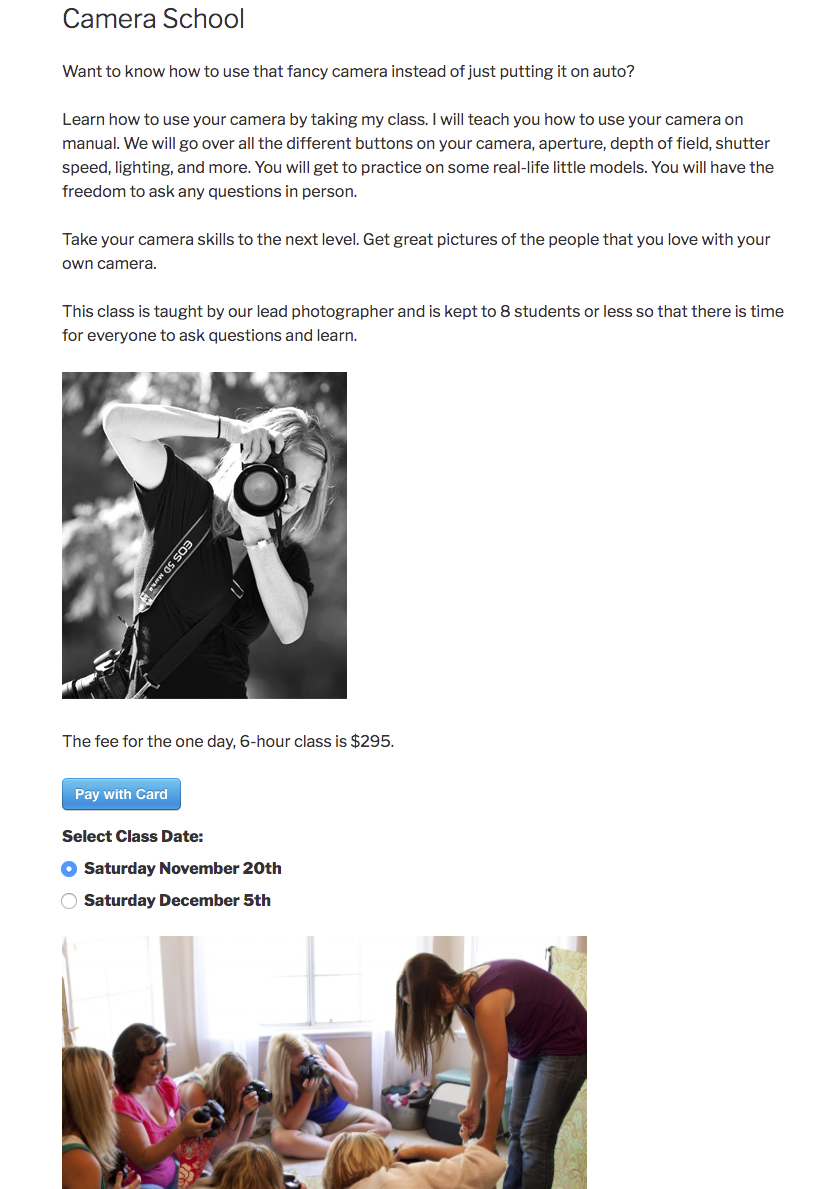
The studio offers a choice of dates for the class, which is one of many features you can select when setting up the payment form’s custom fields.
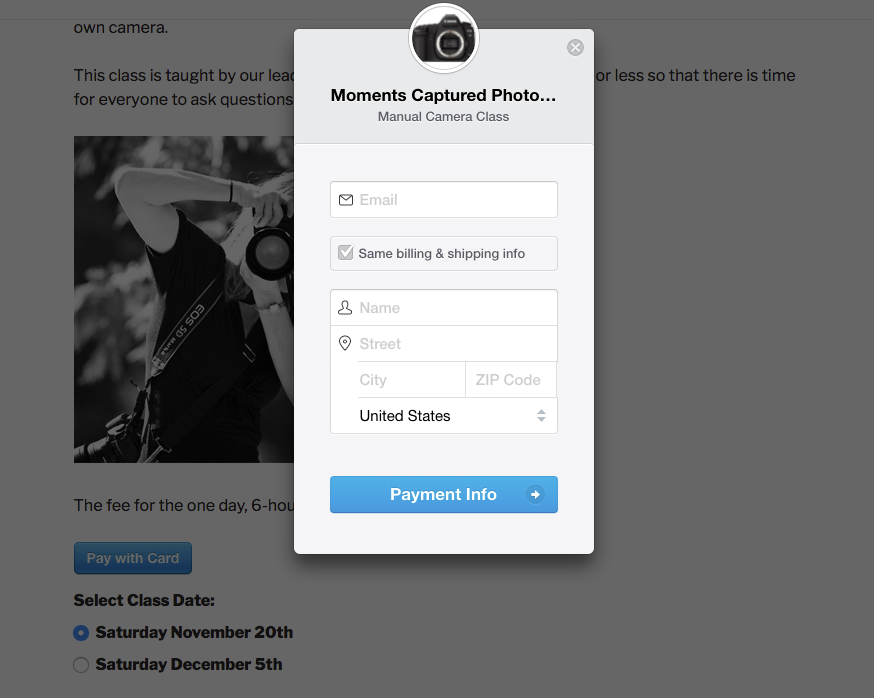
After the customer clicks the Pay with Card button, a payment form window pops up and they enter their billing and shipping address.
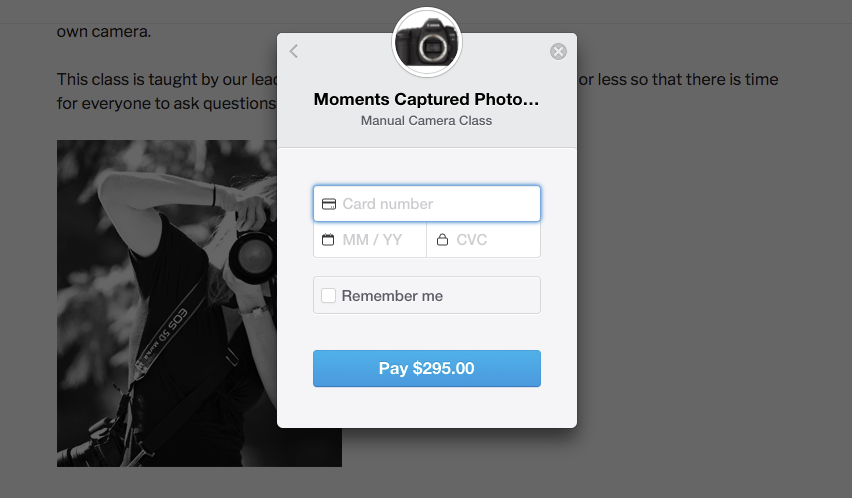
Finally, when they click on the Payment Info button, they are prompted to enter their credit card info. The price you set should appear on the button and now they can simply complete the purchase.
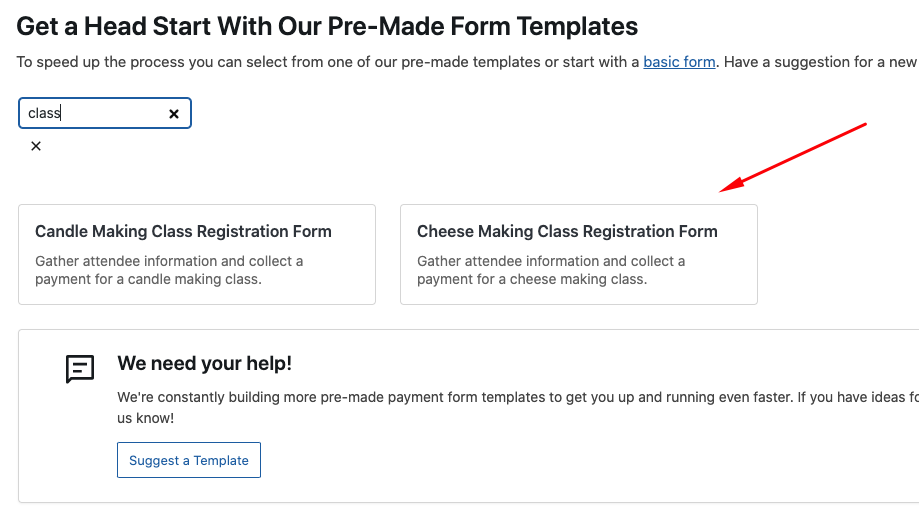
WP Simple Pay provides pre-built registration form templates to help you get a head start on your payment form.
To create a payment form for a photography class, navigate to the templates library page and choose a class registration payment form template. Don’t worry – you can customize your form to meet your specific needs.
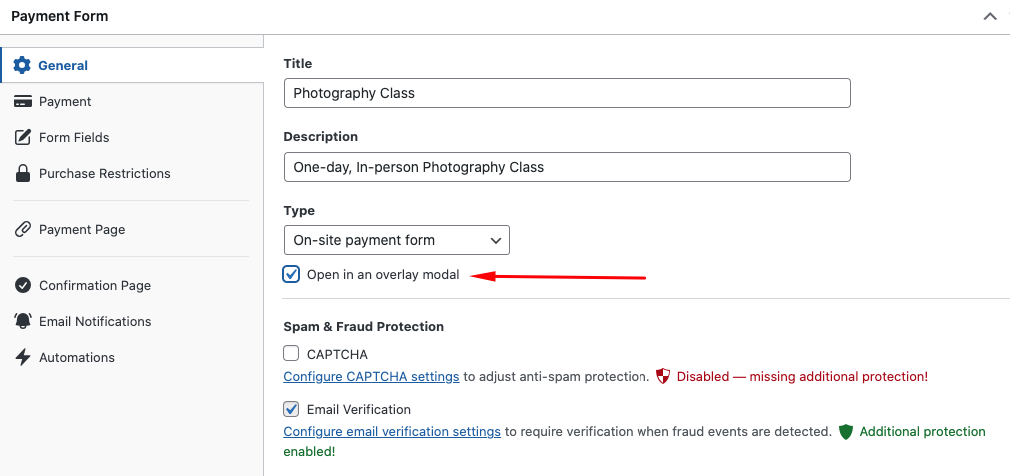
Next, in the General tab, be sure to add the title and description of your form. If you want your form to display similarly to the example, check the box for Open in an overlay modal for the form Type.
Next, in the Payment tab, enter your price amount and choose the payment method options.
Then, click on the Form Fields tab. Here is where the presets have already been configured for the class times. You can add, edit, or remove fields as you see fit.
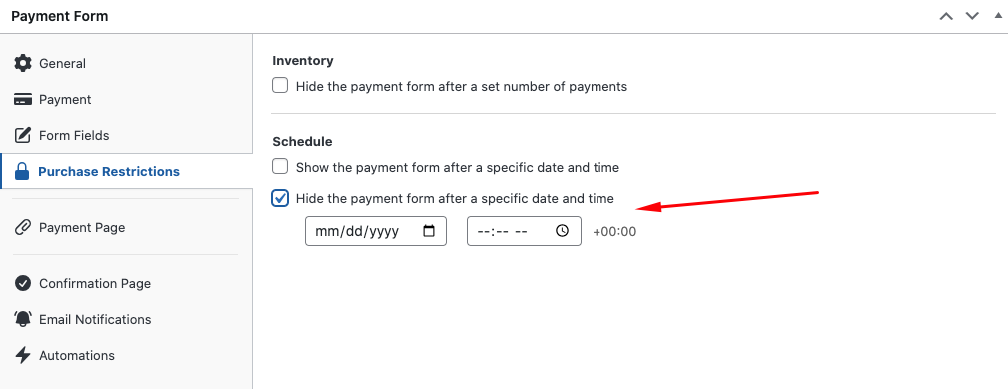
To ensure you don’t overbook or sell registrations after the event has ended, simply click on the Purchase Restrictions tab and configure your form’s schedule and maximum available spaces.
Feel free to also create a personalized confirmation page message and email notification. This is a great way to include additional information about the class.
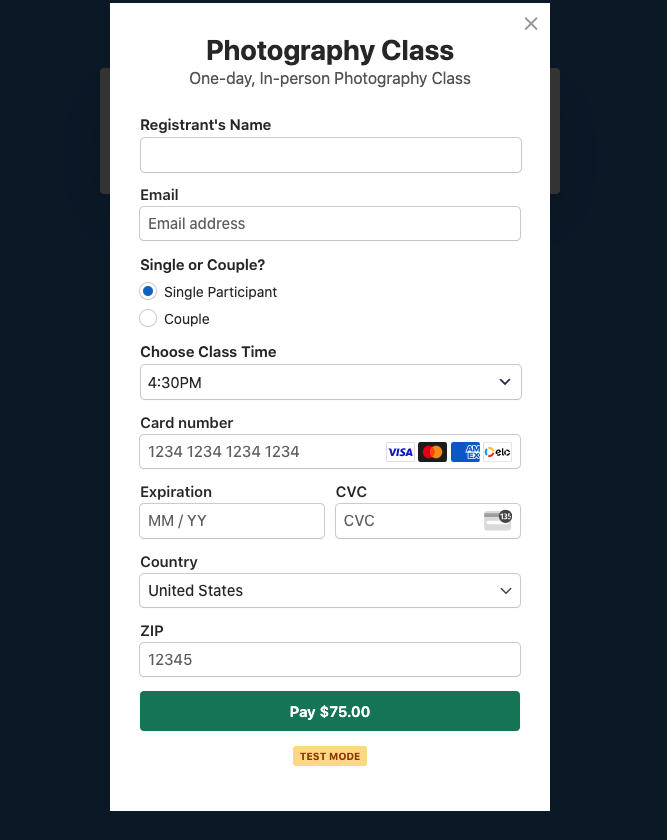
When you’ve finished, go ahead and click on the Preview button. Your form should look similar to the one below. When your visitors click on the CTA button, the form opens in an overlay modal.
Creating this payment form makes accepting payments for a photography class simple and straightfoward.
If you decide you want to offer coupon codes to attract more participants, you can easily create a custom coupon code using WP Simple Pay and add it to your payment form.
To learn more, see our post on how to maximize coupons on your WordPress site.
We hope this article has helped you learn more about how to use WP Simple Pay’s advanced features to accept payments for your photography services.
Frequently Asked Questions
Can I charge a one-time setup fee for my subscription-based services?
If you offer subscription-based photography services or a subscription to your photography classes, you can use WP Simple Pay to create an automatic recurring payment form with a setup fee.
For example, if a visitor subscribes to your weekly class, the first subscription payment will include the setup fee.
Can I sell digital images on my WordPress site using WP Simple Pay?
If your needs are basic, you can use WP Simple Pay to accept payments for digital products like access to photos.
If you offer a lot of digital products on your photography site, you might want to explore Easy Digital Downloads, the best digital eCommerce plugin for WordPress. It lets you create a full-fledged online store for your digital files.
Can I sell registrations to my photography or camera classes on my WordPress site?
Again, if your needs are basic, you can accept payments for your classes with WP Simple Pay. The plugin makes creating a registration payment form for events super easy.
Can I use my own domain name on a Stripe Checkout page?
Unlike many Stripe payment plugins for WordPres, WP Simple Pay lets you connect your own domain name to Stripe Checkout. Remember, it’s all about branding and setting yourself apart as a photographer. Using your domain name on your Stripe Checkout page strengthens your credibility and improves brand recognition.
For more information, see our guide on how to connect your custom WordPress domain to Stripe Checkout.
If you liked this article, be sure to check out:
- Best Affordable Gumroad Alternatives (Compared)
- How to Create a Profitable Online Course Sales Page
- Why Should You Join an Online Marketing Community?
- How to Sell Products in WordPress Without a Shopping Cart
What are you waiting for? Get started with WP Simple Pay today!
To read more articles like this, follow us on X.
Disclosure: Our content is reader-supported. This means if you click on some of our links, then we may earn a commission. We only recommend products that we believe will add value to our readers.

