How to Create Custom Payment Flows with Per-Form Confirmation Messages in WordPress
Last updated on

Do you want to create custom payment flows using per-form confirmation messages in WordPress?
If you sell tailored services, online courses, or even a product requiring post-purchase steps or additional information, setting up specific confirmation messages for individual payment forms is a great way to enhance the overall payment experience for your customers.
In this article, we’ll show you how to easily create custom payment flows with per-form confirmation messages in WordPress.
Creating Custom Payment Flows in WordPress
The best way to create custom payment flows on your site is to use a WordPress Stripe payments plugin that supports per-form payment confirmation messaging and notifications.
WP Simple Pay is the #1 Stripe payments plugin for WordPress that lets you easily create payment forms and accept online payments without setting up a shopping cart.
The plugin also offers confirmation messaging for individual payment forms so users can customize their payment flows exactly how they want.
With WP Simple Pay, you can also…
- Accept multiple payment methods, including credit cards and debit cards, ACH Direct Debit, Affirm, Cash App Pay, Apple Pay / Google Pay, and more.
- Automatically calculate and collect taxes based on the location of your customers.
- Choose from several pre-built templates to create the perfect payment forms in minutes without code.
- Remove the 3% Stripe processing fee by requiring your customers or donors to cover it.
- And so much more.
Remove the additional 3% fee!
Most Stripe plugins charge an additional 3% fee for EVERY transaction
…not WP Simple Pay Pro!
Now, let’s dive in and create a custom payment flow for an individual payment form using WP Simple Pay.
Step 1: Install and Activate WP Simple Pay in WordPress
To get started, you’ll first need to install and activate the plugin on your WordPress site.
All you need to do is visit the pricing page and choose the plan that meets your needs. WP Simple Pay offers four different plans, as well as a free version to help get you started.
To set up customized payment flows using specific messages for individual payment forms, you’ll need to purchase a Pro plan.
To compare each plan, check out our guide: WP Simple Pay Lite vs. Pro: Is Pro Worth the Price?
Once you’ve purchased a plan, simply download the .zip file sent in your email confirmation. You can also find it in your WP Simple Pay account.
Next, head to the Plugins tab in your WordPress admin dashboard, click Add New, and then Upload Plugin.
Once you’ve installed and activated the plugin, its setup wizard will prompt you to connect your Stripe account. If you don’t have a Stripe account yet, you can create one now.
Go ahead and click on Let’s Get Started.

If you didn’t see the setup wizard, simply head over to WP Simple Pay » Settings » Advanced tab and click the Launch Setup Wizard button.
2: Connect WordPress to Stripe
To connect your WordPress site to Stripe, click on Connect with Stripe.

Next up, enter the email address you use for your Stripe account and connect it to your site. If you don’t have a Stripe account, you can easily create one by entering your email address and completing the registration.
Upon completing this process, you’ll be shown a success page that says, “Setup Complete.” Next, click on Create a Payment Form.

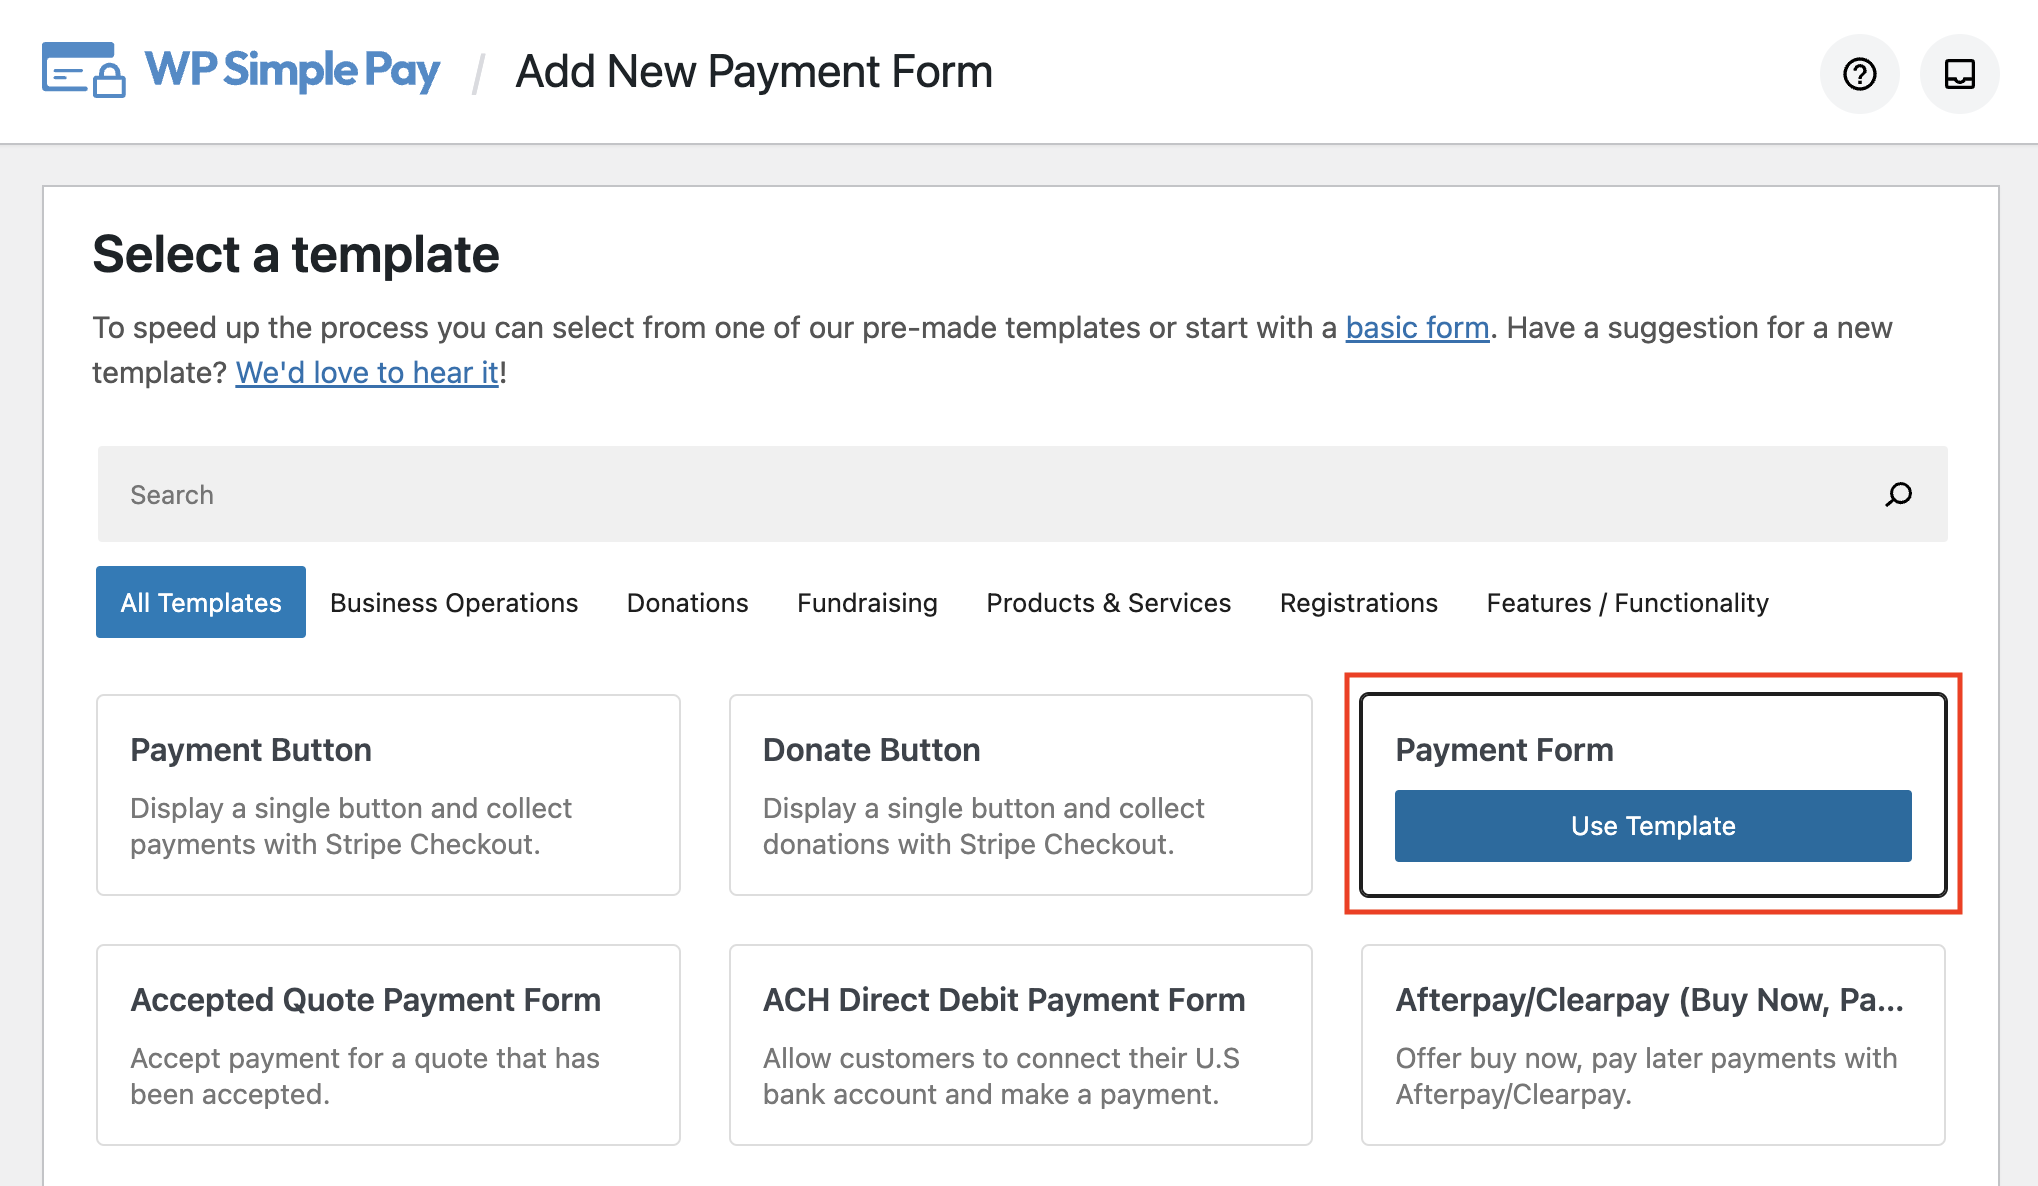
Step 3: Create a Payment Form
You should have landed on the Form Templates library page. You’ll notice the plugin offers tons of different pre-built templates for you to choose from. For the sake of this tutorial, let’s go ahead and choose the basic Payment Form.
You should now be in the General tab on the form builder page, where you can edit the title and description of your form.
This is also where you’ll choose between an on-site payment form and an off-site Stripe Checkout form Type. For the purpose of this tutorial, let’s go ahead and create an on-site payment form. This allows your customers to complete their payments directly on your site.
Next, you can choose your CAPTCHA settings.
Once you’re finished, click on the Payment tab. Here is where you can set up your Tax Collection preferences, add your price, and choose one-time or subscription.
Available payment methods are also shown. You’ll notice Card is selected by default. You can go ahead and check the boxes if you wish to offer additional payment methods.
Now that you’ve configured the payment settings, click the Form Fields tab. You can add, edit, and remove custom fields to collect additional customer information. To rearrange the order of how they’ll appear on your live form, simply drag and drop them.
Next, in the Purchase Restrictions tab, you can schedule when your form starts and stops accepting payments. This feature is great for limited edition products, time-sensitive events like registrations, and donations.
Step 4: Create a Custom Confirmation Message
Now that you’ve created your payment form and configured the settings, it’s time to set up a custom confirmation message for your form and configure where it will be displayed after a successful payment.
Navigate to the Confirmation Page tab, where you’ll notice three options for the Payment Success Page. This is simply where your customers will be redirected after a successful payment. This is also the page that will display your custom message.
Go ahead and keep Global Settings selected and enter your custom message in the text field provided. This is a great chance to thank your customers for their purchase and provide any required next steps or extra information regarding their order.
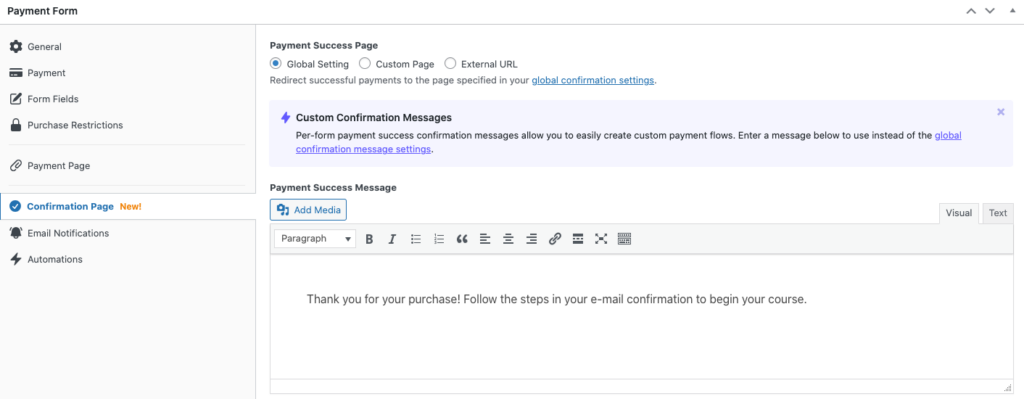
Once you’re finished, click on Publish.
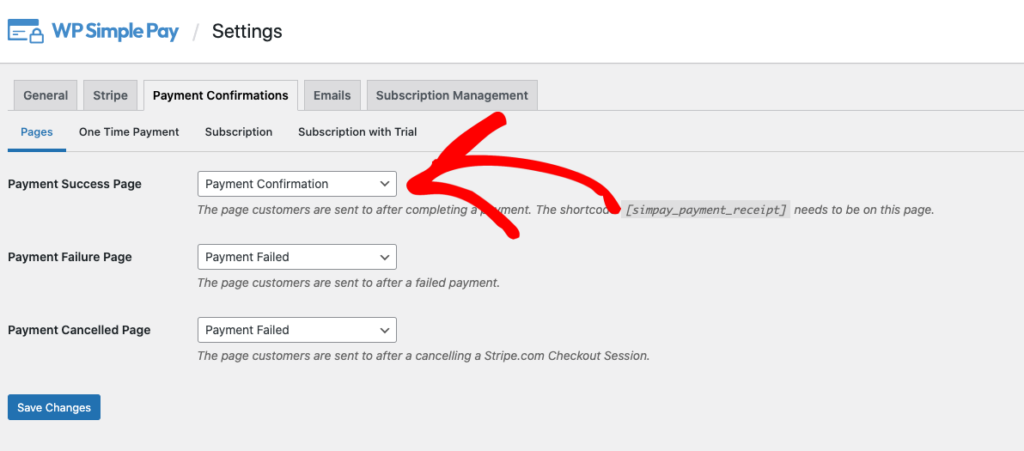
Step 5: Configure Payment Success Page
Now that you’ve published your form so it’s ready to be added to a post or a page on your site, navigate to Settings → Payment Confirmations.
Be sure to select Payment Confirmation from the Payment Success Page dropdown menu. This will ensure that your custom message displays on the correct page after a successful payment has been made using the form.
Once you’re finished, click on Save Changes.
Step 6: Publish Your Form on a Page
You’re almost finished! To publish your form on a page, simply go to the page and click on the + icon to add the WP Simple Pay block. Then, choose the form you just created and click Publish or Update.

Next Steps
Now that you’ve published your form with a custom post-purchase message on your site, it’s recommended that you complete a test purchase to ensure that the message displays correctly on the payment confirmation page.
For more information, see our detailed guide on How to Test Stripe Payments in WordPress.
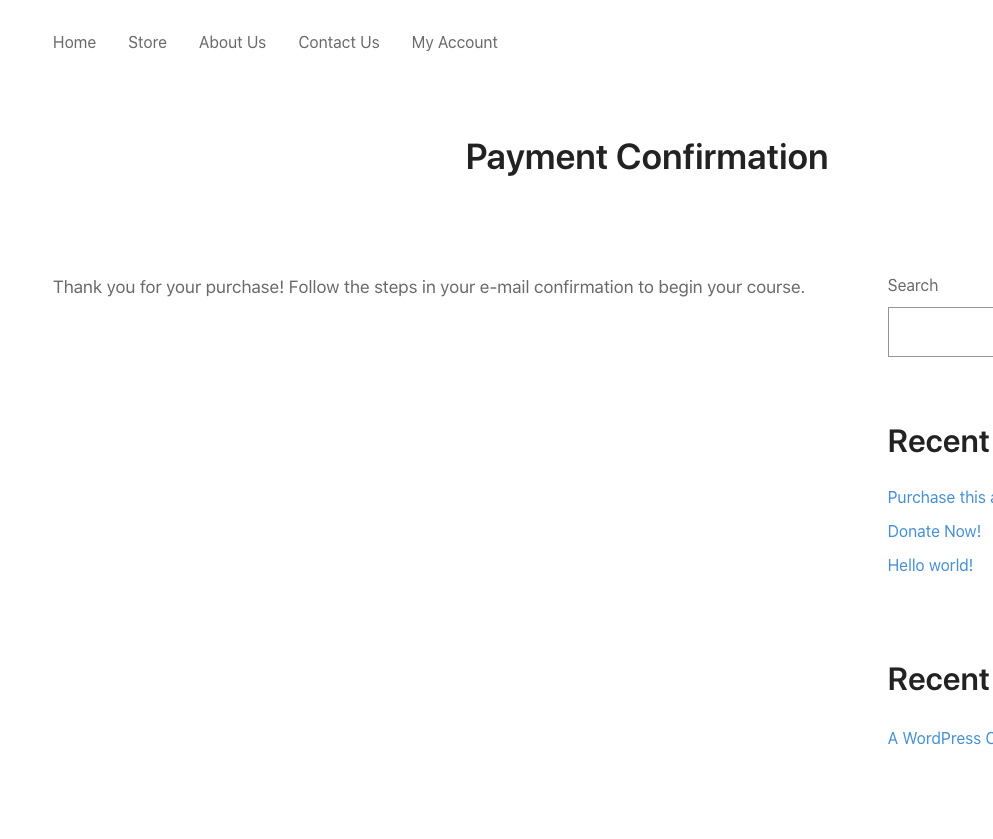
Once your test payment is completed, your custom confirmation message should be displayed on the payment confirmation page.
It should look something like this:
If you want to add an image or a logo alongside your custom message, WP Simple Pay offers this feature. Simply click on the Add Media button in the form builder above the text field and upload your image.
There you have it! We hope this article has helped you create a custom payment flow with a per-form confirmation message.
If you liked this article, you might also want to check out our guide on How to Accept ACH Payments in WordPress.
What are you waiting for? Get started with WP Simple Pay today!
To read more articles like this, follow us on X.
Disclosure: Our content is reader-supported. This means if you click on some of our links, then we may earn a commission. We only recommend products that we believe will add value to our readers.


Leave a Reply