How to Add New Stripe Customers to Your Mailing List Without Code
Last updated on
Looking to add new Stripe customers to your mailing list without code?
Adding new Stripe customers to your mailing list ensures that you maintain communication with them throughout the transaction, and after. You can use your mailing list to notify customers about orders, provide improved customer service, and keep them informed about new products or services.
In this article, we’ll show you how to easily add new Stripe customers to your mailing list without code, and without having to do it manually.
What is Uncanny Automator?

Uncanny Automator is a powerful plugin for WordPress that allows you to connect your plugins and apps together to automate hundreds of different tasks and workflows all without code.
It lets you create recipes, also known as automated sequences, by setting up specific triggers, actions, and conditions directly from your WordPress admin dashboard.
It’s currently being used by over 25,000 companies to cut down on development costs and eliminate the need for multiple plugins.
Uncanny Automator offers over 100 integrations with the most popular apps and services, including Google Sheets, Drip, ActiveCampaign, Twitter, Facebook Pages, and more.
Adding Stripe Customers to Your Mailing List
Adding Stripe customers to your mailing list has never been easier with Uncanny Automator. With a quick integration, you can save yourself time, eliminate errors, and ensure that your email messages are arriving in the mailboxes of your customers as intended.
It’s possible to create tons of different automations to improve the functionality of your WordPress site using Uncanny Automator. If you want to add new Stripe customers to your mailing list each time a purchase is completed, the plugin works well with several different email marketing services, including Drip, ActiveCampaign, and more.
For the purpose of this tutorial, we’re going to show you step-by-step how to add new Stripe customers to your Mailchimp mailing list without code.
The best way to add new Stripe customers to your Mailchimp mailing list is to use a Stripe payments plugin for WordPress that has a built-in integration with Uncanny Automator.
WP Simple Pay is the #1 Stripe payments plugin for WordPress that lets you accept payments directly on your site without the need for a shopping cart or any additional plugins. It offers a built-in Uncanny Automator integration that allows you to create automations for all kinds of tasks on your site without having to use code.
With WP Simple Pay, you can also…
- Accept Multiple Payment Methods: Accept 10+ payment methods, including Cash App Pay, traditional credit and debit cards, Apple Pay / Google Pay / Microsoft Pay, Affirm, ACH Direct Debit, and more.
- Remove the 3% Stripe Processing Fee: Pass the additional fee on to your customers to receive the full payment amount.
- Form Templates: Choose from several pre-built payment form templates to create payment forms and begin accepting payments on your site in minutes.
- Per-Form Email Messages: Send buyers custom email confirmation messages for individual payment forms.
- And more…
Remove the additional 3% fee!
Most Stripe plugins charge an additional 3% fee for EVERY transaction
…not WP Simple Pay Pro!
Let’s get started!
Step 1: Install and Activate WP Simple Pay
The first thing you’ll need to do to start accepting payments on your site and adding your new Stripe customers to your MailChimp mailing list is install and activate WP Simple Pay.
Simply go to the pricing page and choose the best plan for your needs.
After purchasing a WP Simple Pay premium plan, you’ll need to download the plugin from your purchase receipt email or from your WP Simple Pay account.
After it has been downloaded, go to your WordPress dashboard, navigate to Add New under Plugins, and then Upload Plugin.
Click Choose File and find the WP Simple Pay .zip file on your computer. Then, click Install Now. When the installation is complete after a few seconds, press the Activate Plugin button.
Next, click on Let’s Get Started.
If you need help with this step, see our detailed guide on how to install the plugin.

If you didn’t see the setup wizard, simply head over to WP Simple Pay » Settings » Advanced tab and click the Launch Setup Wizard button.
2: Connect WordPress to Stripe
To connect your WordPress site to Stripe, click on Connect with Stripe.
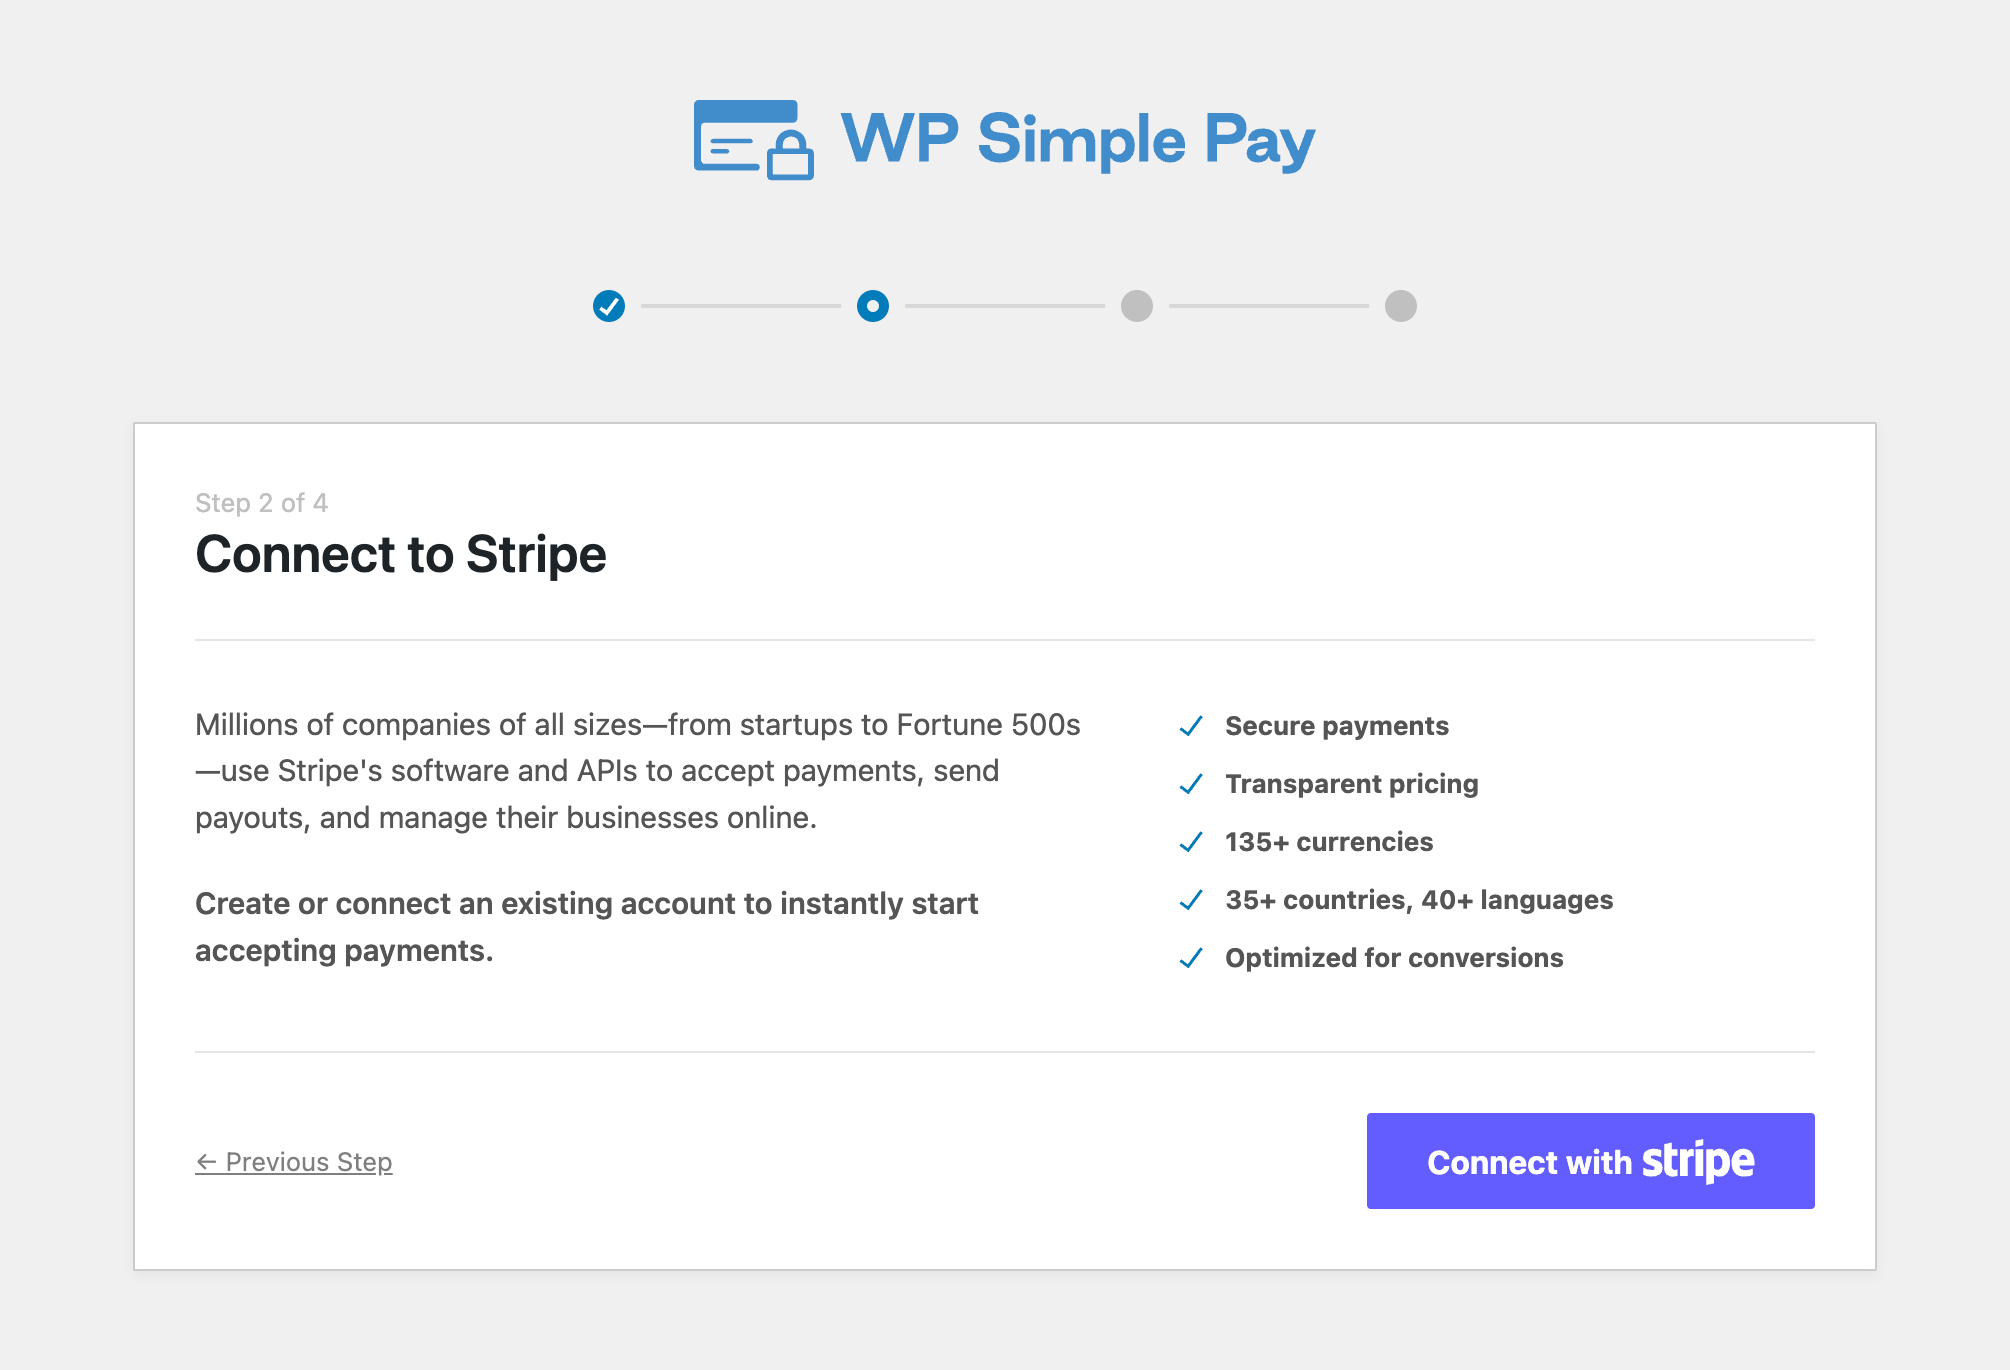
Next up, enter the email address you use for your Stripe account and connect it to your site. If you don’t have a Stripe account, you can easily create one by entering your email address and completing the registration.
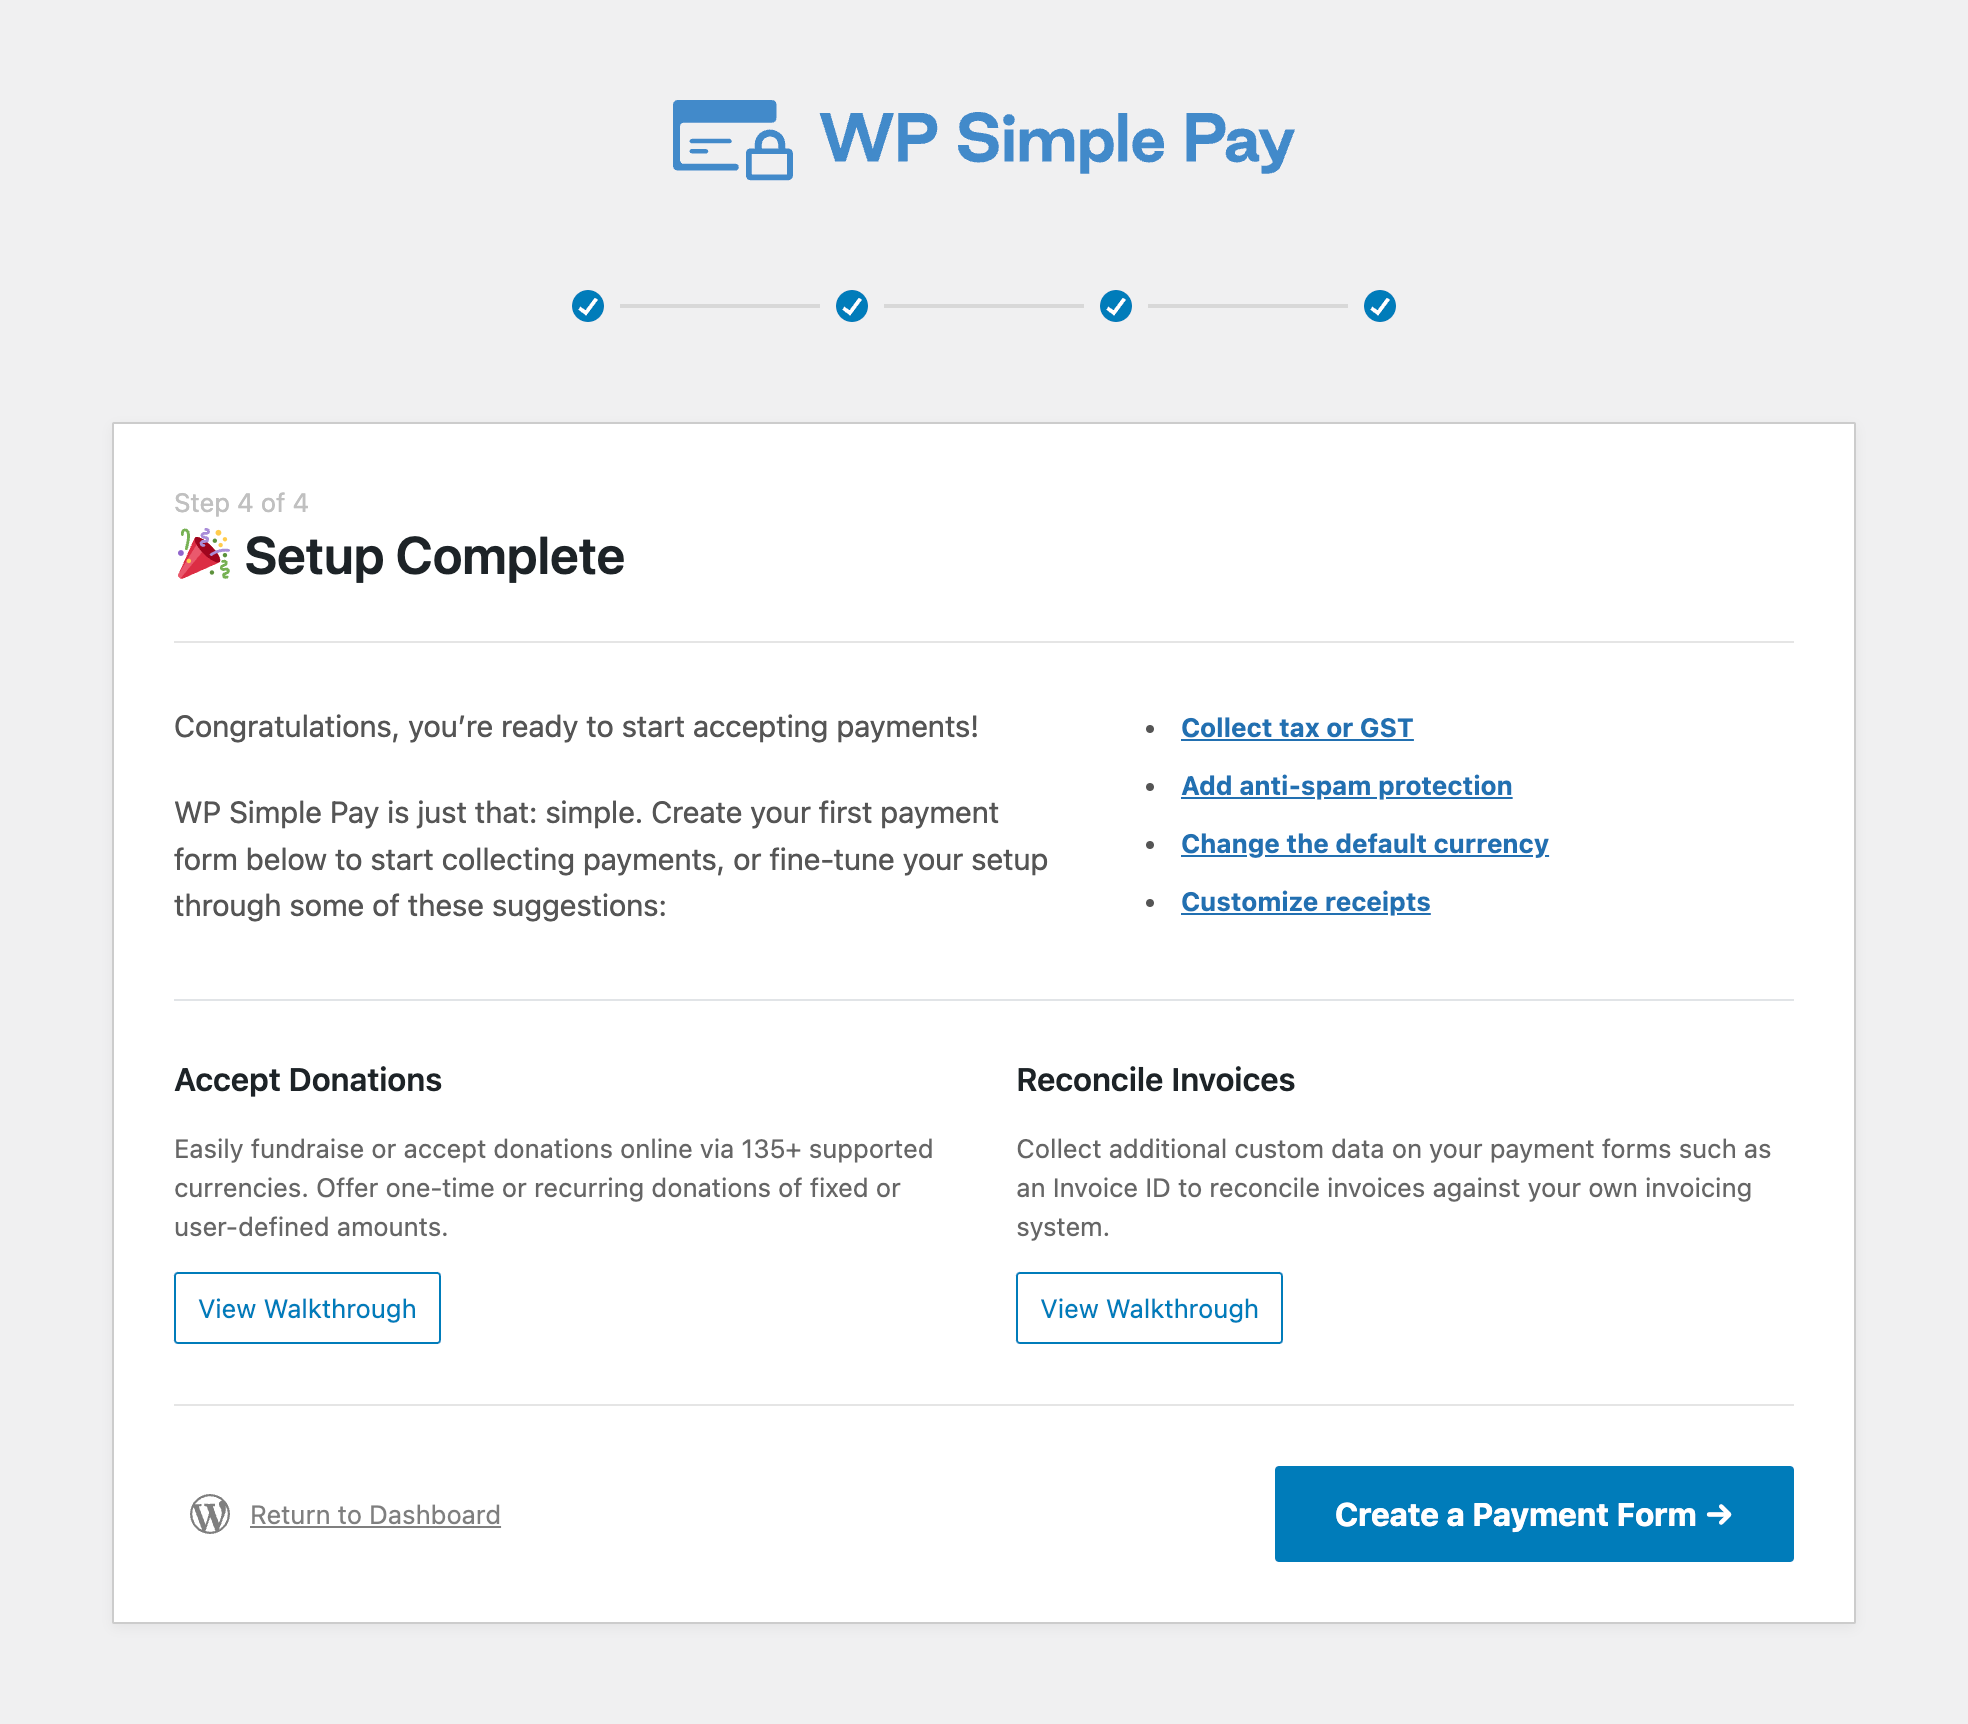
Upon completing this process, you’ll be shown a success page that says, “Setup Complete.” Next, click on Create a Payment Form.
Step 3: Create a Payment Form
Now that you’ve finished setting up the WP Simple Pay plugin and you’ve connected your Stripe account, it’s time to create a payment form.
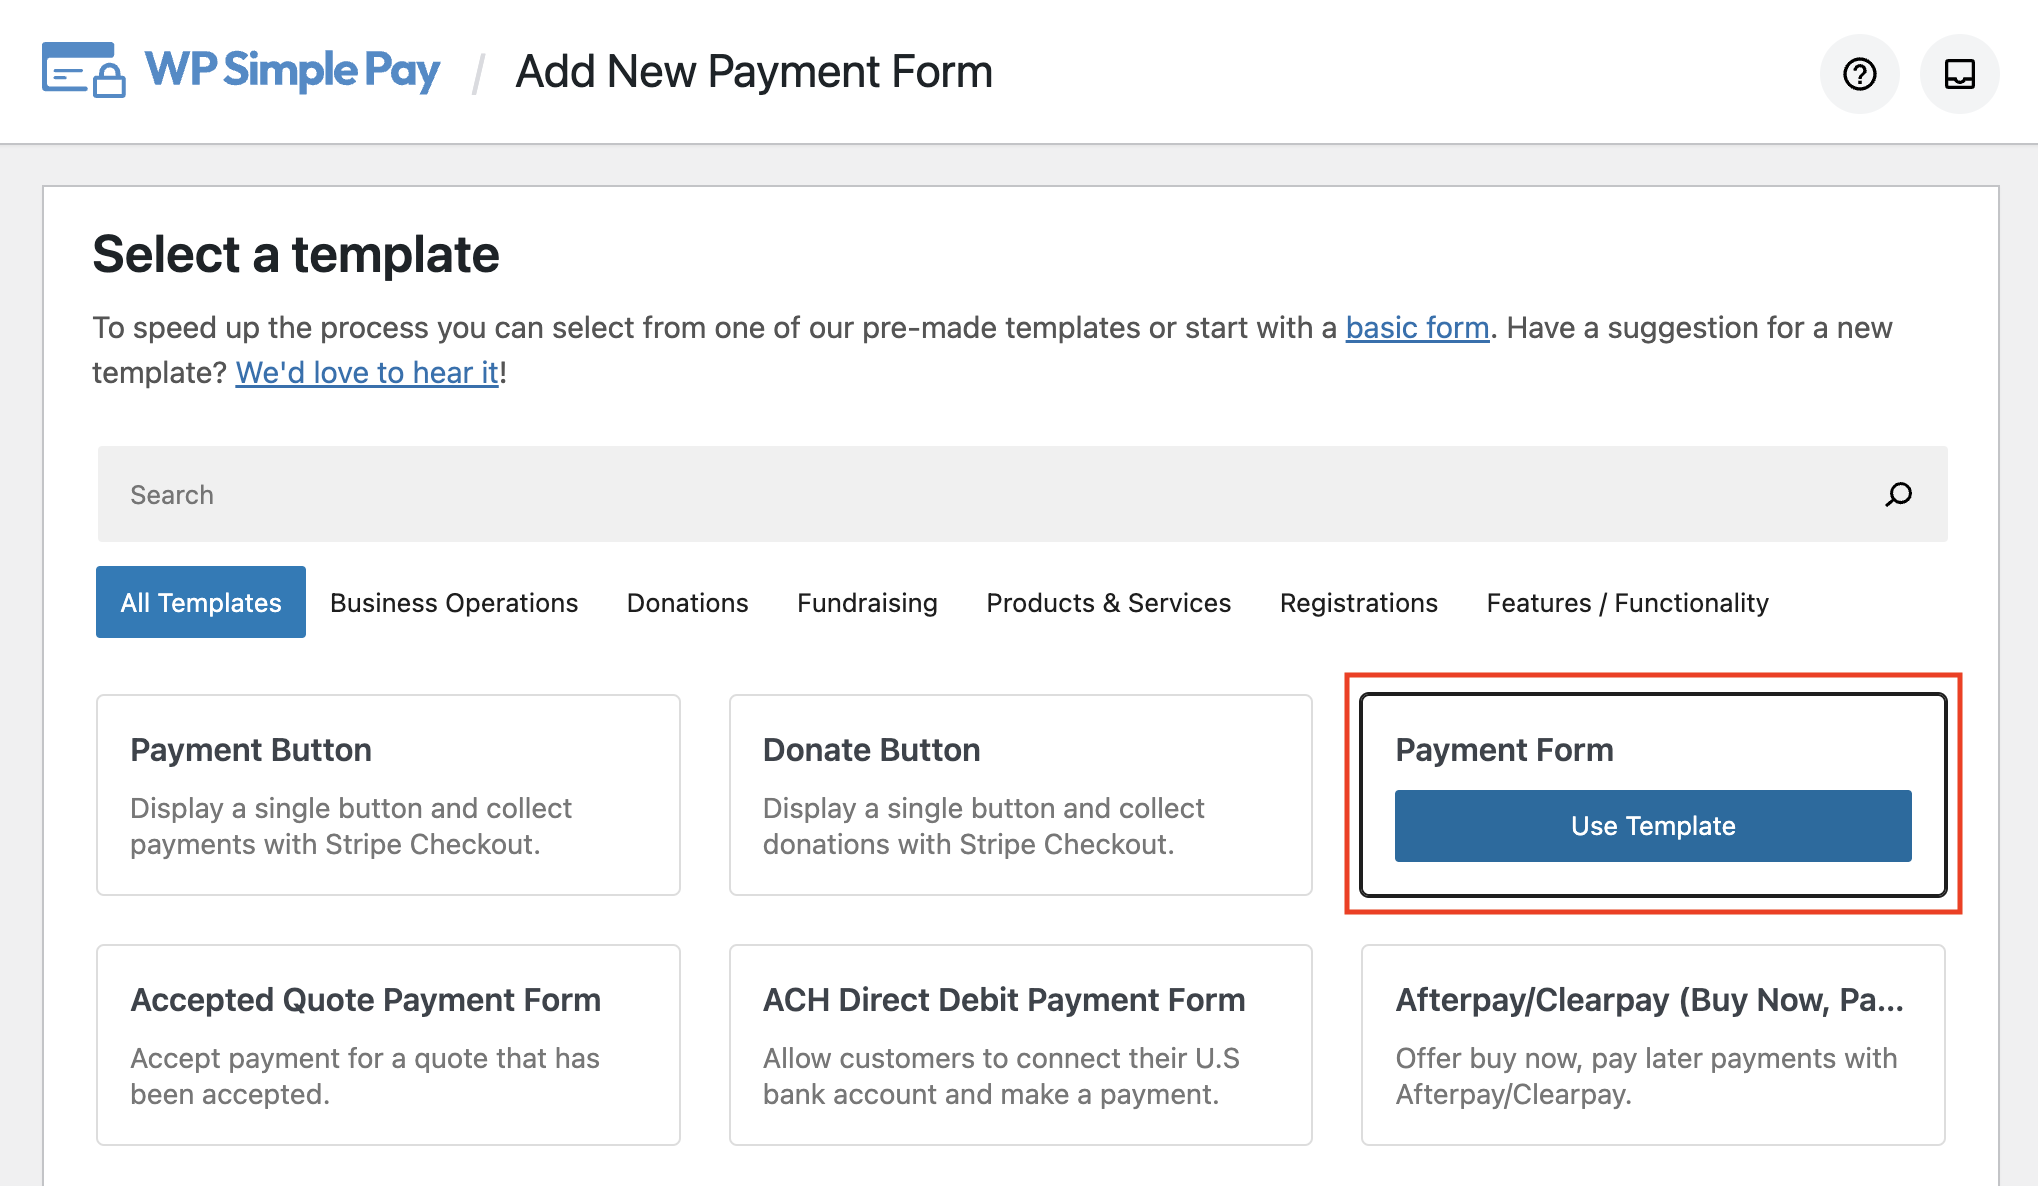
You should have been taken to the templates library page, where you can see that there are tons of pre-built forms available. Go ahead and choose the basic Payment Form template.
Next, in the General tab of the payment form builder page, edit your title and description. This is also where you’ll need to choose between a One-time payment or a Stripe Checkout form. To keep your customers on your site during the checkout process, select One-time payment from the dropdown menu.
Next, click on the Payment tab. Go ahead and add your pricing options and the amounts. This is a great feature if you’re selling products or services with variations. If you’re selling one product at the same price, enter your price amount and choose between a One-time payment and a subscription.
You can also see the list of available payment method options. To reach a wider audience and globalize your business, it’s a good idea to offer several payment options.
Once you’re finished configuring your payment methods, click on the Form Fields tab. WP Simple Pay lets you add, edit, and remove custom form fields to help you customize your forms exactly the way you want.
If you need to set up form scheduling and purchase limits, click on the Purchase Restrictions tab and enter the dates and times.
Step 4: Publish Your Form on Your Site
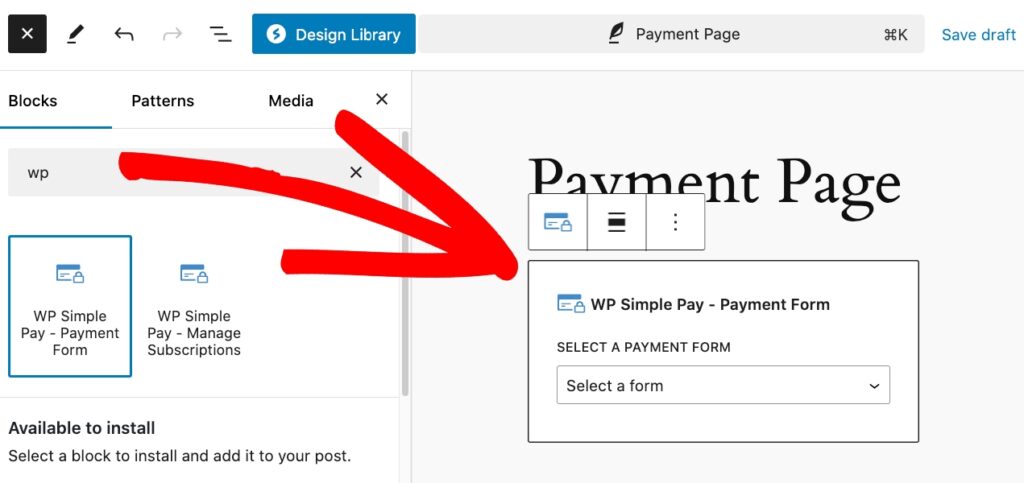
To embed your payment form on a page on your site, simply go to the page and click on the + icon to bring up the WP Simple Pay block. Choose the form you just created from the dropdown and click on Update or Publish.
Step 5: Install and Activate Uncanny Automator
Now that you’ve created your payment form using WP Simple Pay, you’ll need to install and activate Uncanny Automator in WordPress.
Similar to WP Simple Pay, installing the plugin is quick and easy. Just visit the pricing page and purchase the plan best suited to your needs.

Next, download the plugin from your Uncanny Automator account. Then, navigate to Plugins » Add New in the WordPress dashboard. Click on the Upload Plugin button, choose the .zip file, select Install Now, and then Activate.
Step 6: Create an Automation for Your Form
It’s time to create an automation recipe for your WP Simple Pay form that will add new Stripe customers to your Mailchimp mailing list after a purchase is completed on your site.
First, go back to the WP Simple Pay payment form you just created and click on the Automations tab.
Next, find the Mailchimp integration in the list of options or by entering it manually in the search field, and then click on the Automate this Payment Form button.

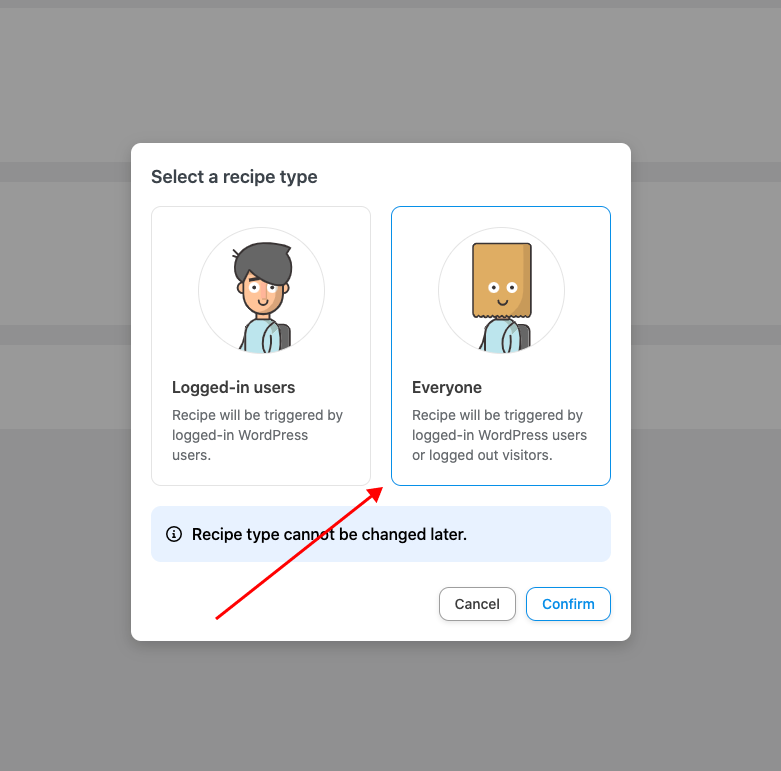
You should now be on the recipe builder page in Uncanny Automator. It will immediately prompt you to choose your recipe type. Click on Everyone and then the Confirm button to continue creating your recipe.
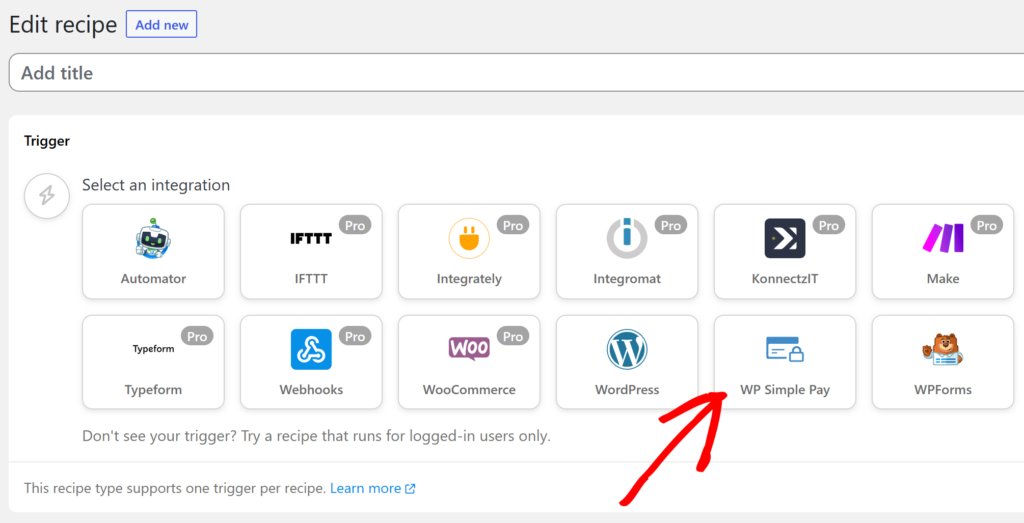
Next, add a title for your recipe that will help you quickly identify this particular automation, and then choose WP Simple Pay for your Trigger.
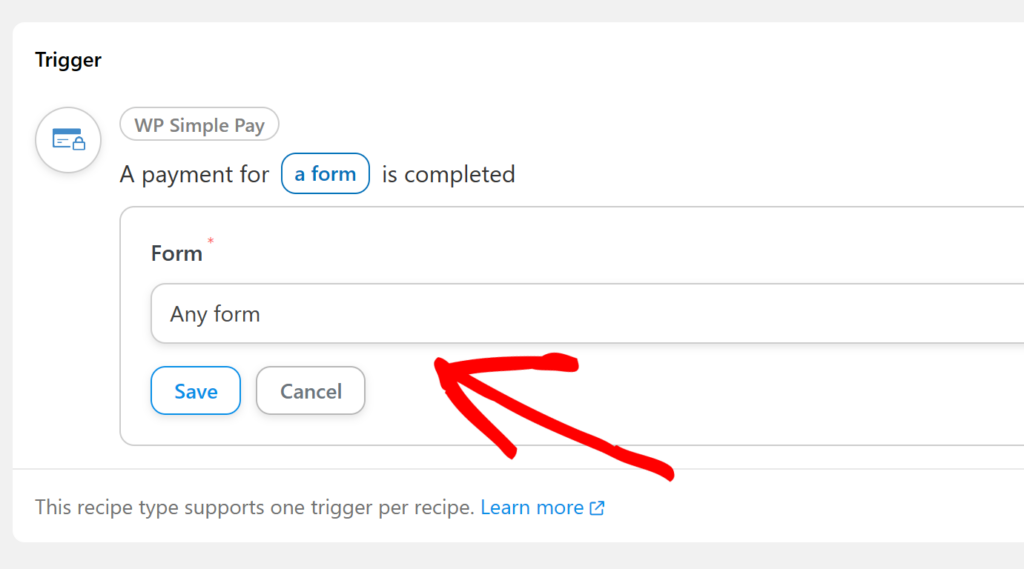
You’ll see a dropdown menu with available trigger options. Go ahead and choose Any form and click Save.
Next, for the Action, click on the Mailchimp icon, and click on Connect account.
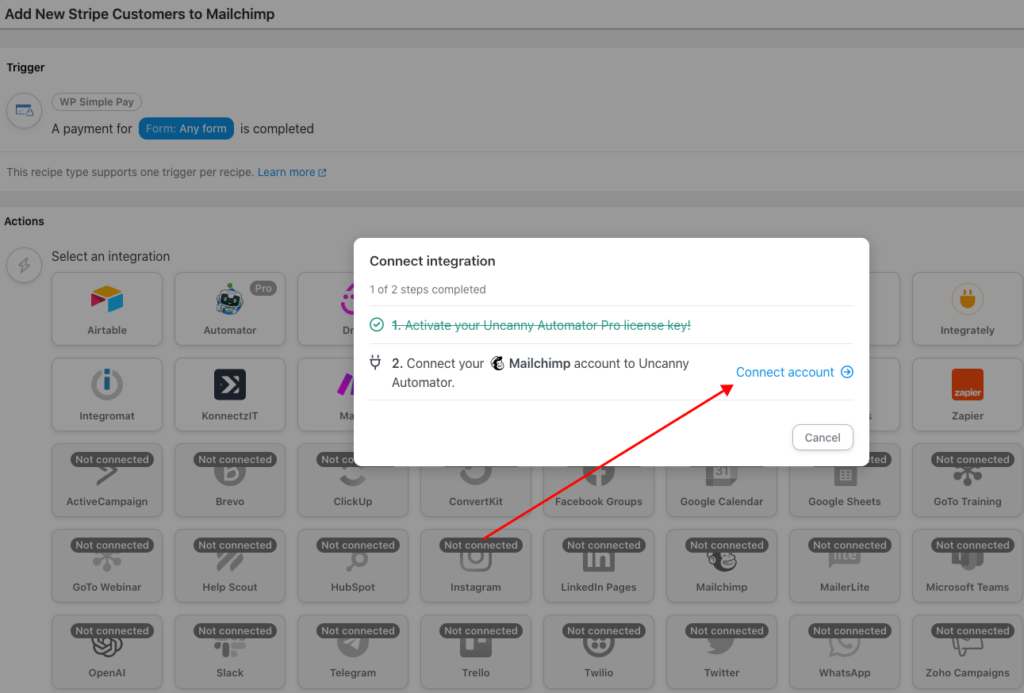
A new window will appear displaying the possible triggers available with the Mailchimp integration. Go ahead and click on the Connect Mailchimp account button.
On the next screen, enter your Mailchimp login information, and click Login. Now, you’ll be asked to authorize Uncanny Automator to access your Mailchimp account. After you’ve read the terms, go ahead and click on Allow.
Once you give access to Uncanny Automator, you will be redirected to the Uncanny Automator Settings tab in the WordPress admin dashboard.
Now that your Mailchimp account is connected to Uncanny Automator, you can finalize your recipe.
From the dropdown menu, click on Add a contact to an audience.
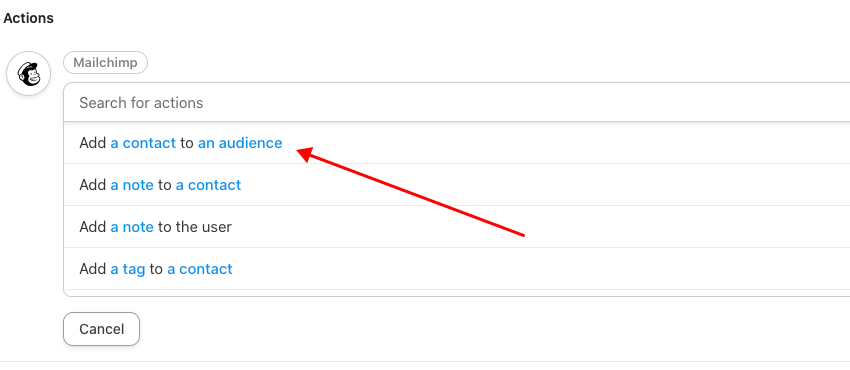
Next, click on the email field, choose Billing email, and click Save.

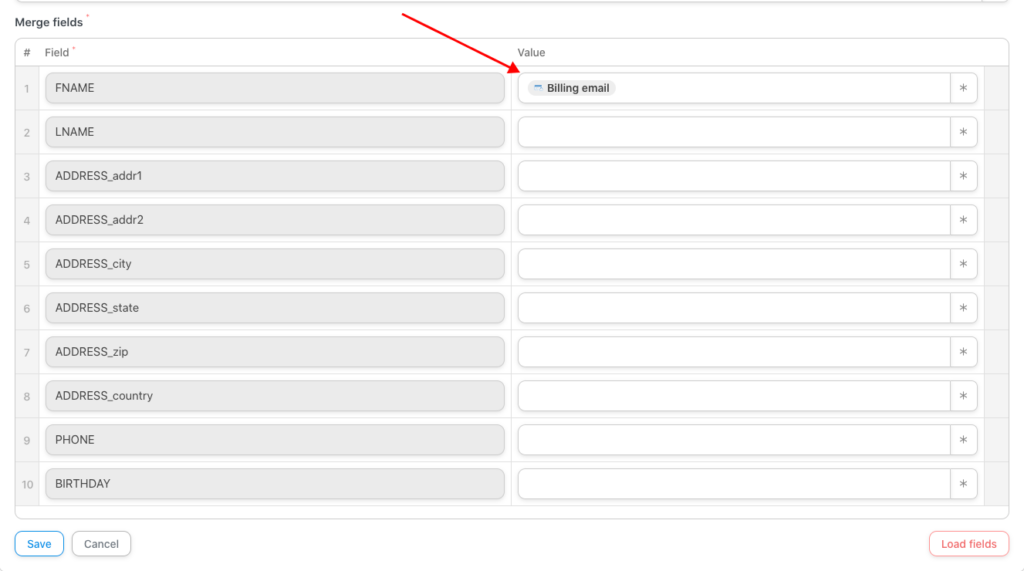
Go ahead and choose your audience (the mailing list you have set up in Mailchimp), and then click on the Load Fields button.
Next, add Billing email for the Value, and then click on Save.
Finally, to ensure your recipe runs smoothly, toggle the switch from Draft to Live.

Now that you’ve created your automation recipe, it’s highly recommended that you perform a test transaction using your WP Simple Pay form. You can check the run log from your WordPress admin dashboard. In addition, logging in to your Mailchimp account and verifying the newly-added contact is a good idea as well.
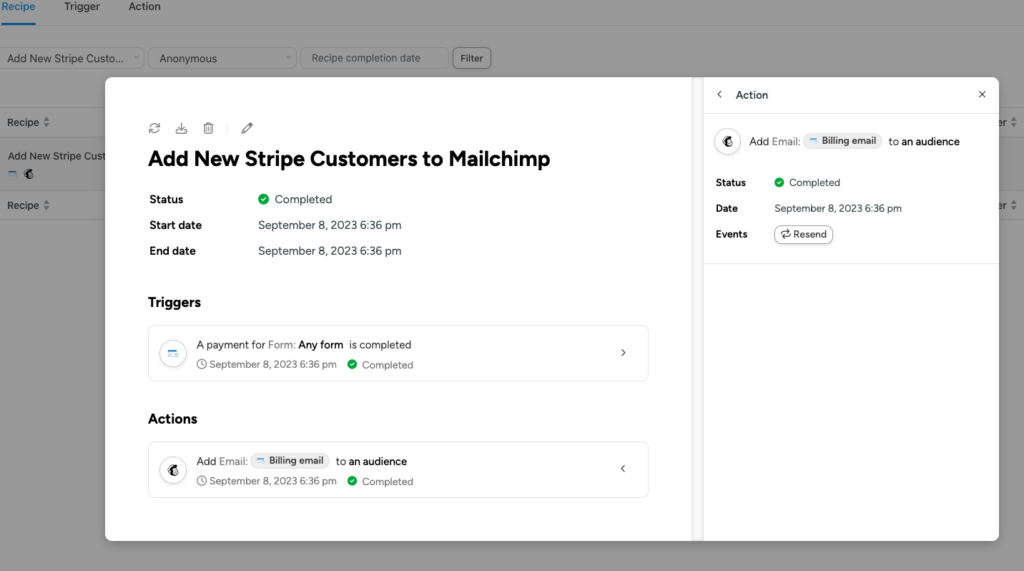
That’s it! We hope this article has helped you add new Stripe customers to your Mailchimp mailing list without using code.
If you liked this article, you might also want to check out our guides on How to Add New Stripe Customers to ActiveCampaign in WordPress and How to Automate Social Proof Posts on Facebook Pages in WordPress.
What are you waiting for? Get started with WP Simple Pay today!
To read more articles like this, follow us on X.
Disclosure: Our content is reader-supported. This means if you click on some of our links, then we may earn a commission. We only recommend products that we believe will add value to our readers.
