How to Connect WordPress Payment Forms with Google Sheets
Last updated on

Do you want to connect your WordPress payment forms with Google Sheets?
For each payment you accept on your site, best practice is to organize its accounting information in a Google sheet. However, adding that data manually can be time-consuming and susceptible to errors.
By connecting your WordPress payment forms with Google Sheets, you can easily automate the task to completely streamline your bookkeeping workflow and track sales and revenue data.
In this article, we’ll show you the easiest way to connect your WordPress payment forms with Google sheets without having to write a single line of code.
Connecting Payment Forms with Google Sheets
You may be asking yourself how it’s possible to automate the task of adding new payments made on your WordPress site to a Google sheet.
The answer is with Zapier!
Zapier is a powerful automation solution that lets you connect your web apps to simplify workflows and improve productivity. Zapier has over 5,000+ connected apps to date.
With that being said, with Zapier’s Stripe + Google Sheets integration, you can easily connect your WordPress payment forms with Google Sheets.
How to Connect Forms with Google Sheets
The best way to connect payment forms with Google Sheets is to use a Stripe payments plugin for WordPress. With the right Stripe payments plugin, you can create payment forms that connect with Google Sheets via the Stripe + Zapier integration.
We strongly recommend using WP Simple Pay, the #1 Stripe payments plugin for WordPress. It lets you easily accept payments on your site without having to create a shopping cart.
One of the best parts about WP Simple Pay is that it works seamlessly with third-party tools to help you drive conversions and keep your workflow running smoothly.
For example, all of the payments and data you collect on your site using WP Simple Pay is transferred to Stripe. This means that the Stripe + Zapier integration allows you to indirectly connect your payment forms with Google Sheets.
WP Simple Pay also integrates with WordPress plugins you may be using already such as AffiliateWP, Divi, and Elementor.
In addition to letting you accept one-time or recurring payments on your site, you can use WP Simple Pay to provide your customers with a user-friendly checkout experience that offers multiple payment method options including credit/debit cards, and ACH direct debit.
The plugin also uses Stripe Connect so you can easily connect your Stripe account with WordPress without having to enter API keys manually.
Additional popular features include advanced custom fields, a drag and drop payment form builder, weekly summary reports, and more.
If you aren’t already using WP Simple Pay, all you need to do to get started is visit the pricing page, choose the best plan for your needs, and upload the plugin from your WordPress admin dashboard.
For more information, check out our detailed guide on how to install WP Simple Pay.
Remove the additional 3% fee!
Most Stripe plugins charge an additional 3% fee for EVERY transaction
…not WP Simple Pay Pro!
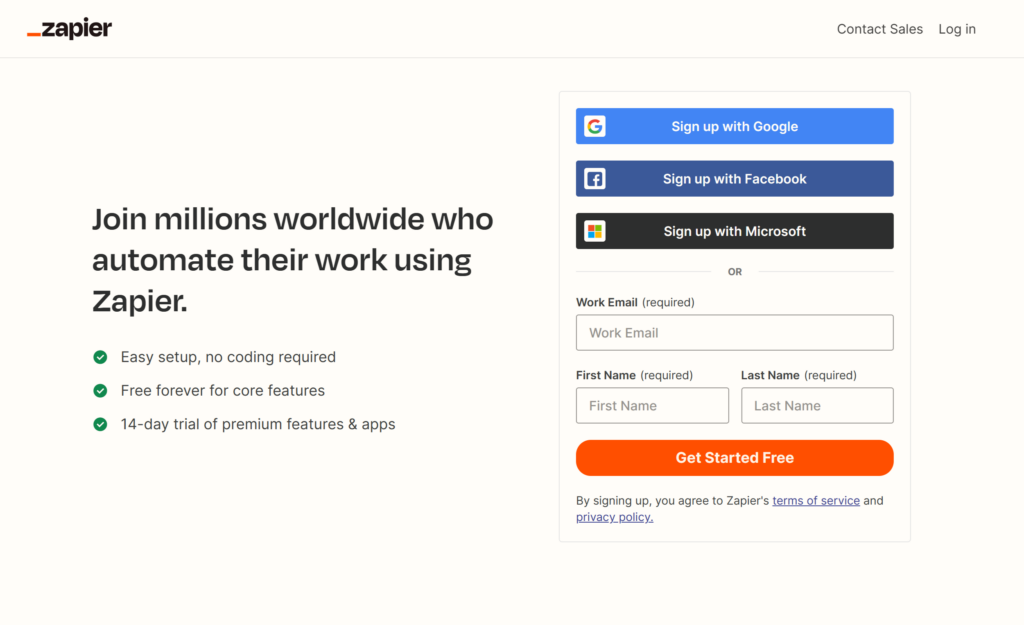
Step1 : Create a Zapier Account
After you’ve installed and activated WP Simple Pay on your WordPress site, you’ll need to sign up for a Zapier account to begin using the Stripe + Zapier integration. This will allow you to connect your payment forms with Google Sheets.
Step 2: Create a Zap
Zapier automations – also known as “zaps” – can be easily customized in the dashboard once you’ve created an account.
While there are tons of different combinations of apps, triggers, and actions you can implement, for this tutorial, we’re going to choose Stripe + Google Sheets for the apps and New Payment → Create Spreadsheet Row for the Action.
This zap will trigger an automation that adds every new payment in Stripe to a new row in the Google Spreadsheet you choose.
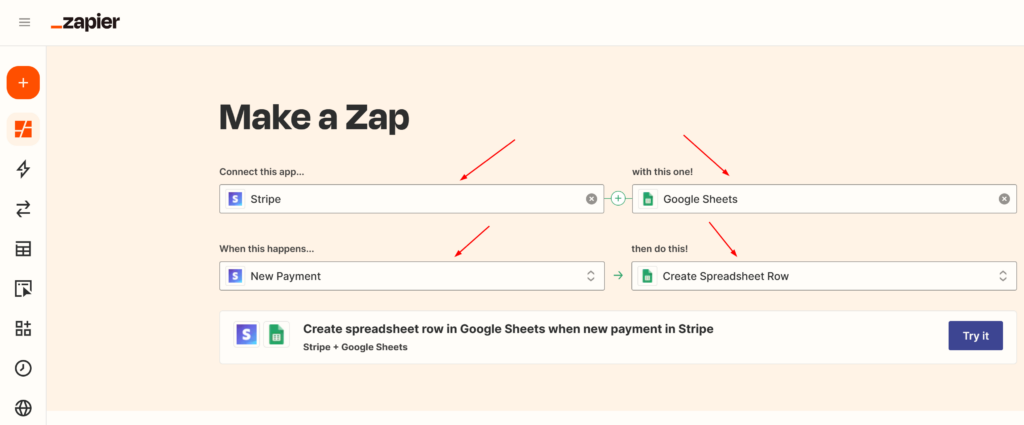
Once you’ve made your zap, go ahead and click on Try it.
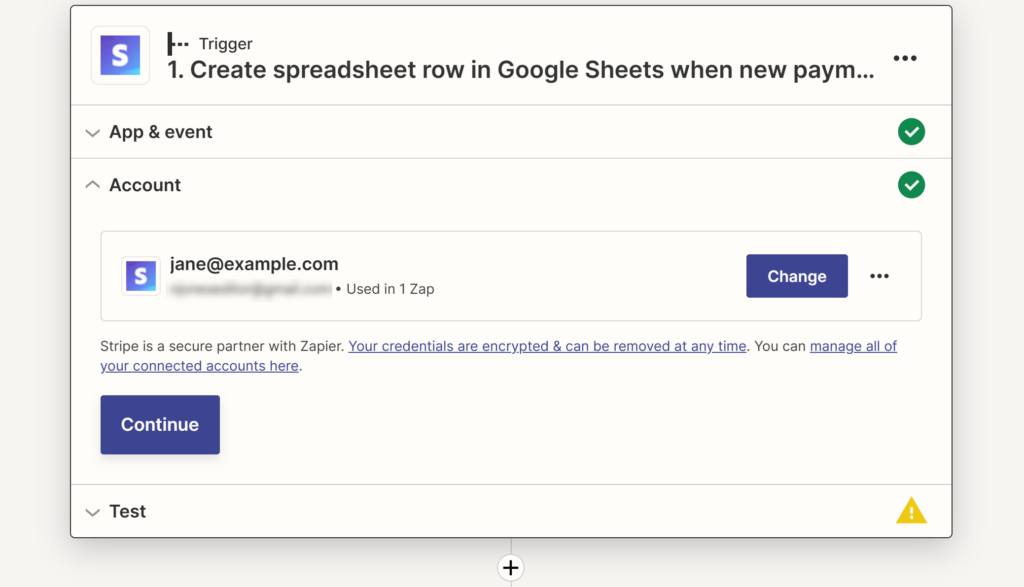
On the next screen, you’ll need to enter your Stripe account details to create your Trigger.
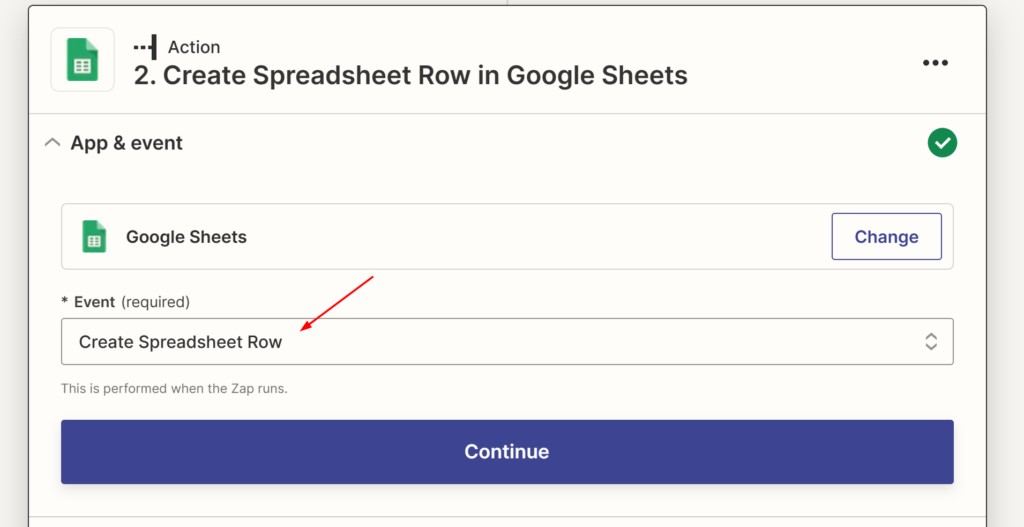
Next, you’ll be prompted to add information related to the Action you want to be triggered. Be sure to choose Create Spreadsheet Row for your event.
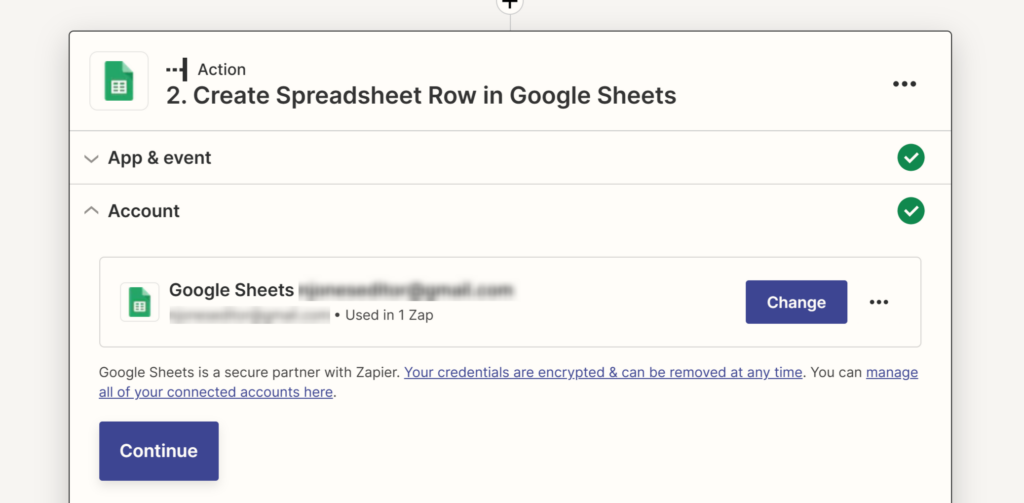
In the next step, you’ll need to connect your Google account by entering your e-mail address and password.
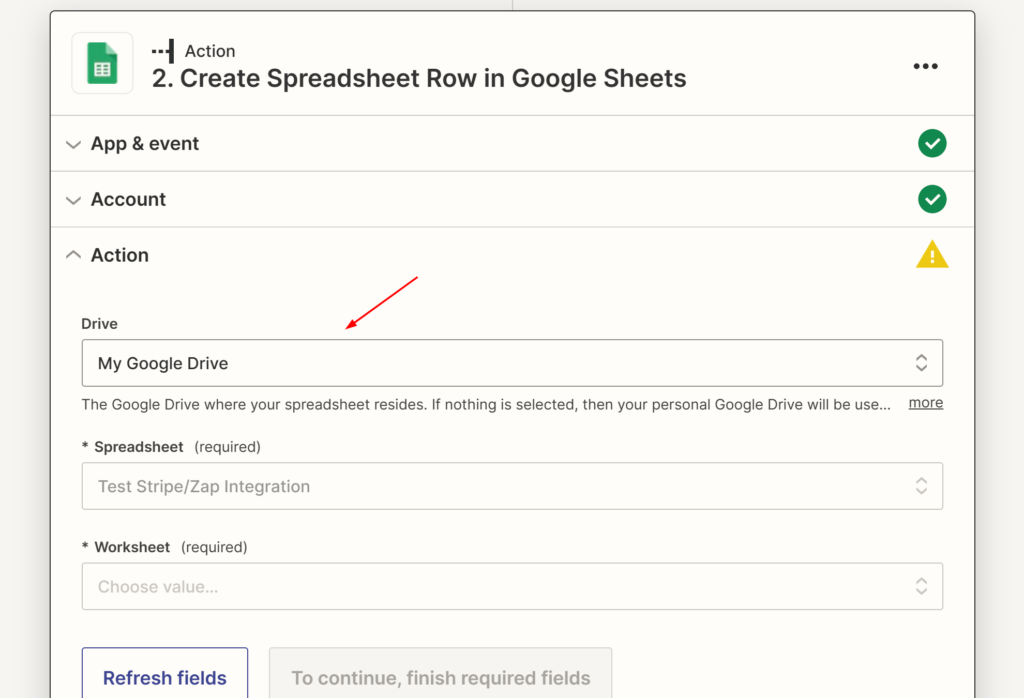
To ensure that your Stripe payment information transfers to the correct Google spreadsheet, you’ll need to select it from the list in the dropdown menu.
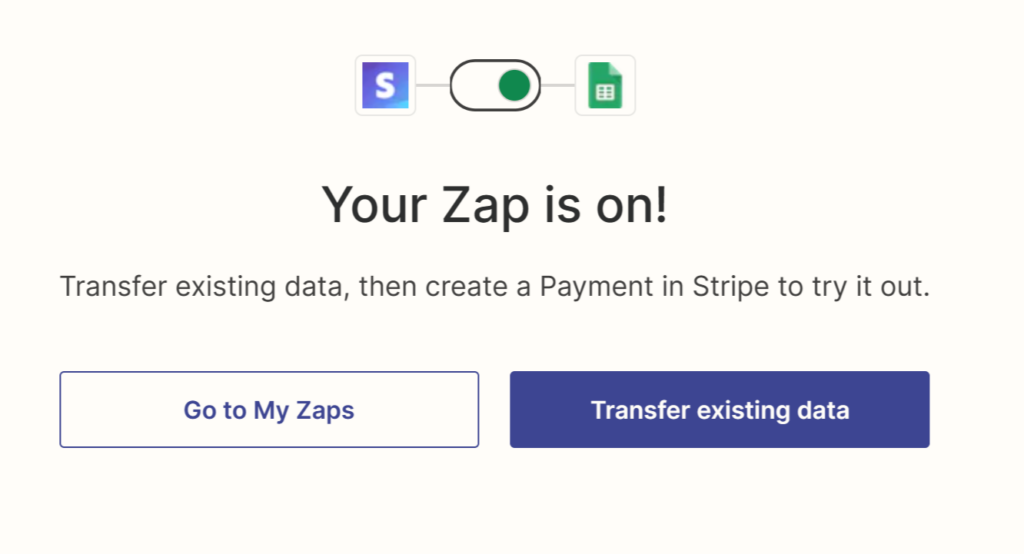
Step 3: Publish Your Zap
Once you’ve finished creating your zap, you can go ahead and click Publish. A confirmation will appear letting you know that your automation is running.
That’s it! It’s really that easy to connect your WordPress payment forms with Google Sheets using WP Simple Pay and Zapier’s Stripe + Google Sheets integration.
When your zap is active, you can refer back to the dashboard at any time to view its usage.
If you liked this article, you might also want to check out 8 Powerful Ways to Automate Stripe Payments with Zapier.
What are you waiting for? Get started with WP Simple Pay today!
To read more articles like this, follow us on X.
Disclosure: Our content is reader-supported. This means if you click on some of our links, then we may earn a commission. We only recommend products that we believe will add value to our readers.


Leave a Reply