
How to Automate Social Proof Posts on Facebook Pages in WordPress
Last updated on

Do you want to automate posts on your Facebook Business Page to enhance social proof?
Using social proof on Facebook Pages can strengthen your brand’s reputation and help grow your business.
In this article, we’ll show you how to integrate your WordPress site with Facebook Pages and automate your social proof posts once a customer completes a purchase.
What is Social Proof?
Social proof is based on the psychological theory that people make purchases once they’ve received validation from the positive experiences of others. You can use it to build trust in your products or services and ultimately increase conversions.
There are several social proof strategies, including online reviews and testimonials. Additionally, adding a post to your Facebook Business Page after a customer has completed a purchase on your site is an excellent way to entice others to do the same.
Using Social Proof on Facebook Pages
The best way to add social proof on your Facebook Business Page is to use a Stripe payments plugin for WordPress and connect it to an automation plugin that supports a Facebook Pages integration.
Uncanny Automator is a powerful plugin for WordPress that allows you to automate different tasks and functionalities on your site. It integrates with tons of apps and platforms to help you cut down on development costs and enhance your site’s capabilities.
The plugin also has a built-in integration with the #1 Stripe payments plugin, WP Simple Pay, so that you can easily accept payments directly on your site and automatically post announcements regarding the sale on your Facebook Business page.
With WP Simple Pay, you can create payment forms for products, services, registrations, events, donations, and more in minutes without setting up a complicated shopping cart. It supports 10+ payment methods and even allows you to remove the additional 3% Stripe processing fee by passing it on to your customers.
Additional features of WP Simple Pay include:
- Advanced Drag & Drop Form Builder: Easily create payment forms in minutes without using any code.
- Custom Form Fields: Add text fields, dropdowns, and checkboxes to collect information from your customers.
- Multiple Payment Methods: Provide your customers with their preferred payment methods, including Cash App Pay, credit and debit cards, ACH Direct Debit, Affirm, Alipay, Apple Pay / Google Pay / Microsoft Pay, and more.
- Per-Form Email Confirmation Messaging and Notifications: Send custom confirmation messages and notifications for individual payment forms.
- And more…
Remove the additional 3% fee!
Most Stripe plugins charge an additional 3% fee for EVERY transaction
…not WP Simple Pay Pro!
How to Automate Posts on Facebook Pages
You will quickly learn that you can use WP Simple Pay and Uncanny Automator together in several different ways to enhance your site and save time. For the sake of this tutorial, we’re going to show you the easiest way to create a post for your Facebook Business page to establish social proof.
The first thing you’ll need to do is install and activate WP Simple Pay on your WordPress site.
Step 1: Download and Activate WP Simple Pay
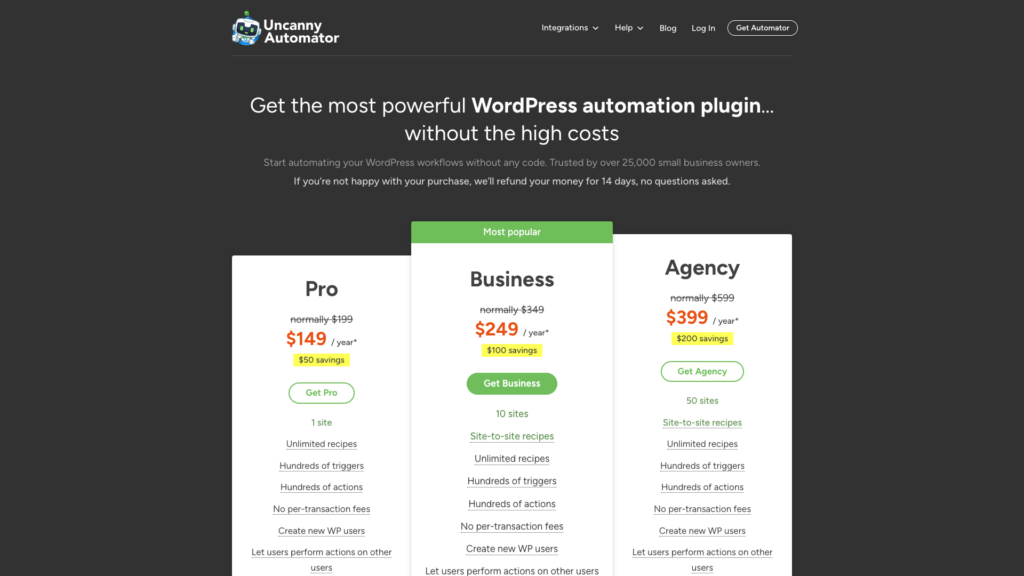
WP Simple Pay offers four unique plans depending on the needs of your business. Simply visit the pricing page and choose the right one for you.
Once you’ve finished purchasing the plugin, you’ll need to download it from your purchase receipt email or from your WP Simple Pay account.
If this is your first time installing a WordPress plugin, don’t worry! We’ve created a detailed guide on how to install WP Simple Pay.
Once the plugin has been downloaded, go to your WordPress dashboard, navigate to Add New under Plugins, and then Upload Plugin.
Next, click on Choose File and locate the WP Simple Pay .zip file on your computer. Then, click Install Now. When the installation is complete after a few seconds, press the Activate Plugin button.
Go ahead and click on Let’s Get Started.

If you didn’t see the setup wizard, simply head over to WP Simple Pay » Settings » Advanced tab and click the Launch Setup Wizard button.
2: Connect WordPress to Stripe
To connect your WordPress site to Stripe, click on Connect with Stripe.

Next up, enter the email address you use for your Stripe account and connect it to your site. If you don’t have a Stripe account, you can easily create one by entering your email address and completing the registration.
Upon completing this process, you’ll be shown a success page that says, “Setup Complete.” Next, click on Create a Payment Form.

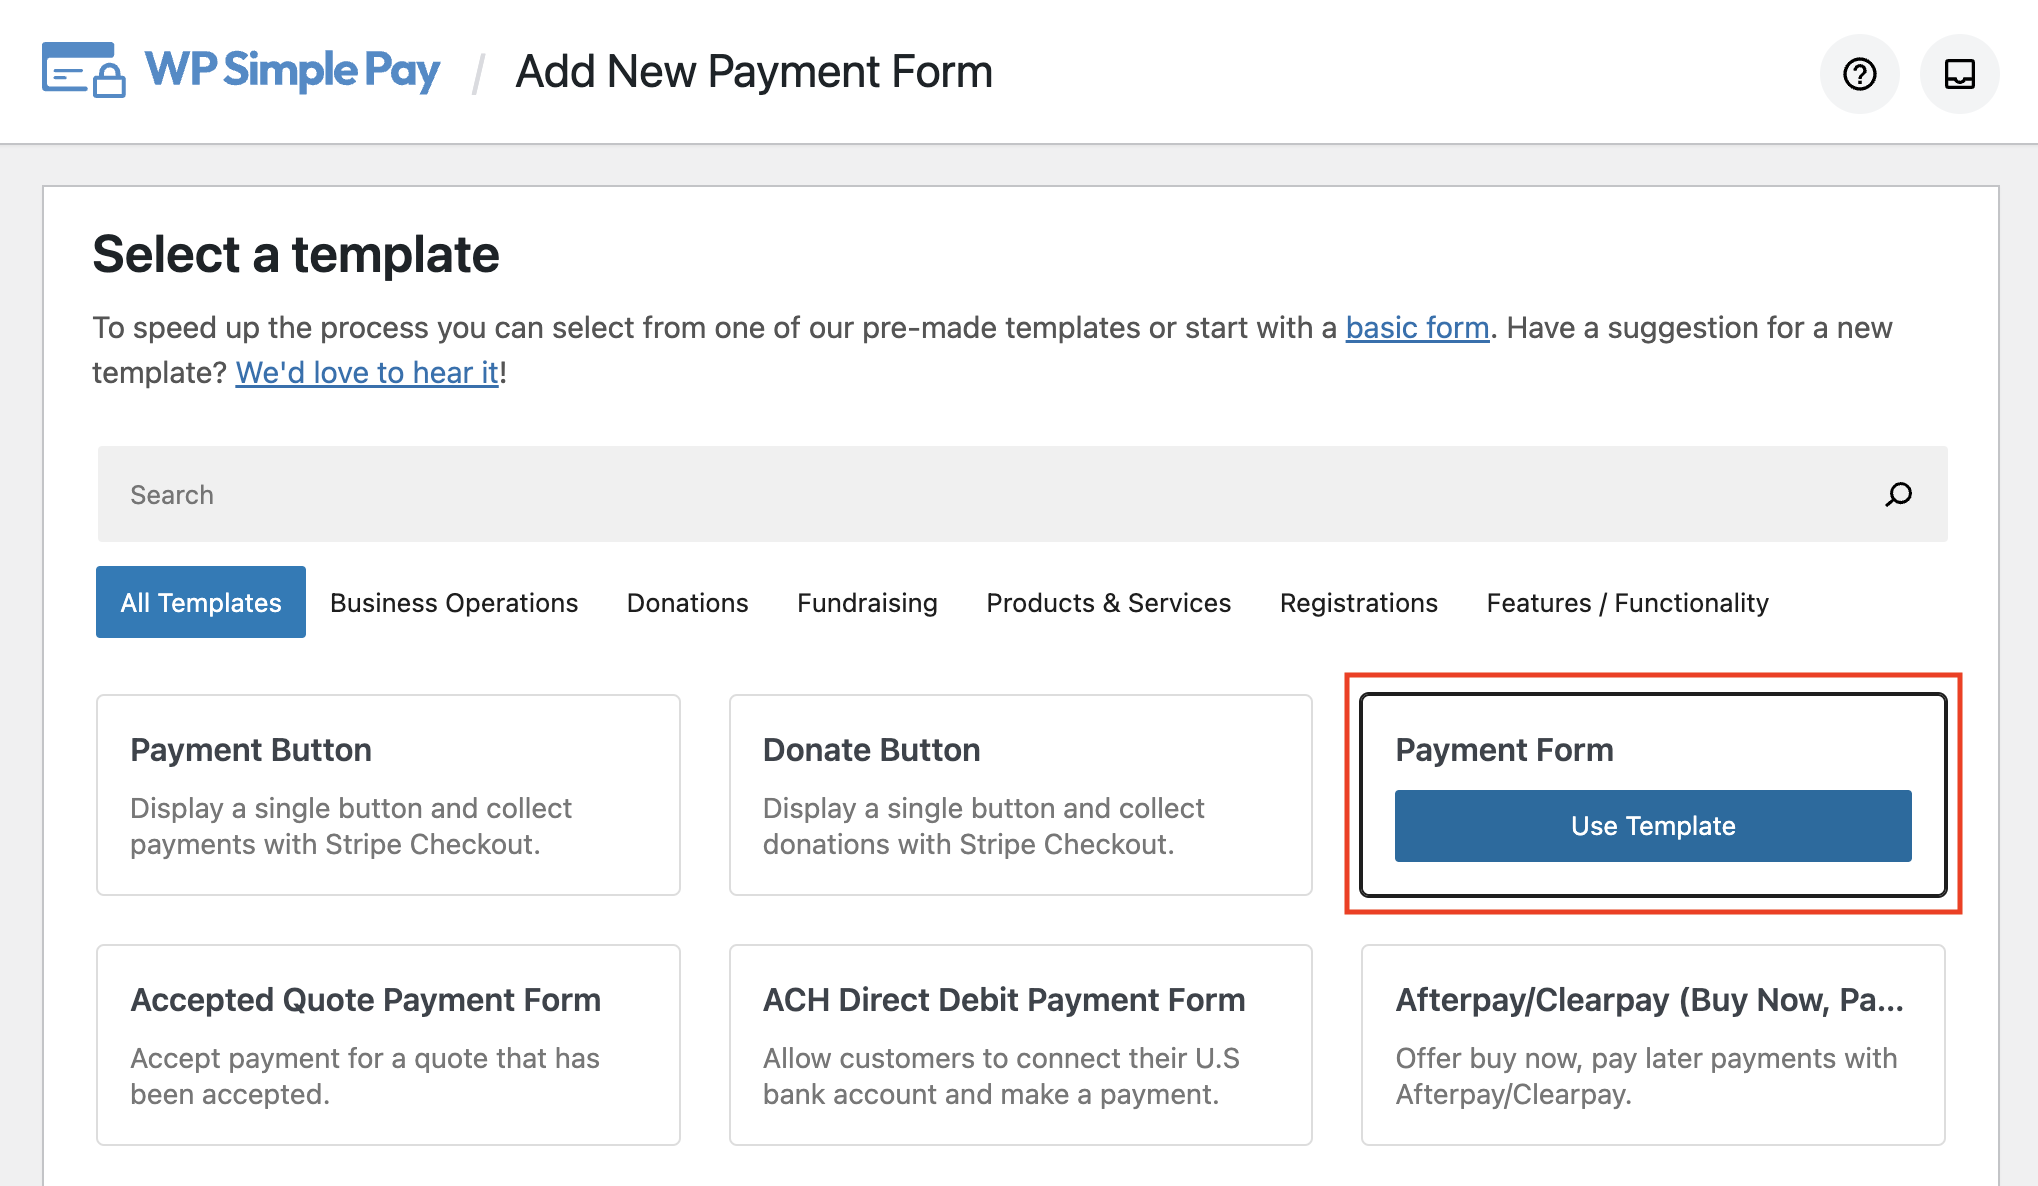
Step 3: Create a Payment Form
Now that you’ve clicked on the Create a Payment Form button, you should be on the payment form templates page. While WP Simple Pay provides tons of pre-built templates to choose from, go ahead and select the basic Payment Form template.
Next, in the General tab of the payment form builder, add the title and description. You can also select either an On-site payment form or an Off-site Stripe Checkout page. To keep your visitors on your site throughout the entire transaction, choose On-site payment.
Once you’re finished, click on the Payment tab. Here is where you can add one or several pricing options and enter the different amounts. You will also need to choose between a one-time payment or a subscription.
Since we’re adding a custom social proof post that will highlight purchases made with this specific form, go ahead and choose a One-time payment.
You’ll also notice the list of available payment method options. In addition to traditional credit and debit cards, it’s always a good idea to offer different non-card payment methods to increase average order values and expand your global reach.
Once you’re finished configuring your payment method options, click on the Form Fields tab. Here, you can add, edit, or remove custom fields to collect additional data from your customers during checkout. You can use the collected information to learn more about your customers, make needed improvements, send custom notifications via SMS, and more.
Next, if you want to set up purchase restrictions, automatic inventory limits, and form scheduling to avoid overselling products with limited availability, click on the Purchase Restrictions tab and enter the requested information.
You’ll notice there are tabs for the Confirmation Page and Email Notifications. These allow you to create custom confirmation messages and email notifications for this individual payment form.
Now that you’ve created your payment form, be sure to click on Publish.
Step 4: Publish Your Payment Form
Now that you’ve published your payment form, it’s time to embed it on a page or a post on your site.
Simply go to the page or post and click on the + icon to bring up the WP Simple Pay block. Choose the form you just created from the dropdown and click on Update or Publish.

Step 5: Install and Activate Uncanny Automator
To automatically generate a social proof post on your Facebook Business Page after a customer completes a purchase using your WP Simple Pay payment form, you’ll need to install and activate Uncanny Automator in WordPress.
The process is similar to installing WP Simple Pay. Simply visit the pricing page and choose the best plan for your budget.
Next, download the plugin from your Uncanny Automator account. Then, navigate to Plugins » Add New in the WordPress dashboard. Click on the Upload Plugin button, choose the .zip file, select Install Now, and then Activate.
Step 6: Create an Automation for Your Payment Form
Now that you’ve installed and activated Uncanny Automator in WordPress, it’s time to create a Facebook Pages automation for your payment form.
With WP Simple Pay, it’s easy to create tons of different automations for specific payment forms directly from the payment form builder.
First, head back over to the payment form you’ve created and click on the Automations tab.
You can find the form in the WordPress admin dashboard by going to WP Simple Pay » Payment Forms.

Next, enter Facebook Pages in the text field provided and click on the Automate this Payment Form button.
From here, you’ll be automatically redirected to the recipe builder page on Uncanny Automator.
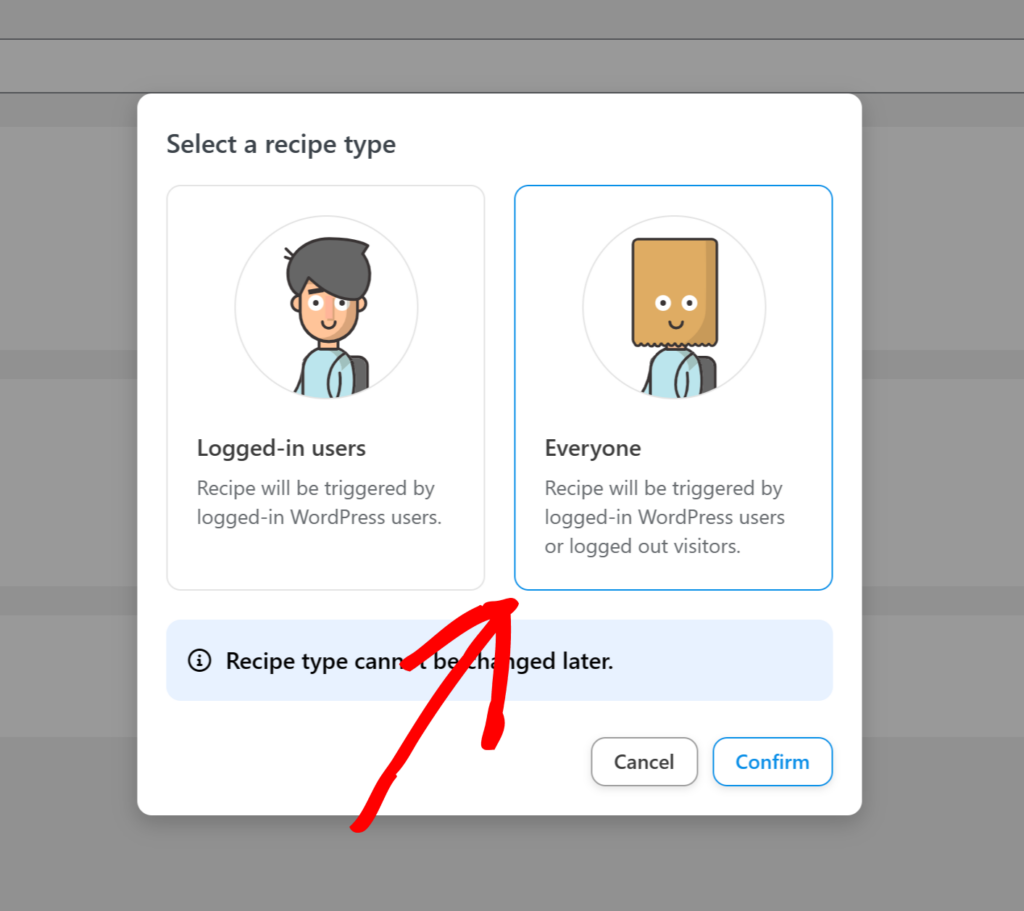
Go ahead and select Everyone for the Recipe Type and click on the Confirm button.
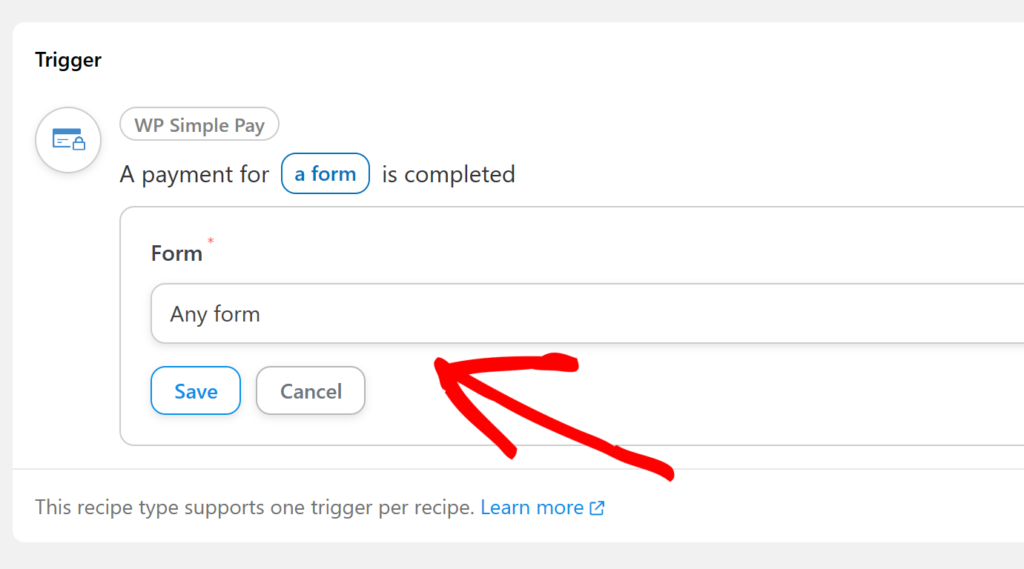
Next, click on the WP Simple Pay icon for your Integration.

For the Trigger, choose Any Form and click Save. You can also select the payment form you just created from the dropdown menu to trigger your Facebook posts for this specific form only.
Now that you’ve set up your trigger, it’s time to configure your action. First, go ahead and click on Add Action.
From the list of integration options, click on Facebook Pages. You’ll be prompted to connect your Facebook Page to Uncanny Automator if you haven’t already done so.
Once you’re finished connecting your Facebook Page to Uncanny Automator, go ahead and choose Publish a post to a Facebook page.
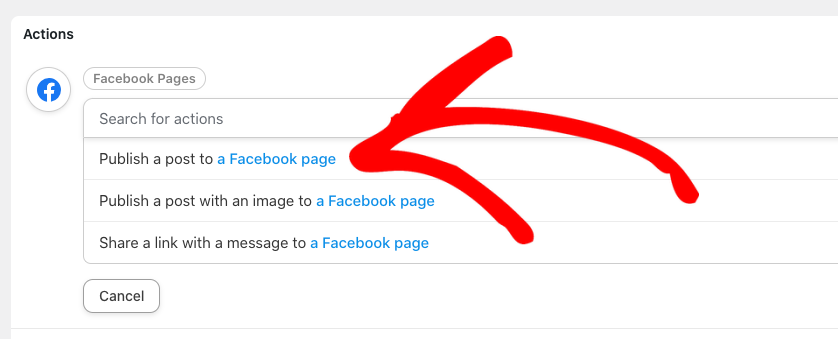
Next, click on your Facebook Page from the dropdown menu and add your custom message in the text field provided. Be sure to click on the Save button when you’re finished.

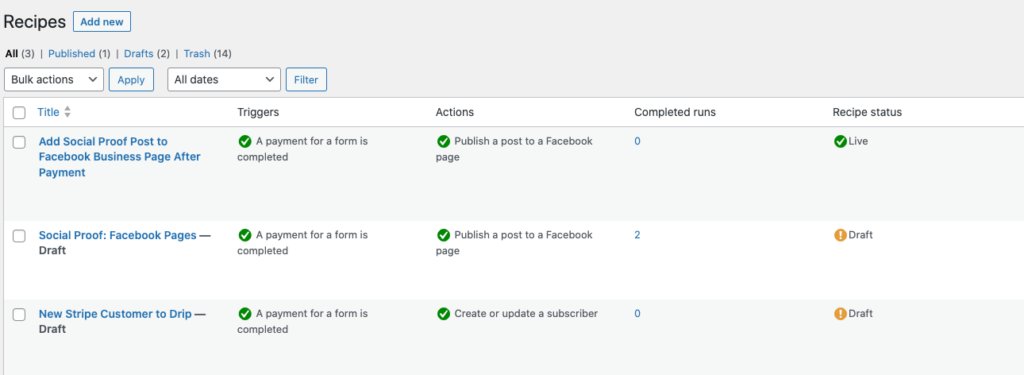
Now that you’ve created your automation recipe for your payment form, toggle the switch from Draft to Live in the upper right-hand part of the screen.
Next, to ensure that the automation is running, navigate to Automator » All Recipes.
Next Steps
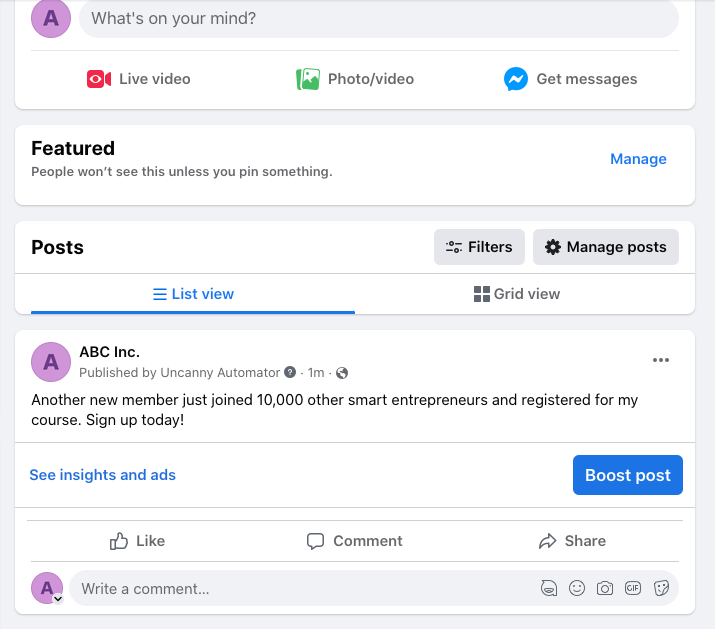
After you have created the Facebook Pages automation for your payment form, it’s highly recommended that you complete a test transaction to ensure the recipe is running smoothly.
You can visit your Facebook Page to see the posted message. It should look something like the one below.
That’s it! We hope this article has helped you learn how to automatically add a social proof post to your Facebook Page.
If you liked this article, you might also want to check out How to Add New Stripe Customers to ActiveCampaign in WordPress.
What are you waiting for? Get started with WP Simple Pay today!
To read more articles like this, follow us on X.
Disclosure: Our content is reader-supported. This means if you click on some of our links, then we may earn a commission. We only recommend products that we believe will add value to our readers.


Leave a Reply