
How to Add SSL/HTTPS in WordPress (Easy Way)
Last updated on

Did you know that if your goal is to accept online payments on your WordPress site, shifting from HTTP to HTTPS and having an SSL certificate are both required?
The purpose of SSL/HTTPS is to keep private information such as credit card numbers, payment details, and email addresses secure.
In this article, we’ll show you how to add SSL in WordPress so that you will keep the data passed between you and your visitors secure. Adding SSL in WordPress will also protect your customers’ personal information during online transactions.
Adding an SSL Certificate in WordPress
Protecting your customers’ private information from fraud attempts and data breaches while making online purchases should be a top priority.
This is why popular online payment service providers like Stripe require any page on your site that hosts a live checkout form to be SSL/HTTPS before allowing you to accept payments.
Without an SSL certificate, your site would put your customers’ data at risk of being intercepted by hackers during online transactions.
WP Simple Pay, the #1 Stripe payments plugin for WordPress, comes bundled with several built-in security measures to keep online transactions secure, such as
- Level 1 PCI-Compliant Payment Forms
- Collects additional authentication on cards compliant with Strong Customer Authentication (SCA) regulations
- Supports Stripe Radar to block fraudulent payments
- One-time password (OTP) verification for payments via email
- And more…
In addition to its security measures, WP Simple Pay offers features such as an advanced drag-and-drop payment form builder, personalized payment receipt templates, and more.
Now, let’s take a look at how to add SSL in WordPress.
Step 1. Install and Activate WP Simple Pay
Before your site can begin securely accepting live payments, you’ll first need to install and activate WP Simple Pay.
Remove the additional 3% fee!
Most Stripe plugins charge an additional 3% fee for EVERY transaction
…not WP Simple Pay Pro!
Just go to the pricing page, pick a plan, and create a WP Simple Pay account. Then download the plugin from your account and install it on your site by uploading it.
For instructions, follow our detailed guide on how to install WP Simple Pay.

If you didn’t see the setup wizard, simply head over to WP Simple Pay » Settings » Advanced tab and click the Launch Setup Wizard button.
2: Connect WordPress to Stripe
To connect your WordPress site to Stripe, click on Connect with Stripe.

Next up, enter the email address you use for your Stripe account and connect it to your site. If you don’t have a Stripe account, you can easily create one by entering your email address and completing the registration.
Upon completing this process, you’ll be shown a success page that says, “Setup Complete.” Next, click on Create a Payment Form.

Step 3. Enable Your Free SSL Certificate
Now that you’ve installed and activated WP Simple Pay, and connected WordPress to your Stripe account, you’re ready to enable your SSL certificate.
There are different options available for you to get a free SSL certificate for your site depending on what WordPress hosting company you use and your level of coding knowledge.
The easiest way to enable your SSL certificate is by choosing one of the following WordPress hosting companies listed below. All of these companies offer free SSL certificates with their hosting plans.
For the purpose of this tutorial, we’re going to use our example Bluehost hosting account to demonstrate how to enable your free SSL certificate.
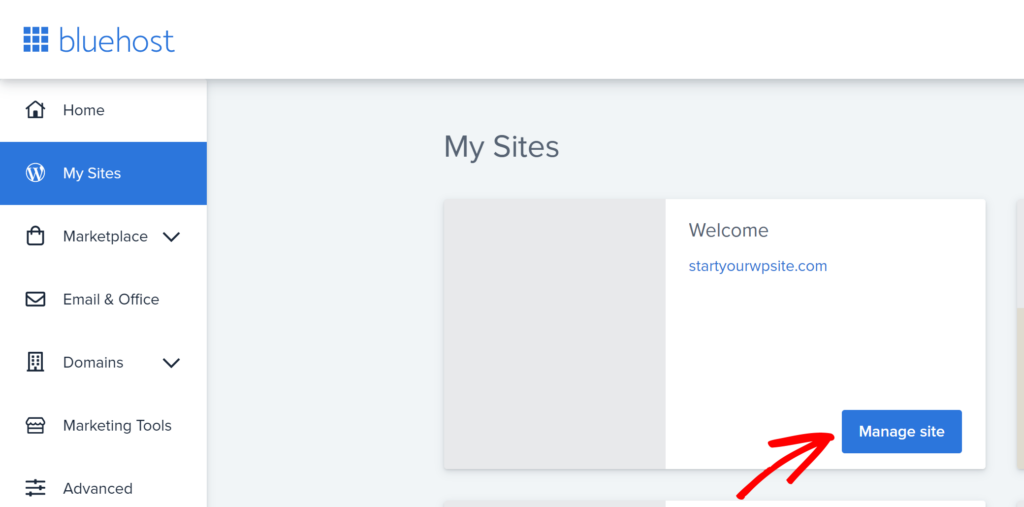
Simply log in to your Bluehost account’s dashboard and navigate to My Sites » Manage Site page. Be sure to choose the domain you want to make SSL certified.
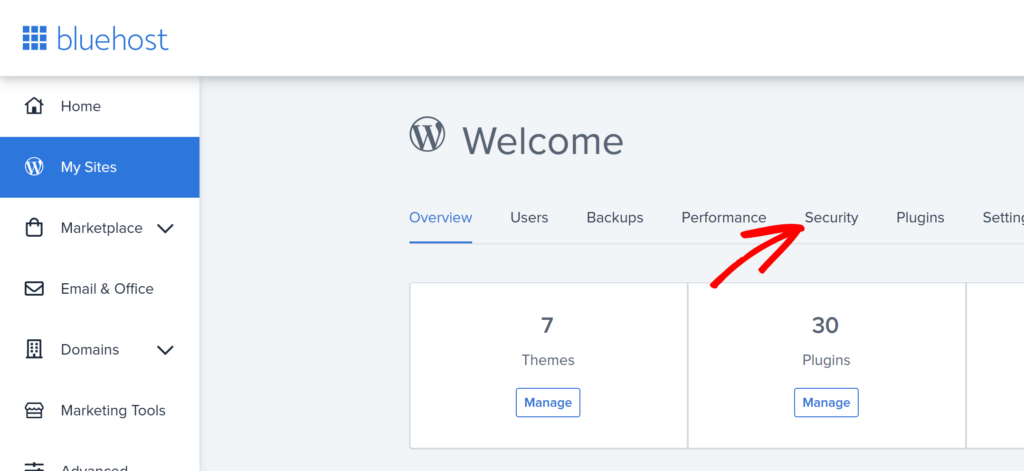
Next, click on the Security tab.
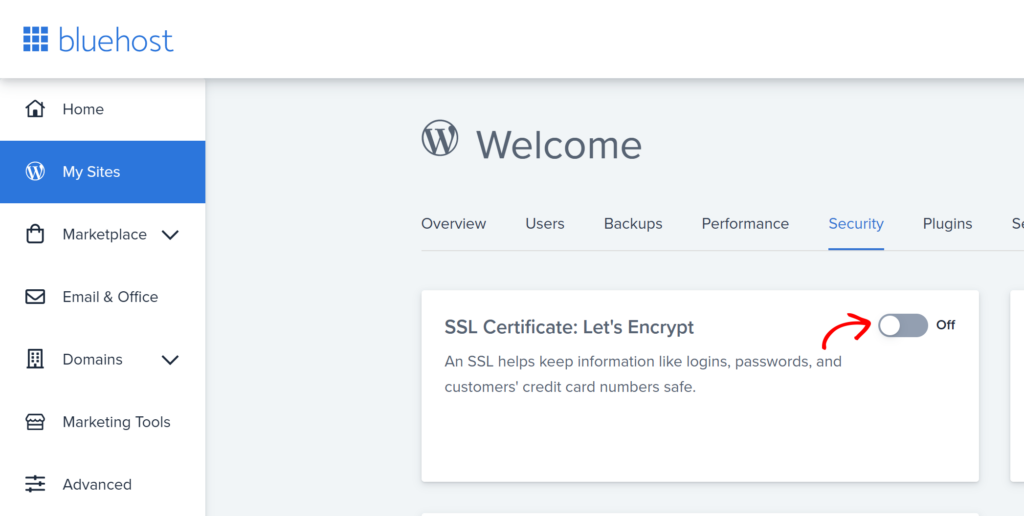
Now, you’ll want to turn the toggle switch on to enable SSL.
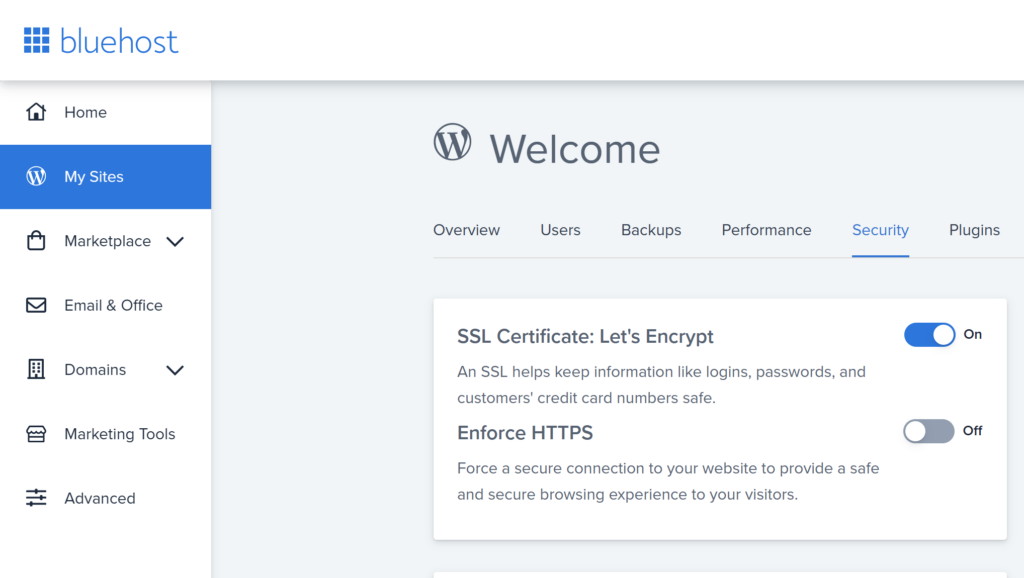
Once SSL is enabled, your dashboard should look something like this.
Step 4. Set Up SSL/HTTPS in WordPress
Now that you have enabled your SSL in Bluehost (or your hosting site’s cPanel dashboard), you’ll need to configure WordPress to start using HTTPS rather than HTTP in all of your site’s URLs.
The easiest way to do this is to install the Really Simple SSL plugin in WordPress.
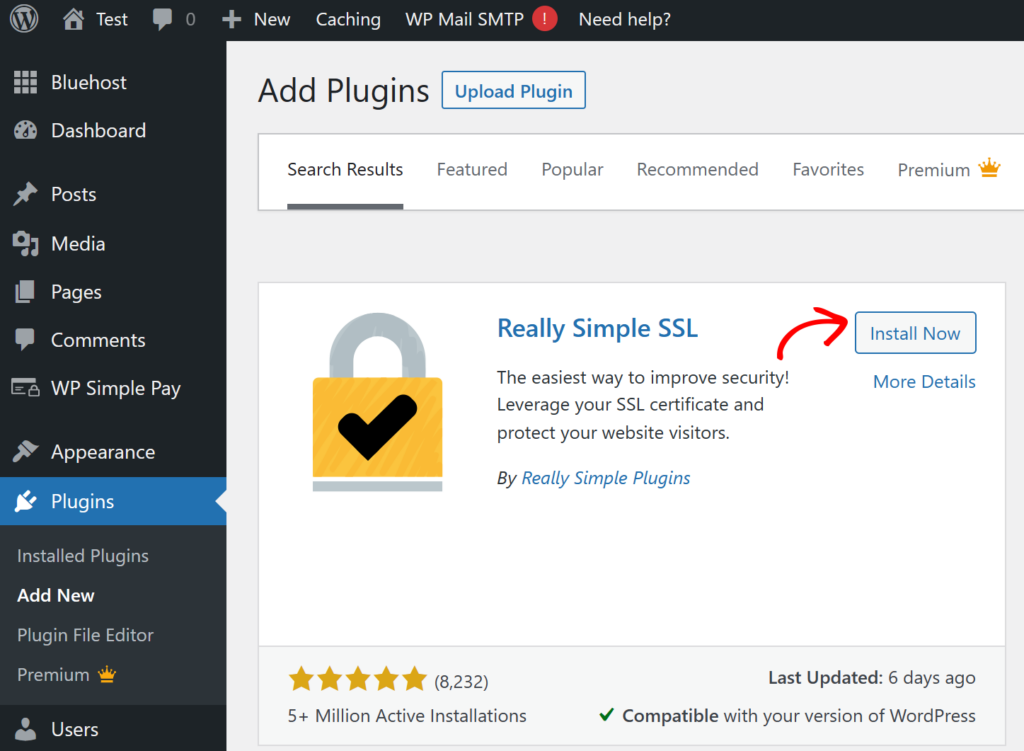
You can do this by visiting your WordPress dashboard and clicking on Plugins >> Add New in the left panel.
Next, enter ‘Really Simple SSL’ in the search bar and click on Install Now, and then Activate.
Next, click on the Activate SSL button.
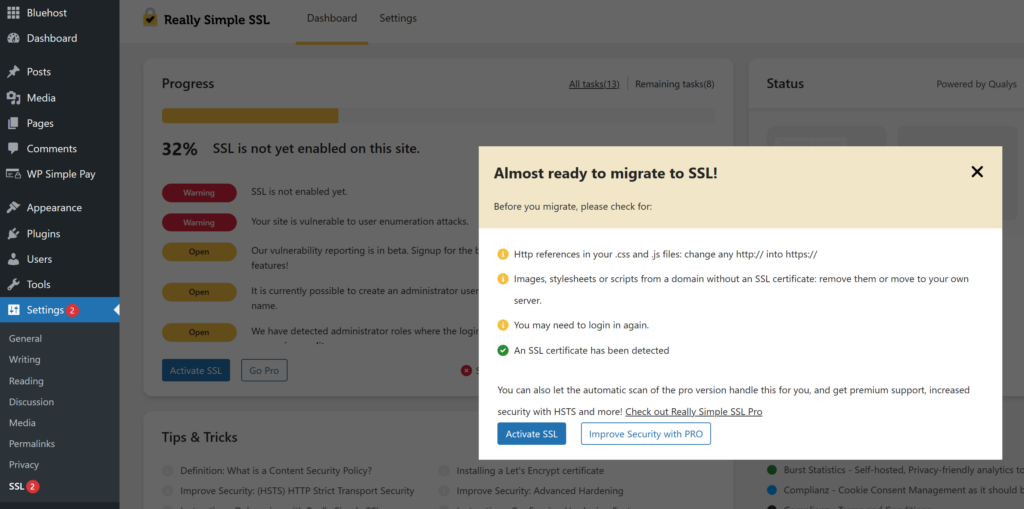
Once you’ve installed and activated the Really Simple SSL plugin, it will automatically check to see if your SSL certificate is enabled.
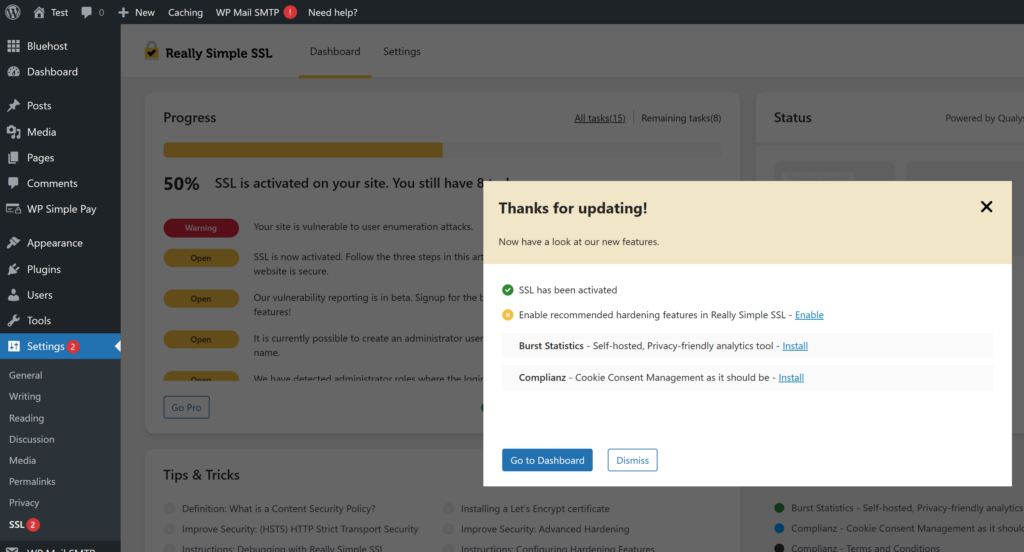
After that, it will turn on HTTP to HTTPS redirect and change your site settings to start using SSL/HTTPS.
Next, you’ll want to check to make sure your SSL certificate is working by typing in your domain name in your browser and navigating to your site.
You should see HTTPS:// and a padlock appear before your domain name and all additional pages on your site to show that your site has been labeled as secure.

There is a manual method to add SSL in WordPress that is a bit more complicated than using the Really Simple SSL plugin.
For a detailed step-by-step guide, check out how to switch WordPress from HTTP to HTTPS.
We hope this article has helped you add SSL in WordPress using the plugin method so that you can start securely accepting payments on your site.
If you liked this article, you might want to check out How to Fix WordPress Not Sending Transactional Emails.
What are you waiting for? Get started with WP Simple Pay today!
To read more articles like this, follow us on X.
Disclosure: Our content is reader-supported. This means if you click on some of our links, then we may earn a commission. We only recommend products that we believe will add value to our readers.


Leave a Reply