How to Fix WordPress Not Sending Transactional Emails Issue
Last updated on

Are you looking for an easy way to fix your WordPress not sending transactional emails issue?
Reconfiguring your WordPress site to send transactional emails using SMTP (Simple Mail Transfer Protocol) rather than the PHP mail function will ensure your emails get authenticated to improve deliverability.
In this article, we’ll show you how to fix the transactional emails not sending issue on your WordPress site, so you can begin successfully sending purchase confirmation emails, receipts, and other notifications with higher acceptance rates.
What Are Transactional Emails?
Transactional emails are sent to users to confirm a successful purchase on your site. They also include shipping information, receipts, and specific details about the status of the online order.
Ensuring timely transactional emails is essential to maintaining trust between you and your customers and keeping them engaged with your brand.
WP Simple Pay, the #1 Stripe payments plugin for WordPress, is the perfect way for you to easily accept payments on your site and successfully send your customers transactional emails.
One of the best parts about the plugin is that it lets you create transactional emails like payment receipts using styled, pre-built templates. The plugin also offers the ability to configure additional email notifications including payment notifications, upcoming invoices, and invoice receipts.
WP Simple Pay also offers powerful insights into how your payment forms are performing through weekly summary reports that are delivered straight to your inbox.
Why Install a SMTP Plugin?
One of the most common reasons why transactional emails sent from a WordPress site are not successfully delivered to recipients’ inboxes is that the site’s hosting server is not configured to use the PHP mail function. WordPress uses the PHP mail function by default.
With that said, even when a WordPress site’s hosting server is configured to use the PHP mail function, anti-spam tools implemented by popular email service providers (mailers) like Gmail prevent transactional emails from reaching their destination. This is because the source of the emails is not authenticated by the mailer, causing them to be marked as spam.
The best way to ensure that your site’s transactional emails get authenticated and achieve close to 100% deliverability is to install a SMTP plugin that integrates your site with a SMTP server and supports a dedicated SMTP mailer.
What is WP Mail SMTP?
WP Mail SMTP is a plugin that lets you reconfigure your WordPress site to use SMTP to send emails rather than the PHP mail function. It integrates with a SMTP-supported mailer to ensure your transactional emails get authenticated.
The best part about the plugin is that it has evolved into a complete management tool used for tracking, monitoring, and storing your emails. While WP Mail SMTP is compatible with several SMTP mailers, we recommend choosing SendLayer because it’s the best email delivery platform for sending transactional emails.
Step 1. Install WP Simple Pay in WordPress
First, you’ll need to install and activate WP Simple Pay to start setting up payment forms on your site and sending transactional emails to your customers.
You can do this by going to the pricing page and choosing a plan. Next, you’ll need to download the plugin from your account and install it on your site.
Remove the additional 3% fee!
Most Stripe plugins charge an additional 3% fee for EVERY transaction
…not WP Simple Pay Pro!
For a detailed guide, check out how to install WP Simple Pay.
Step 2. Install WP Mail SMTP
By installing the WP Mail SMTP plugin, you’ll be able to reconfigure your WordPress site to use SMTP instead of the PHP mail function. This will authenticate your emails to ensure they are delivered successfully.
Once you’ve completed installing and activating WP Simple Pay, you can head over to the plugin in the WordPress dashboard and click on Settings in the left panel.
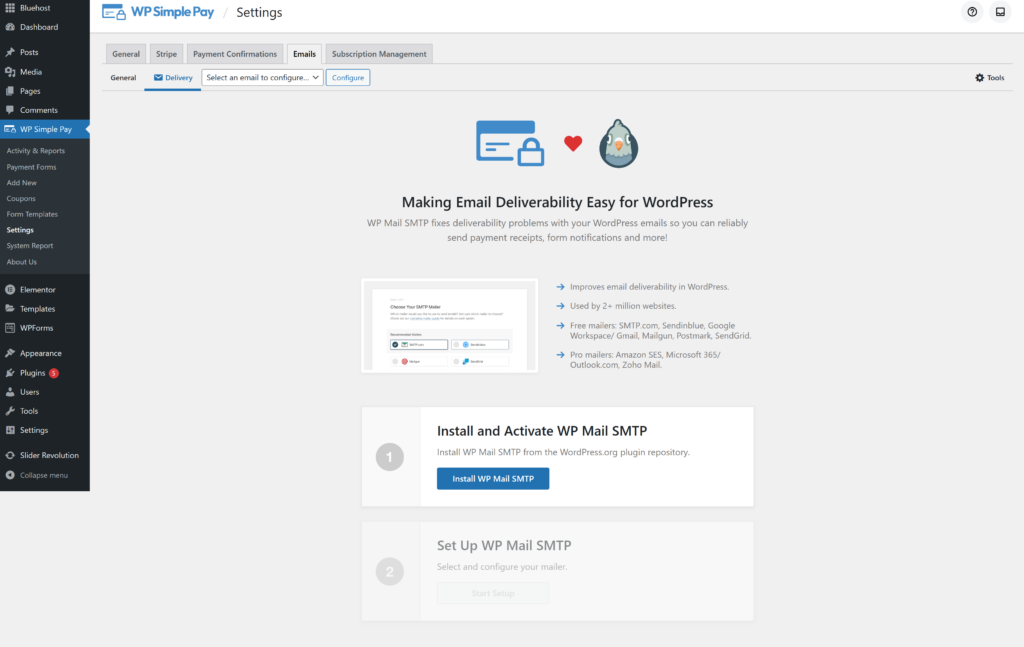
Once you’re in Settings, click on the Emails tab.
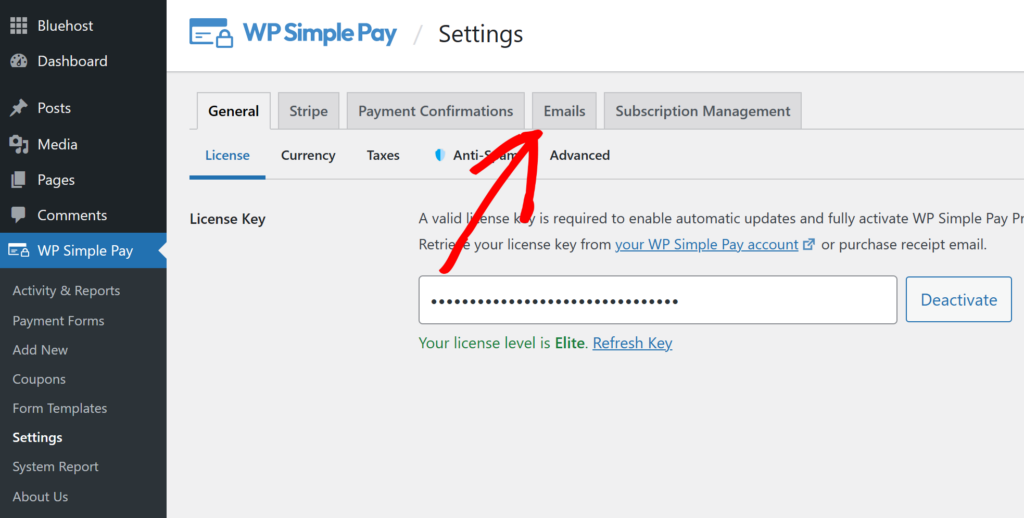
Now, you’ll need to click on the Install WP Mail SMTP button.
Step 3. Connect Your WordPress Site to a Mailer Service
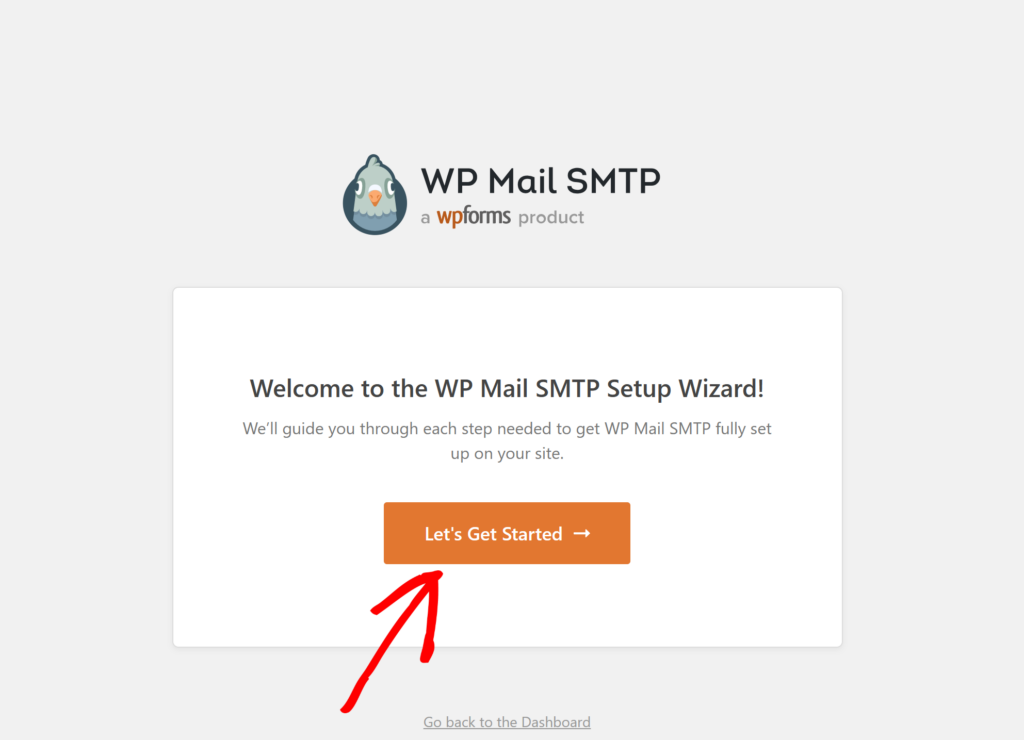
Once you have finished installing and activating the WP Mail SMTP plugin, you’re ready to connect your site to a mailer service.
First, click on the Let’s Get Started tab.
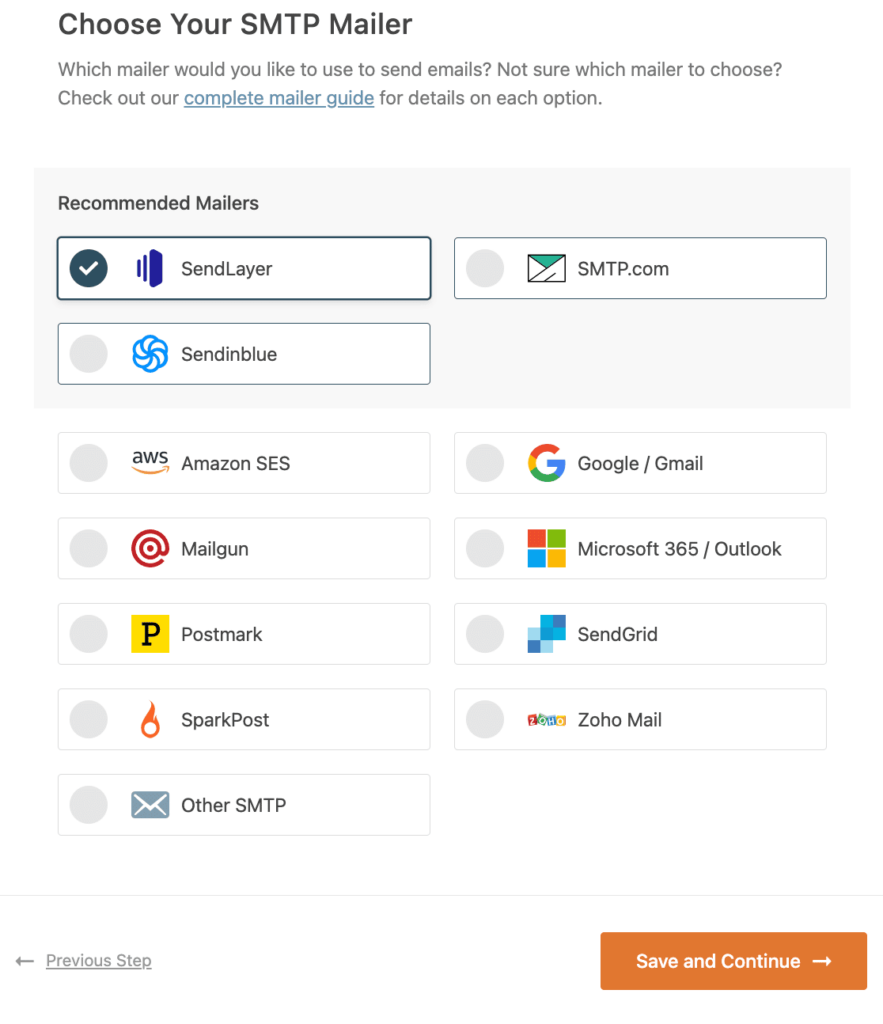
On the next screen, you’ll see all of the SMTP mailer options. While all of these mailers will fix the WordPress not sending transactional emails issue, you’ll want to choose SendLayer because it is best suited for transactional emails.
The SMTP email delivery platform also features a dashboard where you can view open and click analytics, automatically save detailed email logs, and create suppressed email lists.
Step 4. Set Up Your SendLayer Account
Now that you have selected SendLayer as your mailer, you’ll need to go to the SendLayer website to create an account.
From the pricing page, click on Try our SendLayer free trial (send up to 200 emails).
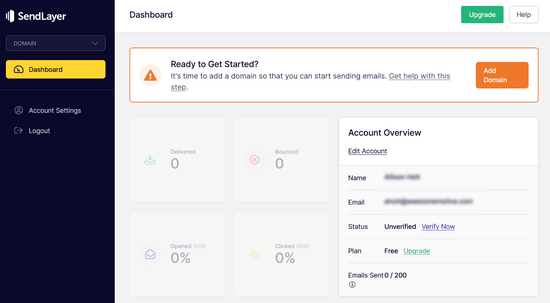
Once you are finished setting up your account, you’ll be taken to your dashboard.
Step 5. Connect Your Site With SendLayer
You’ll need to authorize your domain before you can start sending emails with SendLayer.
This proves to email servers that you are the confirmed owner of your domain and that your emails are being sent from a valid location.
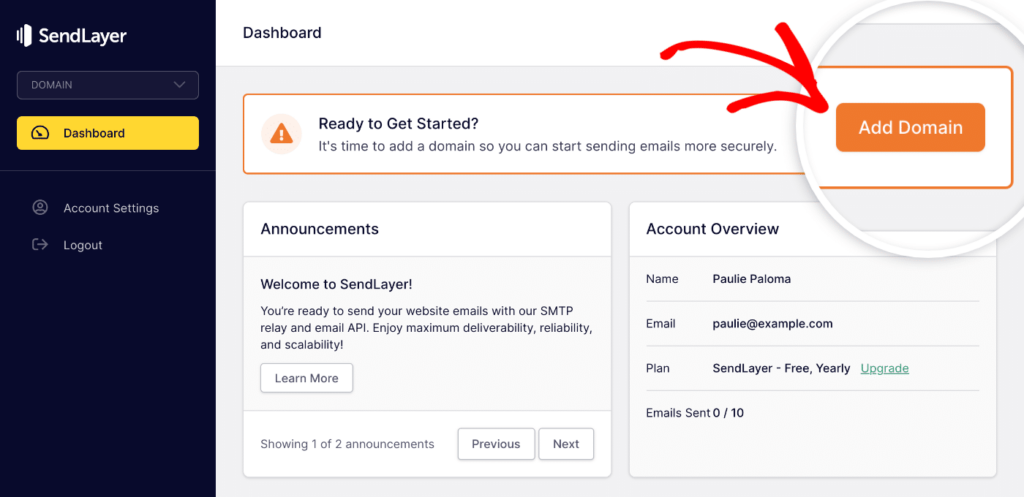
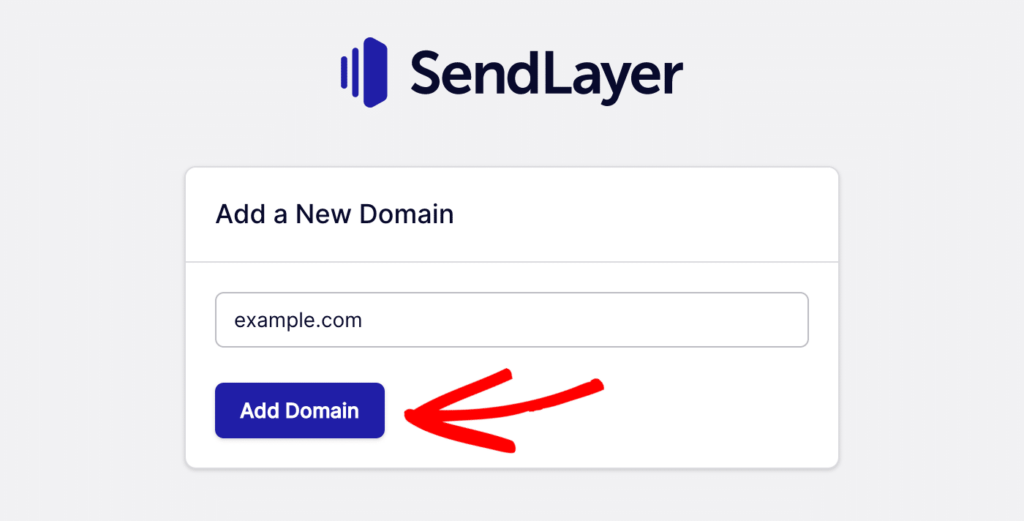
Simply enter your site’s domain and click Add Domain.
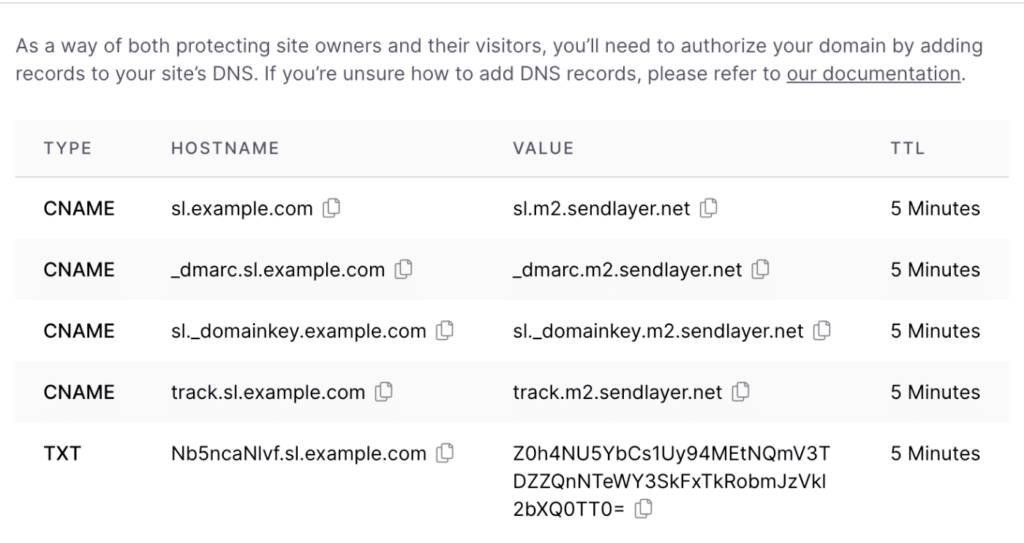
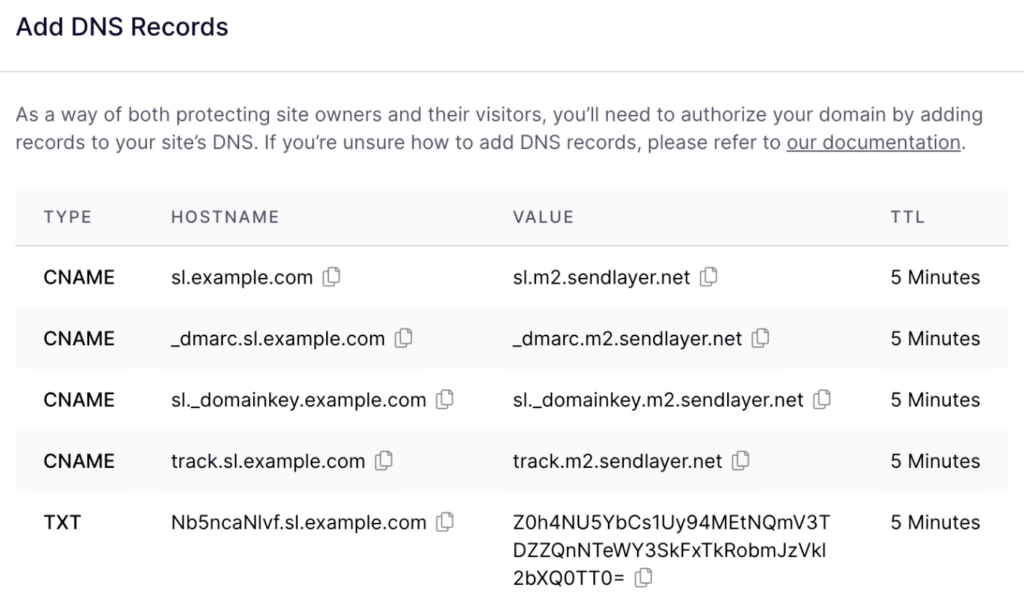
SendLayer will generate five DNS records that are unique to your domain. These records let SendLayer authorize your domain name.
First, you’ll need to add these DNS records to your WordPress site. You can do this by opening up a new browser tab and logging into your WordPress hosting account. All you need to do is copy and paste the DNS records into the right spot on your hosting account.
For this tutorial, we’ll demonstrate on our example Bluehost hosting account.
Note: If you don’t have a Bluehost account, don’t worry. You can check with the hosting company you’re using for your site and follow the instructions on how to add DNS codes for authorization.
Next, you’ll need to find your domain and open up the DNS records.
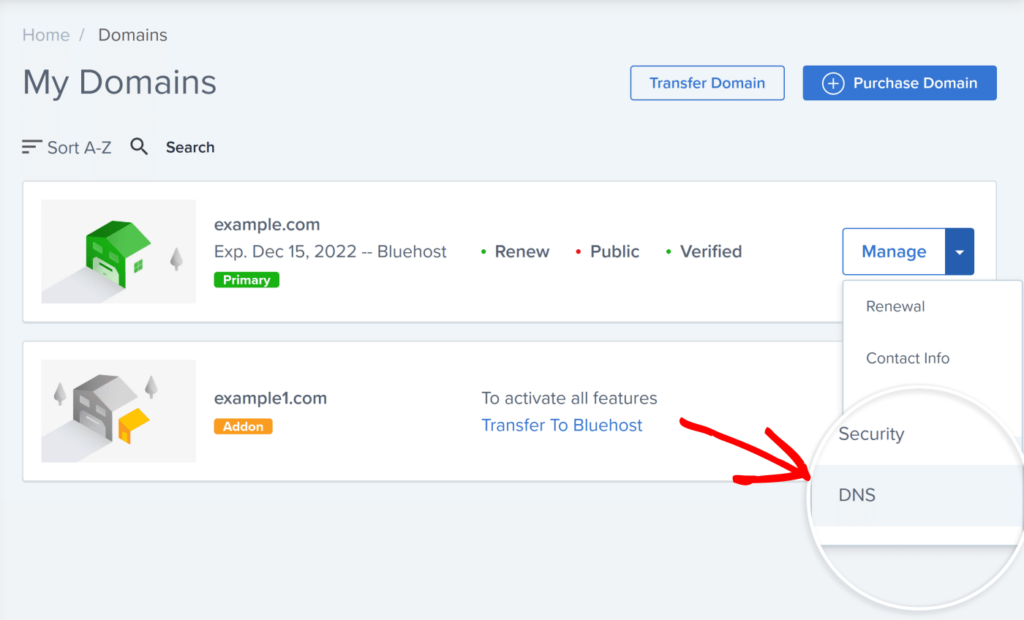
In Bluehost, you can do this by going to Domains and then My Domains.

Next, click the Manage button next to your domain.
To complete the domain authorization process, you’ll need to add each of the 5 DNS records to your site’s DNS settings. Be sure to add the TYPE, HOSTNAME, VALUE, and TTL for each record.
Under DNS Manager, scroll down until you get to the CNAME records. The list below represents an example from an existing site.
By clicking on Add Record button, you’ll bring up a new area that allows you to enter details for a single record.
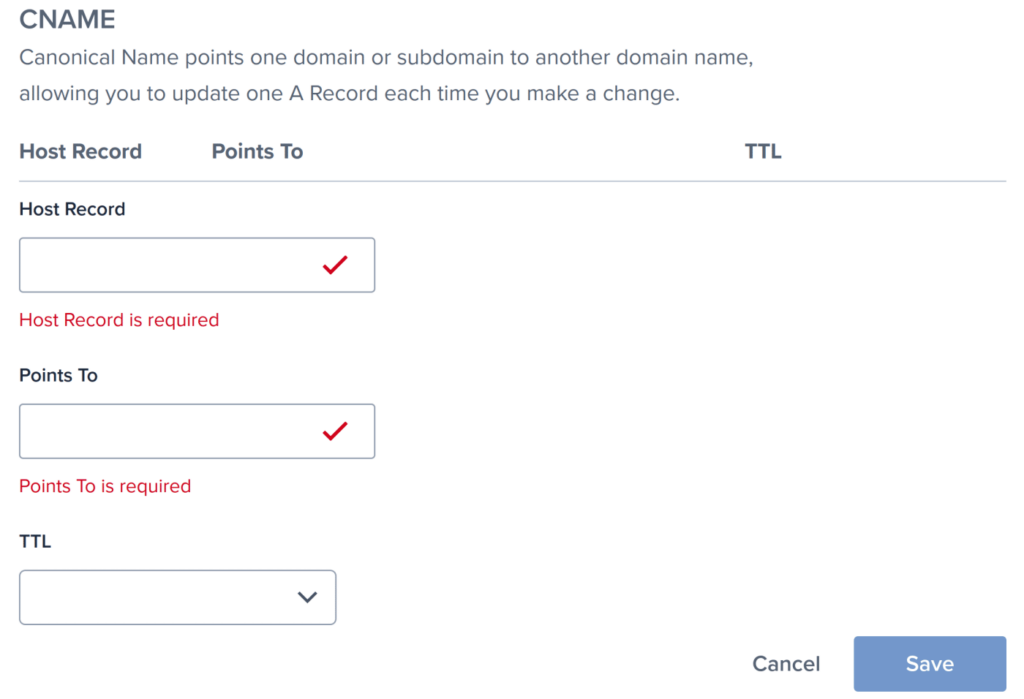
First, you’ll need to copy the HOSTNAME from SendLayer.
Enter the HOSTNAME from SendLayer into the Host Record field in Bluehost. When adding the HOSTNAME, be sure to only add the subdomain because Bluehost will add automatically add your domain.
For instance, if your HOSTNAME is sl.example.com, only enter sl in the Host Record.
Now, return to SendLayer and copy the VALUE of the record you’re adding.
Next, you can enter the VALUE, which matches up with the Points To field in Bluehost.
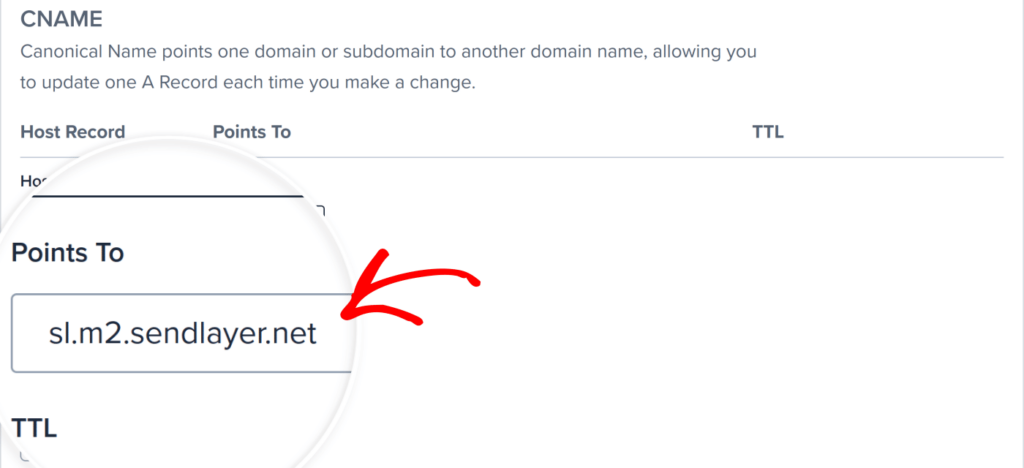
For the TTL, use a value of 4 hours (min).
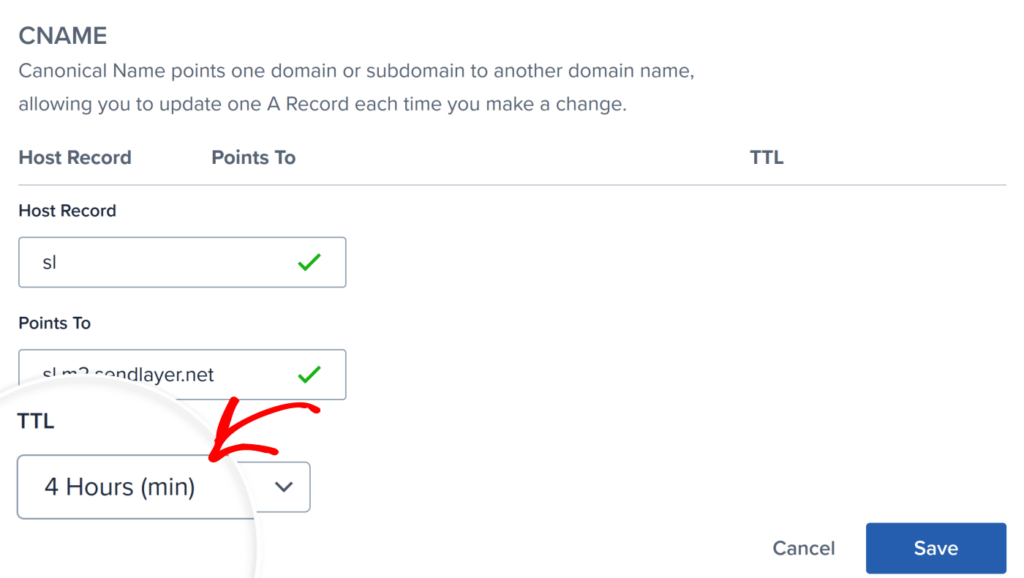
Finally, click on the Save button to add your new record.
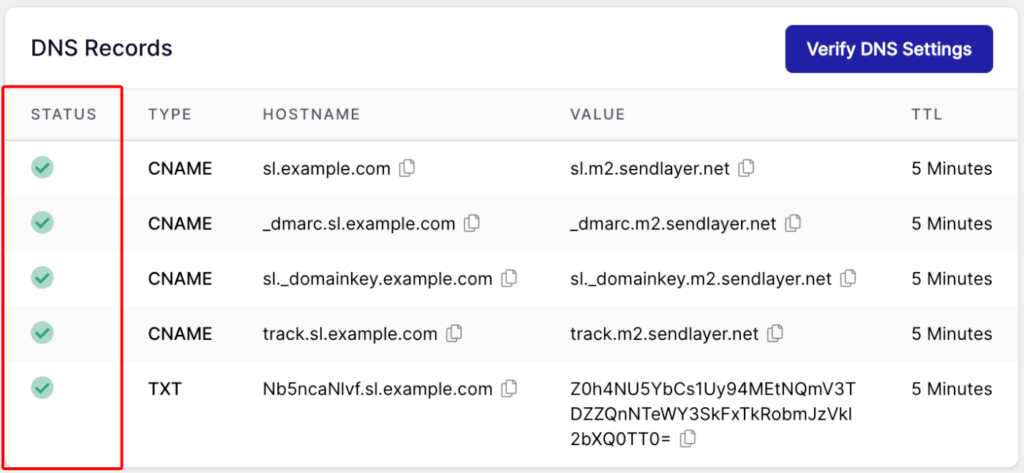
You can add the remaining DNS records by repeating the steps above. Upon completion, you should have 4 CNAME records and 1 TXT record.
After you’ve added your records, go back to your SendLayer dashboard and check the box next to ‘I have added these DNS records and am ready to proceed.’ Then, click the Verify DNS Records button.
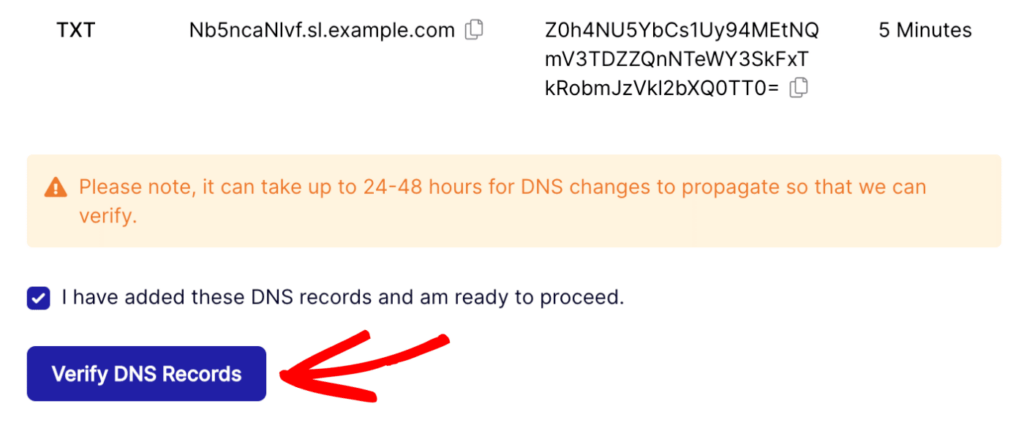
Note: It could take 24-48 hours before SendLayer is able to verify your records.
Once your domain has been successfully authorized, you’ll see green checkmarks next to each DNS record in the STATUS column.
Step 6. Connect WP Mail SMTP with SendLayer
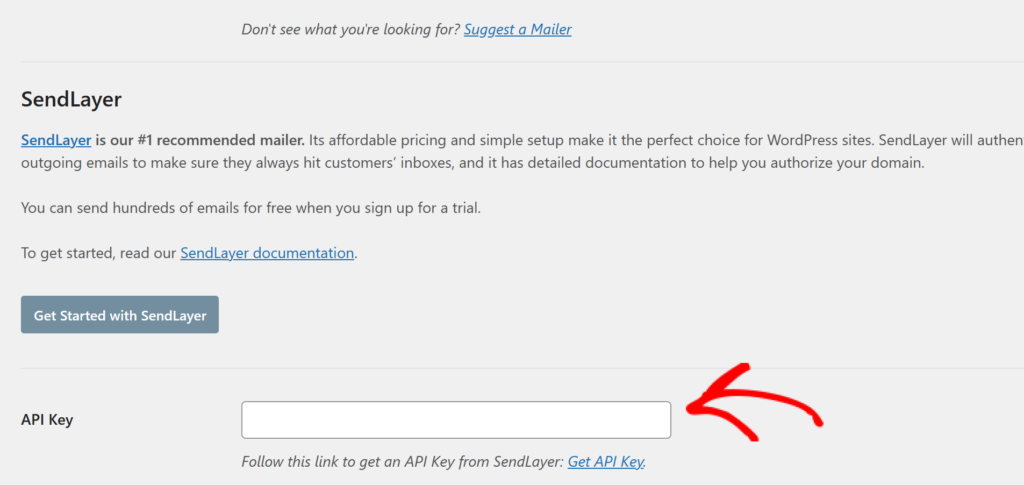
Since you have already selected SendLayer as your mailer in your WordPress dashboard during Step 2, all you need to do to complete the process is find your API key in your SendLayer dashboard and add it to the WP Mail SMTP plugin settings.
You’ll need to go to your SendLayer account to find your API key. To do this, go to your SendLayer dashboard, go to Settings and then click on the API Keys page. Here, you’ll see a default API key that was generated when you authorized your domain in SendLayer.

Copy the API key into the field provided on your WP Mail SMTP settings page.
Congrats! You are now ready to send a test email to make sure everything is working as it should.
You can do this by going to the Email Test tab in the WP Mail SMTP settings menu in your WordPress dashboard. Enter an email address to send an email to.
We hope this article helped you learn how to fix the WordPress not sending transactional emails issue on your site.
If you liked this article, you might also want to check out 10 Components & Best Practices of a Perfect Email Receipt.
What are you waiting for? Get started with WP Simple Pay today!
To read more articles like this, follow us on X.
Disclosure: Our content is reader-supported. This means if you click on some of our links, then we may earn a commission. We only recommend products that we believe will add value to our readers.


Leave a Reply