How to EASILY Customize Stripe Email Receipts in WordPress
Last updated on
Do you want to customize Stripe email receipts? The customization option in the Stripe dashboard for email receipts is limited. With a WordPress plugin, you can control and customize every aspect of Stripe payment processing, including invoices, with ease.
In this article, we’ll show you how to customize Stripe email receipts in WordPress.
Customizing Stripe Email Receipts in WordPress
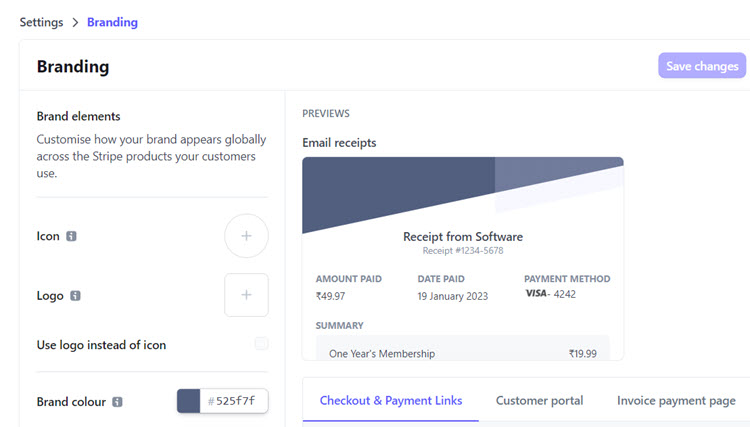
Stripe lets you immediately send an automated email receipt to your users after a successful payment or after a refund is initiated. While you can change a few receipt elements, such as logo and language, the customization options you get through the Stripe dashboard are limited.
This is where a WordPress Stripe plugin like WP Simple Pay comes in.
With WP Simple Pay, one of the best WordPress plugins for Stripe, you can customize the email receipt the way you want. Here are a few benefits of using a WordPress Stripe plugin for sending a customized email receipt.
- Endless customization: Easily customize the email content right within the WordPress dashboard, just as tweaking a post or a page.
- No learning curve: Since WordPress is a platform you’re already familiar with, you can easily tweak the receipt even if you’re an absolute beginner to Stripe.
- No additional tools: You don’t need an additional email marketing tool for sending automated receipts.

Besides custom email receipts, with WP Simple Pay, you can easily create Stripe payment forms, enable around 13 payment methods, accept recurring payments, and more.
Step 1: Install WP Simple Pay
To start accepting Stripe payments and customizing email receipts, you’ll need to install WP Simple Pay on your WordPress site. To install the plugin, head over to the pricing page, pick a plan and complete your payment. Once done, you’ll receive the plugin file, which you’ll need to upload to your WordPress site.
Remove the additional 3% fee!
Most Stripe plugins charge an additional 3% fee for EVERY transaction
…not WP Simple Pay Pro!
For more details, see this step-by-step guide on how to install WP Simple Pay.
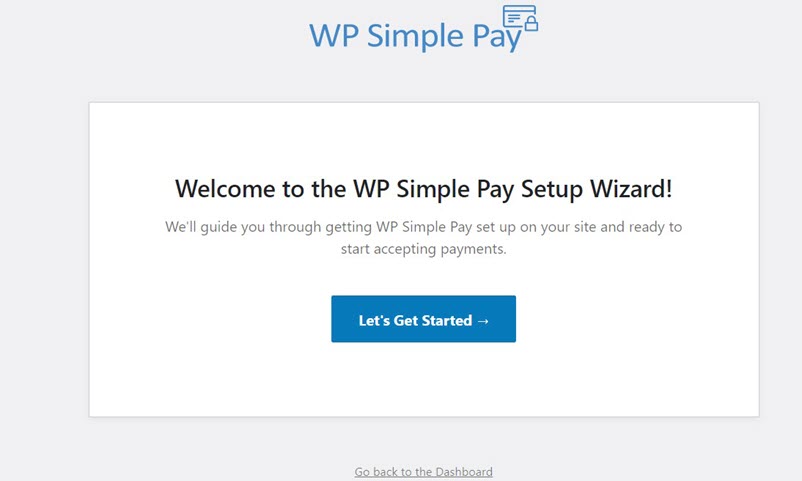
After the plugin is installed and activated, you’ll be asked to set up WP Simple Pay and connect your site with your Stripe account. To proceed, click Let’s Get Started.
Step 2: Integrate WordPress With Stripe
After installing WP Simple Pay, you’ll need to make sure your Stripe account is properly connected to the plugin. In the setup wizard, click Connect with Stripe.
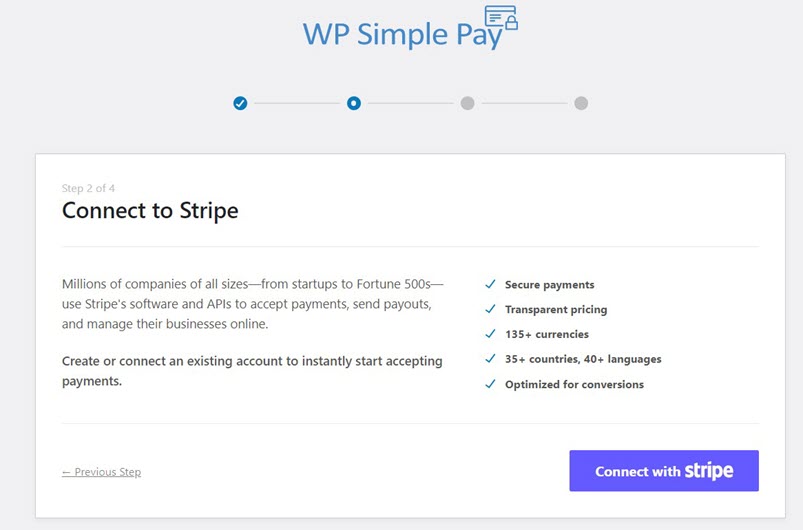
If you skip the setup wizard in the previous step, you can always go back to WP Simple Pay » Settings to connect your Stripe account with your site. You’ll find the Connect with Stripe button under the Stripe tab. Just click on that button.
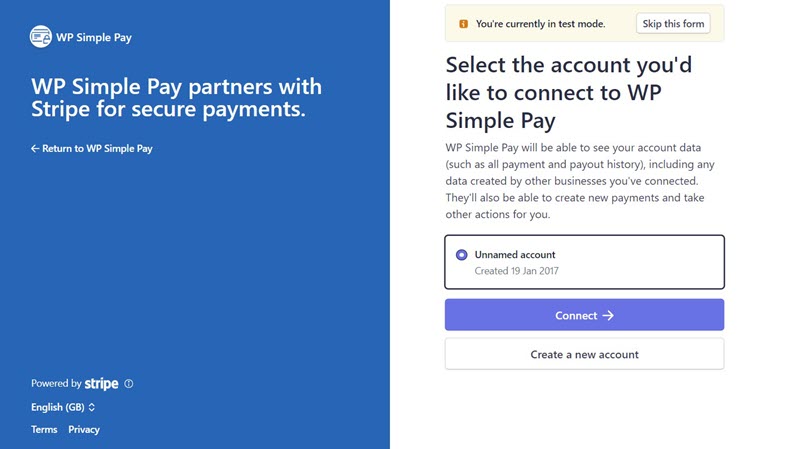
Next up, you’ll be prompted to create a new Stripe account or integrate your existing account with your site. Go ahead and integrate your account with WP Simple Pay. Keep in mind that choosing Skip this form will create a temporary Stripe account that’s only capable of testing and can’t be used for accepting real payments. So, if you’re using the plugin on your production site, let’s not choose the Skip this form option.
Step 3: Choose “From Name” and “From Email”
Now that you’ve installed the plugin and connected it with Stripe, let’s start configuring your Stripe email receipts. WP Simple Pay lets you set up 4 different email options. No matter how many emails you set up, you’ll be using the same From Name and From Address.
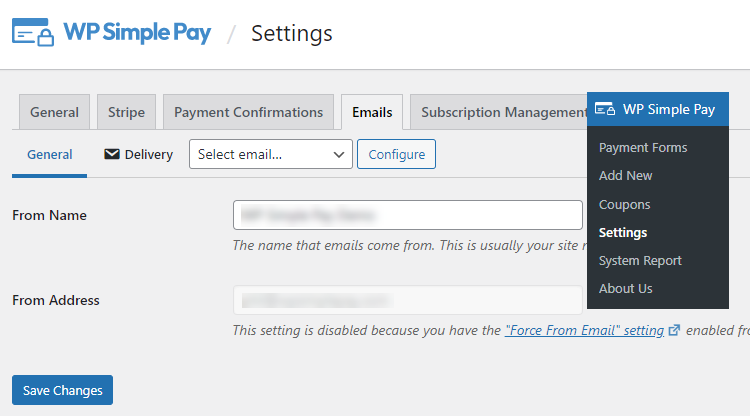
Navigate to WP Simple Pay » Settings and then click the Emails tab, where you can fill out From Name and From Address for all your email notifications.
After filling out From Name and From Address, click Save Changes.
Step 4: Customize Stripe Email Receipts
WP Simple Pay lets you configure 4 different email notifications as follows…
- Payment Receipt: To let your users know that payment has been completed and received on your end.
- Payment Notification: Unlike other email options that send emails to customers, this notification is built to alert you, the website owner, when a user completes a payment.
- Upcoming invoice: To let users know the upcoming invoice details. It comes in handy for recurring / subscription payments.
- Invoice receipt: To notify subsequent invoice payments after a subscription has been activated.
To enable and configure each email, under Emails, select an email from the dropdown and click Configure.
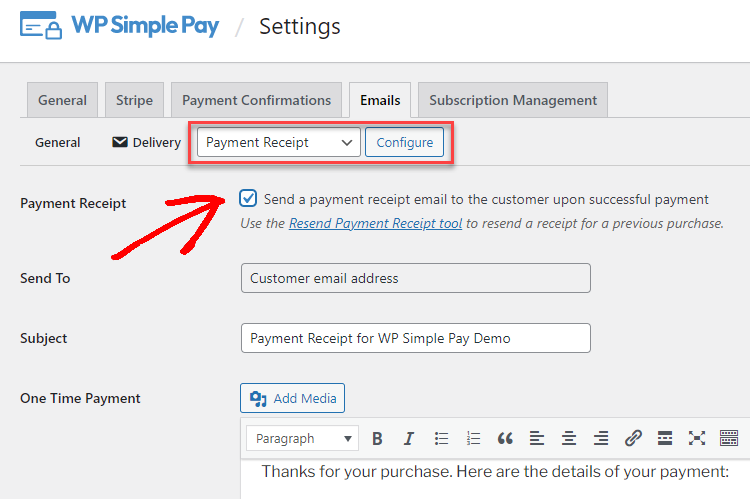
Enable the checkbox next to the email you’ve selected. You’ll now be shown the WordPress Classic editor, where you can customize the email the way you want.
WP Simple Pay supports the following smart tags out of the box. With smart tags, you can automatically pull data from the payment form entries and display those details in the email receipt.
- {form-title} – The form’s title.
- {form-description} – The form’s description.
- {total-amount} – The total price of the payment.
- {customer-name} – The value of the Name form field.
- {charge-date} – The charge date returned from Stripe.
- {charge-id} – The unique charge ID returned from Stripe.
- {payment-type} – The type of payment (one-time or recurring).
- {card-brand} – The brand of the card used. Visa, Amex, etc.
- {card-last4} – The last four digits of the card used.
- {tax-amount} – The calculated tax amount based on the total and the tax percent setting.
- {recurring-amount} – The recurring amount to be charged each period of the subscription plan.
- {max-charges} – The total number of max charges set for an installment plan.
- {next-invoice-date} – The date the next invoice is due.
- {update-payment-method-url} – URL to update the subscription’s payment method.
Keep in mind that in the Payment Receipt email, you can customize the emails individually for one time payment, subscription, and subscription with trial.
Step 5: Disable Stripe Email Receipt Settings
This step is only needed for those who have previously enabled Stripe emails from the Stripe dashboard.
Since you’ll be sending emails from your WordPress site, you need to ensure that email receipt settings are disabled in the Stripe dashboard. Otherwise, users might be receiving 2 email receipts: through your WordPress site and through the Stripe dashboard.

Log into the Stripe dashboard and disable Successful payments from here and disable Send emails about upcoming renewals from here.

Step 6: Create a Payment Form and Accept Payments
You’ve now successfully customized email receipts in your WordPress dashboard. Now it’s your turn to create a payment form with WP Simple Pay and start accepting payments.
WP Simple Pay makes it super easy to create a payment form thanks to its easy-to-use drag-and-drop form builder. You can either host the form on your WordPress site or host it on Stripe’s site. If you’re creating a payment form for the first time, check out these articles:
- How to create a credit card form
- How to create a recurring payment form
- How to create a Google Pay / Apple Pay form
- How to create a form that accepts the Buy Now, Pay Later offer
Customizing Stripe Email Receipts – FAQs:
Here are some of the frequently asked questions (FAQs) asked by people who customize Stripe email receipts in WordPress.
I am not receiving email notifications. Why?
The reason could be that your WordPress hosting server is not properly configured to use the PHP mail() function, which is the function that WordPress uses to send emails. To fix it, you can use the free WP Mail SMTP plugin. Check out the complete guide to learn how to fix it.
Can I customize the email template?
With WP Simple Pay, you can customize the emails the way you want and send emails in HTML format. To send emails in rich text, you can use the free WP HTML Mail plugin.
How Can I Show Custom User Data in the Emails?
By now, you might already know that WP Simple Pay uses various built-in smart tags to populate customer data in email receipts. To pull additional custom data from the form entries and populate it in the email receipt, you can create custom form field smart tags.
Aside from using the data in emails, you can collect custom form field data in the Stripe dashboard and display it on the payment confirmation pages.
That’s it!
We hope this article helped you learn how to customize Stripe email receipts in WordPress.
You might also want to check out how to allow users to choose a payment method in WordPress.
What are you waiting for? Get started with WP Simple Pay and stat customizing email receipts.
To read more articles like this, follow us on Facebook and Twitter.
Disclosure: Our content is reader-supported. This means if you click on some of our links, then we may earn a commission. We only recommend products that we believe will add value to our readers.


Leave a Reply