Come Offrire Piani di Pagamento Rateale in WordPress (Modo Facile)
Ultimo aggiornamento il

Vuoi offrire ai clienti piani di pagamento rateale senza interessi sul tuo sito WordPress?
Accettare piani di pagamento rateale flessibili è un modo efficace per aumentare il valore medio dell'ordine e incrementare le conversioni.
Inoltre, aiutano a fidelizzare i clienti rendendo i tuoi prodotti e servizi accessibili.
In questo articolo, ti mostreremo il modo migliore per offrire piani di pagamento rateale in WordPress.
Abilitare Piani di Pagamento Rateale in WordPress
Utilizzare un plugin per pagamenti Stripe come WP Simple Pay è il modo più semplice per offrire piani rateali sul tuo sito WordPress.
Con WP Simple Pay, puoi accettare pagamenti Stripe sul tuo sito in diversi modi.
- Compra Ora, Paga Dopo: WP Simple Pay supporta tre diversi servizi di finanziamento a breve termine, Klarna, Afterpay/Clearpay e Affirm, permettendoti di offrire servizi Compra Ora Paga Dopo sul tuo sito.
- Pagamenti Ricorrenti: Offrire piani di abbonamento è l'opzione migliore per automatizzare la fatturazione e generare un flusso costante di entrate affidabili.
- Accetta Google Pay/ Apple Pay/Microsoft Pay: Consenti ai clienti di pagare con il loro portafoglio digitale preferito.
- Pagamenti Singoli: I clienti possono effettuare un pagamento singolo utilizzando oltre 10 opzioni di pagamento, incluse carte di credito e debito tradizionali, addebito diretto SEPA, Cash App Pay, Alipay e altro.
Come Offrire Piani di Pagamento Rateale
Ricorda che per accettare pagamenti Stripe sul tuo sito, Stripe richiede l'uso della crittografia SSL/HTTPS. Non preoccuparti se non hai ancora un certificato SSL! Tutto ciò che devi fare è seguire questa guida passo passo su come aggiungere SSL in WordPress.
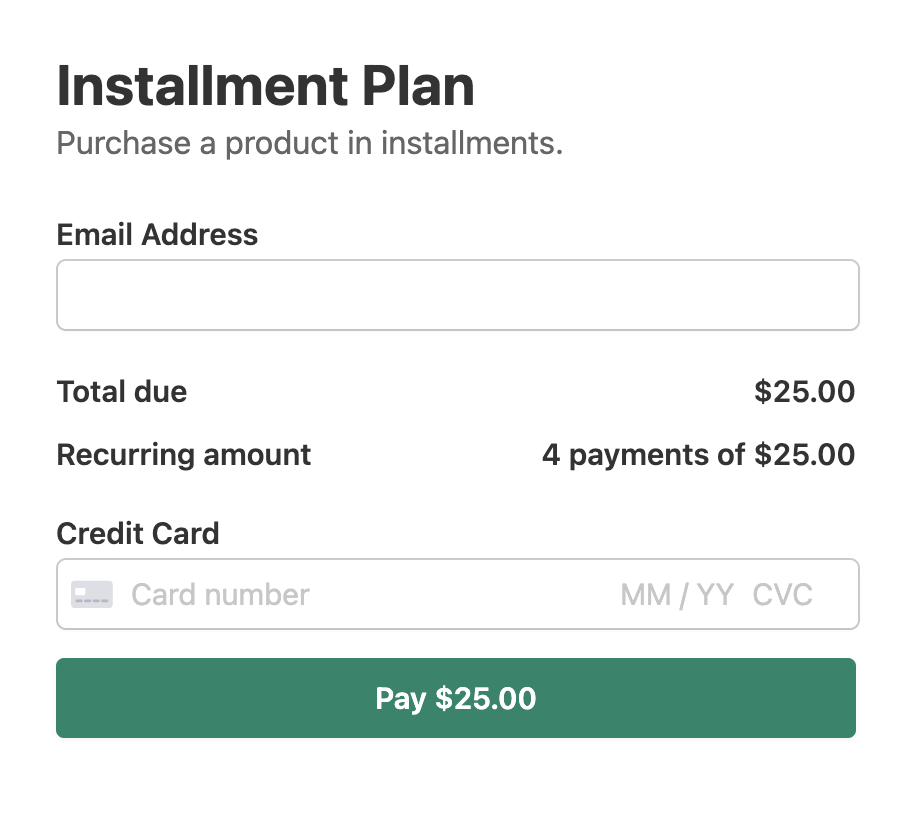
Ecco il modulo di piano di pagamento rateale che creeremo con questo tutorial:
Passaggio 1: Installa WP Simple Pay per Offrire Piani Rateali
La prima cosa che dovrai fare per offrire piani di pagamento rateale sul tuo sito è installare e attivare il plugin WP Simple Pay sul tuo sito.
Per maggiori dettagli, consulta questa guida passo passo su come installare WP Simple Pay.
Visita semplicemente la pagina dei prezzi e scegli un piano. Per aiutarti a decidere, consulta la nostra guida: WP Simple Pay Pro vs. Lite: Vale la pena Pro?
Successivamente, una volta terminata l'installazione del plugin in WordPress, la procedura guidata ti accompagnerà nella connessione del tuo account Stripe al tuo sito.
Fai clic su Iniziamo.

Se non hai visualizzato la procedura guidata di configurazione, vai alla scheda WP Simple Pay » Impostazioni » Avanzate e fai clic sul pulsante Avvia procedura guidata di configurazione.
2: Collega WordPress a Stripe
Per collegare il tuo sito WordPress a Stripe, fai clic su Connetti con Stripe.

Successivamente, inserisci l'indirizzo email che utilizzi per il tuo account Stripe e collegalo al tuo sito. Se non hai un account Stripe, puoi crearne facilmente uno inserendo il tuo indirizzo email e completando la registrazione.
Al termine di questo processo, ti verrà mostrata una pagina di successo che dice: “Configurazione completata.” Successivamente, fai clic su Crea un modulo di pagamento.

Passaggio 3: Abilita Piani Rateali con Stripe
Dopo aver fatto clic sul pulsante Crea un Modulo di Pagamento, ti verrà chiesto di scegliere un modello di modulo di pagamento.
Successivamente, poiché vogliamo accettare pagamenti con opzioni di piano rateale, selezioniamo il Modulo Piano Rateale.
Nel caso in cui salti la procedura guidata dopo aver attivato WP Simple Pay, puoi creare un modulo di pagamento andando su WP Simple Pay » Aggiungi Nuovo.

Dopo aver selezionato il modello giusto, ti verrà chiesto di configurare il modulo. Nella scheda Generale, puoi personalizzare il titolo, la descrizione e alcuni altri elementi del tuo modulo.
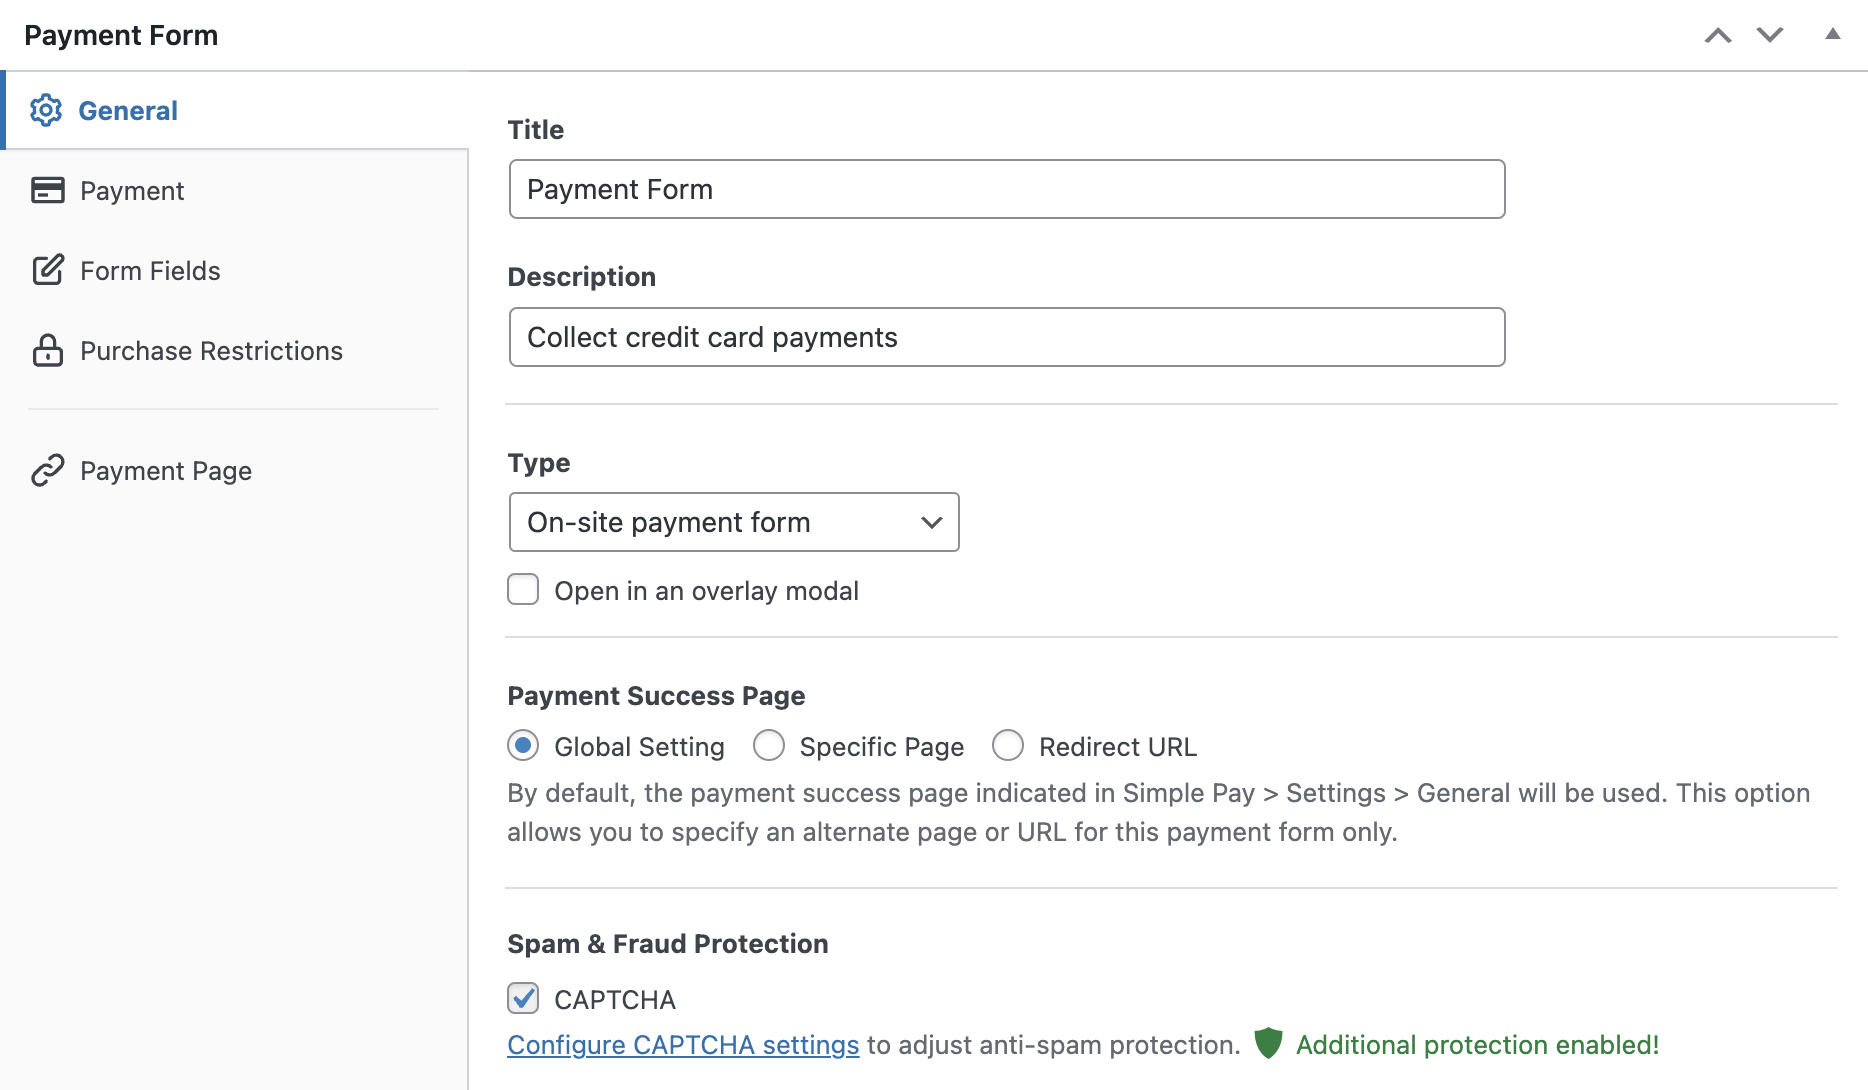
Per impostazione predefinita, il Modulo di pagamento in loco è scelto come Tipo di pagamento. Se desideri ospitare il modulo su una pagina di checkout ospitata da Stripe anziché sul tuo sito, puoi scegliere il modulo di checkout Stripe esterno.
Per maggiori dettagli, consulta la guida completa all'impostazione di Stripe checkout sul tuo sito.
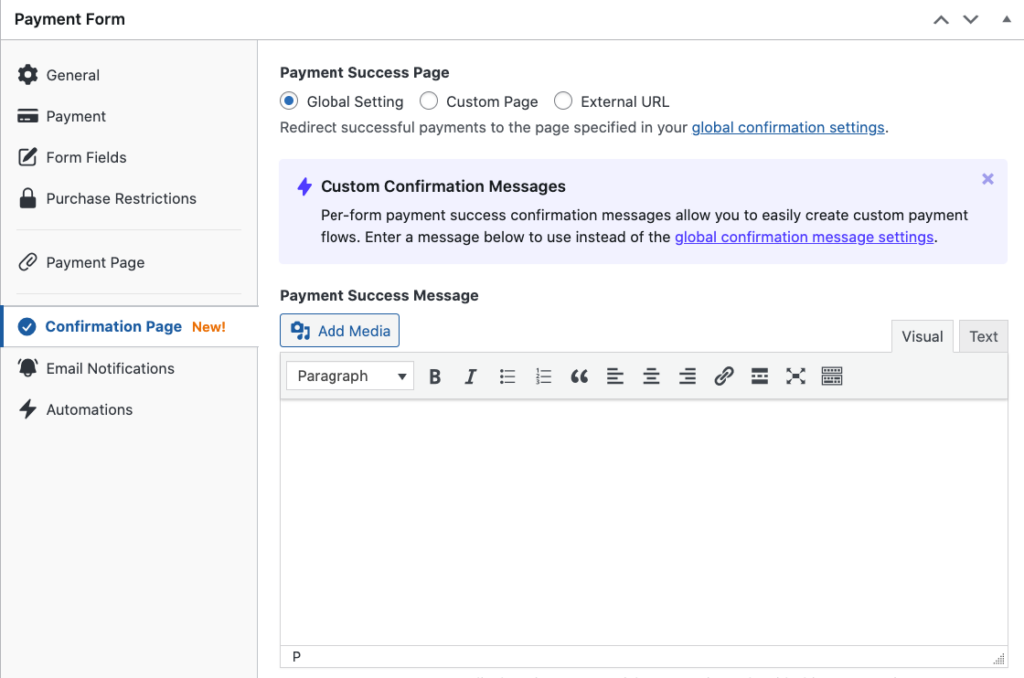
WP Simple Pay ti consente inoltre di creare un messaggio personalizzato per la tua pagina di conferma del pagamento utilizzando la scheda Pagina di conferma. Questo è un ottimo modo per informare i tuoi clienti sui loro ordini e fornire i passaggi successivi richiesti immediatamente dopo il checkout.
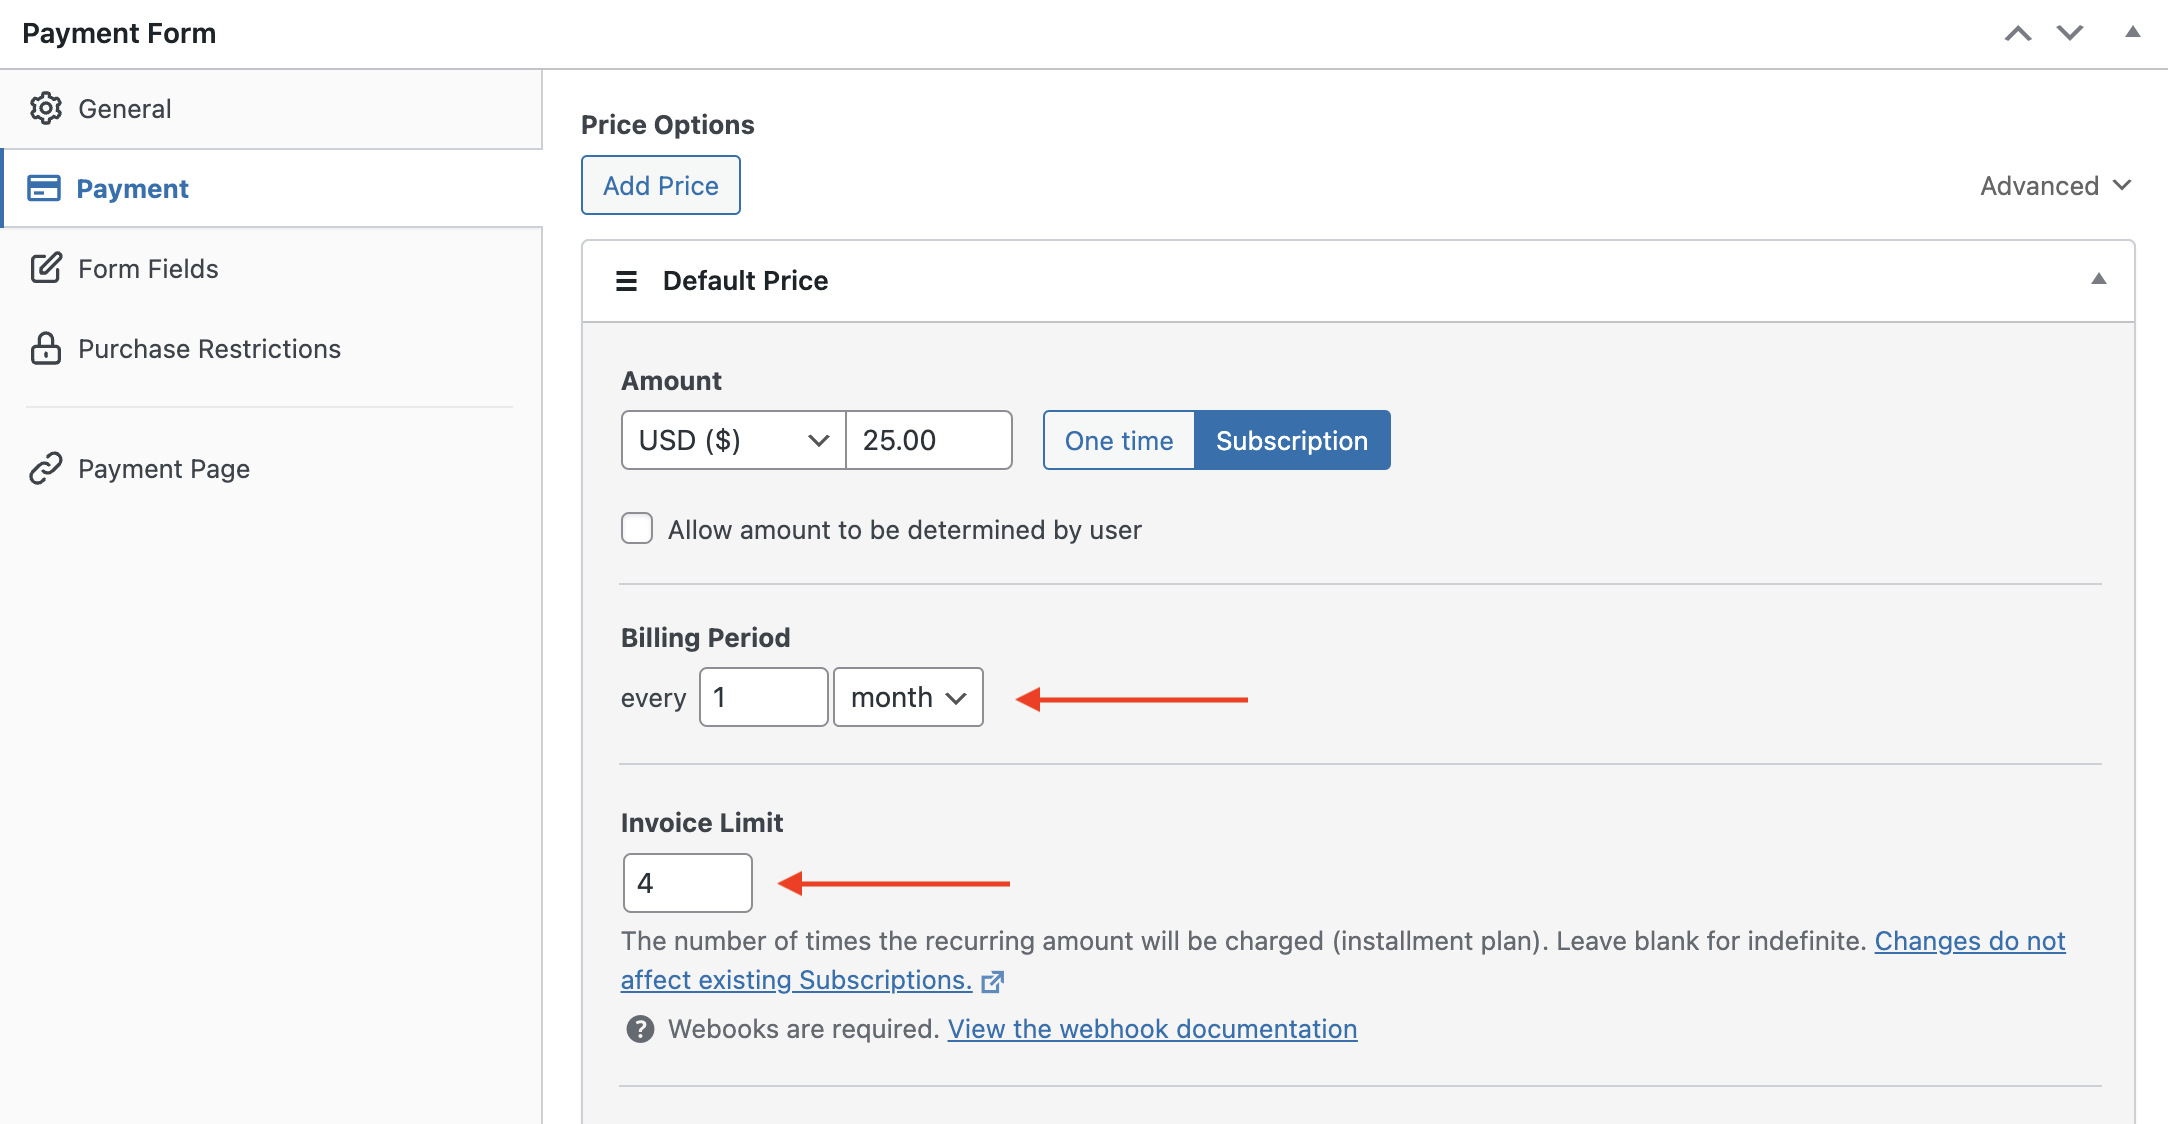
Ora, scegliamo l'opzione Pagamento sulla sinistra per configurare le impostazioni di pagamento. Puoi aggiungere nuovi prezzi, modificare la valuta e l'importo, e selezionare tra pagamenti una tantum o in abbonamento da questa pagina. Inoltre, poiché abbiamo scelto un modello per i piani di rateizzazione, l'opzione Abbonamento è stata scelta per impostazione predefinita.
Il periodo di fatturazione è stato configurato per essere mensile. Sentiti libero di cambiarlo in base alle tue esigenze.
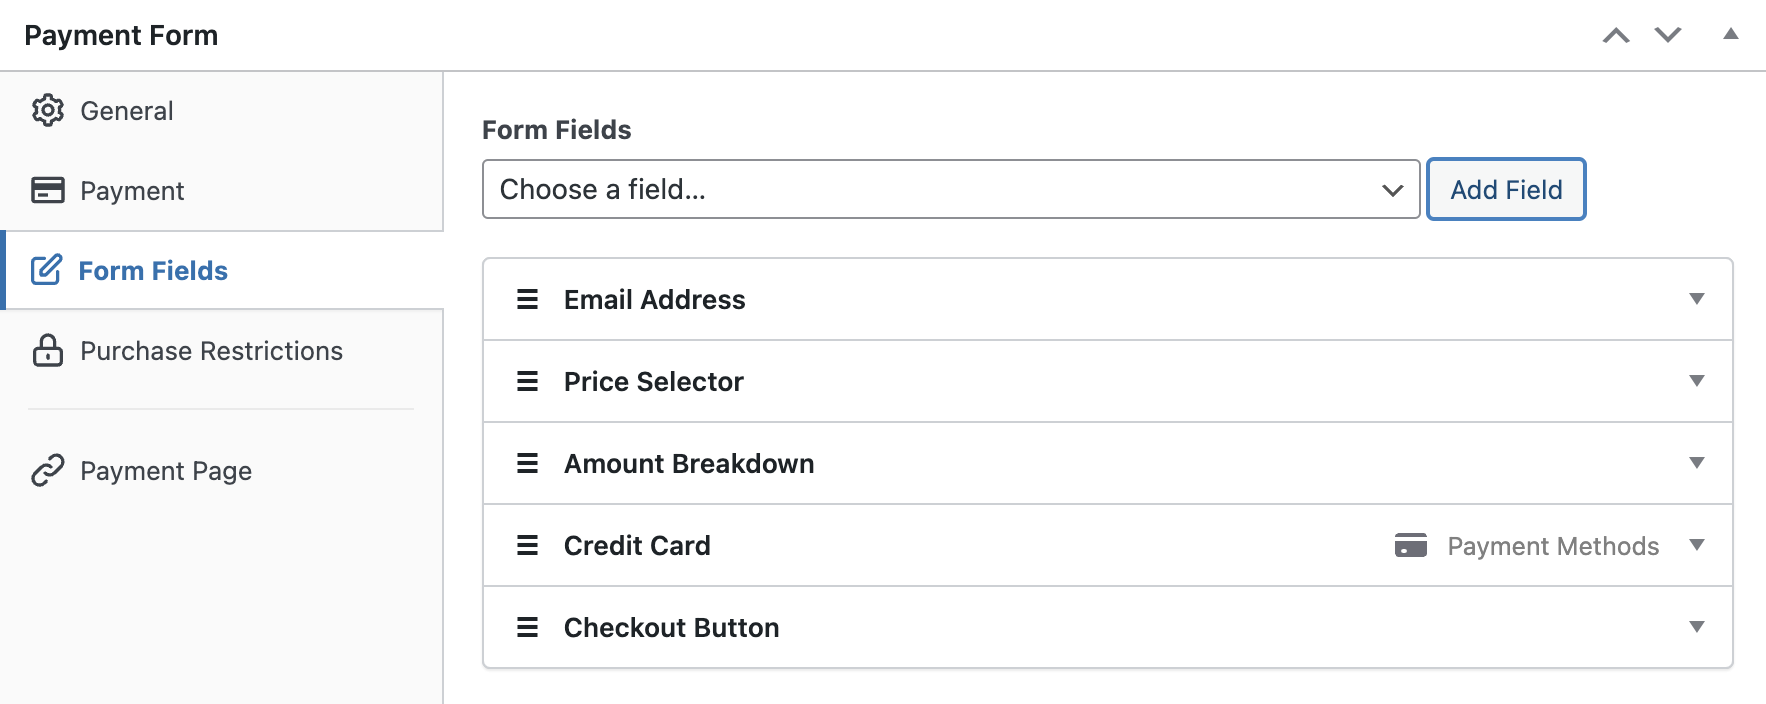
Puoi anche aggiungere e personalizzare i campi del modulo nella scheda Campi del modulo. Assicurati di aggiungere il campo Riepilogo importo a questo modulo per mostrare quale piano i tuoi clienti stanno scegliendo. In questo modo, puoi mostrare l'Importo totale dovuto e l'Importo ricorrente nel modulo live.
Passaggio 4: Pubblica il tuo modulo sul tuo sito
Fatto! Ora sei pronto per accettare pagamenti tramite rate sul tuo sito. Procedi e pubblica il tuo modulo facendo clic sul pulsante Pubblica sul lato destro.
Inoltre, dovrai assicurarti di testare prima il modulo prima che vada online. Puoi passare l'intero sito o singoli moduli di pagamento tra le modalità di test e live. Per maggiori informazioni, consulta la nostra guida su come abilitare la modalità di test di Stripe in WordPress.
Per incorporare il modulo, vai al post o alla pagina in cui desideri pubblicarlo.
Quindi, fai clic sull'icona + per aggiungere il blocco WP Simple Pay. Scegli il modulo che hai appena creato e quindi fai clic su Pubblica o Aggiorna.

Speriamo che questo articolo ti abbia aiutato a imparare come offrire piani di pagamento rateali in WordPress.
Se ti è piaciuto questo articolo, potresti anche voler consultare la nostra guida su come abilitare i piani di pagamento "Acquista ora, paga dopo" in WordPress.
Cosa stai aspettando? Inizia oggi stesso con WP Simple Pay!
Per leggere altri articoli come questo, seguici su X.
Divulgazione: I nostri contenuti sono supportati dai lettori. Ciò significa che se cliccate su alcuni dei nostri link, potremmo guadagnare una commissione. Raccomandiamo solo prodotti che crediamo aggiungeranno valore ai nostri lettori.


Lascia un commento