
How to Enable Stripe Payment Element in WordPress
Last updated on

 Spencer Finnell
Are you looking for a way to simplify the process of accepting online payments while improving the user experience on your WordPress site?
With Stripe Payment Element, you can create visually pleasing, customized payment forms that accept 10+ payment methods directly on your site with a single integration. Plus, you can do all of this without setting up a shopping cart or online storefront.
In this article, we’ll show you how to EASILY enable Stripe Payment Element in WordPress so you can start securely collecting payments in multiple payment methods from across the globe.
What is Stripe Payment Element?
Stripe is the best payment processor available. It allows businesses to receive online payments via debit/credit cards, ACH Direct Debit, Google Pay / Apple Pay / Microsoft Pay, Buy Now, Pay Later services such as Klarna and Afterpay, and more.
Stripe Payment Element is part of Stripe’s suite of Stripe Elements, which are prebuilt design components that help you create stylized payment forms without needing to have coding skills. Users who enable Stripe Payment Element see an average increase in revenue of 11.9%.
With the Stripe Payment Element feature, you can easily add a payment gateway directly to your site to collect one-time or recurring payments.
Stripe Payment Element also offers user-friendly, customizable payment forms that let you accept over 10 payment methods and integrate seamlessly into any WordPress site.
Conventionally, each payment method required integrating a separate Element. Now, with Stripe Payment Element, you can create a form that accepts payments from one or multiple payment methods. As a result, you can broaden your global reach and increase your conversions.
In fact, according to a recent study, 81% of customers abandon the checkout process if their preferred payment method isn’t available.
Enabling Stripe Payment Element in WordPress
The easiest way to enable Stripe Payment Element in WordPress is to choose a Stripe payments plugin that supports the feature.
WP Simple Pay is the best Stripe payments plugin. It easily enables the Stripe Payment Element, which allows you to begin accepting multiple payment methods without needing to build a shopping cart or use a complicated eCommerce platform.
The standalone plugin also offers an advanced drag-and-drop payment form builder that integrates with Stripe Payment Element, allowing you to create attractive and user-friendly payment forms without writing a single line of code.
Additionally, WP Simple Pay features international phone number validation to ensure that the phone number entered by your customers during checkout is correct. This allows you to perform follow-up communications concerning the order, shipping, delivery, and customer support.
The best part about WP Simple Pay is that you can easily use Stripe Payment Element to create forms that accept multiple payment methods without having to install any additional plugins or perform multiple integrations.
Now, let’s examine how to easily enable the Stripe Payment Element in WordPress so you can begin offering your customers multiple payment method options.
Step 1: Install and Activate WP Simple Pay
To enable Stripe Payment Element in WordPress, the first thing you’ll need to do is install and activate WP Simple Pay in WordPress.
You can do this by simply visiting the pricing page, choosing the best plan for your specific needs, and downloading it from your purchase email receipt or from your WP Simple Pay account.
Remove the additional 3% fee!
Most Stripe plugins charge an additional 3% fee for EVERY transaction
…not WP Simple Pay Pro!
To install the plugin in WordPress, go to your dashboard, navigate to Add New Plugins, and then Upload Plugin.
Next, click Choose File and find the WP Simple Pay .Zip file on your computer. Click Install Now. When the upload is complete, press the Activate Plugin button.
For detailed instructions, see our step-by-step guide on how to install WP Simple Pay.
Step 2: Connect Stripe to WordPress
After you’ve successfully installed and activated WP Simple Pay, you’ll need to create a Stripe account or connect your existing one to integrate Stripe Payment Element in WordPress.
The WP Simple Pay setup wizard will automatically prompt you to complete this step.
Go ahead and click on Let’s Get Started.

Don’t worry if the setup wizard didn’t automatically appear. You can easily launch it by going to WP Simple Pay » Settings » Advanced and clicking the Launch Setup Wizard button.
To connect Stripe with WordPress, click on Connect with Stripe.
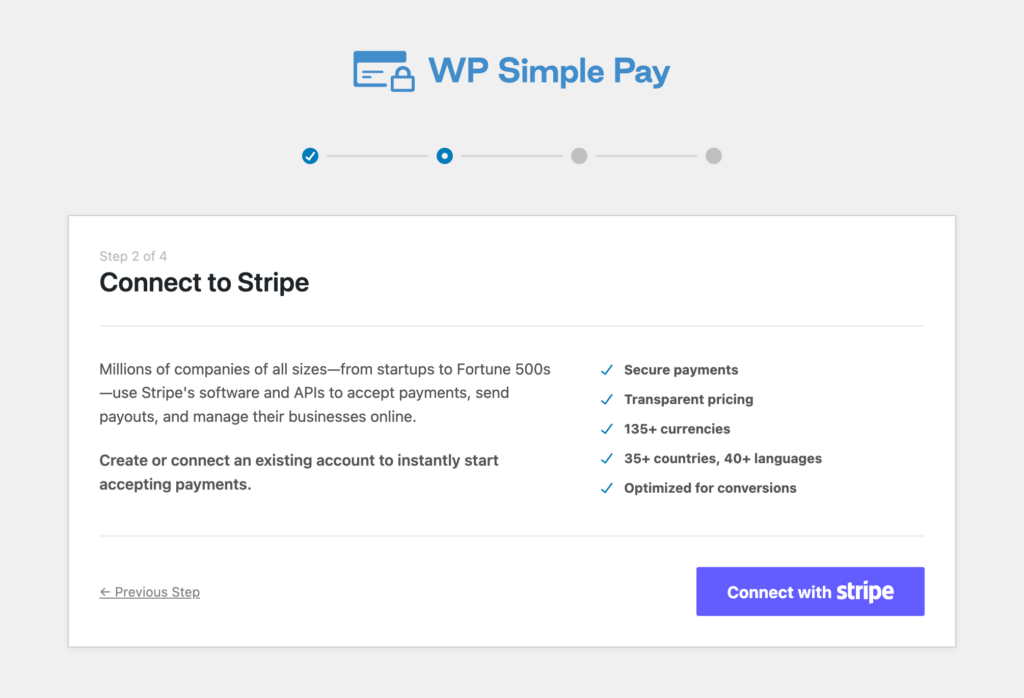
After that, just enter the email address you use for your Stripe account and connect it to your site. If you don’t have a Stripe account, you can easily create one by entering your email address and completing registration.

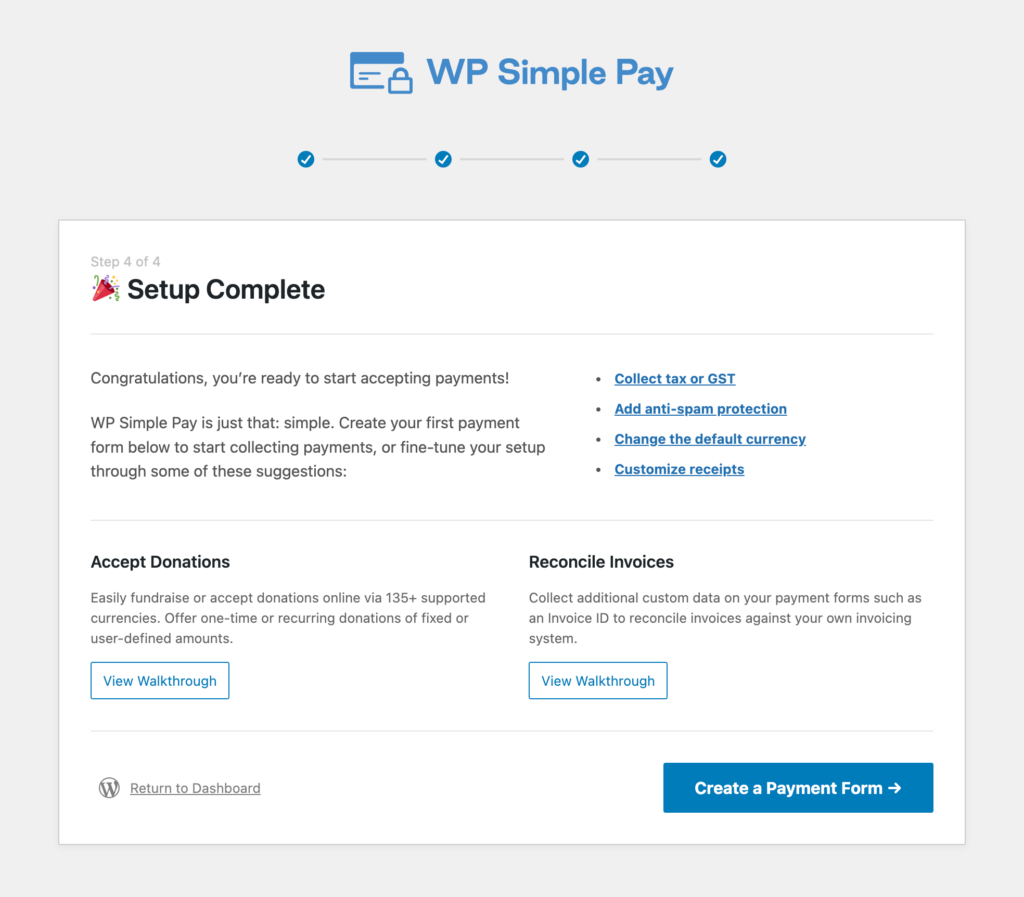
Once your WordPress site is connected to your Stripe account, you’ll be shown a success page that says Setup Complete.
Next, go ahead and click on Create a Payment Form.
Step 3: Create a Payment Form
At this point, you’ve installed and activated WP Simple Pay and connected your Stripe account to WordPress.
The next thing you’ll need to do to start accepting payments on your site using the Stripe Payment Element feature is to create a payment form.
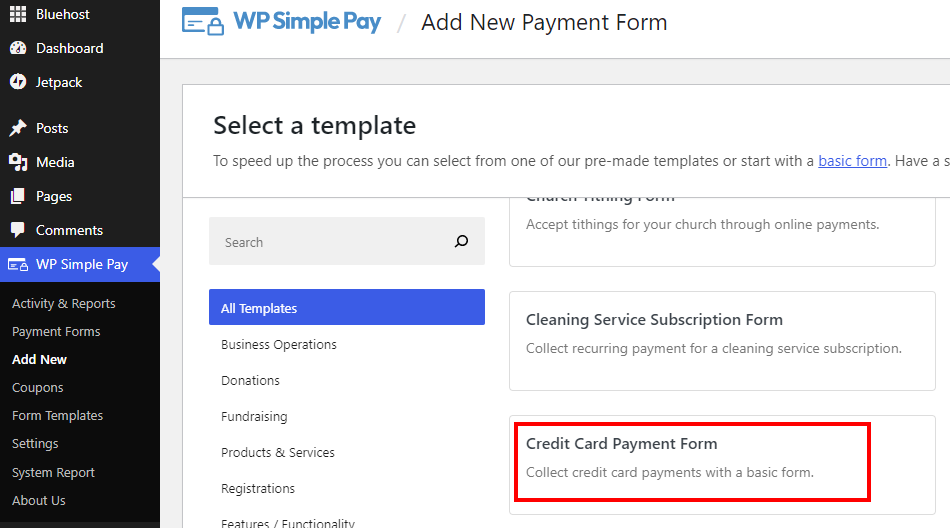
WP Simple Pay offers a wide variety of pre-built payment form templates to choose from, depending on your business’s specific needs.
For the purpose of this tutorial, let’s select Credit Card Payment Form.
After you click on the Use Template button, you’ll be taken to the form’s General tab. Here, you can edit the title, description, form type, and payment success page settings.
The General tab is also where you can enable your spam and fraud protection settings, including email verification and CAPTCHA.
For the sake of this tutorial, we’re going to focus on the form Type.
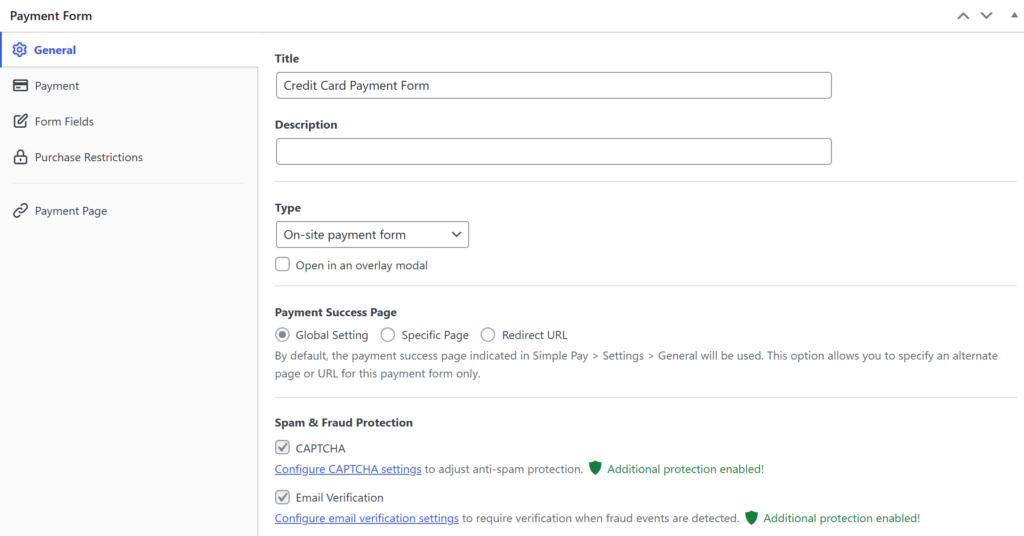
You may have noticed that the form Type field is set to On-site payment form by default, which means that your payment form can be embedded directly into any post or page on your site.
On-site payment forms allow your users to easily complete their purchases without ever leaving your site.
The best part about on-site payment forms is that you can style, customize, and rearrange them anywhere on the page.

Step 4: Configure Payment Methods
Next, to enter the price and add or configure payment methods click on the Payment tab on the left.
This is where you can enter the price of your product or service and see the complete list of payment methods offered in your location. Be sure to click on the Payment Methods dropdown menu and select All.

Keep in mind that if you want to allow your customers to check out using Apple Pay, Google Pay, or Microsoft Pay, you can enable Mobile Wallets by clicking on Configure next to the Card tab and checking the box in the popup.

Once you’ve added the price, chosen a one-time payment or a subscription, and selected the payment methods you want to accept on your form, you’re ready to click on Form Fields.
The Form Fields page is where you can add fields such as Name, Phone, and Address to your form by selecting each of them from the dropdown menu and clicking on Add Field. You can also remove the fields you don’t want.
To rearrange the order of the fields, simply click on the menu button icon next to each field and drag up or down.
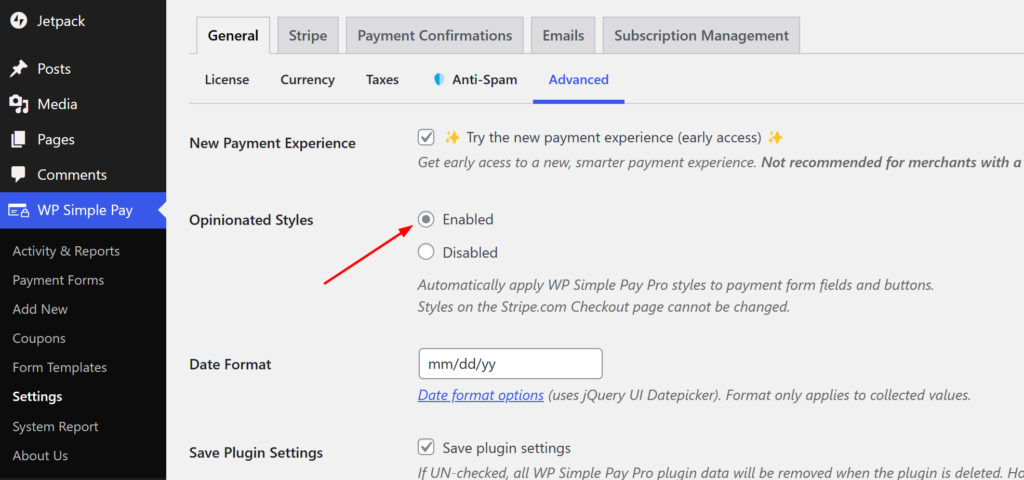
Step 5: Enable Opinionated Styles
Apply WP Simple Pay styles to ensure that your payment form fields and buttons work properly.
You can easily do this by going to WP Simple Pay » Settings » General » Advanced and selecting Enabled next to the Opinionated Styles options. Be sure to save your changes.
Step 6: Publish Your Payment Form
You’re finished! Now that you’ve finalized creating your payment form with Stripe Payment Element enabled, it’s time to publish it on a page or post on your site.
Be sure to test your form before making it live to ensure that it works. In WordPress, you can easily toggle between live mode and test mode.
For more information about Test mode, check out how to enable Stripe test mode in WordPress.
To embed your form, go to the post or page where you want to publish it. Next, click on the + icon to add the WP Simple Pay block. Then, choose the form you just created and click Publish.
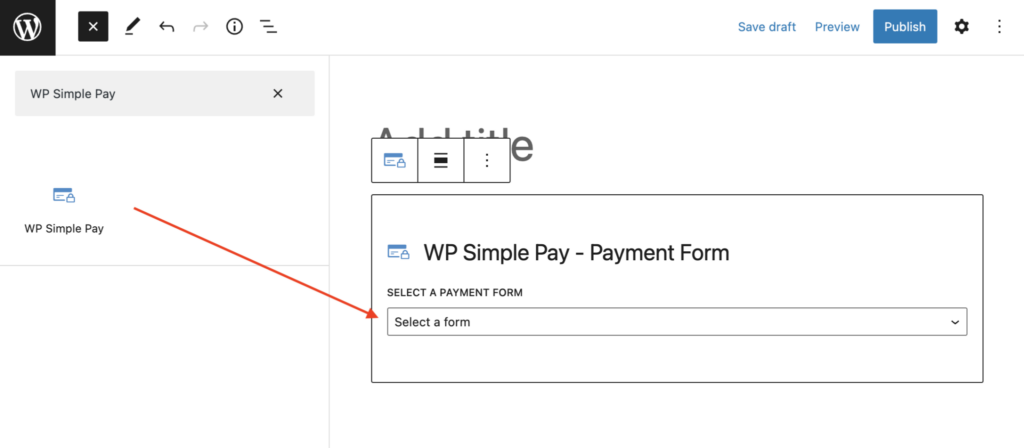
To see how your payment form looks with Stripe Payment Element enabled, visit the page on the front end of your site.
That’s it! We hope this article has helped you learn how to enable Stipe Payment Element in WordPress. You’re now well on your way to accepting multiple payment methods.
If you liked this article, you might also want to check out how to create a one-click checkout form in WordPress.
What are you waiting for? Get started with WP Simple Pay today!
To read more articles like this, follow us on X.
Disclosure: Our content is reader-supported. This means if you click on some of our links, then we may earn a commission. We only recommend products that we believe will add value to our readers.


Leave a Reply