
How to Create a One-Click Checkout Form in WordPress
Last updated on

Do you want to create a one-click checkout form in WordPress?
Enabling your users to check out using their saved payment details can increase your conversion rates by over seven percent.
In this article, we’ll show you how to create a secure, one-click checkout form so your customers can complete purchases faster and easier.
Creating a One-Click Checkout Form in WordPress
Offering a way for your customers to check out with one click using saved information allows them to complete a transaction nine times faster than having to enter it manually.
While this is a great way to boost conversions, you’ll need to ensure that the private information is saved securely. This is why we recommend using Stripe Link, a simple and secure one-click checkout solution that is built directly into your Stripe account.

Link uses Stripe’s Level 1 PCI-compliant servers to securely store and process payments. This means no credit card details or additional information ever touches your server, ensuring that your customers data is encrypted with leading encryption standards to keep it secure.
Since Link is now available on hundreds of thousands of sites, all users have to do is save their payment information on any Link-supported site to begin paying in one click across the network, including yours.
Before you can enable your customers to use Link on your site to complete transactions in just six seconds, you’ll need to get a Link-supported payment plugin.
WP Simple Pay, the #1 Stripe payments plugin for WordPress, supports Link and other advanced Stripe features including 13 payment methods in 135+ currencies, location-based tax collection, and buy now, pay later services.
Additional WP Simple Pay features include:
- On-Site Payment Forms keep visitors on your site longer and allow them to complete transactions directly on your WordPress site.
- Pre-Made Payment Form Templates allow you to create a customized payment form for all kinds of products and services in minutes.
- Drag and Drop Payment Form Builder lets you easily create a payment form without having to write any code.
- Fee Recovery enables you to pass the additional Stripe fee onto your customers.
Remove the additional 3% fee!
Most Stripe plugins charge an additional 3% fee for EVERY transaction
…not WP Simple Pay Pro!
Now that you know why you should allow your customers to check out in one click, we’ll show you the best way to create a one-click checkout form for your WordPress site.
Step 1. Install and Activate WP Simple Pay
To create a payment form that enables your customers to check out in one click, the first thing you’ll need to do is install and activate WP Simple Pay.
After purchasing the WP Simple Pay plugin, download it from your purchase email receipt or from your WP Simple Pay account.
To install it, go to your WordPress backend, navigate to Add New under Plugins, and then Upload Plugin. Click Choose File and find the WP Simple Pay .zip file on your computer. Click Install Now. When the upload is complete, press the Activate Plugin button.
If you want to install WP Simple Pay via FTP, follow this guide.

If you didn’t see the setup wizard, simply head over to WP Simple Pay » Settings » Advanced tab and click the Launch Setup Wizard button.
2: Connect WordPress to Stripe
To connect your WordPress site to Stripe, click on Connect with Stripe.

Next up, enter the email address you use for your Stripe account and connect it to your site. If you don’t have a Stripe account, you can easily create one by entering your email address and completing the registration.
Upon completing this process, you’ll be shown a success page that says, “Setup Complete.” Next, click on Create a Payment Form.

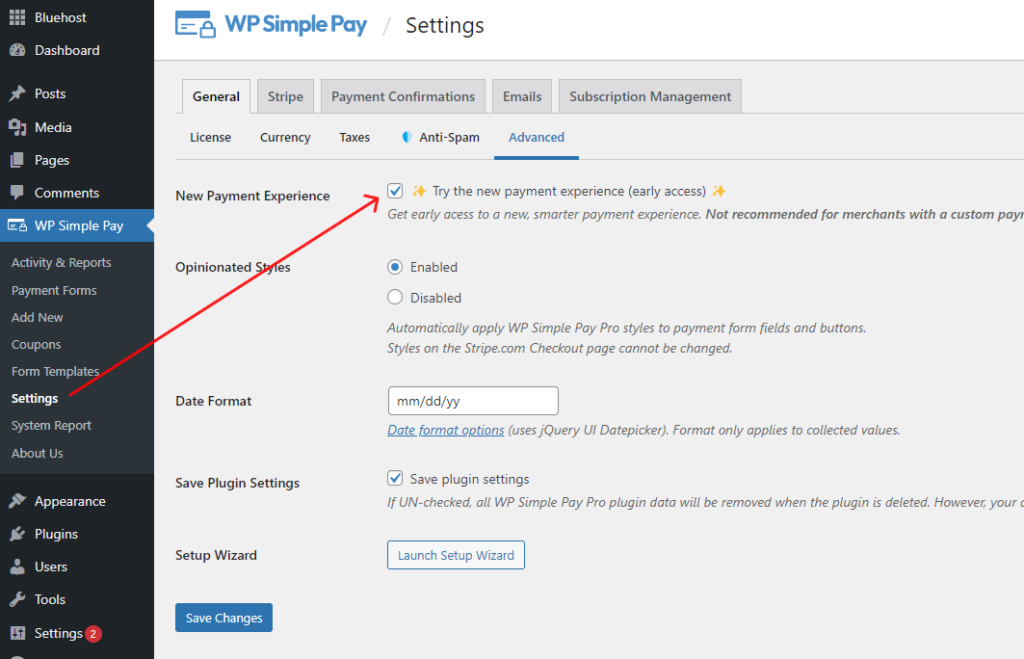
Step 3: Enable Stripe Link in WordPress
Before going straight to creating a one-click payment form, you’ll need to be sure Stripe Link is enabled in WP Simple Pay.
You can easily do this in your WordPress dashboard by navigating to WP Simple Pay » Settings » Advanced and selecting the New Payment Experience checkbox.
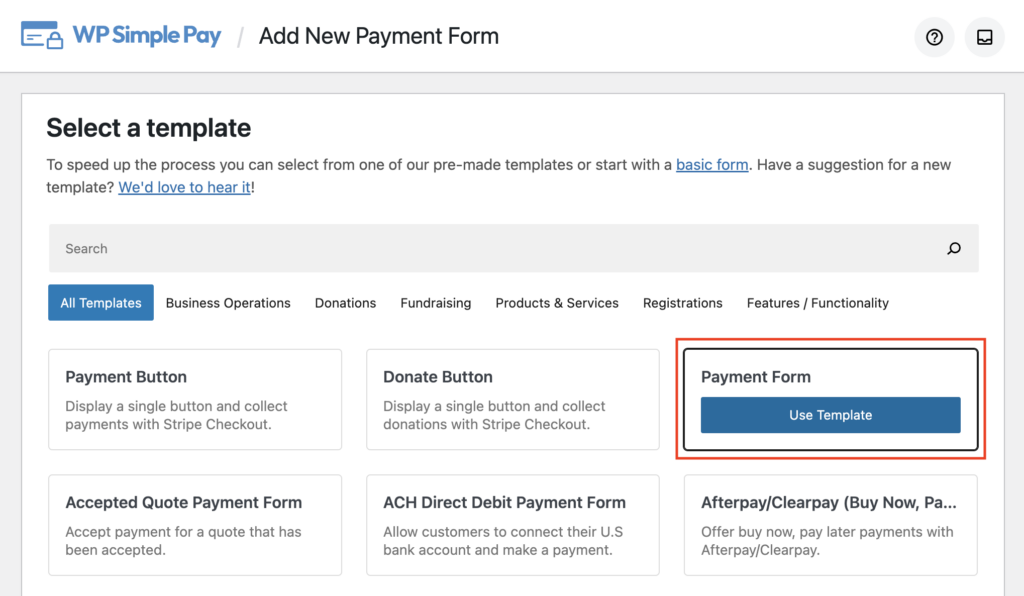
Step 4: Create a Payment Form
Now, it’s time to create a payment form.
To do this, you’ll first need to navigate to WP Simple Pay » Add New and then choose a template from the library of templates.
Each of the pre-made template forms comes preselected with form fields and payment options. Don’t worry, you can still customize the dropdowns, checkboxes, and text fields using pre-made templates.
For the purpose of this tutorial, we’re going to choose a simple template called Payment Form.
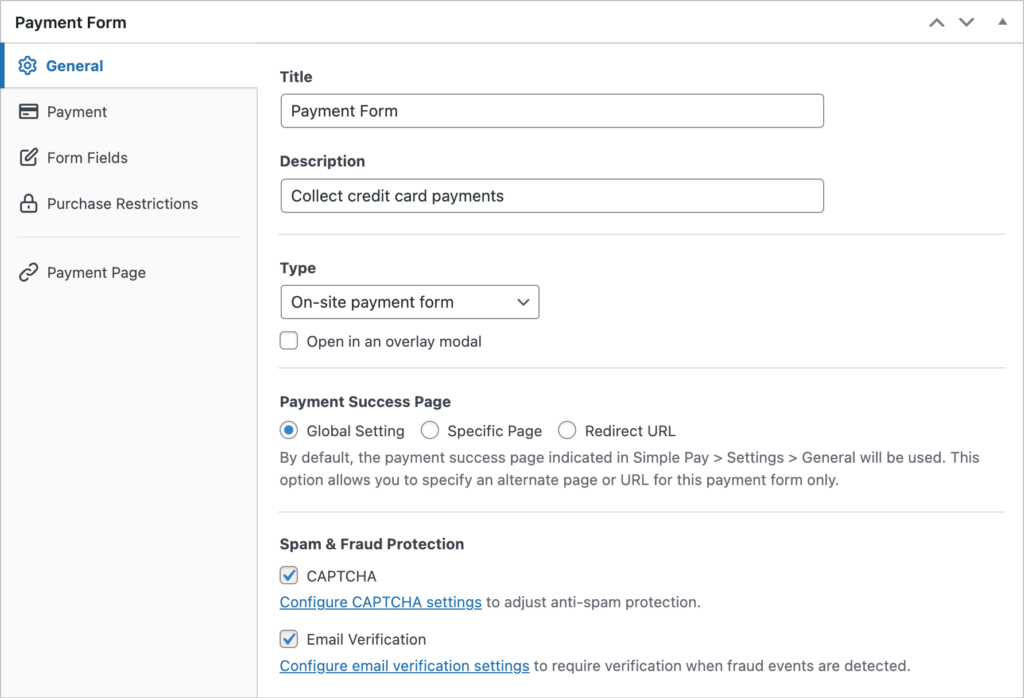
Step 5: Configure Your Payment Form
Now that you have chosen your template, you’ll be taken to the configuration page, where you can configure the settings for your payment form.
In the General tab, you can change the title, description, and form type. You can also enable spam and fraud protection features including CAPTCHA and email verification.
Check out this article to learn more about different payment form types.
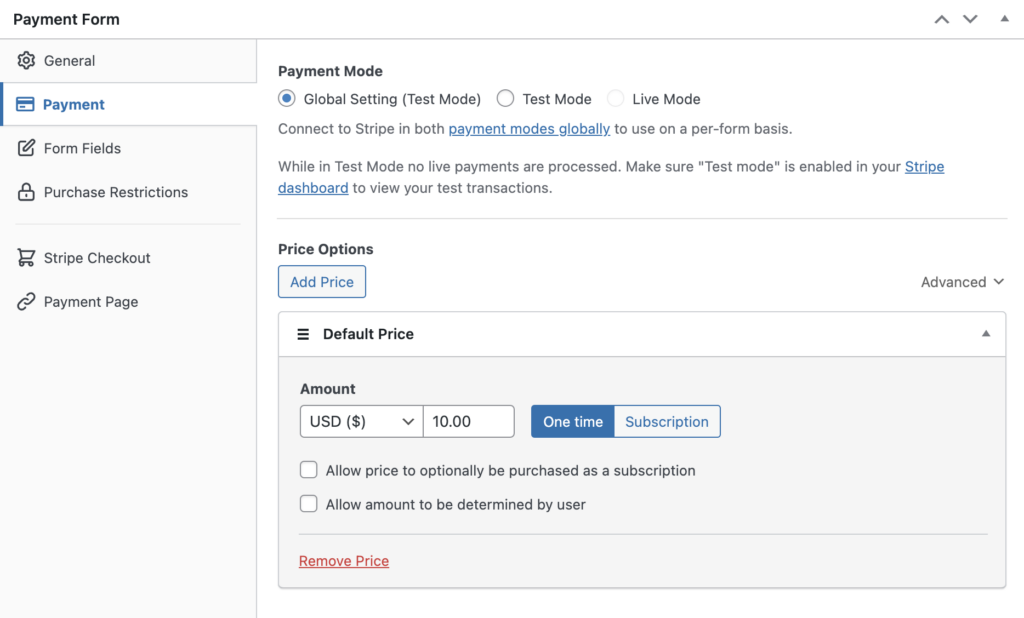
Next, click on Payment in the left panel so you can customize the currency and price. You can also choose between a one-time payment or subscription option for your form.
Next, it’s time to enable Link so your customers can complete the checkout process in one click.
You can do this by simply going to Form Fields in the left panel and checking the Offer Saved Payment Methods box within the Email Address custom field.
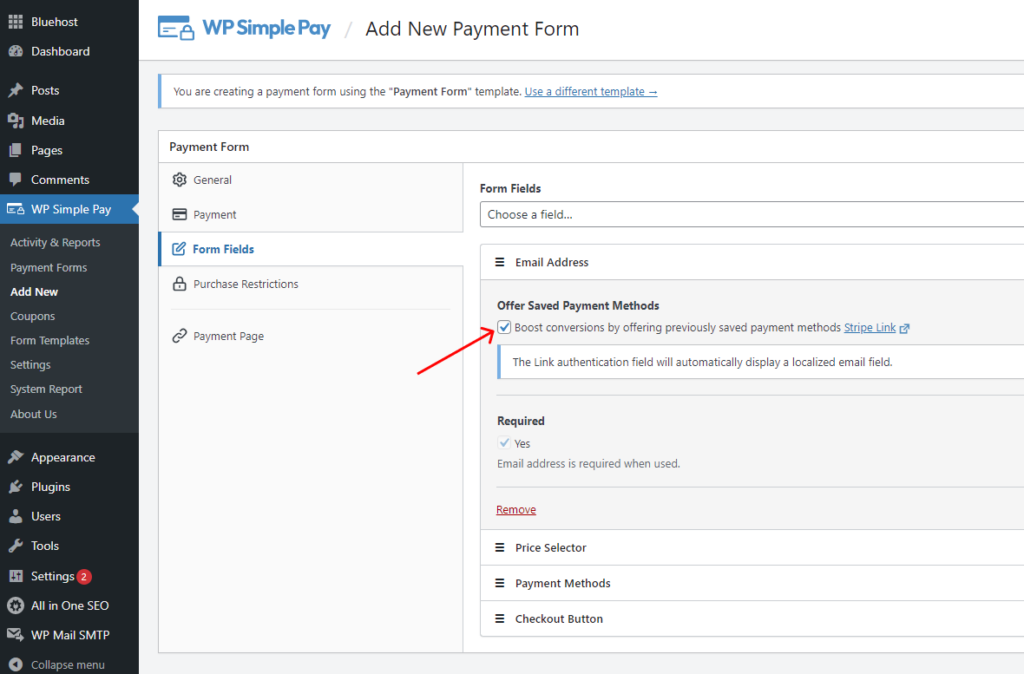
You can also customize or add any form field you would like.
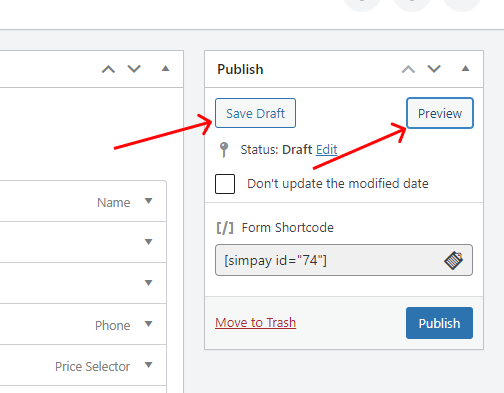
Once you’ve saved your completed payment form, we recommend previewing it so you can be sure it looks exactly how you want it to.
You can do this by clicking on the Save Draft button and then the Preview button in the right-hand column.
Step 6: Add the Payment Form to a Page
Now that you have created your one-click checkout form and you’re ready to begin accepting payments, it’s time to embed your form on your site.
To ensure that your form is working properly, you’ll want to test it. You can toggle your entire site or individual payment forms between test and live modes.
For more details, you can check out how to use test mode until your forms are ready to go live.
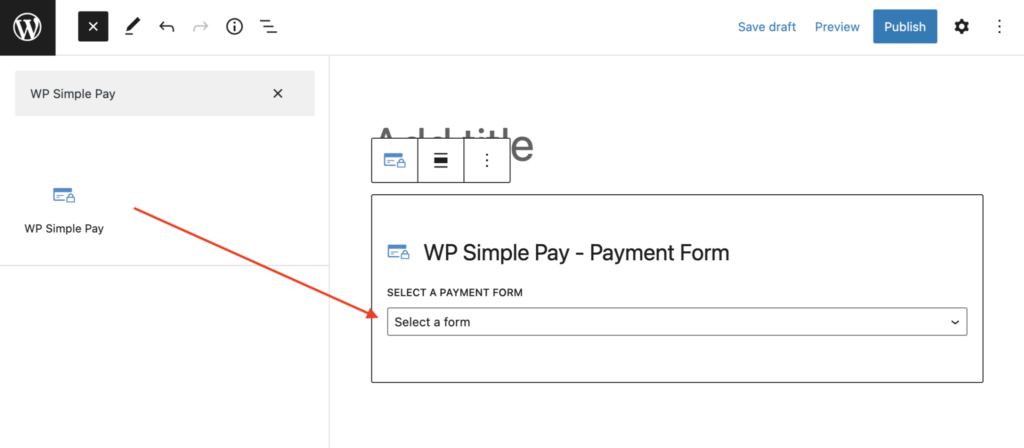
To embed the form, go to the post or page where you want to publish it on your WordPress site.
Then, click on the + icon to add the WP Simple Pay block and choose the form you just created.
Lastly, click Publish or Update.
You’re all set!
We hope this article helped you learn how to create a one-click checkout form on your WordPress site so you can provide your customers a faster and easier way to complete transactions.
If you liked this article, you might also want to check out how to add hCaptcha to WordPress payment forms.
What are you waiting for? Get started with WP Simple Pay today!
To read more articles like this, follow us on X.
Disclosure: Our content is reader-supported. This means if you click on some of our links, then we may earn a commission. We only recommend products that we believe will add value to our readers.


Leave a Reply