How to Accept Digital Wallet Payments in WordPress
Last updated on

Do you want to start accepting digital wallet payments on your WordPress site?
The usage of digital wallets continues to grow in popularity because they offer convenient and secure contactless payments. To stay competitive as an online business, you’ll need to offer your customers digital wallet options.
In this article, we’ll share how you can easily add digital wallets to your available payment method options.
Accepting Digital Wallet Payments in WordPress
The easiest way to accept digital wallet payments is to use a WordPress payments plugin that supports them.
WP Simple Pay is the #1 Stripe payments plugin for WordPress that lets you collect payments directly on your site without having to set up a shopping cart or implement a complicated eCommerce solution.
It lets you accept the most popular digital wallet payments, including Apple Pay, Google Pay, Microsoft Pay, Cash App Pay, Alipay, and GrabPay.
Some of WP Simple Pay’s additional features and benefits include:
- Advanced Drag & Drop Form Builder: Build the perfect payment forms in minutes with zero code.
- Custom Form Fields: Collect additional data from your customers or donors during checkout using dropdowns, text fields, and checkboxes.
- Fee Recovery: Remove the Stripe processing fee by passing it on to your customers.
- Payment Form Templates: Choose from several different pre-built payment form templates to get a jump start and meet the unique goals of your business or organization.
- Customized Payment Landing Pages: Easily create branded, distraction-free landing pages for your payment forms to help reduce checkout abandonment and increase conversions.
Remove the additional 3% fee!
Most Stripe plugins charge an additional 3% fee for EVERY transaction
…not WP Simple Pay Pro!
How to Accept Digital Wallet Payments
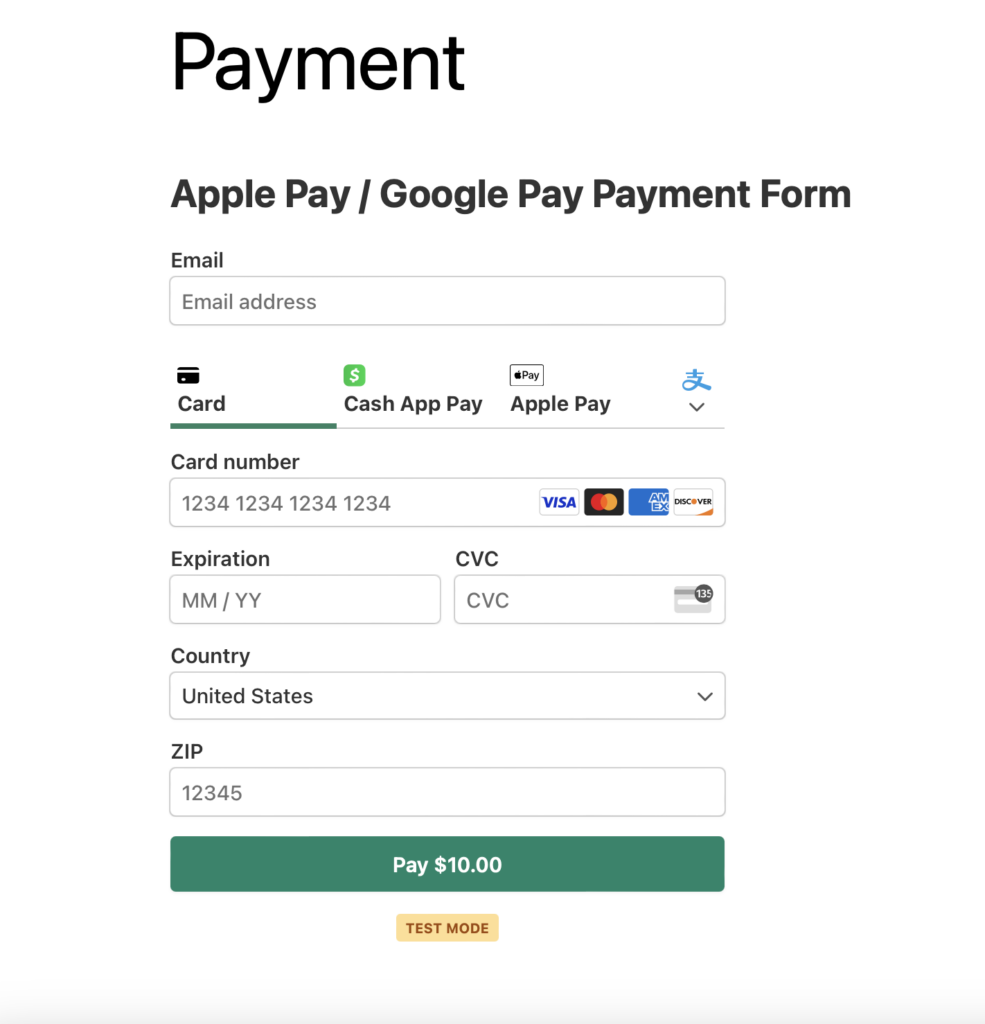
For the purpose of this tutorial, we’re going to create the following digital wallet payment form using WP Simple Pay.
Step 1: Download and Activate WP Simple Pay
To create a payment form for digital wallets, you’ll first need to download WP Simple Pay on your WordPress site and activate it.
First, head over to the pricing page and choose the best plan for your specific needs. If you need help with this step, see our WP Simple Pay review to learn more about the different options available.
Next, download the plugin from your WP Simple Pay account or your payment confirmation e-mail. Then, simply install it in WordPress.
For more details, see our detailed guide on how to install WP Simple Pay.
Once you’ve finished activating the plugin, you’ll be directed to the setup wizard. The setup wizard allows you to set up a Stripe account if you don’t already have one and connect it to your site without having to enter your API keys manually.

If you didn’t see the setup wizard, simply head over to WP Simple Pay » Settings » Advanced tab and click the Launch Setup Wizard button.
2: Connect WordPress to Stripe
To connect your WordPress site to Stripe, click on Connect with Stripe.

Next up, enter the email address you use for your Stripe account and connect it to your site. If you don’t have a Stripe account, you can easily create one by entering your email address and completing the registration.
Upon completing this process, you’ll be shown a success page that says, “Setup Complete.” Next, click on Create a Payment Form.

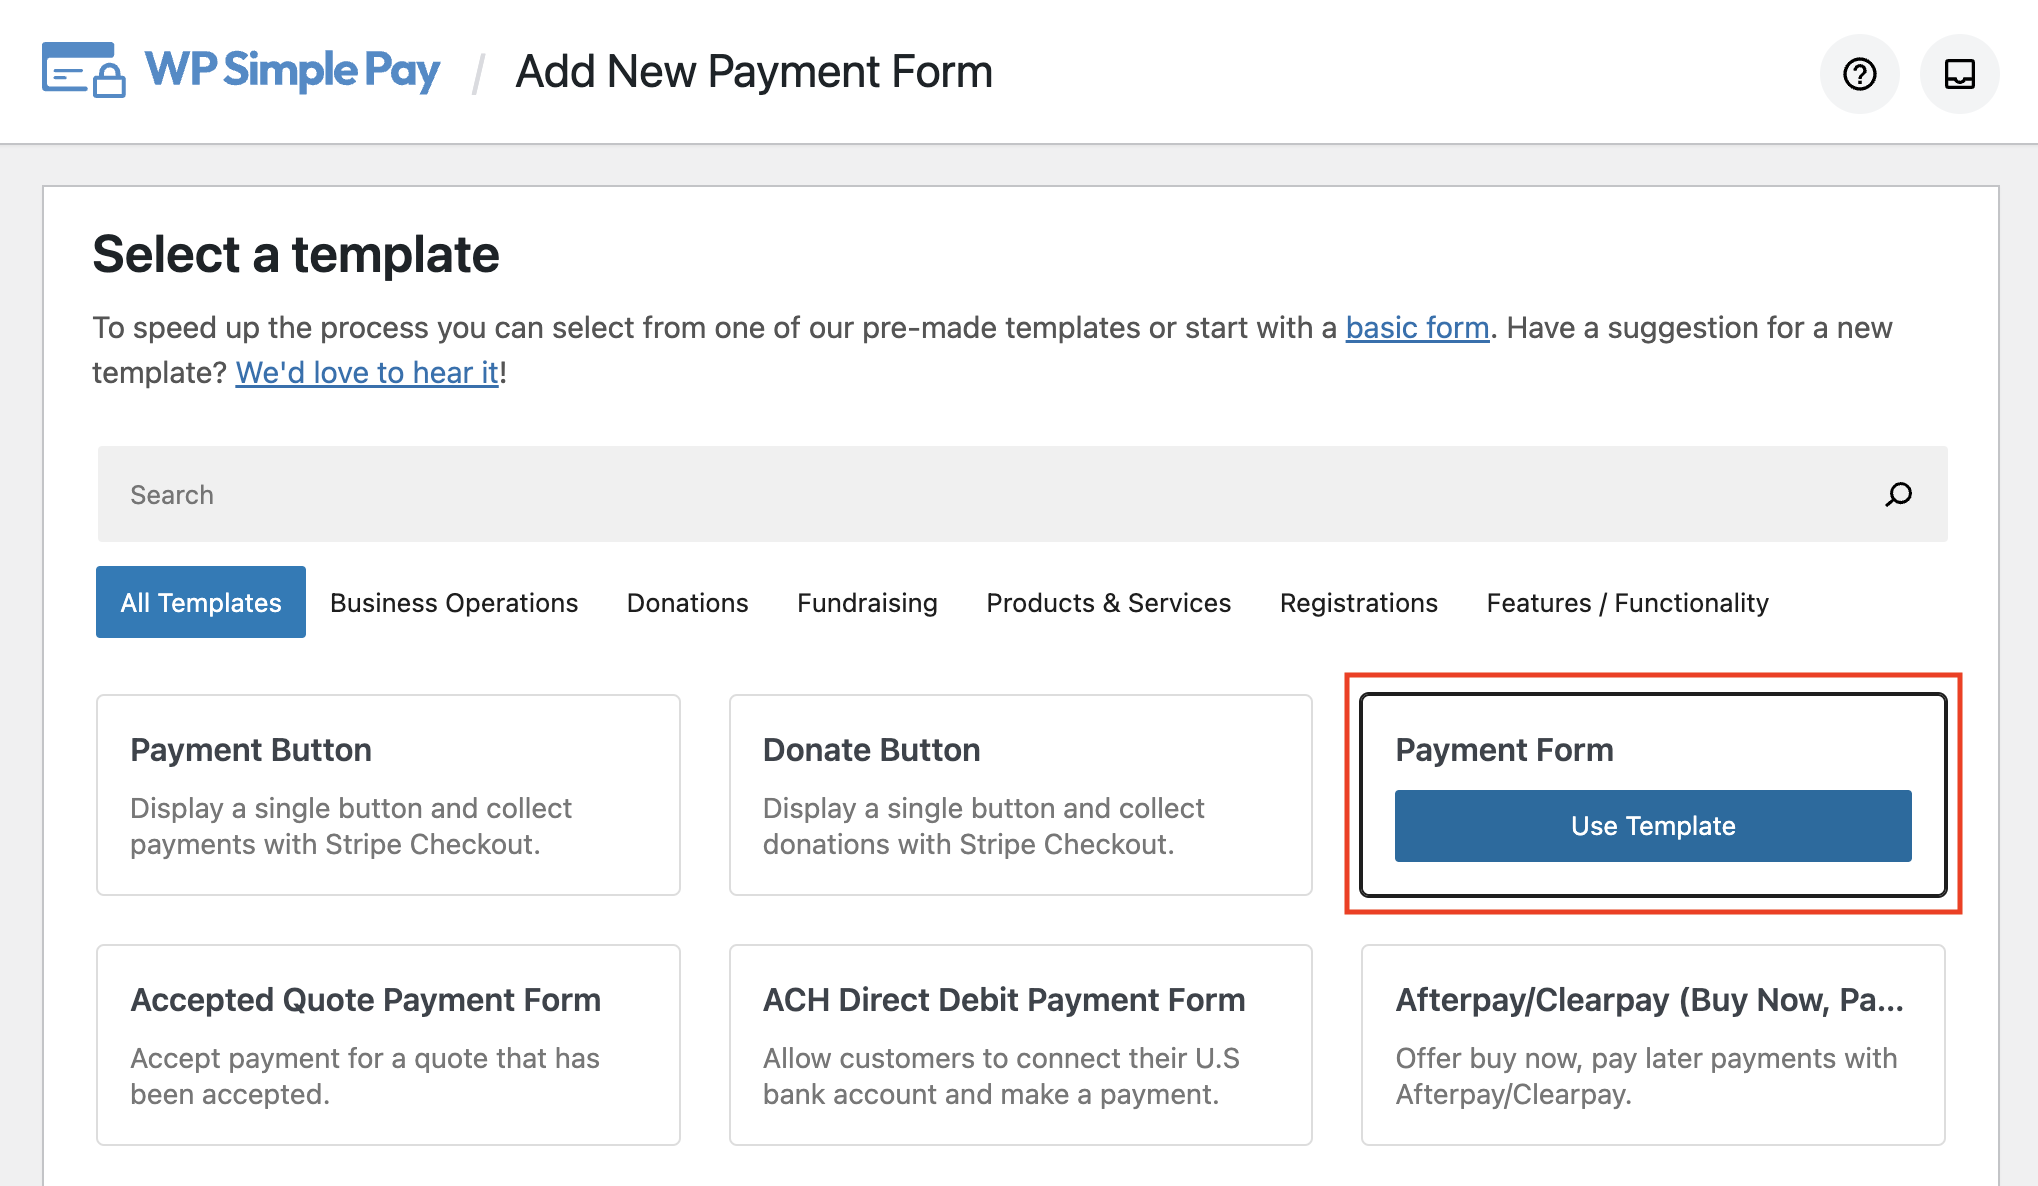
Step 3: Create a Digital Wallet Payment Form
You should have landed on the payment form templates library page. Go ahead and choose the basic Payment Form template.
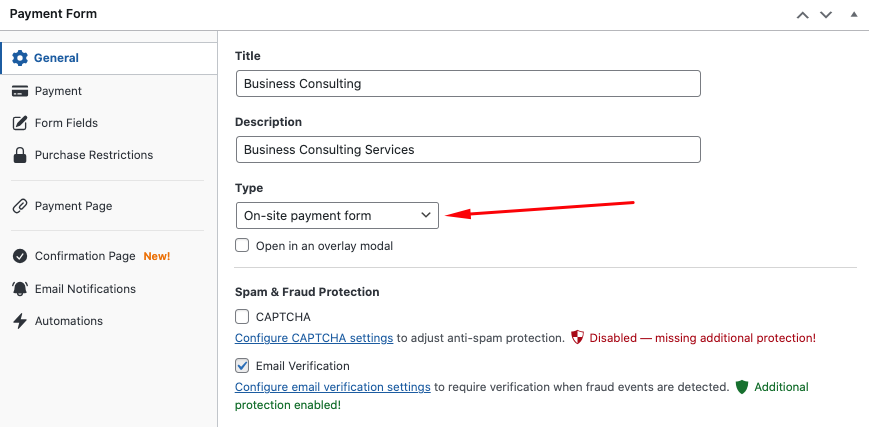
From the General tab, enter the title and description of your form and choose On-site payment form for the form Type. This will ensure that your customers or donors can complete their payments without having to leave your site, reducing checkout abandonment.
Next, click on the Payment tab. Here is where you’ll need to enter the price amount and choose the digital wallet options you want to offer.
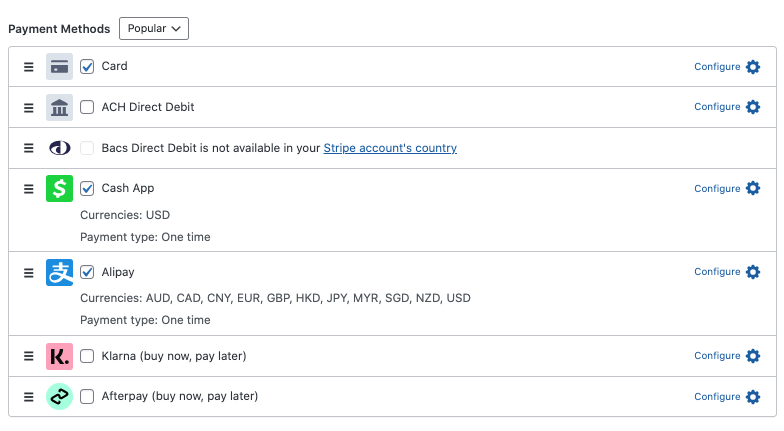
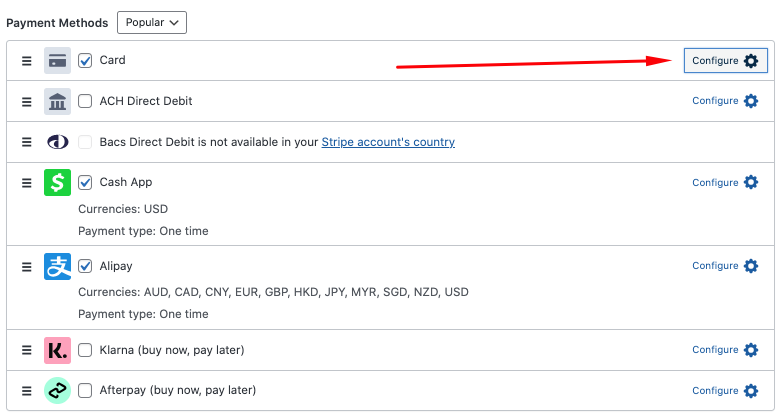
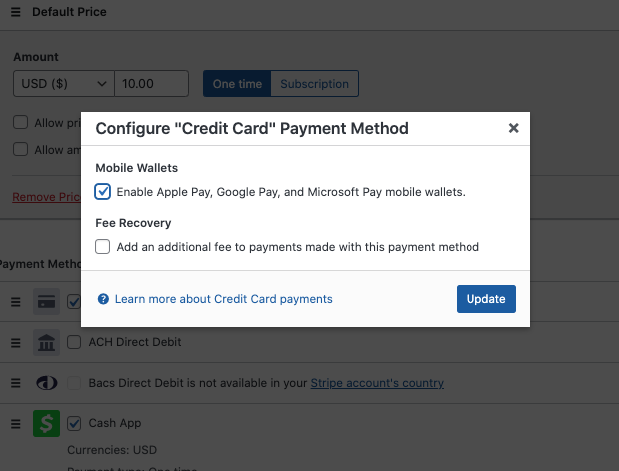
For Cash App Pay and Alipay digital wallets, you can simply check the boxes. If you want to offer Apple Pay / Google Pay / Microsoft Pay, be sure to click on the Configure icon for the Card method.
Then, check the box for Mobile Wallets.
Next, go ahead and click on the Form Fields tab. Here is where you can add, edit, and remove custom form fields to ensure that you collect the needed information from your customers or donors.
Feel free to schedule when your form starts and stops accepting payments from the Purchase Restrictions tab.
You can also create a personalized payment confirmation message and email using the Confirmation Page and Email Notifications Tabs.
Once you’ve finished, be sure to click on Save.
Step 4: Publish Your Digital Wallet Payment Form
Now that you’ve created your digital wallet payment form, it’s time to publish it on your site. Go ahead and click on the Publish button.
Then, to embed the form, go to the post or page you want your form on. Click on the + icon to add the WP Simple Pay block. Then choose the form you just created and click Publish or Update.

There you have it! We hope this article has helped you learn how to accept digital wallet payments on your WordPress site.
If you liked this article, you might also want to check out our guide on the top eCommerce trends to watch for in 2024.
What are you waiting for? Get started with WP Simple Pay today!
To read more articles like this, follow us on X.
Disclosure: Our content is reader-supported. This means if you click on some of our links, then we may earn a commission. We only recommend products that we believe will add value to our readers.


Leave a Reply