
How to Accept GrabPay Payments in WordPress
Last updated on

Do you want to accept GrabPay payments on your WordPress site?
GrabPay, a popular payment method in Southeast Asia, allows online businesses in Malaysia and Singapore to offer a digital wallet payment solution to their customers for one-time payments.
In this article, we’ll share how to easily accept GrabPay payments in WordPress.
What is GrabPay?
Launched by Grab, a ridesharing service provider, GrabPay is the most widely accepted digital wallet in Southeast Asia. It allows its users to make online payments using a stored balance. They can also “top-up” their GrabPay wallet balance using their connected debit card or bank account.
Offering GrabPay removes the need for your customers to enter their card and billing details during checkout, increasing the likelihood of them completing their transactions.
Additionally, depending on your payment processor, the transaction fees for GrabPay are generally less expensive than credit and debit card payments.
For example, in Singapore, Stripe charges 3.4% + S$0.50 per transaction for local card payments. The Stripe fee for GrabPay payments is just 3.3%.
In Malaysia, the Stripe processing fee for GrabPay payments is 3%, while the payment processor charges 3% + RM1.00 for card payments.
How Does GrabPay Work?
To pay with GrabPay, customers in Singapore and Malaysia are redirected to GrabPay’s website, where they have to authenticate the transaction using a one-time password. After authentication is complete, customers are redirected back to your site.
GrabPay payments offer a lowered risk of fraud because the authentication is initiated and completed by the customer.
How to Accept GrabPay Payments in WordPress
Let’s dive right in and create a GrabPay payment form.
First, to get started, you’ll need a WordPress plugin that supports GrabPay.
WP Simple Pay is the best Stripe payments plugin for WordPress that lets you easily collect online payments without setting up a shopping cart. One of the best parts about the plugin is that it lets you create payment forms for one-time or recurring payments without code for multiple payment methods, including GrabPay.
Step 1: Install and Activate WP Simple Pay in WordPress
To begin accepting GrabPay payments on your site, the first thing you’ll need to do is install and activate WP Simple Pay.
Simply visit the pricing page and choose the right plan for your needs.
Next, locate the .zip file in your purchase confirmation email or your new WP Simple Pay account and download it to your computer.
Then, upload the file to your site from the WordPress admin dashboard.
First time installing a plugin? Don’t worry! We’ve created a step-by-step guide on how to install WP Simple Pay.
Once you’ve installed and activated WP Simple Pay, the setup wizard will guide you through connecting your Stripe account to your site.
Go ahead and click on the Let’s Get Started button.

If you didn’t see the setup wizard, simply head over to WP Simple Pay » Settings » Advanced tab and click the Launch Setup Wizard button.
2: Connect WordPress to Stripe
To connect your WordPress site to Stripe, click on Connect with Stripe.

Next up, enter the email address you use for your Stripe account and connect it to your site. If you don’t have a Stripe account, you can easily create one by entering your email address and completing the registration.
Upon completing this process, you’ll be shown a success page that says, “Setup Complete.” Next, click on Create a Payment Form.

Step 3: Create a GrabPay Payment Form
Now that you’ve installed and activated WP Simple Pay in WordPress and connected your Stripe account, it’s time to create a payment form that accepts GrabPay payments.
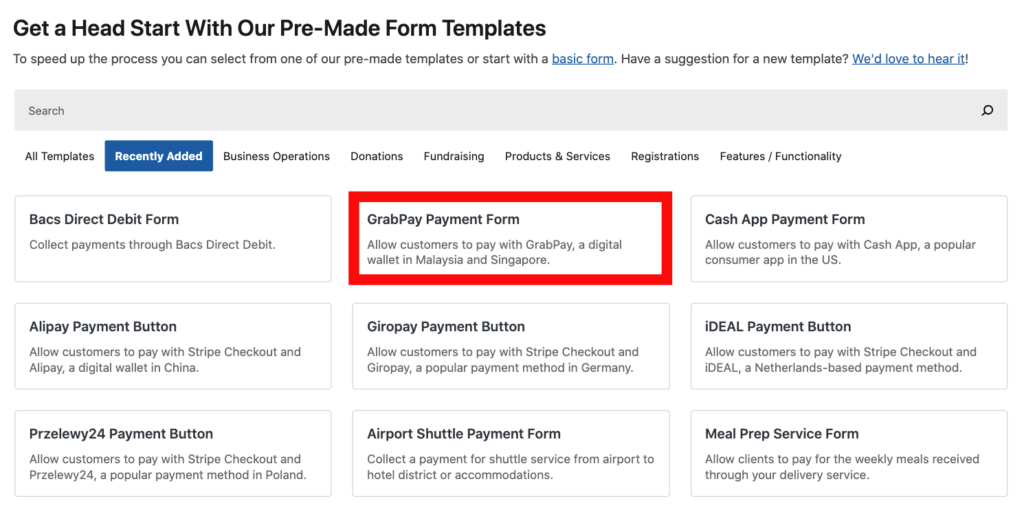
You should be on the payment form templates library page, where you’ll notice several different templates to choose from.
For the sake of this tutorial, go ahead and choose the GrabPay Payment Form.
Next, in the General tab, you’ll need to enter the title and description of your form.
Be sure to leave the On-site payment form selected for the form Type. You can also configure the Spam & Fraud Protection settings, including CAPTCHA and Email Verification.
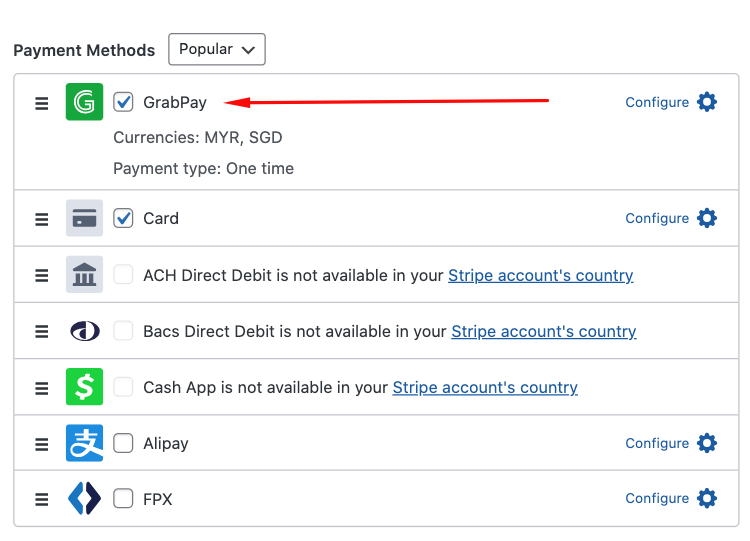
Once you’ve finished, go ahead and click on the Payment tab. Here is where you’ll need to enter your price amount and choose One time to accept one-time payments. Currently, recurring payments are not available with GrabPay.
You’ll notice the list of available payment method options. GrabPay has been conveniently chosen for you with this specific payment form template.
Next, click on the Form Fields tab to access the menu of custom field options. You can add, edit, and remove the fields to ensure you’re collecting the information you need regarding the payment. For example, you can require your customers to fill in their name and shipping address.
Once you’ve finished, be sure to click on the Save Draft button on the top right-hand corner of the screen. You can now preview your form.
If you’d like to send your customers a customized payment confirmation email or display a personalized message after a successful payment, you can easily do this by clicking on the Confirmation Page and Email Notifications tabs and entering your messages.
WP Simple Pay offers built-in integration that allows you to set up tons of different automations to enhance the functionality of your site and automate purchase-related tasks, such as automatically adding a new customer to your mailing list. Simply click on the Automations tab to get started.
Now that you’ve created your GrabPay payment form and you’ve previewed it, go ahead and click on the Publish button.
Step 4: Publish Your GrabPay Payment Form on Your Site
Now that you’ve published your payment form, it’s time to add it to a page or a post on your site.
Simply go to the page or post you want your form on and click on the + icon on the top left-hand side of your screen. From the WP Simple Pay block, choose the payment form you just created.
Once you see your payment form displayed on your page or post, be sure to click on the Update or Publish button.

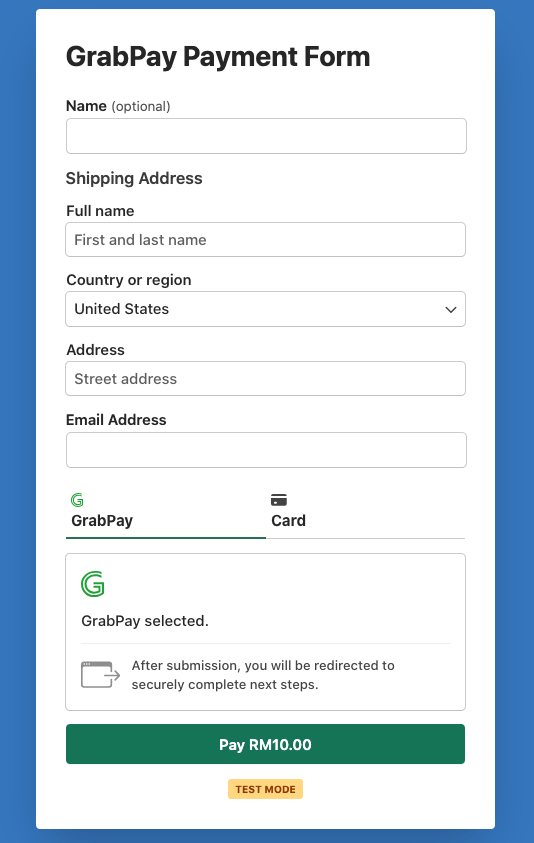
Your published form should look similar to the one below. When you’re ready to begin accepting live payments, simply navigate to the Payment tab and select Live Mode.
There you have it! We hope this article has helped you learn how to easily accept GrabPay payments on your WordPress site.
If you liked this article, you might also want to check out our article: 7 Reasons Why You Should Accept Digital Wallet Payments.
What are you waiting for? Get started with WP Simple Pay today!
To read more articles like this, follow us on X.
Disclosure: Our content is reader-supported. This means if you click on some of our links, then we may earn a commission. We only recommend products that we believe will add value to our readers.


Leave a Reply