How to Create a Stripe Payments Landing Page in WordPress
Last updated on

Do you want to learn how to create a custom checkout / payment page for your WordPress site?
Creating a distraction-free landing page where your customers or donors can complete their payments is a great way to boost conversion rates. In addition, customized landing pages with images and your logo can help build brand awareness. Thankfully, with the right tool, you can easily add dedicated landing pages that host Stripe payments to your site.
In this article, we’ll show you the best way to create a custom landing page for Stripe payments in WordPress.
Creating a Stripe Payments Landing Page
A dedicated payment page ensures high conversions as it removes unnecessary friction on the page, like headers, footers, and more, regardless of the WordPress theme you use.
The easiest way to create dedicated checkout landing pages for your site is to use a Stripe payments plugin for WordPress that supports customized landing pages.
With WP Simple Pay, the #1 Stripe payments plugin, you can create branded landing pages for your payment forms with zero coding. One of the best parts about the plugin is that it lets you customize the payment confirmation messages for individual payment forms to improve communication with your customers and help streamline any post-purchase steps that are required.
With WP Simple Pay, you can also:
- Accept Multiple Payment Methods: Offer preferred payment methods to expand your reach and broaden your customer base. Payment methods include Cash App Pay, Apple Pay / Google Pay / Microsoft Pay, ACH Direct Debit, Credit and Debit Cards, Alipay, and more.
- Create Per-form Emails: Automaticlly send your customers or donors custom payment confirmation e-mails for individual forms.
- Make Payment Forms in Minutes: Use pre-built payment form templates and an advanced drag-and-drop payment form builder to begin collecting payments on your site within minutes.
- Remove the 3% Stripe Processing Fee: Pass the addtional Stripe processing fee on to your customers to collect the full payment amount.
- And more…
Remove the additional 3% fee!
Most Stripe plugins charge an additional 3% fee for EVERY transaction
…not WP Simple Pay Pro!
Here are a few benefits of using a payment page on your site.
- Increase conversions: With a dedicated payment page, you can remove all the unnecessary elements that keep your visitors from making a payment.
- Independent of your theme: None of your theme elements, including your header, footer, and navigation menu, will be used in your custom payment page. This gives you endless opportunities to optimize the page for high conversions without hiring a developer.
- Customizable: With WP Simple Pay, you can easily add your logo, custom header, and more without touching a single line of code.
How to Create a Stripe Payments Landing Page
Step 1: Install WP Simple Pay to Create a Payment Page
To create a payment landing page on your site, the first thing you’ll need to do is to install and activate WP Simple Pay. To install the plugin, navigate to the pricing page and select a plan that suits your needs. Then download the plugin from your WP Simple Pay account or from your payment confirmation e-mail. Then, install it in WordPress.
For more details, see this step-by-step guide on how to install WP Simple Pay.
Once you’ve finished activating the plugin, you’ll be directed to the setup wizard. The setup wizard allows you to set up a Stripe account if you don’t already have one and connect it to your site without having to enter your API keys manually.

If you didn’t see the setup wizard, simply head over to WP Simple Pay » Settings » Advanced tab and click the Launch Setup Wizard button.
2: Connect WordPress to Stripe
To connect your WordPress site to Stripe, click on Connect with Stripe.

Next up, enter the email address you use for your Stripe account and connect it to your site. If you don’t have a Stripe account, you can easily create one by entering your email address and completing the registration.
Upon completing this process, you’ll be shown a success page that says, “Setup Complete.” Next, click on Create a Payment Form.

Step 3: Create a Stripe Payment Form
Now that you’ve installed and activated WP Simple Pay on your WordPress site, it’s time to create a payment page.
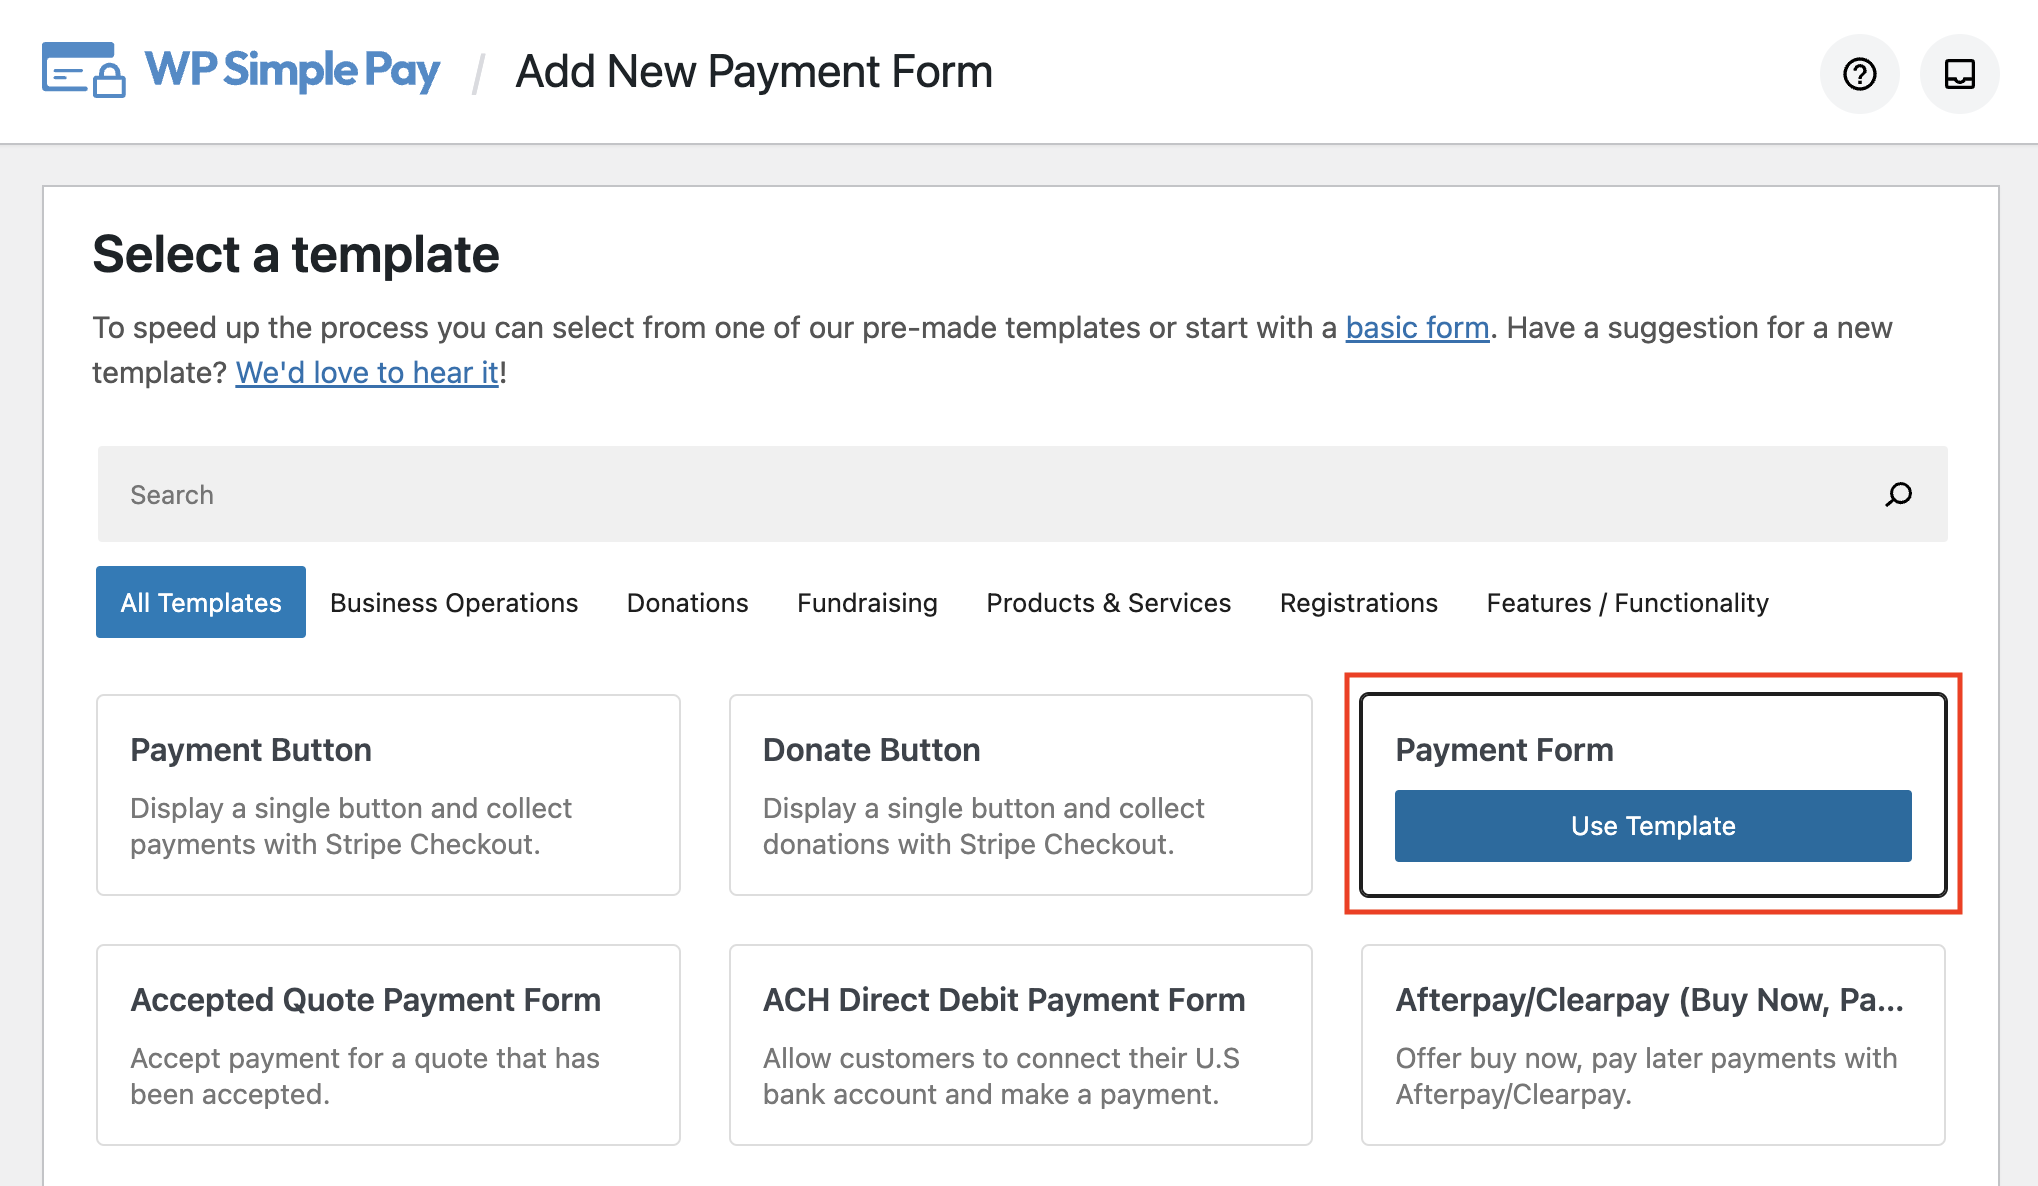
You should have been directed to a complete list of pre-built payment form templates. If you’re not on this page yet, simply navigate to WP Simple Pay » Add New.
While you can choose any form template based on your needs, for the purpose of this tutorial, we’ll be selecting the basic Payment Form template.
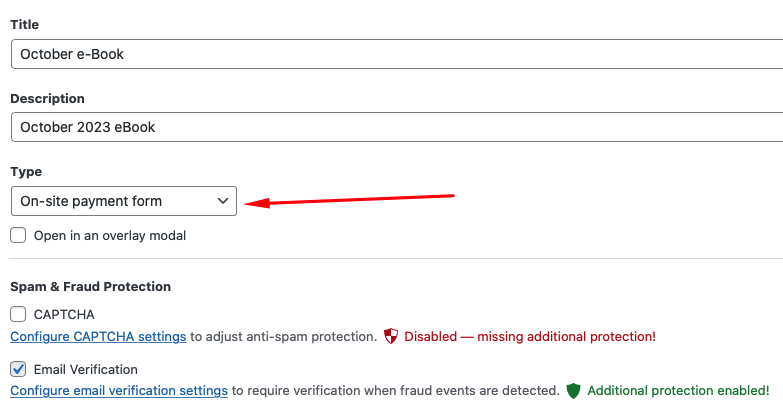
Next, you’ll be prompted to enter the title and description to your payment form. Be sure to also select On-site payment form to ensure that your customers complete their purchases directly on your site.
Note: If you choose Off-site Stripe Checkout form for the Type, your visitors will be redirected to a Stripe-hosted checkout page.
For the payment success page, if you don’t want to use the default page configured in the plugin settings, choose Specific Page. Alternatively, if you want to redirect users to an external site, choose Redirect URL.
To configure the payment settings, let’s choose the Payment option on the left. Here, you can add new price options and customize the existing ones. Aside from choosing an amount, you can also change the currency and even choose between one time or subscription payments.
Keep in mind that once the form is published, you no longer would be able to customize it. So, for now, let’s NOT change the payment mode to Live Mode until you preview and test the form.
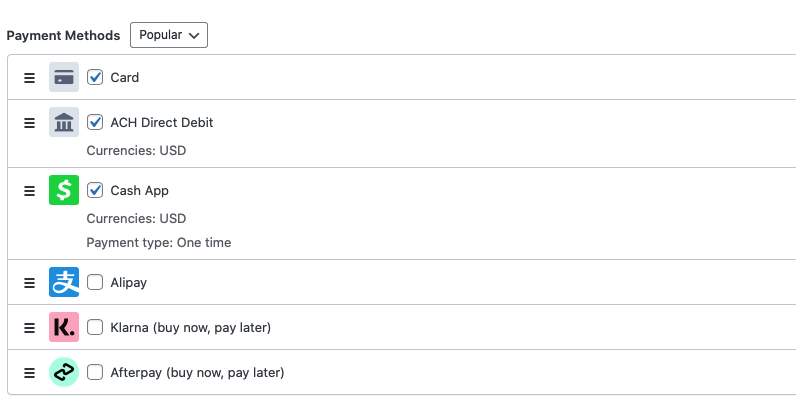
Feel free to enable as many payment methods as you want under the Payment Methods section. It’s best to offer multiple payment methods to ensure that you’re not excluding potential customers.
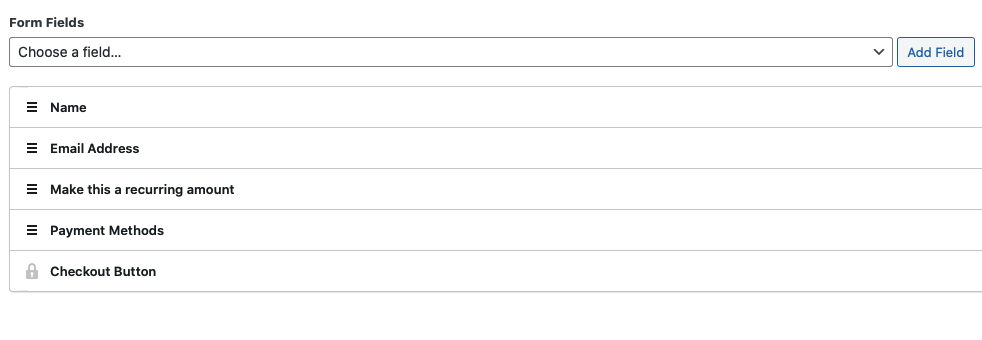
Next, click on the Form Fields option on the left-hand side. Here, you can add, remove, or edit any existing form fields.
Step 4: Create a Stripe Payment / Checkout Page
To create the Stripe payment page, select Payment Page from the left-hand side.
Next, select the checkbox Enable a dedicated payment page.
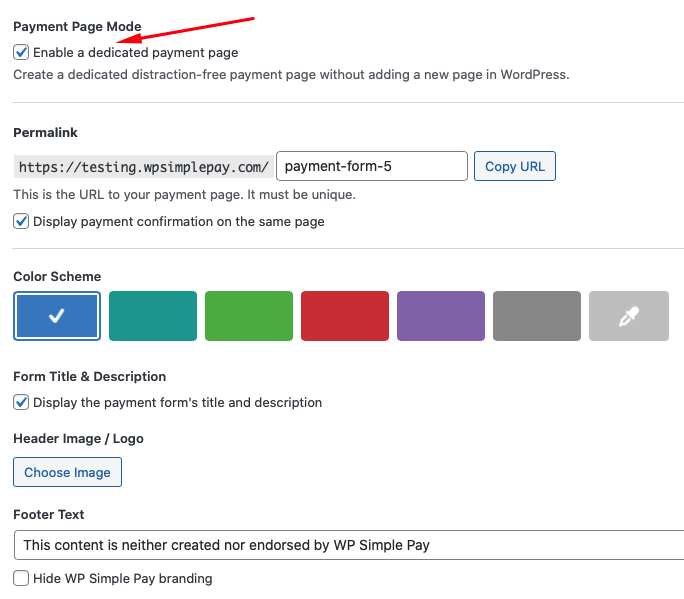
As soon as you click on the checkbox, you’ll be prompted to specify the URL for your payment page, a color scheme for the background, and a header image or logo. You can also choose to show or hide your payment form’s title and description on the page.
Be sure to uncheck the box next to Display payment confirmation on the same page. For the sake of this tutorial, we’re going to create a custom payment confirmation message related to this specific form.
Go ahead and click on the Confirmation Page option on the left-hand side. Here, you can enter a custom payment confirmation message that your customers will see after a successful payment.

Once you’ve entered your custom payment confirmation message in the text field provided, be sure to click on Publish after you’ve previewed your form.
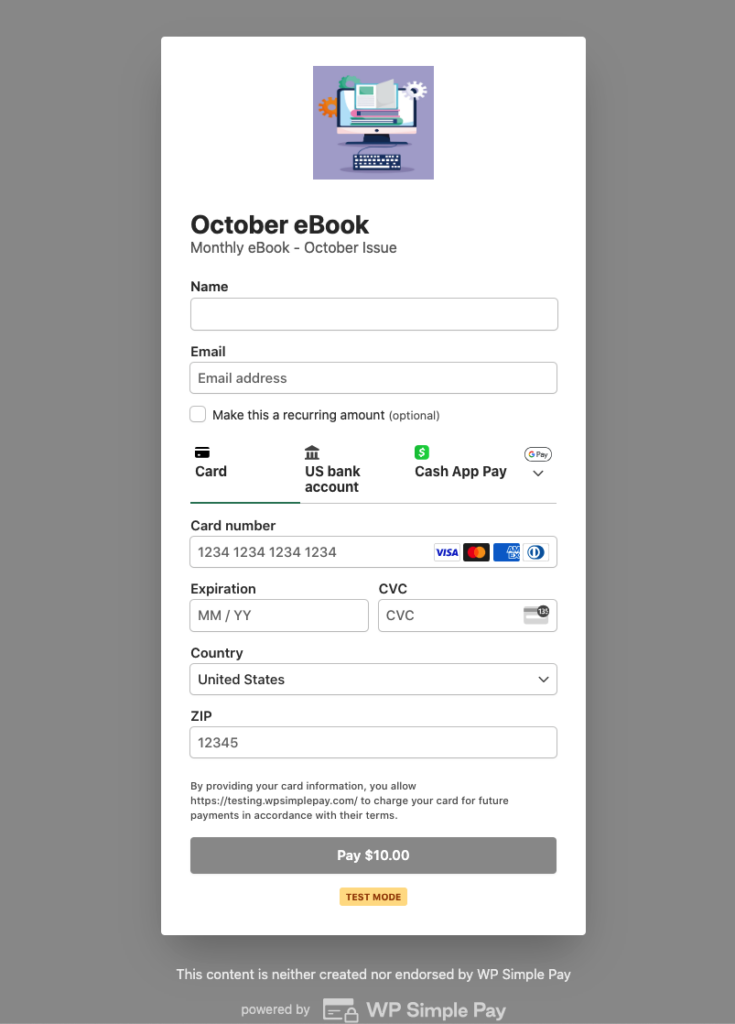
After you’ve published the form, you can check the live landing page by going to the URL you created in the Payment Page editor.
Below is the dedicated landing page we just created.
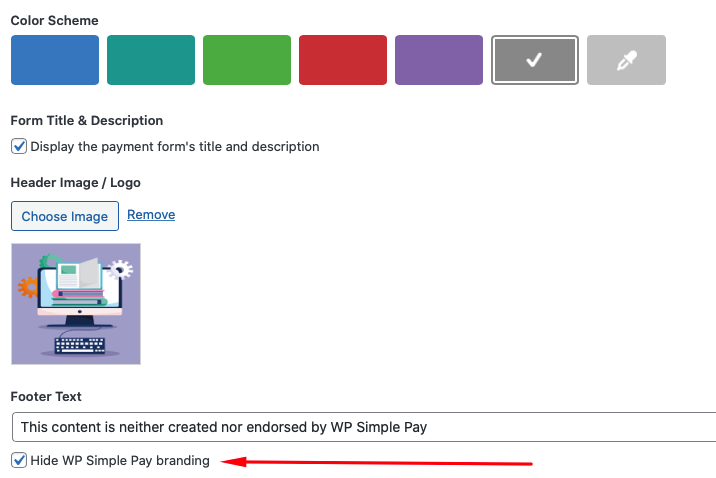
If you decide you want to remove the WP Simple Pay branding from the landing page, you always have the option to check the box next to Hide WP Simple Pay branding in the Payment Page editor.
That’s it!
We hope you learned how to create a custom Stripe payments / checkout page in WordPress.
If you liked this article, you might also want to check out our following guides:
- How to accept Google Pay / Apple Pay / Microsoft Pay in WordPress
- How to accept buy now, pay later payment in WordPress
- How to accept recurring payments with WordPress
What are you waiting for? Get started with WP Simple Pay today!
To read more articles like this, follow us on X.
Disclosure: Our content is reader-supported. This means if you click on some of our links, then we may earn a commission. We only recommend products that we believe will add value to our readers.


Leave a Reply