
How to Optimize Your WordPress Checkout Flows
Last updated on
 Reviewed By:
 Spencer Finnell
Your online checkout process works like a careful dance between your customer and your eCommerce website. Every extra step or confusing element can make potential customers leave the entire process.
Providing a smooth and user-friendly checkout flow can increase conversion rates by 25% or more, and it doesn’t have to be hard to implement one in WordPress.
In this article, I’ll cover how to create high-converting checkout flows that boost sales and foster long-term customers.
You’ll learn about adding multiple payment methods options, creating custom payment confirmation emails, and how to build checkout experiences that guide customers smoothly through their purchase.
Optimizing Your WordPress Checkout Flow
Setting up an optimized checkout isn’t just about accepting payments. Small tweaks in payment options, customized confirmation emails, and follow-up confirmation pages make a big difference in completing sales and retaining customers.
Let’s take a look at a few key components of a high-converting checkout flow.
How to Create Optimized Checkout Flows in WordPress
Setting Up Multiple Payment Methods
Simply put, online stores with multiple payment method options get more sales. After adding just one extra payment method, you could see sales jump by 15% on average.
Picking the right combination of payment methods makes a difference. Stripe is the most reliable payment gateway that lets you accept 10+ payment method options. Credit cards and ACH Direct Debit work like a trusty old friend, while digital wallets, Buy Now, Pay Later, and Stripe Link feel more like a speedy shortcut for younger shoppers.
Before you add a payment method, check the processing fees. Stripe typically charges 2.9% plus $0.30 per transaction.
Remove the additional 3% fee!
Most Stripe plugins charge an additional 3% fee for EVERY transaction
…not WP Simple Pay Pro!
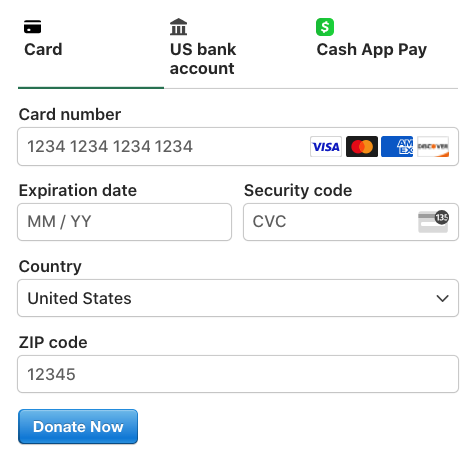
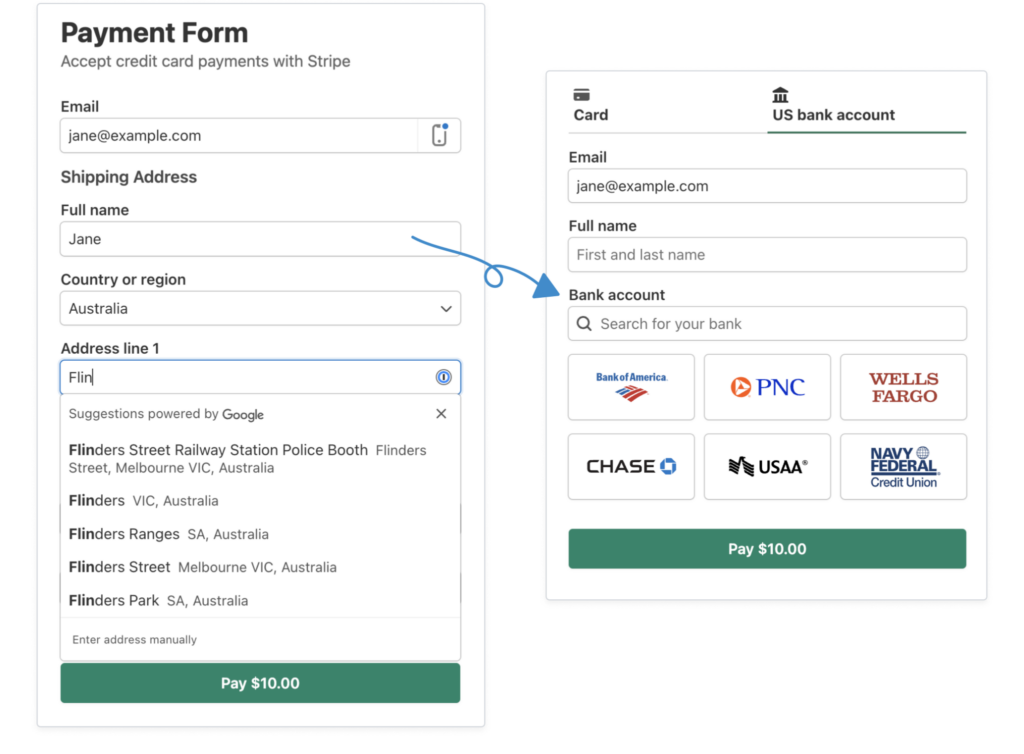
Your payment methods should stand out on your payment form to make it easy for customers to know their options. In the example below, you’ll notice the payment methods are labeled clearly and are also easily clickable.
Creating Custom Payment Confirmation Emails
The first email you send customers after purchase is golden. It’s your chance to start the relationship on the right foot. Think of it as the digital handshake after a sale.
If you sell tailored services, online courses, or even a product requiring post-purchase steps or additional information, setting up specific confirmation messages for individual payment forms enhances the overall payment experience for your customers.
Most default confirmation emails fall flat. We’ve tested different email styles with real customers and found that personalized touches make a big difference. Adding the customer’s name and specific order details makes the email feel more like a conversation than an generic response.
Here’s what our best-performing confirmation emails include:
- A clear “thank you” message at the top
- The exact amount paid and what it’s for
- Next steps or delivery information
- Contact details for support
- Links to helpful resources or guides
Subject lines make or break open rates. Our data shows that simple subject lines like “Your [Product Name] Order Details” get opened 35% more than fancy marketing lines.
The timing of your email matters too. We’ve found that instant confirmation emails get the best response. Delayed emails by even 5 minutes cause customer support questions to increase by up to 20%.
For digital products, you should always include download links right in the email. For services and subscriptions, adding additional steps required by the customer is essential. Each email type serves a different purpose, so it’s good to customize the content based on what the customer bought.
Adding your logo or an image related to the purchase is also a great way to gain trust in your brand.
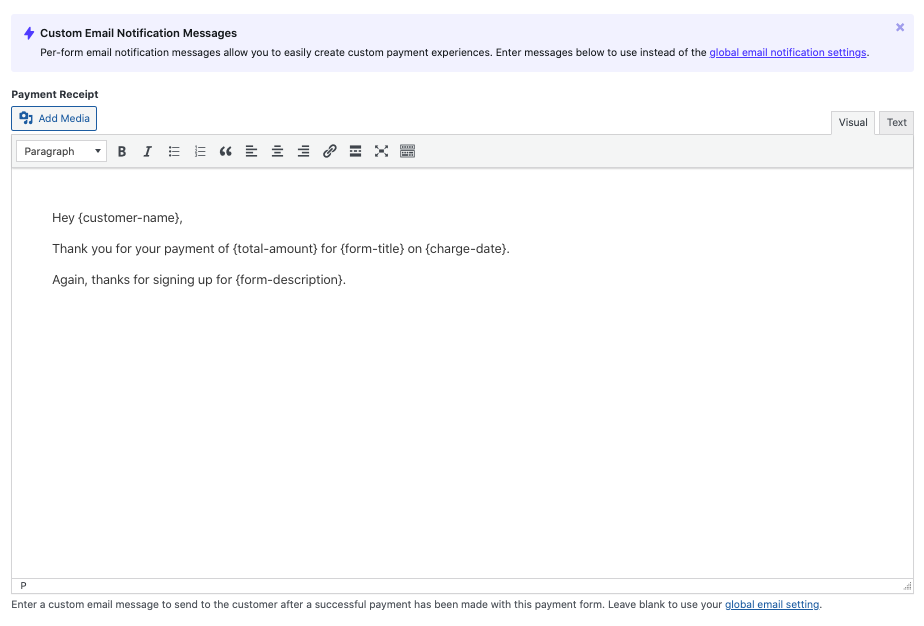
Using WP Simple Pay, the best Stripe payments plugin for WordPress, you can even use Smart Tags to create email confirmation messages that automatically add information about the purchase, like the price and date.
Sending Delayed Payment Processing Messages
Payment processing for certain payment methods like ACH Direct Debit is delayed. Providing timely updates about the status of a customer’s delayed payment method processing enhances the overall customer experience and helps protect you from disputes.
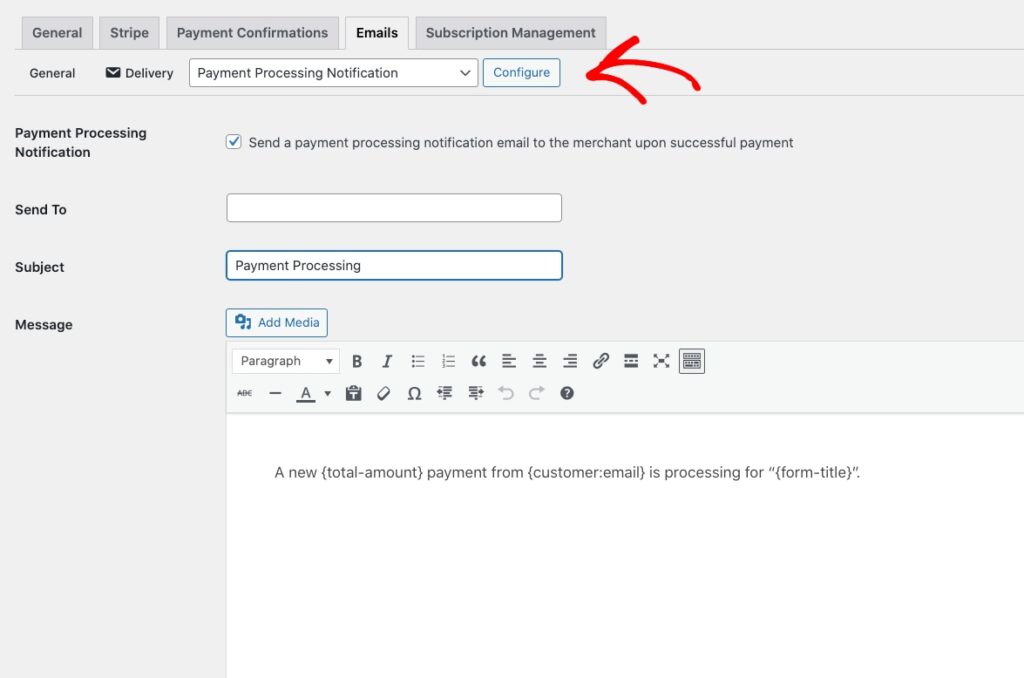
WP Simple Pay lets you easily create custom delayed payment processing email messages directly from your WordPress admin dashboard.
You can use the plugin to set up an automatic email once the payment has successfully processed.
Building Custom Checkout Confirmation Pages
Your payment confirmation page is more than just a “thank you.” It’s your chance to guide customers through what happens next. Support tickets can drop by 30% just by adding clear next steps to these pages.
Every sale type needs its own confirmation approach. Here’s what you need to include on your confirmation pages:
- Order summary with all purchase details
- Clear next steps (numbered or bulleted)
- Expected delivery or access timing
- Links to relevant tutorials or guides
- Ways to contact support if needed
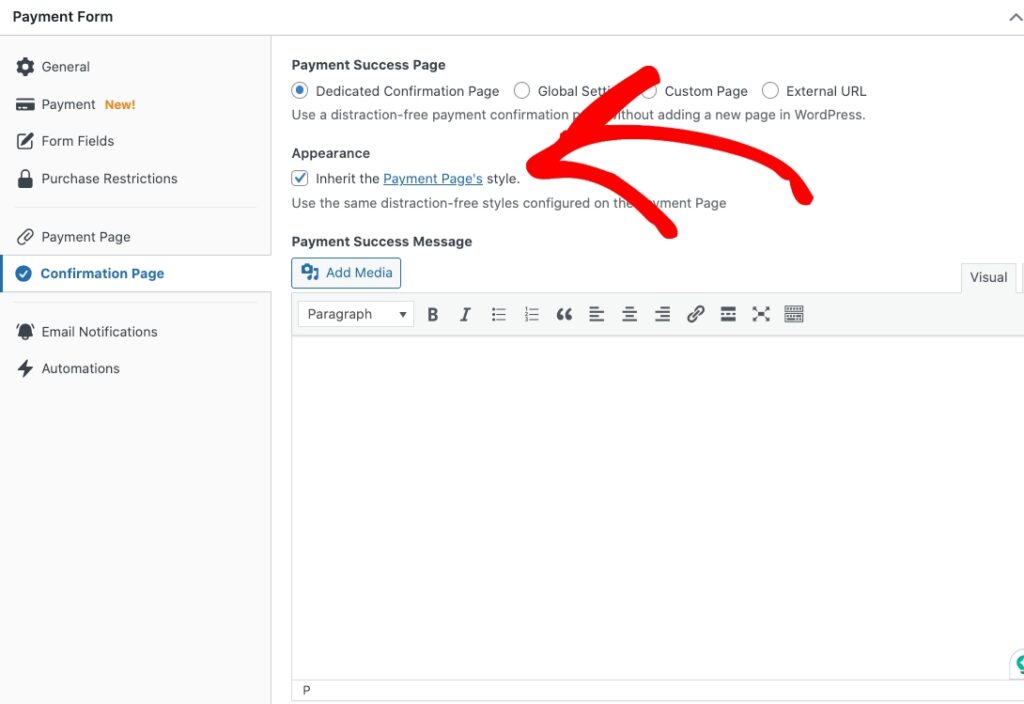
Below is an example of a payment confirmation page you can create using WP Simple Pay.
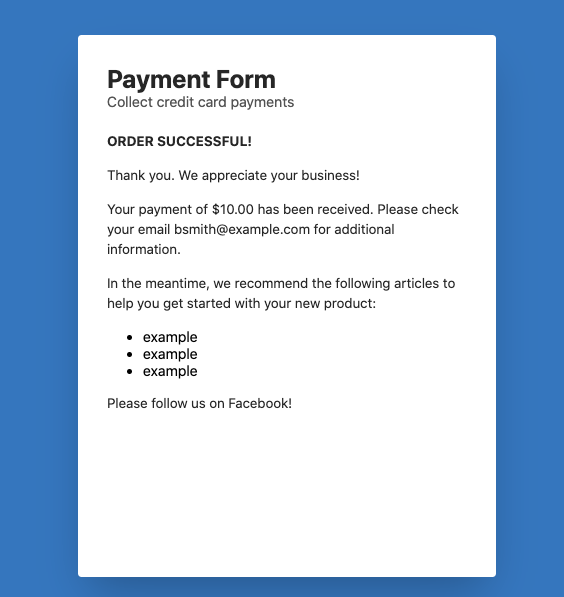
The plugin even lets you match your confirmation page with your payment page design without coding.
Social proof fits naturally here too. I recommend adding small customer testimonials or usage stats on your payment confirmation pages. This extra confidence boost helps reduce refund requests.
For subscriptions, adding account creation options right on the confirmation page is extremely helpful for your customers. You should also let subscribers know how they can update their account details and manage their subscription if needed.
Custom messages based on payment method help too. ACH Debit payments might need different instructions than credit card purchases.
Optimizing Checkout Form Fields
We all know that every extra field on your payment form costs you sales. Customers will abandon forms that ask for too much information. It’s just like someone walking out of a store because the checkout line is too long.
Start with the must-haves. These fields are essential:
- Email address
- Name
- Payment details
- Billing address & Shipping Address
Field order matters more than you might think. You should put Email first because it’s easy to fill out and builds momentum.
Always remember that autofill is your friend. It’s like having a helper filling out forms for your customers.
Smart field validation saves customers time. WP Simple Pay offers automatic form field validation via phone number and location.
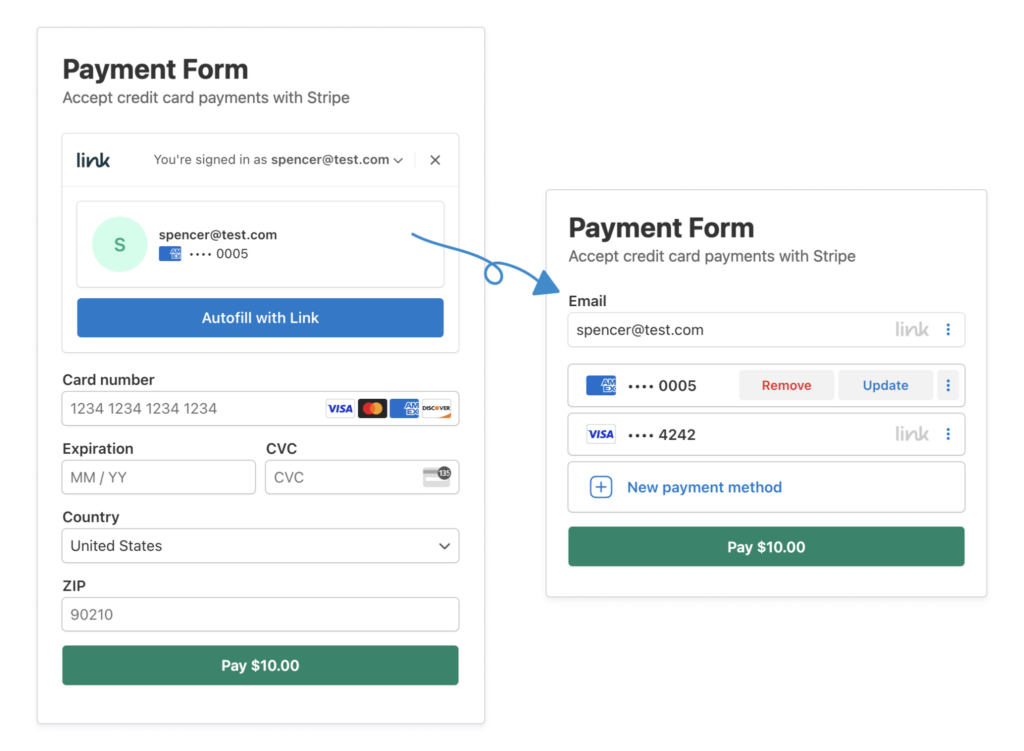
Additionally, the plugin supports Link, Stripe’s one-click checkout solution. Autofilling payment information for one-click payments can increase conversions by over 7% for logged-in Link users.
Here are a few bonus tips to optimize your field layout:
- Single column forms complete faster than multi-column
- Top-aligned labels work better than left-aligned
- Larger text fields reduce error rates
- Clear error messages help customers recover quickly
For detailed instructions, check out our guide on how to create per-form checkout flows with custom confirmation messages.
We hope this article has helped you learn how to optimize your WordPress checkout flows. You might also want to check out the following articles:
- How to Use Smart Tags to Personalize Payment Confirmation Emails
- How to Boost Conversions with Your Payment Confirmation Pages in WordPress
- How to Accept Additional Payment Methods in Stripe for free
- How to Use Stripe Link on Your WordPress Payment Forms
- How to Collect Customer Data During Checkout in WordPress
What are you waiting for? Get started with WP Simple Pay today!
To read more articles like this, follow us on X.
Disclosure: Our content is reader-supported. This means if you click on some of our links, then we may earn a commission. We only recommend products that we believe will add value to our readers.


Leave a Reply