How to Improve Customer Communication with Delayed Payment Method Confirmations
Last updated on

 Spencer Finnell
Do you want to provide customers with improved communication regarding delayed payment method processing?
Payment processing for certain payment methods like ACH Direct Debit is delayed. Providing timely updates about the status of a customer’s delayed payment method processing enhances the overall customer experience and helps protect you from disputes.
In this article, we’ll show how to set up delayed payment method confirmation emails in WordPress.
Sending Delayed Payment Method Confirmations
When it comes to sending delayed payment method confirmation emails, the best solution is to use a Stripe payments plugin for WordPress that lets you accept multiple payment methods and also supports customizable confirmation emails and notifications.
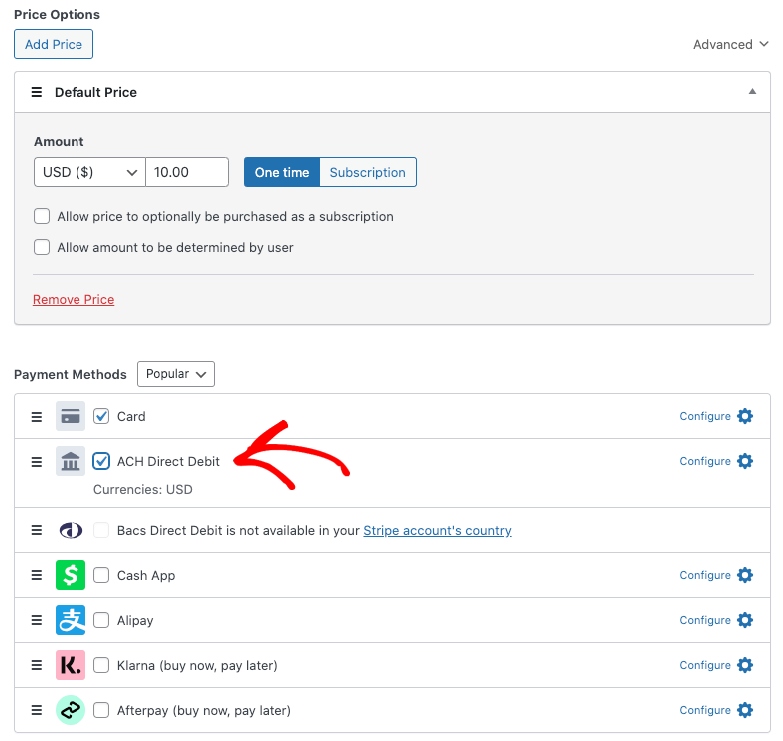
WP Simple Pay is the #1 Stripe payments plugin for WordPress that allows you to accept 10+ payment methods directly on your site, including ACH Direct Debit. It also lets you create customized email confirmations for delayed payment methods.
One of the best parts about WP Simple Pay is that Stripe transaction fees for ACH Direct Debit, SEPA Direct Debit, Bacs Direct, and Giropay are lower than those for card payment methods.
To learn more, see our guide on how to use non-card payment methods supported by Stripe.
The plugin allows you to send confirmation emails for delayed payment methods and create customized email confirmations and alerts for cancelled subscriptions and refund statuses.
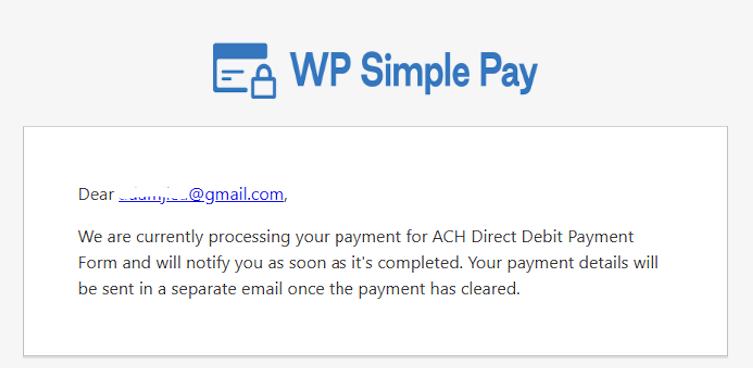
For the purpose of this tutorial, we’ll be creating an email confirmation like the one below using WP Simple Pay:
Step 1: Install and Activate WP Simple Pay
To send delayed payment method confirmation emails, the first thing you’ll need to do is install and activate WP Simple Pay on your WordPress site.
Simply visit the pricing page and choose the best plan for your specific needs.
Once you’ve purchased the WP Simple Pay plugin, you can download it from your purchase email receipt or your WP Simple Pay account.
For more details, check out how to install WP Simple Pay.
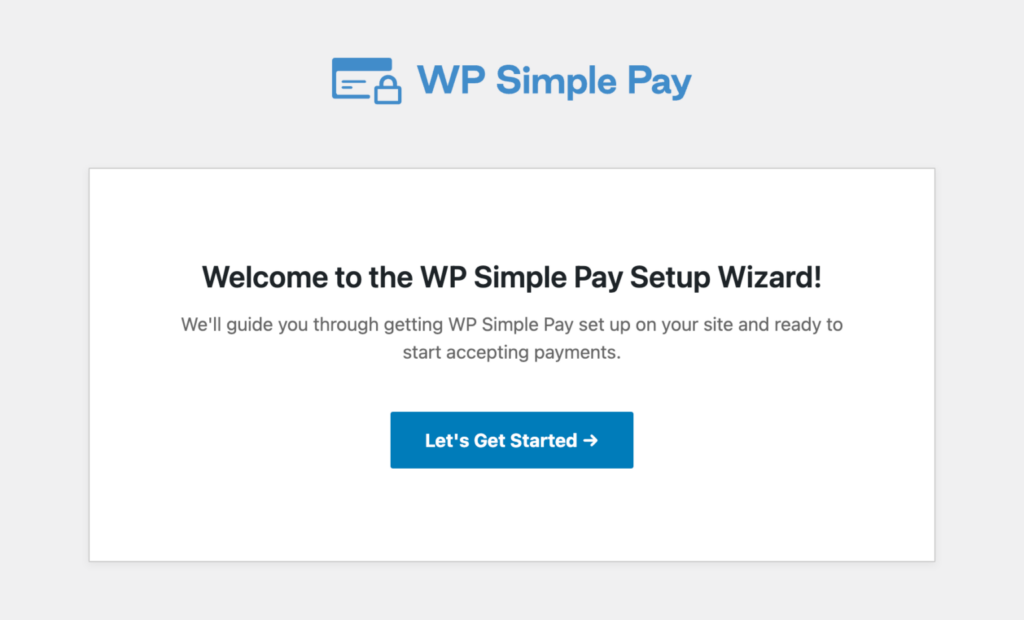
After you’ve installed and activated the plugin, you’ll be directed to the setup wizard. The setup wizard walks you through how to set up a Stripe account and connect it to your site. In the setup wizard, go ahead and click Let’s Get Started.
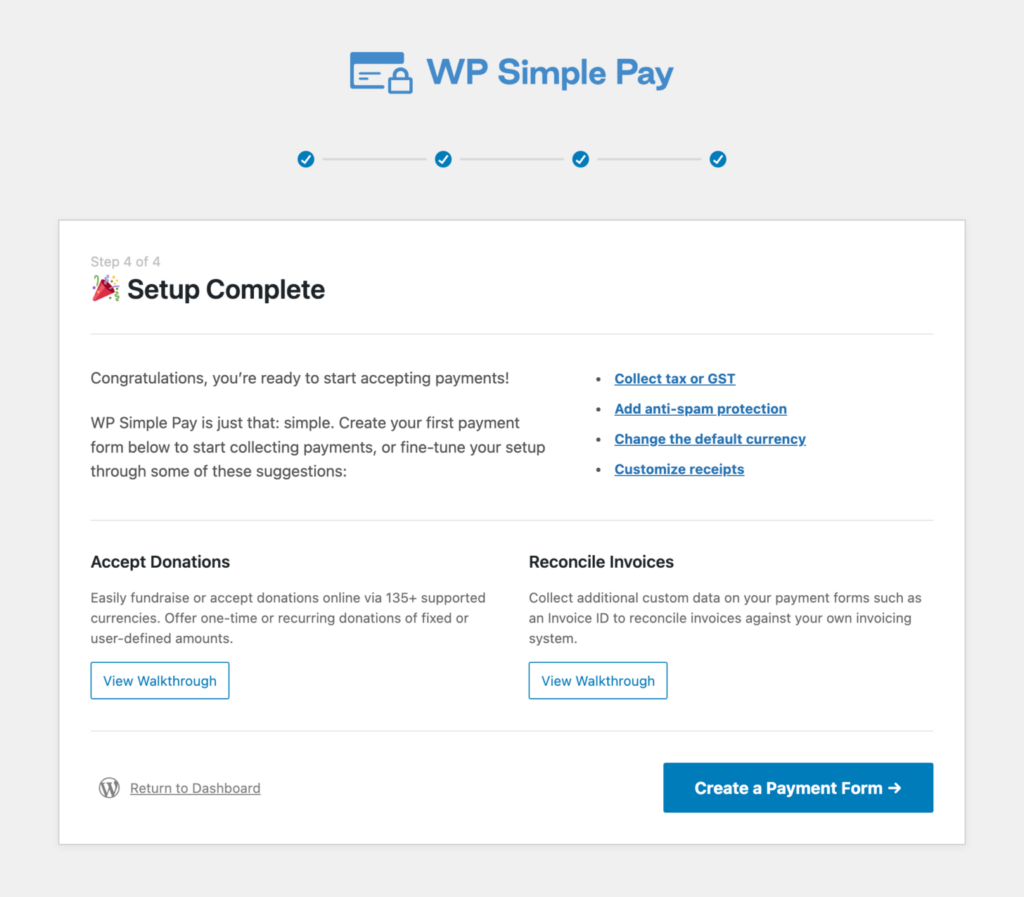
A success page will appear, letting you know that your Stripe account is connected to your site. Go ahead and click on Create a Payment Form.
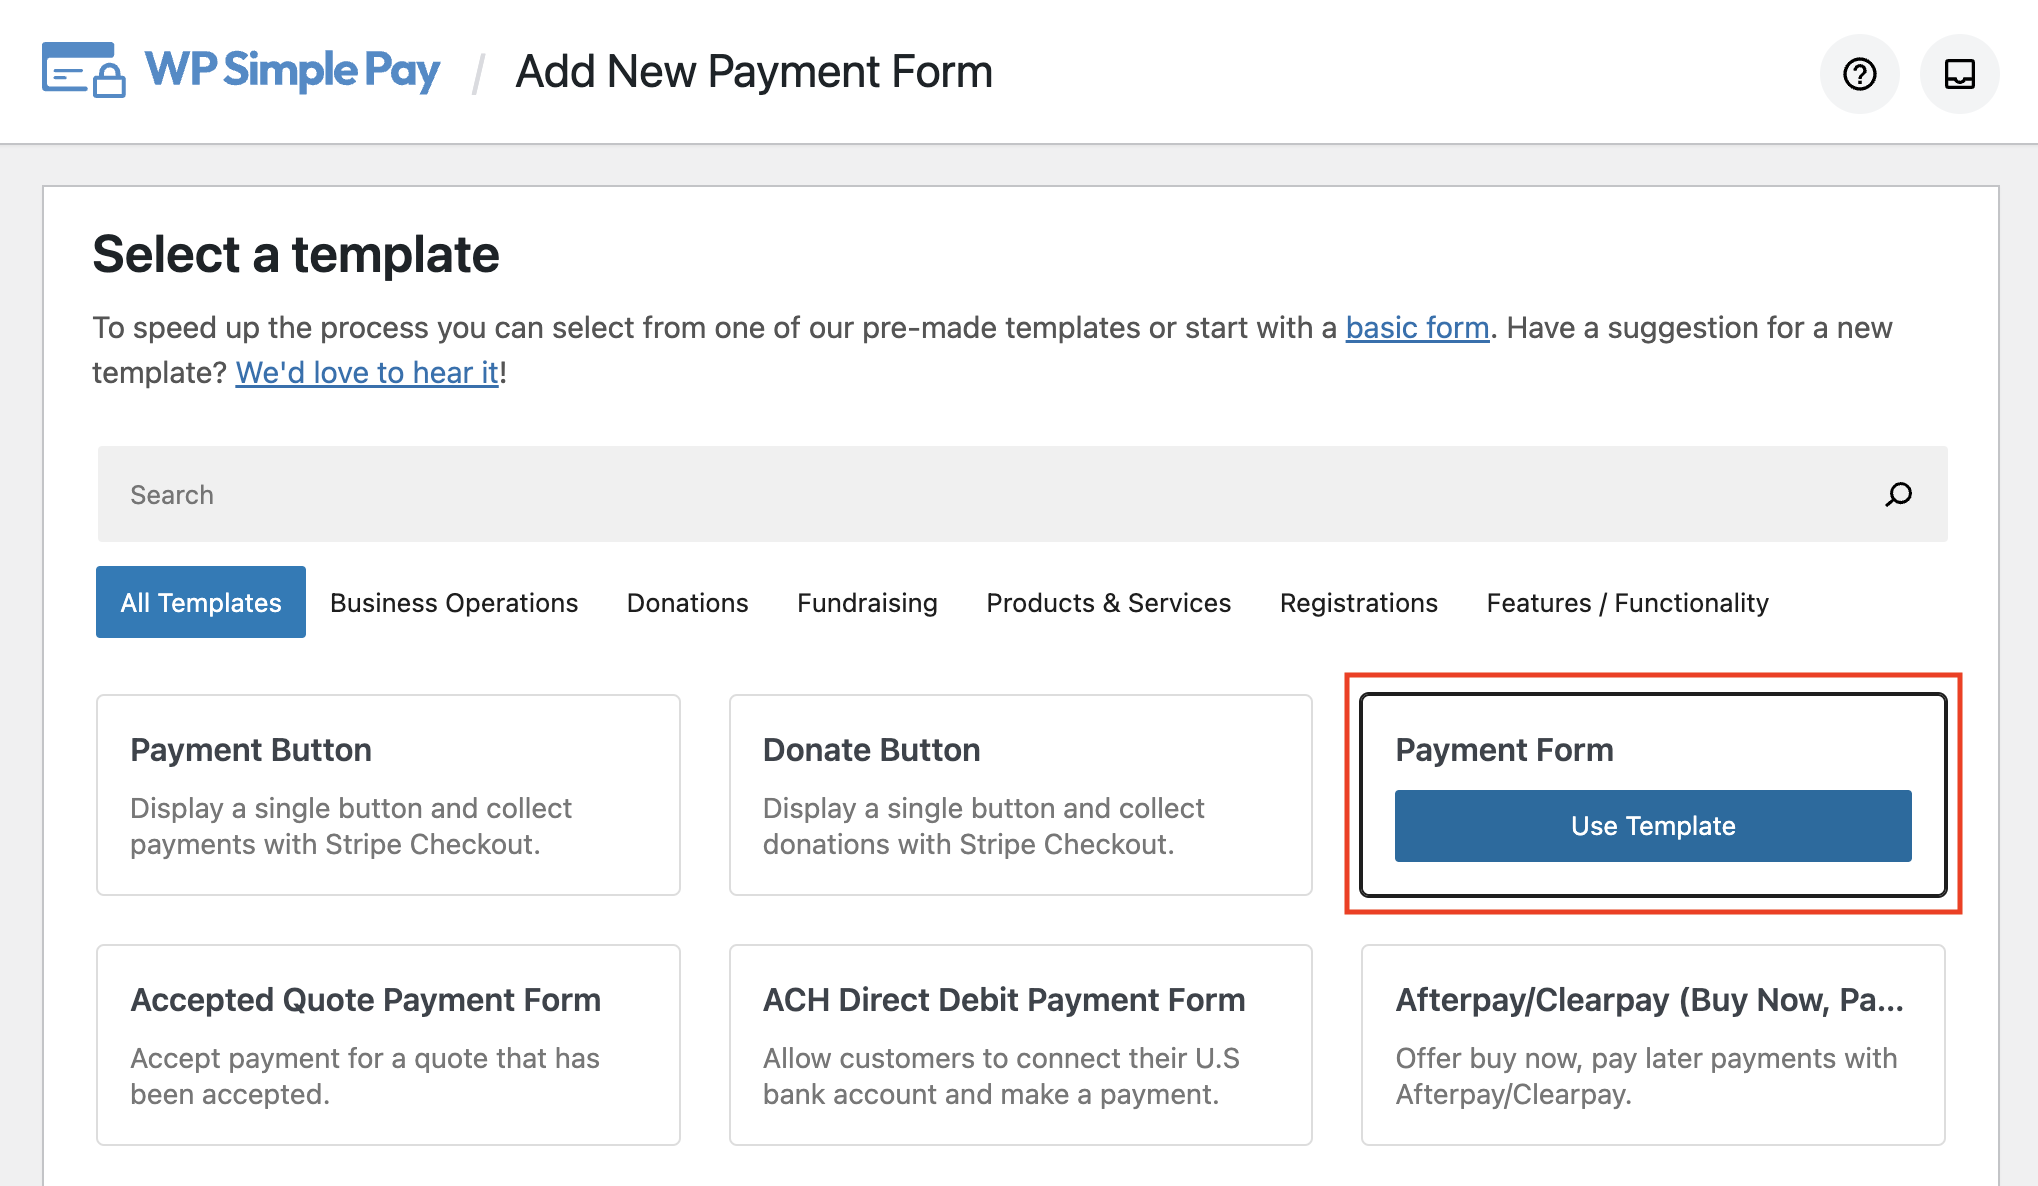
Step 2: Create a Payment Form
Once you click on Create a Payment Form, you’ll be directed to the templates library page. Here, you can choose from several different payment forms.
Go ahead and choose the basic Payment Form.
In the General tab, be sure to add your form’s title and description. Then, click on the Payment tab and add your price amount and payment methods.
Next, use the tabs in the drag-and-drop payment form builder to configure custom form fields and purchase restrictions. The Payment Page tab also allows you to create a dedicated landing page for your payment form.
Be sure to preview your form and click on Publish when you’re finished.
Step 3: Create a Delayed Payment Confirmation
Now that you’ve created your payment form, it’s time to set up a delayed payment method confirmation email.
First, navigate to the dashboard’s WP Simple Pay Settings tab and choose Email. Next, select Payment Processing Confirmation from the dropdown and click on Configure.
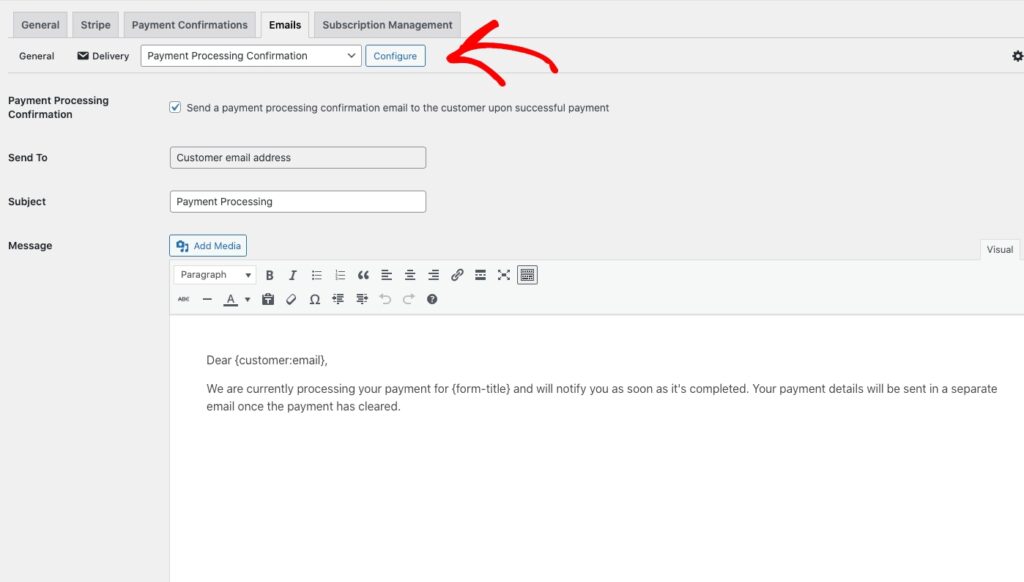
Once you’ve finished customizing your message, click on Save Changes.
Select Payment Processing Notification from the dropdown menu if you want to receive an email notification about delayed payment method processing statuses.

Step 4: Publish Your Payment Form
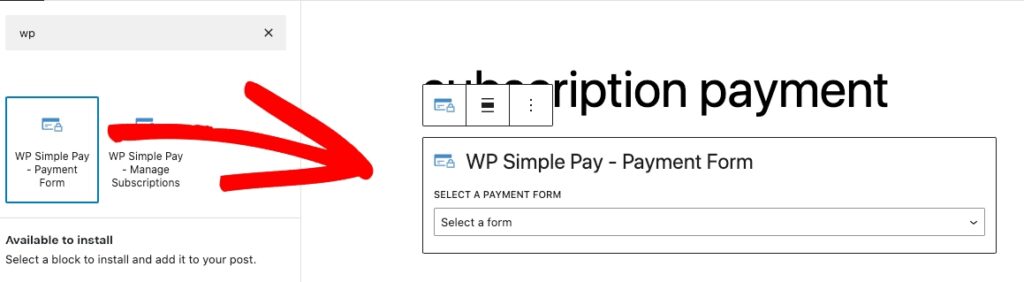
Now that you’ve created a payment form for your site and configured the delayed payment method confirmation email and notification, it’s time to add the form to a page or a post.
Go to the post or page where you want to publish it. Then click on the + icon to add the WP Simple Pay block. Then, choose the payment form you just created from the dropdown menu.
Finally, click Publish or Update.
That’s it! We hope this article has helped you learn how to improve customer communication with delayed payment method confirmation emails.
If you liked this article, you might also want to check out our guide on how to accept ACH payments in WordPress.
What are you waiting for? Get started with WP Simple Pay today!
To read more articles like this, follow us on X.
Disclosure: Our content is reader-supported. This means if you click on some of our links, then we may earn a commission. We only recommend products that we believe will add value to our readers.


Leave a Reply