How to Win Back Subscribers with Cancelled Subscription Confirmation Emails
Last updated on

 Spencer Finnell
Do you want to win back cancelled subscribers with your cancelled subscription confirmation emails?
Retaining existing customers is necessary for businesses that sell subscription-based products or services to grow. Reducing subscription churn should be a top priority and can be achieved in several ways using cancelled subscription confirmation emails.
In this article, we’ll show you how to create customized cancelled subscription confirmation emails to help you win back subscribers.
Why Customize Cancelled Subscription Emails?
Well-crafted cancelled subscription confirmation emails can turn a lost subscriber into a loyal customer. They can also help you get actionable feedback regarding your products or services.
Here are just a few effective cancelled confirmation email strategies you should consider:
- Personalized Offers: Offer personalized discounts, free trials, or other incentives to encourage subscribers to reconsider.
- Reassurance and Support: Express empathy and understanding in the email. Assure subscribers that their feedback matters and provide a clear path for contacting customer support if they have concerns.
- Highlight Benefits: Remind subscribers of the value they receive from your products or services. Highlight unique features, exclusive content, or benefits they might have forgotten.
- Feedback: Include a brief survey or link to gather feedback on why they cancelled. Use this information to improve your offerings and prevent future cancellations.
- Limited-Time Offers: Create a sense of urgency by offering time-limited promotions or bonuses.
Customizing Your Cancelled Subscription Emails
Now that you know more about why cancelled subscription emails are so important, let’s take a look at how you can customize them to meet your specific needs.
The easiest way to send customized cancelled subscription emails is to use a Stripe payments plugin for WordPress that allows you to accept subscription payments and also supports customization options for payment confirmation emails.
WP Simple Pay is the #1 Stripe payments plugin for WordPress that lets you create payment forms for one-time or recurring payments without having to set up a shopping cart or install extra addons.
One of the best parts about the plugin is that you can customize your cancelled subscription confirmation emails to help you win back subscribers.
Using WP SImple Pay, you can also…
- Accept multiple payment methods, including credit and debit cards, digital wallets (Apple Pay / Google Pay / Microsoft Pay), ACH Direct Debit, Buy Now, Pay Later, and more.
- Create the perfect payment forms in minutes using an advanced, no-code drag-and-drop payment form builder.
- Allow your customers to manage their subscriptions through the Manage Subscriptions Block feature.
- Attract more subscribers by offering free trial periods and discounts.
- Offer 100% discounts on subscription activations to attract more customers.
- And more..
For the purpose of this tutorial, we’ll be creating a subscription cancellation confirmation email using WP Simple Pay.
Step 1: Install and Activate WP Simple Pay
The first thing you’ll need to do to customize your subscription cancellation confirmation email is install and activate the plugin in WordPress.
Simply visit the pricing page and choose the best plan for your needs.
Once you’ve finished purchasing the WP Simple Pay plugin, download it from your purchase email receipt or your WP Simple Pay account.
For more details, check out how to install WP Simple Pay.
After you’ve activated the plugin, you’ll be directed to the setup wizard. The setup wizard walks you through how to set up a Stripe account and connect it to your site. In the setup wizard, go ahead and click Let’s Get Started.

If you didn’t see the setup wizard, simply head over to WP Simple Pay » Settings » Advanced tab and click the Launch Setup Wizard button.
2: Connect WordPress to Stripe
To connect your WordPress site to Stripe, click on Connect with Stripe.

Next up, enter the email address you use for your Stripe account and connect it to your site. If you don’t have a Stripe account, you can easily create one by entering your email address and completing the registration.
Upon completing this process, you’ll be shown a success page that says, “Setup Complete.” Next, click on Create a Payment Form.

Step 3: Create a Subscription Payment Form
Now that you’ve installed WP Simple Pay and connected your Stripe account, you’ll need to create a subscription payment form.
You should have been directed to the payment form templates library page, where you can search for the subscription form template that fits your needs.
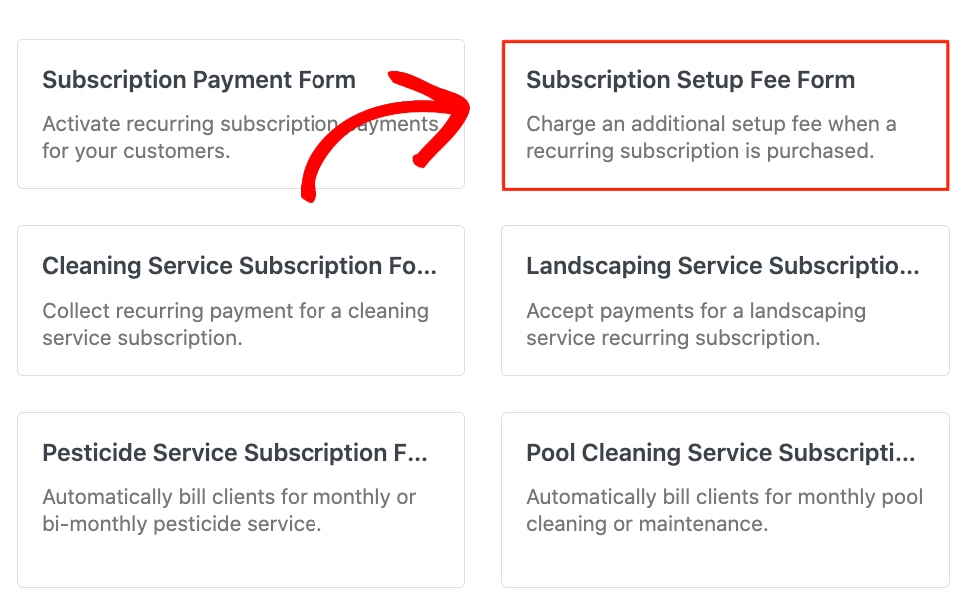
Let’s go ahead and choose the Subscription Setup Fee Form. This is a great way to collect a one-time setup fee with the first subscription payment to cover your upfront costs.
In the General tab, enter the title and description of your form. Next, click on the Payment tab and enter your pricing amounts, options, and setup fee.
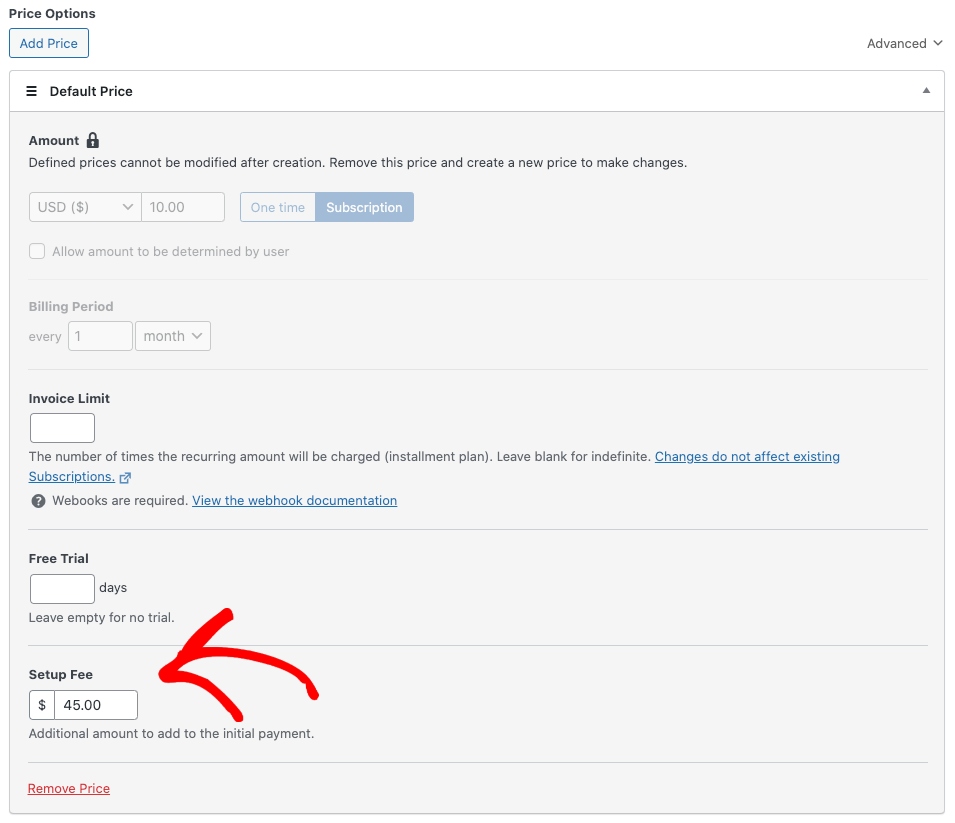
Once you’ve added your price amounts, billing period, and setup fee, be sure to select the payment methods you want to accept.

Next, in the Form Fields tab, you can add, edit, or remove custom form fields.
To send a personalized cancelled subscription email confirmation and other notifications regarding the subscription, you’ll need to add Name. This way, you can personally address the customer by his or her name in your emails.

Once you’re happy with your form fields, go ahead and click on the Email Notifications tab. Here is where you can customize your subscription payment confirmation email. You can add smart tags to your personalized message and include any required steps regarding the subscription. To learn more, see our detailed guide on how to create per-form email confirmation messages in WordPress.
Be sure to click on Publish when you’re finished.
Step 4: Create a Cancellation Confirmation Email
Now that you’ve created a subscription payment form for your site, it’s time to create a customized subscription cancellation confirmation email to help you win back subscribers.
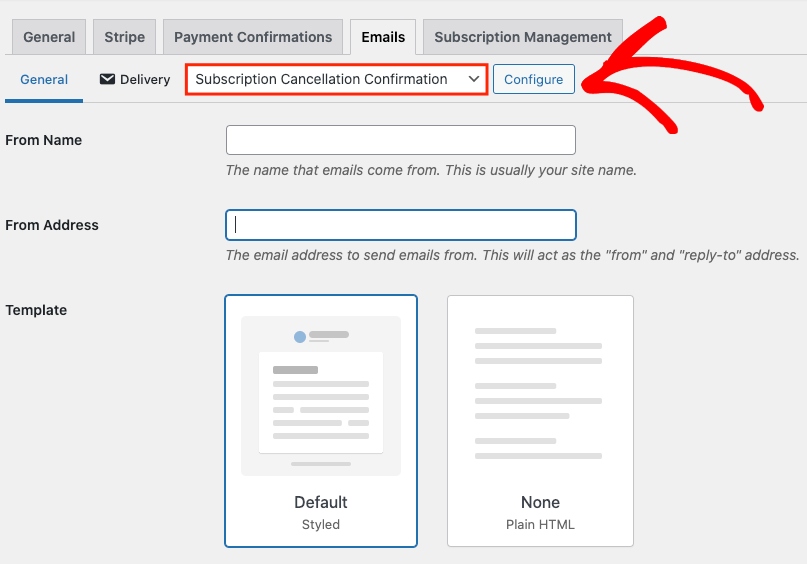
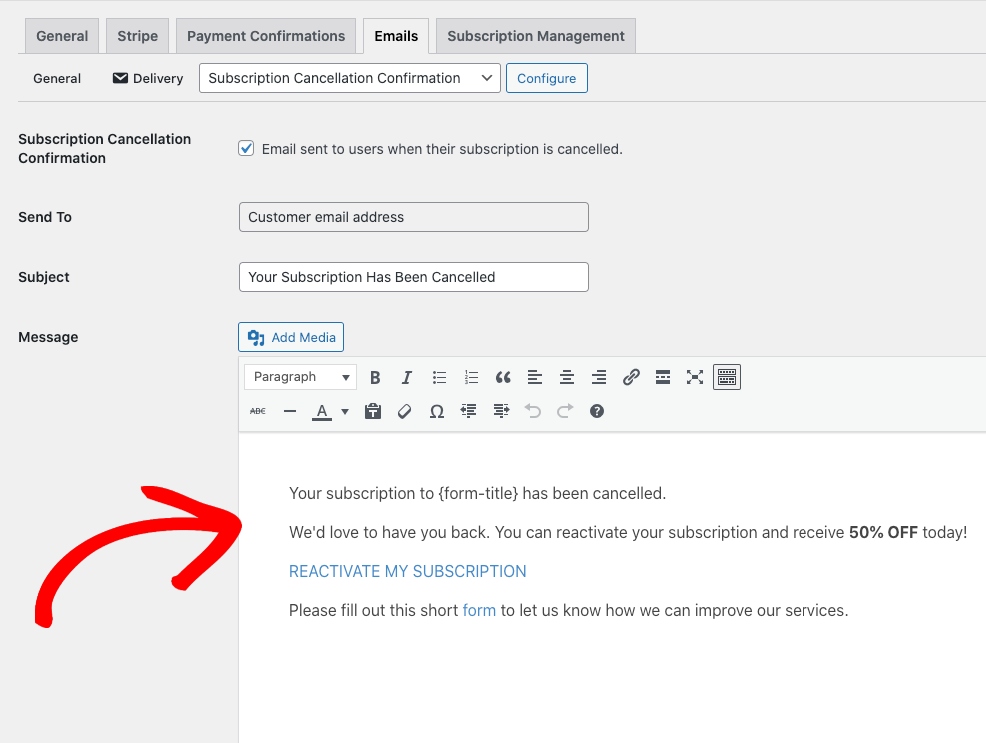
First, navigate to the WP Simple Pay Settings tab in the admin dashboard and choose Emails. Next, from the dropdown menu, choose Subscription Cancellation Confirmation and click on the Configure button.
In the text field provided, go ahead and add your custom message. Remember, adding an incentive like a discount is great way to motivate the cancelled subscriber to renew.
As you can see in the example message below, we’ve added a discount and a link for the subscriber to reactivate the subscription. It also includes a link to a survey. Feel free to be creative with your custom message. You can add a logo or another image to the email.
To learn more, see our detailed guide on how to add a discount code to a payment form.
If you’d like to receive an email notification whenever a subscriber has cancelled, click on the Subscription Cancellation Notification option in the dropdown and click on the Configure button.

Be sure to click on the Save Changes button when you’ve finished.
Step 5: Publish the Subscription Payment Form
Now that you’ve created a subscription payment form and a customized subscription cancellation confirmation email, it’s time to publish your form on your site.
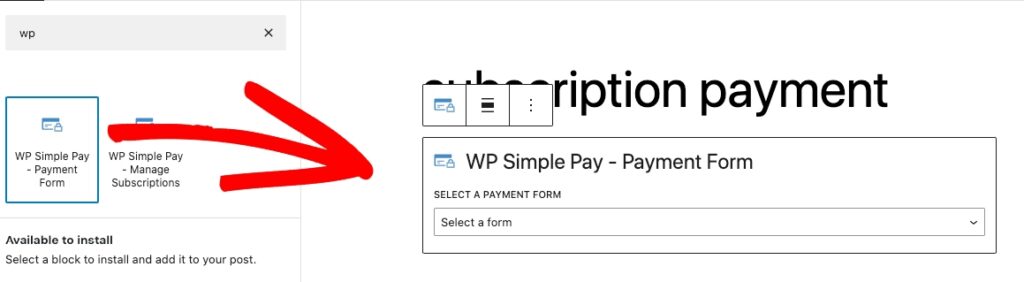
Simply go to the post or page where you want to publish it. Then click on the + icon to add the WP Simple Pay block. Then, choose the subscription form you just created from the dropdown menu. Finally, click Publish or Update.
That’s it! We hope this article has helped you learn how to create customized subscription cancellation confirmation emails.
If you liked this article, you might also want to check out the following guides:
- How to Use Limited-Time Offers to Drive More Sales
- How to Add a Setup Fee to a Stripe Subscription Payment Plan in WordPress
- How to Offer 100% Discounts on Subscription Signups in WordPress
- How to Allow Subscribers to Manage Subscriptions in WordPress
- How to Offer Installment Payment Plans in WordPress
What are you waiting for? Get started with WP Simple Pay today!
To read more articles like this, follow us on X.
Disclosure: Our content is reader-supported. This means if you click on some of our links, then we may earn a commission. We only recommend products that we believe will add value to our readers.


Leave a Reply