How to Boost Conversions with Your Payment Confirmation Pages in WordPress
Last updated on

 Spencer Finnell
Do you want to use your payment confirmation page to increase sales on your WordPress site?
Aside from assuring customers that their payment has been processed, your payment confirmation page can be used to increase conversions and boost engagement with your brand.
In this article, we’ll show you how to customize your payment confirmation pages to drive conversions and grow your business.
What is a Payment Confirmation Page?
A payment confirmation page is a page on your site that customers are redirected to directly after purchasing. The primary purpose of a payment confirmation page is to express your appreciation and to let customers know their payment has gone through successfully.
With all that being said, your payment confirmation page can also be used to offer upsells, provide engaging information, and share important information about the product or service.
To maximize your payment confirmation pages, you’ll need to add value to your message with a touch of personalization.
Creating Customized Payment Confirmation Pages
The easiest way to customize your payment confirmation pages is to use a Stripe payments plugin for WordPress that allows you to create them without coding. It’s also wise to choose a plugin that lets you personalize your payment confirmation pages for individual payment forms.
WP Simple Pay, the #1 Stripe payments plugin for WordPress, lets you accept online payments directly on your site and create personalized payment confirmation pages from your WordPress admin dashboard.
A few additional features include:
- Multiple Payment Methods: Accept the most popular payment method options, including debit and credit cards, digital wallets (Apple Pay / Microsoft Pay / Google Pay), ACH Direct Debit, Buy Now, Pay Later services, and more.
- Advanced Payment Form Builder: Create forms for one-time or recurring payments in minutes without coding.
- Email Receipts: Automatically send your customers an email receipt after completing their purchases.
- Custom Fields: Easily collect the information you need during checkout to send personalized email receipts and create customized payment confirmation pages.
- Distraction-free Landing Pages: Create branded landing pages that host your payment forms.
- And more…
For the purpose of this tutorial, we’ll be using WP Simple Pay to create a customized payment confirmation page in WordPress. Let’s get started!
Step 1: Install and Activate WP Simple Pay
To create customized payment confirmation pages for your site, you’ll need to install and activate WP Simple Pay in WordPress.
Simply navigate to the pricing page and choose a plan.
Next, find the .zip file in your email receipt and download it to your desktop. Then, install it in WordPress.
If this is your first time installing a plugin, see our detailed guide on how to install WP Simple Pay.
Once you’ve installed and activated the plugin, you’ll be taken to the Setup Wizard. Go ahead and click on Let’s Get Started.

If you didn’t see the setup wizard, simply head over to WP Simple Pay » Settings » Advanced tab and click the Launch Setup Wizard button.
2: Connect WordPress to Stripe
To connect your WordPress site to Stripe, click on Connect with Stripe.

Next up, enter the email address you use for your Stripe account and connect it to your site. If you don’t have a Stripe account, you can easily create one by entering your email address and completing the registration.
Upon completing this process, you’ll be shown a success page that says, “Setup Complete.” Next, click on Create a Payment Form.

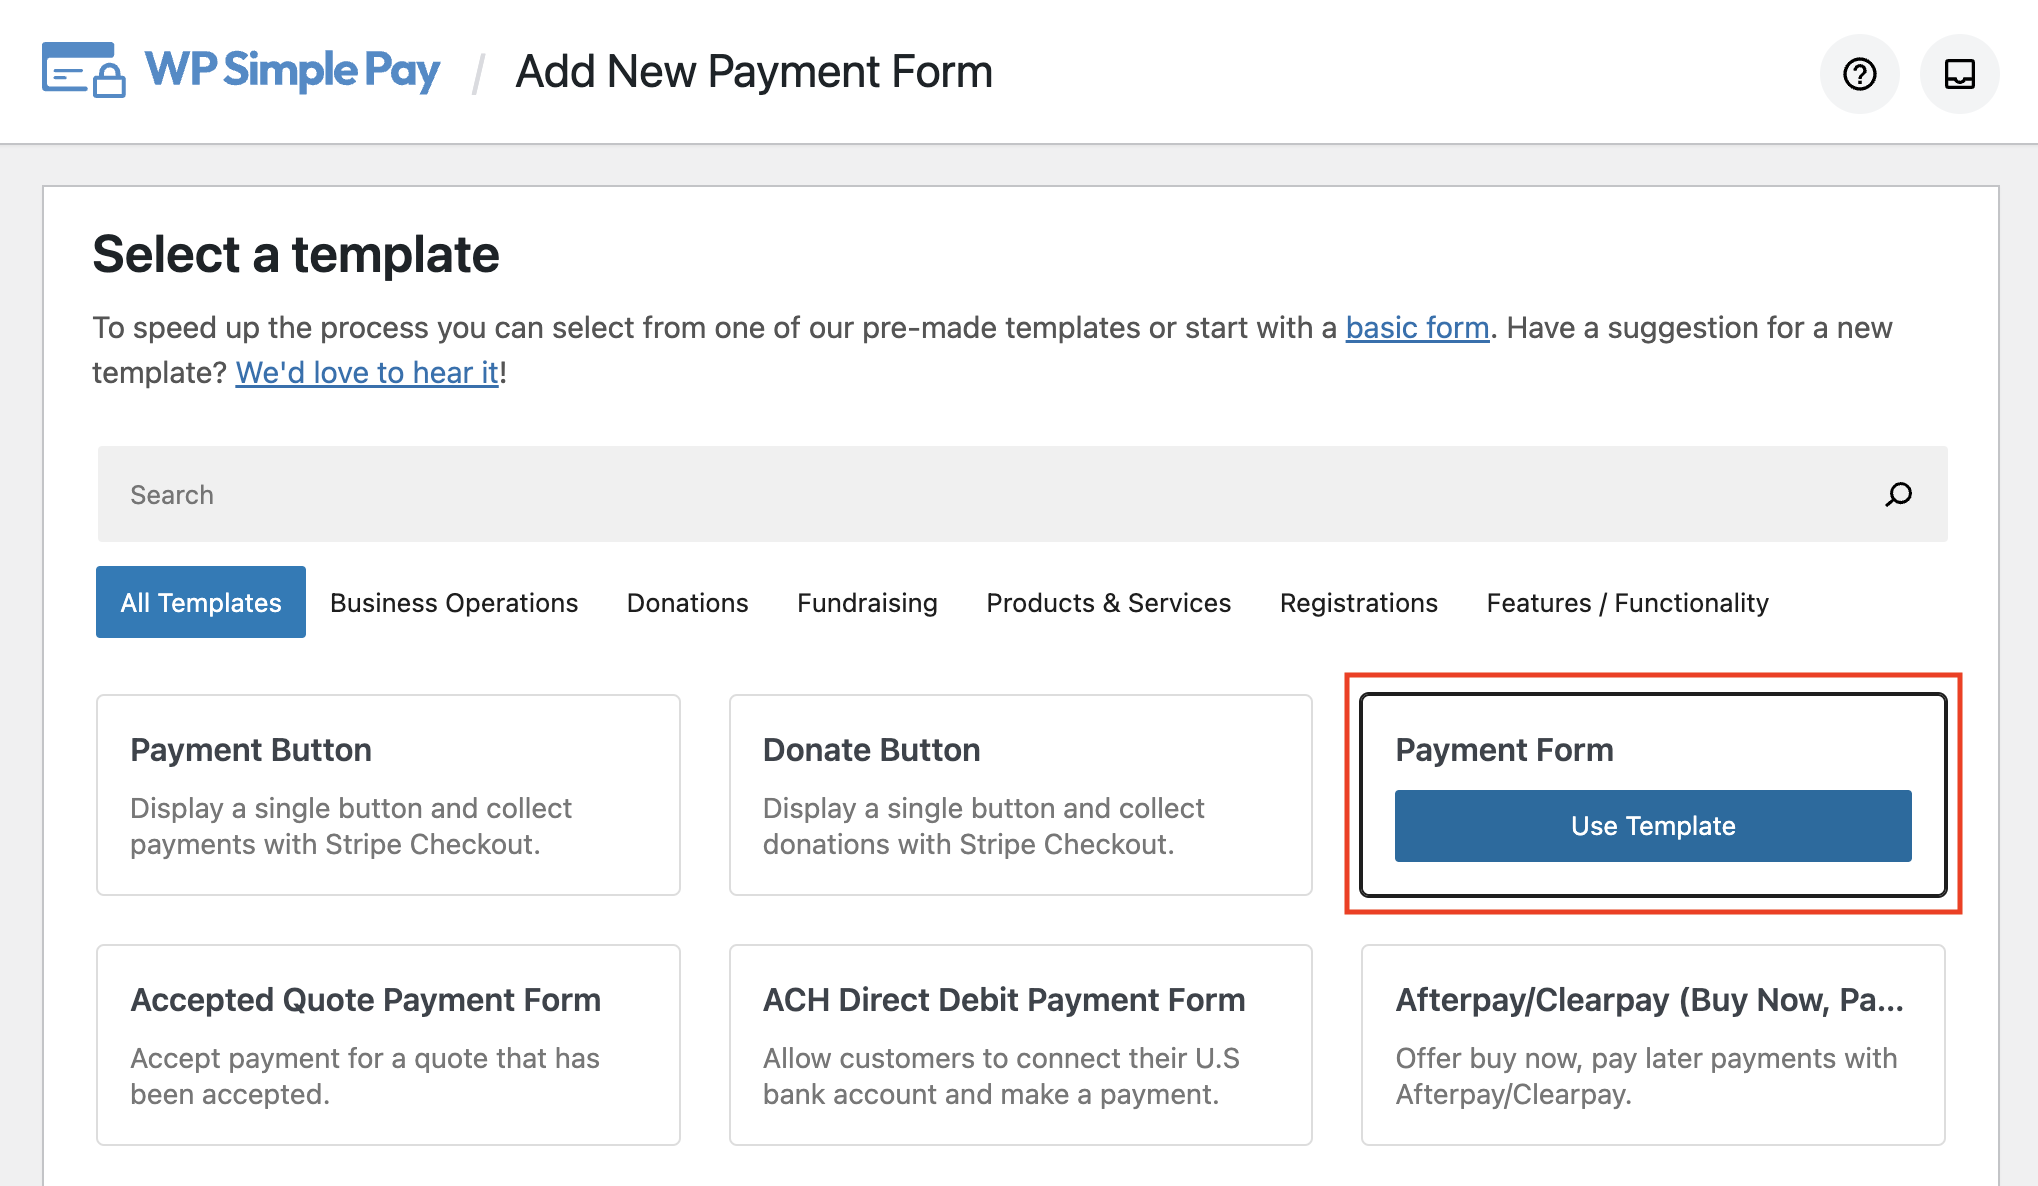
Step 3: Create a Payment Form
Now that you’ve installed and activated the plugin and connected your Stripe account, it’s time to create a payment form.
From the payment form templates library page, select the Payment Form template.
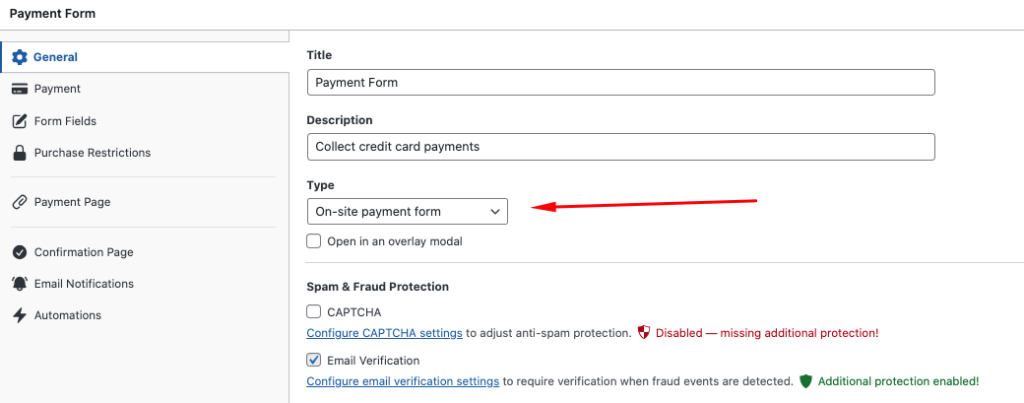
Next, in the General tab, be sure to enter the title and description of your form. You can also choose between an On-site payment form and an Off-site Stripe Checkout form.
Be sure to leave On-site payment form selected from the dropdown menu. This will keep your visitors on your site throughout the entire checkout process, which helps reduce checkout abandonment.
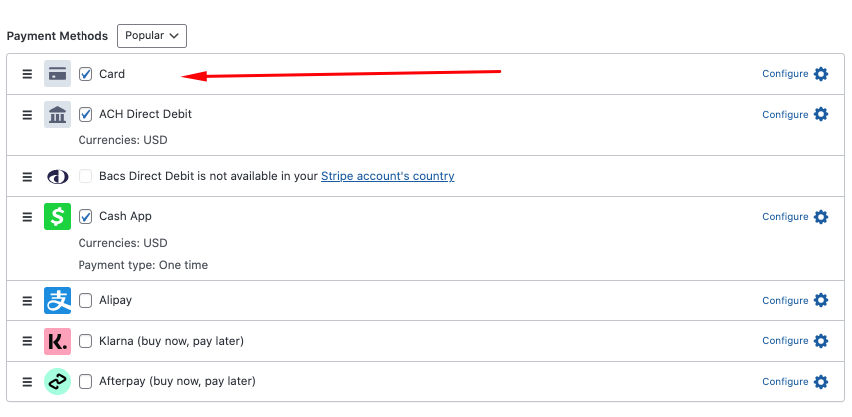
Next, from the Payment tab, choose your price amounts and options. Here is also where you can allow your customers to sign up for recurring payments by checking the box next to Allow price to optionally be purchased as a subscription.
For Payment Methods, choose Card, ACH Direct Debit, and Cash App. Remember, offering multiple payment method options means more conversions!
Once you’ve finished configuring your pricing options and payment methods, click on the Form Fields tab.
Here, you can collect additional information from your customers, such as their name, shipping address, email, etc.
For more information on collecting customer data, see our complete guide.
If you want to create a distraction-free landing page for your payment form, click on the Payment Page tab and check the box next to Enable a dedicated payment page.
Step 4: Customize Your Payment Confirmation Page
Now that you’ve created your payment form, you can customize the payment confirmation page. WP Simple Pay makes it super easy.
Simply click on the Confirmation Page tab and enter your custom message. The plugin supports several Smart Tags to help you create a high-converting, personalized page.
Below is a quick example of a message you can create using the plugin. You can add a link to your Facebook page and a few helpful articles about your products to improve engagement:
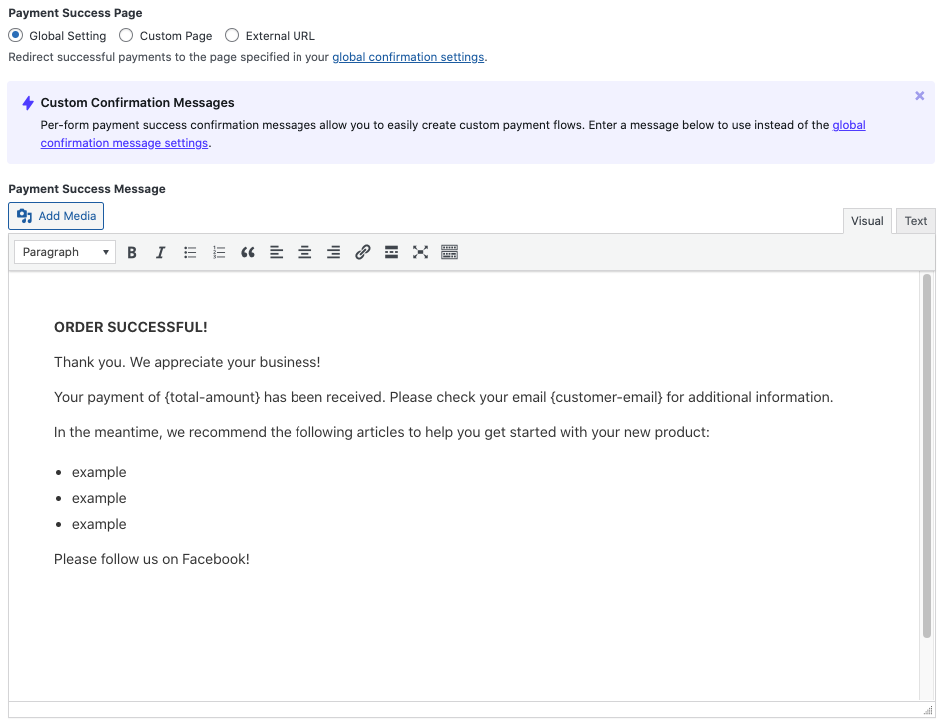
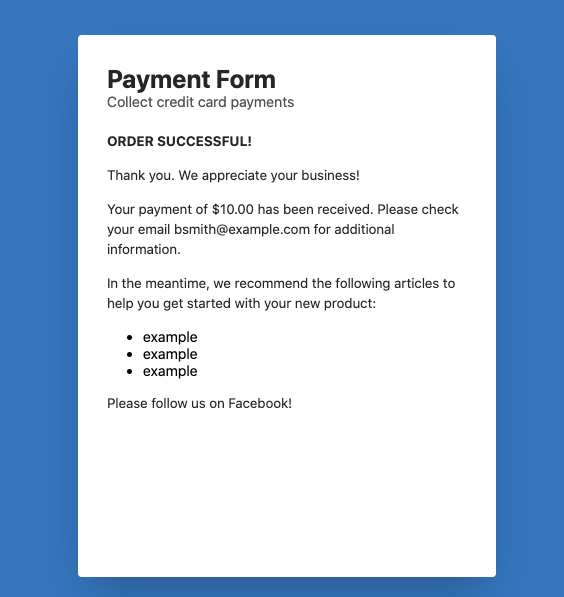
The confirmation page for this payment form should look like the one below. The customer’s email and total amount paid are automatically generated because we’ve added the Smart Tags: {total-amount} and {customer-email}.
Feel free to get as creative as possible with your personalization settings and think of ways to give your customers more value. You can change the font styles and colors and add your logo to the top of the page.
Here is a full list of available Smart Tags you can use to customize your confirmation page:
{card-brand}
The brand of card used. Visa, Amex, etc.
{card-last4}
The last four digits of the card used
{coupon-amount}
The amount of the coupon applied to the payment
{custom-fields}
Outputs all information stored in the Payment’s metadata.
{charge-date}
The charge date returned from Stripe.
{charge-id}
The charge ID returned from Stripe.
{fee-recovery-amount}
The calculated fee recovery amount based on the form total and fee recovery settings
{payment-type}
The type of payment made returned from Stripe (card, ACH, etc)
{payment-url}
A direct link to the Payment record in the Stripe Dashboard
{subtotal-amount}
The amount prior to any discounting or fees
{tax-amount}
The calculated tax amount based on the total and tax percentage setting
{total-amount}
The total price of the payment.
Once you’ve finished creating your confirmation page message, it’s time to publish your payment form and perform a test payment to ensure that it works as expected.
Step 5: Publish Your Payment Form
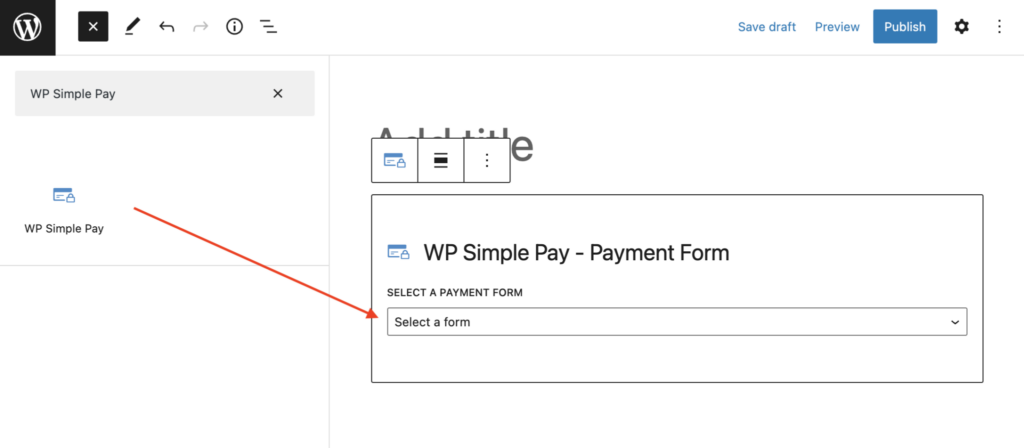
WP Simple Pay makes publishing your payment form on any page or post on your site easy.
To embed the form, go to the post or page where you want to publish it. Then click on the + icon to add the WP Simple Pay block. Then, choose the form you just created. Finally, click Publish or Update.
Step 6: Test Your Payment Confirmation Page
Now that you’ve published your payment form, you’ll need to make a test transaction to ensure your confirmation page looks good.
See our step-by-step guide for more information on how to test Stripe payments in WordPress.
There you have it! We hope this article has helped you learn how to create customized, high-converting payment confirmation pages in WordPress.
If you liked this article, you might also want to check out our guide on how to create per-form email confirmation messages in WordPress.
What are you waiting for? Get started with WP Simple Pay today!
To read more articles like this, follow us on X.
Disclosure: Our content is reader-supported. This means if you click on some of our links, then we may earn a commission. We only recommend products that we believe will add value to our readers.


Leave a Reply