
How to Accept Donation Payments Online with WordPress (2025 Update)
Last updated on

 Spencer Finnell
Are you passionate about making a difference in your community or beyond? Whether you run an animal sanctuary, work to create sustainable communities, organize a church camp, or support orphans and foster kids, every big, beautiful endeavor needs the right resources to thrive.
Thankfully, securing funding can be as simple as accepting online donations.
In this article, we’ll guide you through a few of the easiest and most effective ways to set up online donation payments for your WordPress website so you can focus on the cause that matters most to you.
How to Accept Donation Payments on WordPress
The Best Solution for Accepting Online Donations
If you need to accept donations easily and securely online with credit cards, the best solution is WP Simple Pay, the #1 Stripe payments plugin for WordPress.
The plugin allows you to accept one-time or recurring donation payments directly on your website without having to write a single line of code or set up a complicated shopping cart.
WP Simple Pay also offers several pre-built payment form templates and a drag-and-drop form builder that allows you to get a donation form up and running on your site in just minutes.
Additional features of WP Simple Pay include:
- Custom Form Fields: Collect additional information along with the donation from your donors.
- Maximum Donation Amounts: Ensure that you stay within regulatory donation limits.
- Form Scheduling: Control when donation payments are accepted by setting up a start and end date.
- Weekly Summary Reports: Keep track of how your payment forms are performing with weekly summary reports sent straight to your inbox.
- Multiple Payment Methods: Collect more donations by offering 10+ payment methods including Cash App, Apple Pay / Google Pay, ACH Direct Debit, Alipay, and more.
Remove the additional 3% fee!
Most Stripe plugins charge an additional 3% fee for EVERY transaction
…not WP Simple Pay Pro!
Accepting Donations on WordPress
Before we dive in and start creating a donation form on WordPress, it’s worth taking a moment to examine the different types of donation forms you can create.
Offering Monthly Recurring Donations
One of the best ways to get consistent donations is to allow donors to opt in to recurring monthly donations.
You can use WP Simple Pay and WordPress to implement recurring donation forms directly on your website effortlessly.
Below is an example of a monthly recurring donation form that offers multiple amounts:

You can also set up donation forms with the option to donate once or monthly, giving donors more flexibility. Adding the checkbox is simple using WP Simple Pay’s form builder.

Creating Automatic Monthly Donation Forms
To create similar forms for your WordPress website, you can simply install and activate WP Simple Pay and get building.
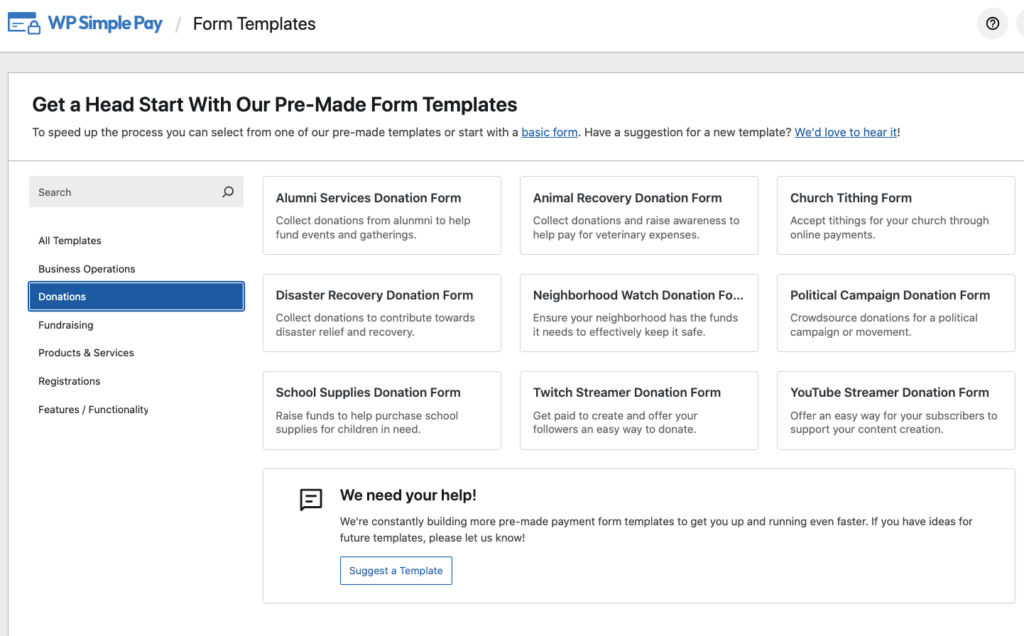
Once you’ve finished setting up the plugin, navigate to the form templates library page and choose the one that best suits you. Alternatively, you can start your form from scratch.
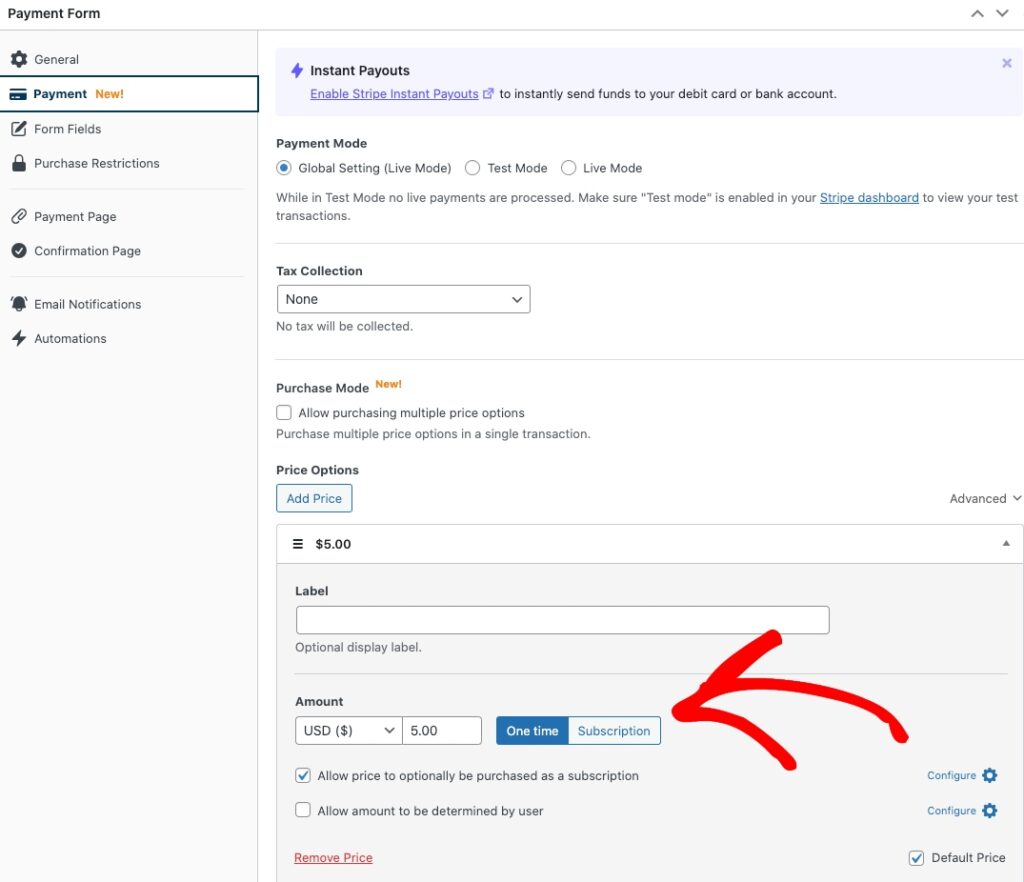
Once you’re in the form builder, you can add your donation price options, toggle on one time and check the box to allow the price to optionally be purchased as a subscription.
Or, you can require the price option to be set up as a monthly recurring donation by toggling on the Subscription option.
An effective way to increase recurring monthly donations is to create a donation form that already has the subscription option selected. This is possible using the plugin’s Automatic Opt-In feature.

Creating Custom Donations with Dropdowns & Text Fields
WP Simple Pay also lets you customize your donation forms by adding dropdowns and text fields.
For example, you can use custom fields to collect more information from your donors. This can help encourage donors to sign up for your enewsletter.

Allowing donors to remain annonymous is also helpful in some situations. You can easily add this option using custom form fields.

Creating a Donation Form (Step by Step)
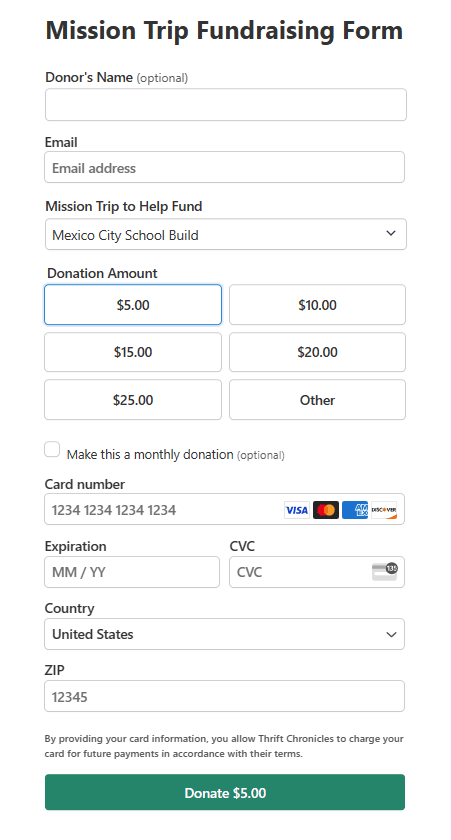
For the sake of this tutorial, we’re going to create a donation form that offers donors choices for custom amounts and a custom dropdown menu with different mission trip options using WP Simple Pay.
WP Simple Pay offers several pre-built donation payment forms to help you create a form in minutes with little effort. We’ll be using the Mission Trip Fundraising form. We’ll also see different customization options for advanced use cases.
Here’s a donation form we created by following the below step-by-step guide:
Let’s get started!
Step 1: Install and Activate WP Simple Pay
First things first. To create a donation form, you’ll need to install and activate the WP Simple Pay plugin. For more details, check out this step-by-step guide on how to install a WordPress plugin.
After installing the plugin, go ahead and activate it and you’ll be directed to the setup wizard.
With the setup wizard, anyone who can point and click can connect their Stripe account with their site quickly and easily. In the setup wizard, click Let’s Get Started.

If you didn’t see the setup wizard, simply head over to WP Simple Pay » Settings » Advanced tab and click the Launch Setup Wizard button.
2: Connect WordPress to Stripe
To connect your WordPress site to Stripe, click on Connect with Stripe.

Next up, enter the email address you use for your Stripe account and connect it to your site. If you don’t have a Stripe account, you can easily create one by entering your email address and completing the registration.
Upon completing this process, you’ll be shown a success page that says, “Setup Complete.” Next, click on Create a Payment Form.

Step 3: Accepting Donations Online with WordPress
So far, you’ve installed WP Simple Pay and connected your site to your Stripe account. The next thing you’ll need to do is to create a payment form, so you can start accepting donations on your WordPress site.
Once you complete the onboarding, you’ll be prompted to choose a payment form template. If you’re not on this page yet, you can navigate to WP Simple Pay » Add New to start creating a payment form.
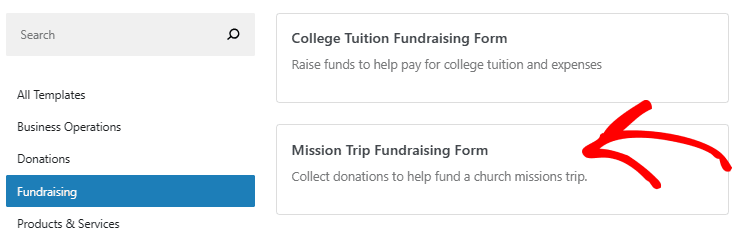
For the sake of this tutorial, we’re looking to create a donation form with custom amounts and different trip options. Go ahead and click on Mission Trip Fundraising Form.
Alternatively, if you need a donation button, click on Donate Button instead. The configuration would be pretty much the same for both the form and button.
Upon choosing the template Mission Trip Fundraising Form, you’ll be prompted to configure your form. Feel free to change the title and description of your form.
In the Type field, you’ll find a few different options. You can use either off-site payment type or on-site payment type.
When on-site payment form is chosen, you can even configure the plugin to open the form in an overlay method. You can leave the field as it is to go ahead with the default option.
For more details, check out 3 different types of payment forms.
If you want to customize the Payment Success Page, you can either choose a Specific Page from your site, or if you want to redirect users to a third-party site, choose Redirect URL.
Now, let’s choose the Payment option on the left.
By default, you can see that a few different payment amounts have been added. Feel free to change the currency and the amount. In addition, you can even choose between a one-time and subscription payment.
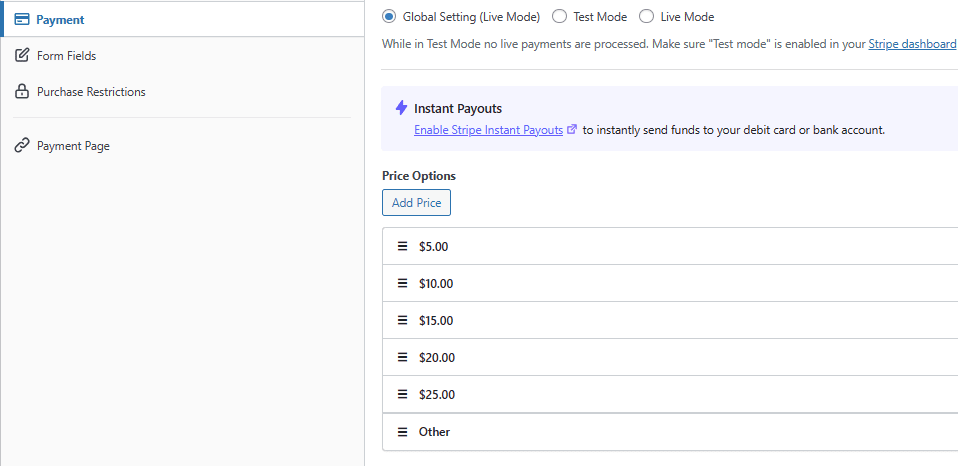
There are a few more things you can do on this page, like allowing users to determine the amount while making the donation.
To do this, click one of the listed amounts and select the checkbox Allow amount to be determined by user.

Next, click on the Form Fields option on the left. Here, you can add or customize any existing form fields.
You can also choose from different display styles. By default, Buttons are chosen, but you can change the style to radio select, dropdown, or list.

Once you’re all set, you can go ahead and preview the form to figure out if it’s working as it should. After double-checking all the configurations and making a test payment, you can change the mode from test to Live when you’re ready to accept donations.
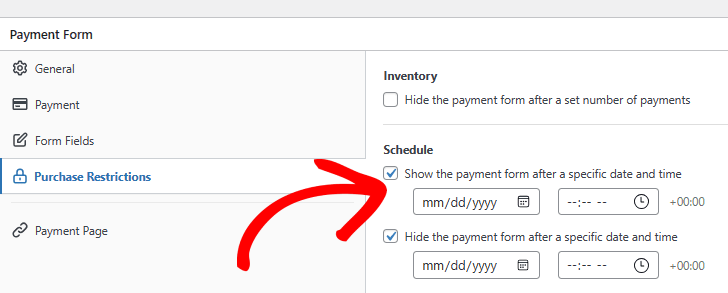
If you want to schedule when your form starts and stops accepting donation payments, all you need to do is navigate to the Purchase Restrictions option on the left and enter your desired dates and times.
Step 4: Publish Your Donation Form
Now that your donation form is ready, it’s time to embed / publish it on your site.
To embed the form, navigate to the post or page where you want to publish it. Next, add the WP Simple Pay block by clicking on the + icon and selecting the WP Simple Pay block. Then choose the donation form you just created. And then, publish or update the form.

That’s it!
We hope this article helped you learn how to accept donations on a WordPress site.
If you liked this article, you might also want to check out our article on how to increase donations with targeted popups.
Ready to get started? No need to wait. Get the best Stripe payments plugin for WordPress now and start accepting donations for your big, beautiful cause today!
For more articles like this, follow us on Facebook and Twitter.
Disclosure: Our content is reader-supported. This means if you click on some of our links, then we may earn a commission. We only recommend products that we believe will add value to our readers.

