
How to Increase Donations with Targeted Popups
Last updated on

Are you wanting to increase donations with targeted popups?
Using targeted popups on your site, you can ensure your message is displayed for the right users at the right time. In addition, you can create customized campaigns to increase donations on your site.
In this article, we’ll show you how to easily increase donations for your cause using targeted popup campaigns.
What Are Targeted Popups?
Targeted popups allow you to display specific messages on your site to convert visitors into subscribers, customers, and donors.
You can use targeted popup campaigns to encourage visitors to donate to your cause by reaching specific audiences based on their location and site behavior such as scrolling, time on page, and exit intent.
Done right, targeted popups can effectively generate leads, grow your subscribers, and boost donations. They’re also a great solution for reducing checkout abandonment.
Increasing and Accepting Donation Payments
The easiest way to increase donations using targeted popups is to use a popup plugin for WordPress that lets you create targeted popup campaigns without having to use code and also integrates with a Stripe payments plugin.
OptinMonster is the #1 popup plugin for WordPress that lets you create high converting popups, announcement bars, gamified wheels, and more.
The plugin also offers an advanced drag and drop campaign builder to help you create targeted popups for your donation site.
Its display rules let you choose how and when to trigger your popups based on different visitor factors and behaviors, including location and how long they’ve been on your site. The plugin’s Exit-Intent® Technology and Geolocation Targeting features allow you to control when your popups are triggered.
One of the best parts about OptinMonster is that it integrates seamlessly with your WordPress site. In addition, the plugin works with the #1 Stripe payments plugin for WordPress, WP Simple Pay, to help you easily create exit intent popups for your donation payment forms.
WP Simple Pay also allows you to accept donation payments without having to set up a shopping cart. You can use the plugin to create on-site payment forms for donations, fundraising, and more.
Additional features of WP Simple Pay include:
- Multiple Payment Methods: Accept 10+ payment methods, including ACH direct debit, traditional debit/credit cards, Apple Pay/ Google Pay, Cash App, and more.
- Payment Form Templates: Choose from tons of payment form templates to create the perfect donation form in minutes.
- Custom Form Fields: Customize your forms to collect additional information from your donors.
- User-Entered Amounts: Allow donors to choose how much they’d like to donate.
- Purchase Restrictions: Choose when your donation forms start and stop accepting payments.
- Fee Recovery: Save the additional 3% Stripe processing fee by forcing or encouraging your donors to cover it.
- And more…
Remove the additional 3% fee!
Most Stripe plugins charge an additional 3% fee for EVERY transaction
…not WP Simple Pay Pro!
How to Increase Donations Using Targeted Popups
For the purpose of this tutorial, we’re going to show you how to easily increase and accept donation payments on your site using WP Simple Pay and OptinMonster.
The first thing you’ll need to do is download and activate WP Simple Pay on your WordPress site.
Step 1: Download and Activate WP Simple Pay
Simply visit the pricing page and choose the right plan for your needs.
Once you’ve finished purchasing the plugin, you’ll need to download it from your purchase receipt email or from your WP Simple Pay account.
After it has been downloaded, go to your WordPress dashboard, navigate to Add New under Plugins, and then Upload Plugin.
Click Choose File and find the WP Simple Pay .zip file on your computer. Then, click Install Now. When the installation is complete after a few seconds, press the Activate Plugin button.
If you need help with this step, see our detailed guide on how to install the plugin.
Go ahead and click on Let’s Get Started.

If you didn’t see the setup wizard, simply head over to WP Simple Pay » Settings » Advanced tab and click the Launch Setup Wizard button.
2: Connect WordPress to Stripe
To connect your WordPress site to Stripe, click on Connect with Stripe.

Next up, enter the email address you use for your Stripe account and connect it to your site. If you don’t have a Stripe account, you can easily create one by entering your email address and completing the registration.
Upon completing this process, you’ll be shown a success page that says, “Setup Complete.” Next, click on Create a Payment Form.

Step 3: Create a Donation Payment Form
Now that you’ve set up WP Simple Pay on your site and connected your Stripe account, it’s time to create a donation payment form.
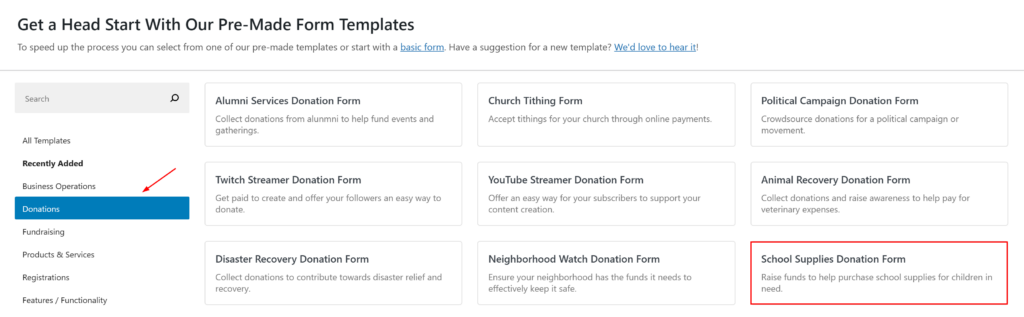
You should have landed on the payment form template library page, where you can choose from all kinds of different forms. For the purpose of this tutorial, let’s go ahead and use School Supplies Donation Form.
Next, in the General tab, edit your title and description to reflect your specific cause.
For the form Type, be sure On-site payment form is selected. This will ensure that your payment form allows your donors to checkout directly on your site.
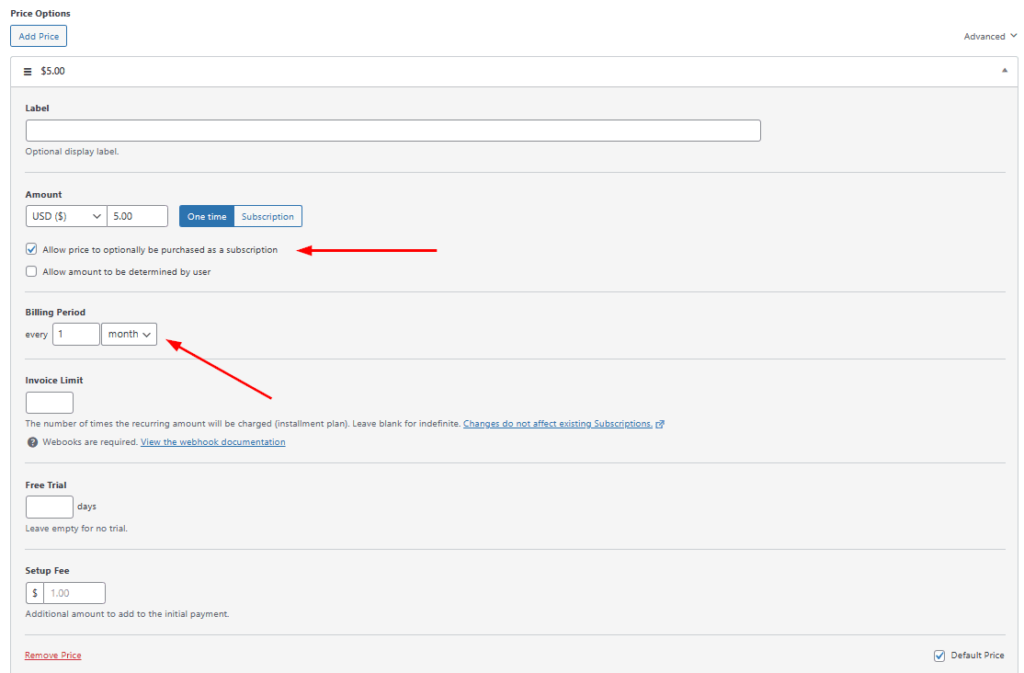
Once you’ve finished, click on the Payment tab. This is where you can add or remove pricing options and choose whether you’d like your donors to complete a one-time payment or subscribe to recurring monthly, weekly, or yearly payments.
Check the box next to Allow price to optionally be purchased as a subscription for each price amount and choose month for the Billing Period.
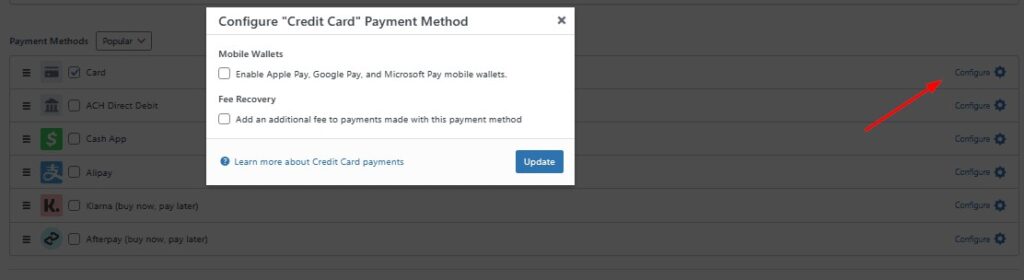
Next, for Payment Methods, choose the ones you want to offer your donors. If you’d like to offer Apple Pay / Google Pay, be sure to click on Configure and check the box. This is also where you can set up Fee Recovery to ensure you collect the total donation amount.
Now that you’ve set up your pricing options and configured your payment methods, go ahead and click on Form Fields.
Here is where you can add or remove custom fields to your form. Custom fields are great for collecting additional information aside from the payment details so you can automate communications with your donors and add them to your mailing list.
Next, click on Purchase Restrictions. This is where you can schedule the time and date that your form will accept donation payments. This is a great feature to use if your cause is time sensitive.
When you’re finished, be sure to click on Save Draft, and preview your form. If everything looks good, go ahead and click on Publish.
Step 4: Embed Your Form to a Page or Post
Now that you’ve published your donation payment form, all you have left to do is embed it on a page or post on your site.
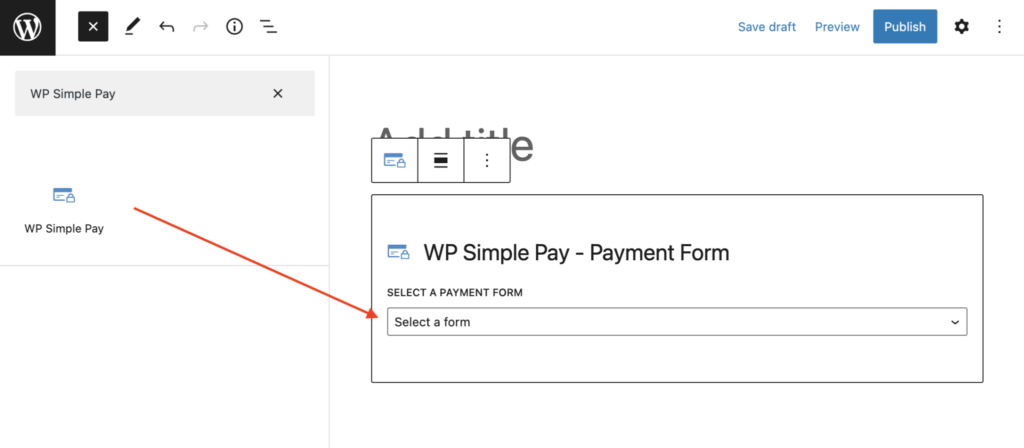
Just go to the page or post and click on the + icon in the top left corner of your dashboard.
Next, from the WP Simple Pay block, choose the form you just created and be sure to click on Update or Publish.
Your published form should look something like the one below:

Step 5: Create an OptinMonster Account
To create a targeted popup campaign for your donation payment form, you’ll need to create an OptinMonster account.
To do this, simply go to the pricing page and choose the right plan for your needs.
Once you’ve completed your purchase, you can login to your new account. You’ll be prompted to add your site’s domain to your account.
To connect your WordPress site to your OptinMonster account, you’ll need to install and activate the plugin. This allows you to manage your campaigns directly from the WordPress admin dashboard.
For more details on how to set up OptinMonster, follow the OptinMonster step-by-step installation guide.
Step 6: Create an Exit Intent Popup
From your WordPress admin dashboard, go to OptinMonster » Templates to begin designing and configuring your popup.
Next, select Popup for your Campaign Type and choose the Get More Donations popup template.

On the next screen, you’ll need to add a title for your campaign and click on Start Building.
Once you’re in the popup builder, you’ll notice that there are tons of features to help you create exactly what you need. The template already has a Call-to-Action button and a countdown timer. You can edit the text, upload your own images, and even use Unsplash to find a stock image for your popup. In addition, by clicking on the countdown timer, you can adjust the times to meet your specific needs.

So far, our popup looks like this:

Next, you’ll need to add a URL to the Call-to-Action button that will redirect your visitors to the page with the donation payment form on your site.
Simply click on the Donate Now button in the popup builder and enter the redirect URL. This URL needs to be the page on your site that you published your WP Simple Pay donation payment form on.
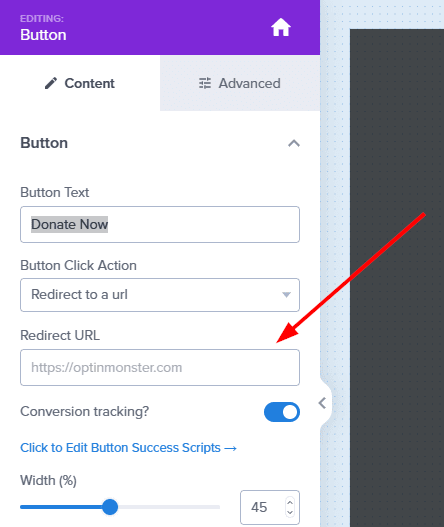
When your popup looks good, be sure to click on Save.
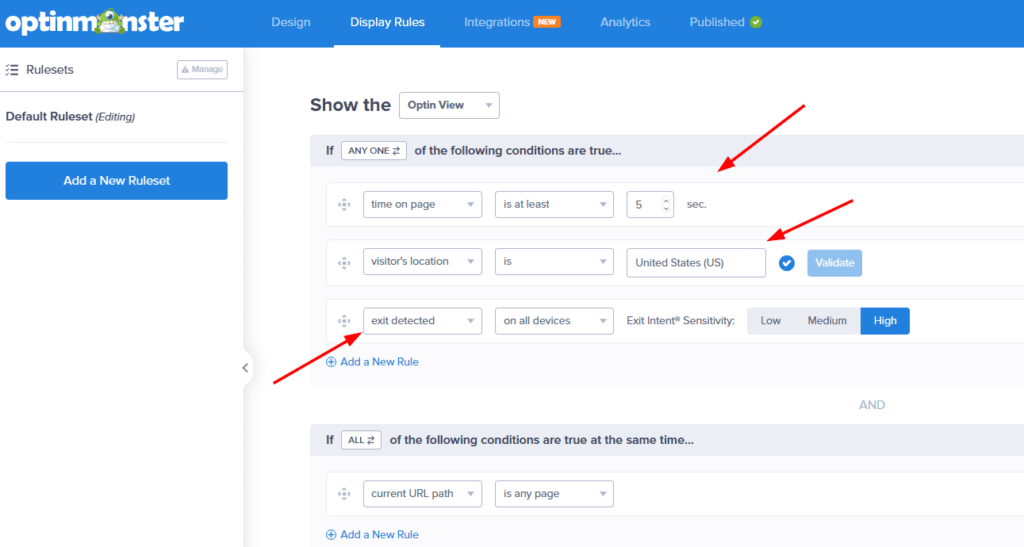
Next, from your dashboard, click on Display Rules. Here is where you can edit your exit intent and geolocation targeting rules. Be sure to save your changes when you’re finished.
Be sure to navigate back to your WordPress admin dashboard and click on OptinMonster » Campaigns to publish your popup campaign.
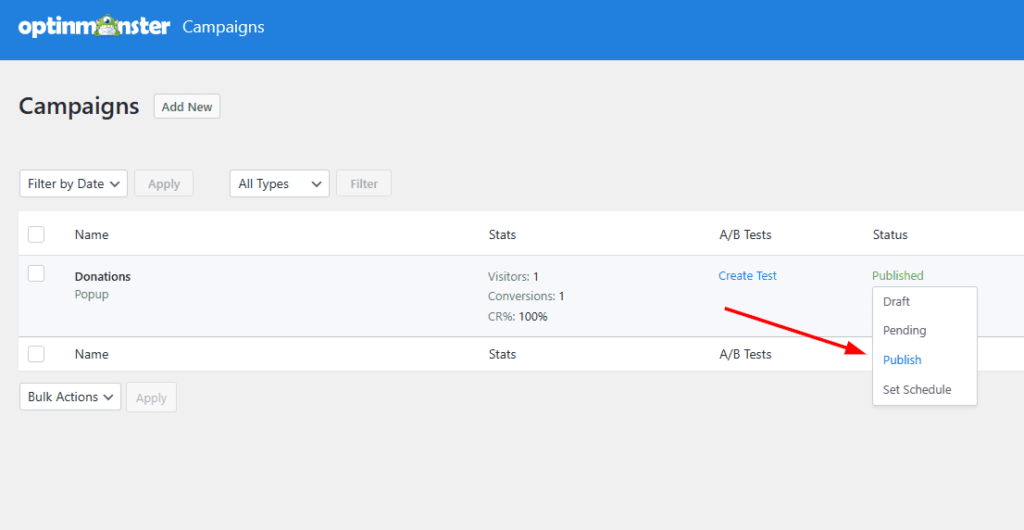
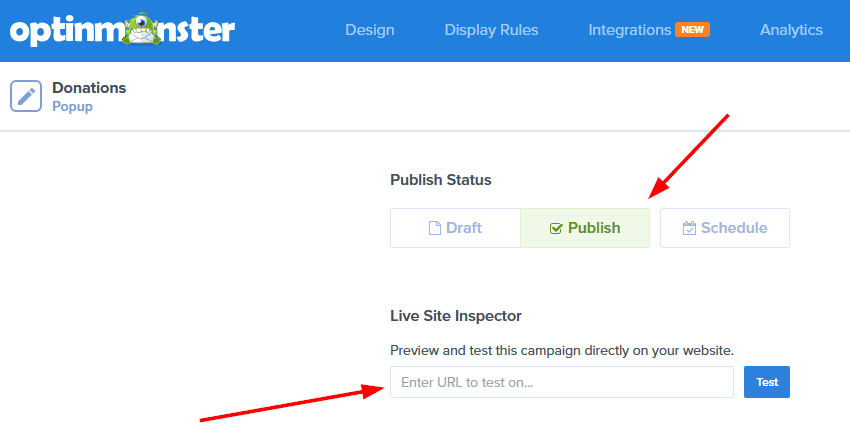
Once you’re happy with the design and settings, set the campaign Status to Publish and then Save your campaign. You can enter your site to preview the popup.
There you have it! We hope this article has helped you learn how to increase donations with targeted popups.
If you liked this article, you might also want to check out how to use email campaigns to collect donations.
Additional Resources
- Best Popup Plugins for WordPress (Compared)
- Best Crowdfunding Plugins for WordPress (Compared)
- How to Accept Donation Payments Online with WordPress
What are you waiting for? Get started with WP Simple Pay today!
To read more articles like this, follow us on X.
Disclosure: Our content is reader-supported. This means if you click on some of our links, then we may earn a commission. We only recommend products that we believe will add value to our readers.


Leave a Reply