How to Reduce Checkout Abandonment With an Exit Intent Popup
Last updated on

 Spencer Finnell
Do you want to reduce the checkout abandonment rate on your site’s payment forms?
Checkout abandonment is when a visitor begins filling out the payment form but then leaves your site before completing the purchase. The average checkout abandonment rate for eCommerce businesses is 69.99%.
In this article, we’ll show you how to use an exit intent popup on your payment page to recover abandoned checkouts and boost conversions.
What is an Exit Intent Popup?
An exit intent popup will appear to a visitor when he or she is about to exit the page. This is detected when visitors move the mouse outside the browser window to navigate to a new site or close the tab.
So, why are potential customers abandoning their purchases after visiting or even starting to fill out a payment form?
Perhaps they need more details about your product or service and have a few unanswered questions. Or, they may simply be unsure if the value they’ll receive will be worth the cost.
With an exit intent popup that addresses one or both of these issues, you can expect to recover 3% to 8% of your visitors who would otherwise leave your payment forms.
Fortunately, it’s pretty simple to create an exit intent popup that does just this on your WordPress site.
This tutorial will show you how to add an exit intent popup to a WP Simple Pay payment form on a WordPress site using the OptinMonster plugin.
Let’s get started.
In This Article
Step 1: Install and Connect OptinMonster
First, you’ll need to install the OptinMonster plugin on your site. In your WordPress dashboard, select Plugins » Add New, then search for OptinMonster.
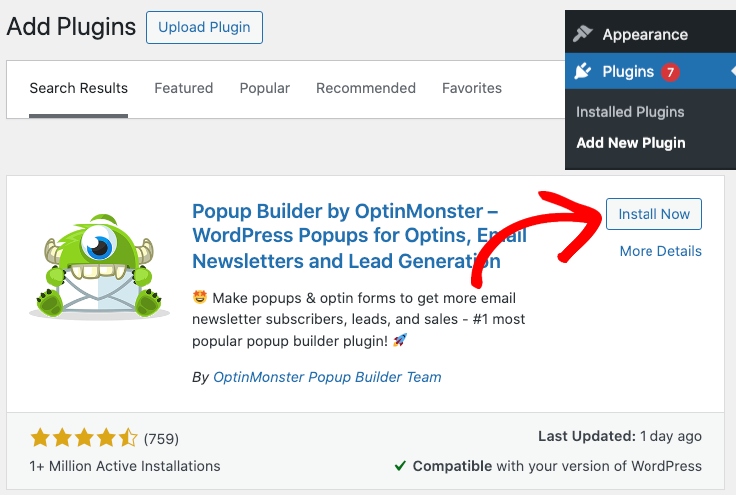
Once you find the OptinMonster plugin, click Install Now, then click Activate.
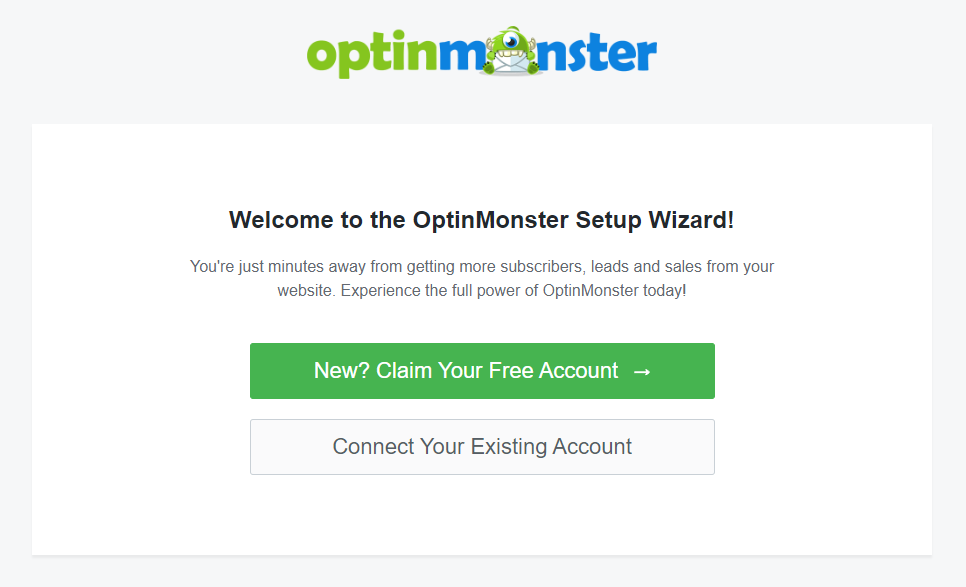
After you’ve activated the plugin, an OptinMonster setup wizard should appear.

Next, open a new browser tab, go to OptinMonster.com, and choose a premium plan so that you can use the exit intent popup feature.
Once your account is created, you can connect it with the WordPress plugin that you have just installed.
Back in your WordPress dashboard, with the OptinMonster setup wizard open, simply click Connect Your Existing Account and proceed through the steps.
For more details and assistance with setting up OptinMonster, check out the OptinMonster step-by-step installation guide.
Step 2: Create an Exit Intent Popup Campaign
Within the exit intent popup itself is where you’ll want to give your potential customers an incentive to complete their purchases. We’ll go ahead and create a popup that includes a coupon code.
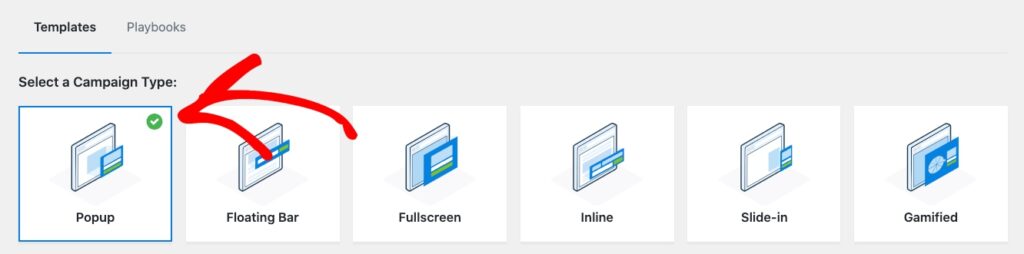
At the end of the OptinMonster setup wizard, click Create Your First Campaign. Alternatively, you can select OptinMonster » Campaigns, then Add New in the left-hand menu.
Here, select the Popup campaign type.
Next, choose a template from the available options. Go ahead and search for “coupon” and select the Get a Discount Code template for the purpose of this tutorial, but you could choose any template that appeals to you as they’re all simple to configure.

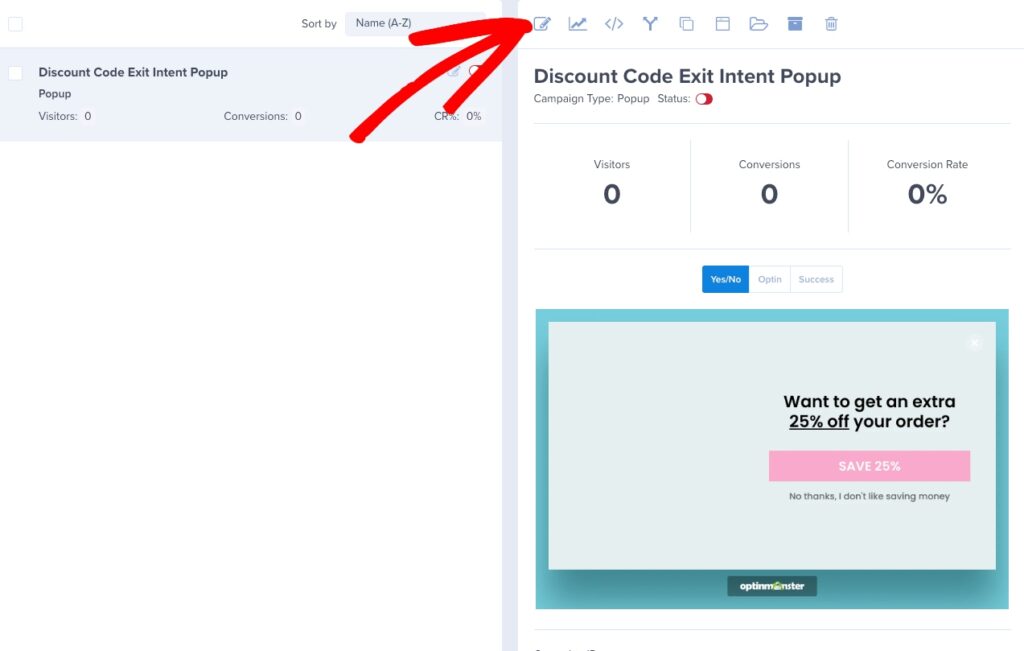
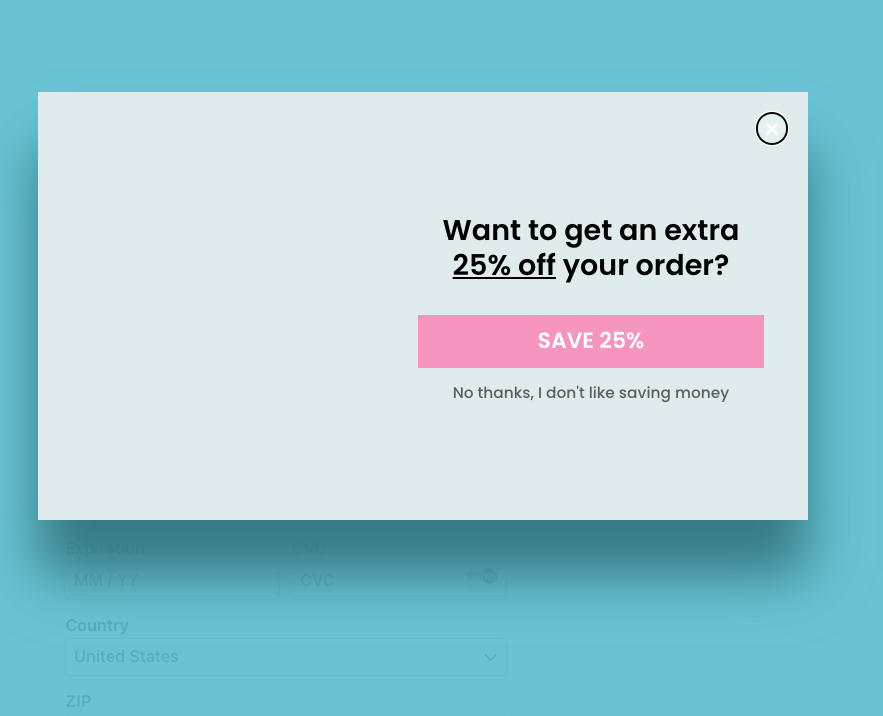
Now, you’ll be prompted to name your campaign and start editing the popup design. You’ll see many customization tools on the left-hand side. As you edit your campaign, you’ll see a live preview on the right-hand side. In this example, remove a few elements and add text that contains the coupon code SAVE25 for 25% off as we’ll be adding this coupon to our payment form later on.
It should end up looking similar to the following:
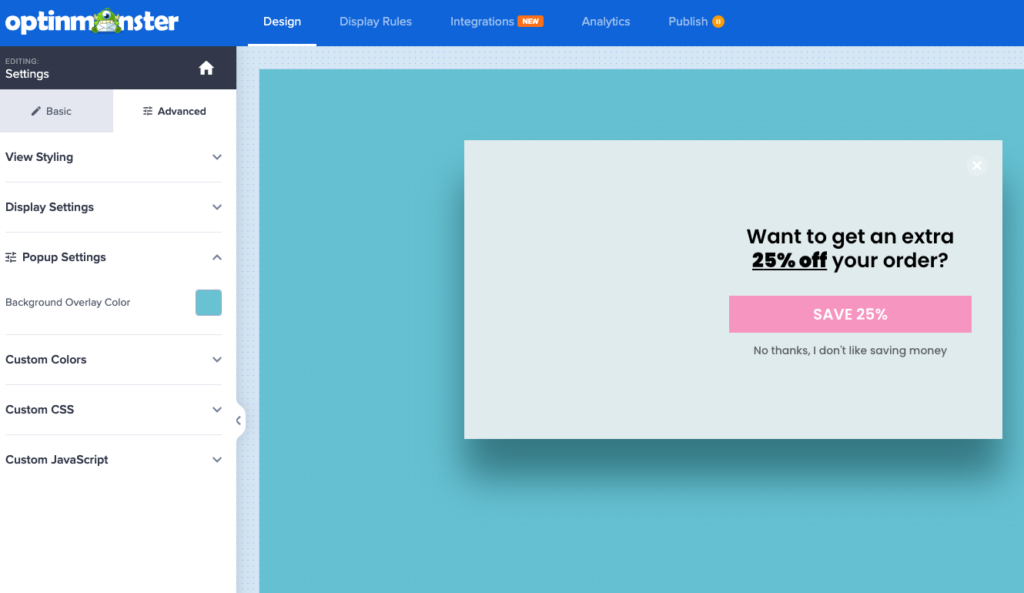
When you like how it looks, click Save.
For more help designing your first campaign, visit OptinMonster’s Creating Your First Campaign guide.
Step 3: Set Up a WP Simple Pay Payment Form
Now that you’ve created your exit intent popup using MonsterInsights, you’ll need to create a payment with WP Simple Pay. If you prefer, you can also just as easily modify a payment form that you’ve created previously.
If you’re new to WP Simple Pay, you’ll need to purchase a Pro license to continue. Once purchased, a wizard will walk you through the first-time setup, but if you need more help, you can simply follow the WP Simple Pay step-by-step installation guide.
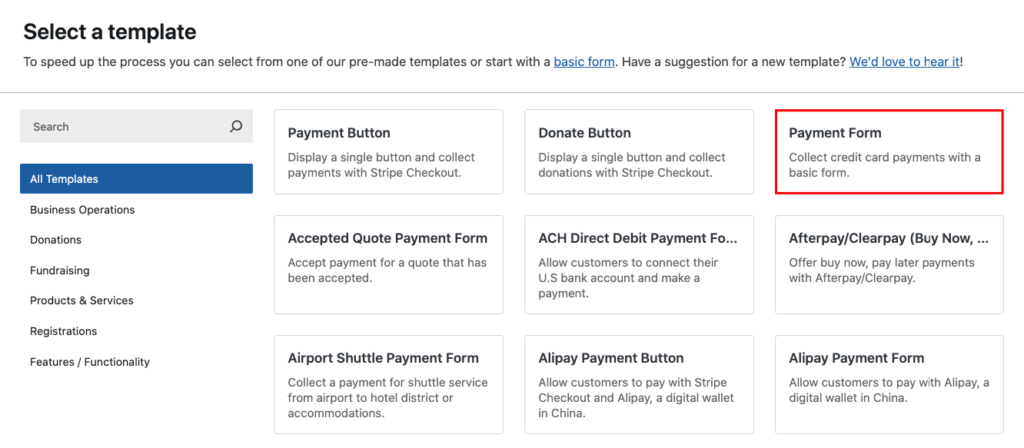
To create a payment form in your WordPress dashboard, select WP Simple Pay » Add New, and then choose the Payment Form template.
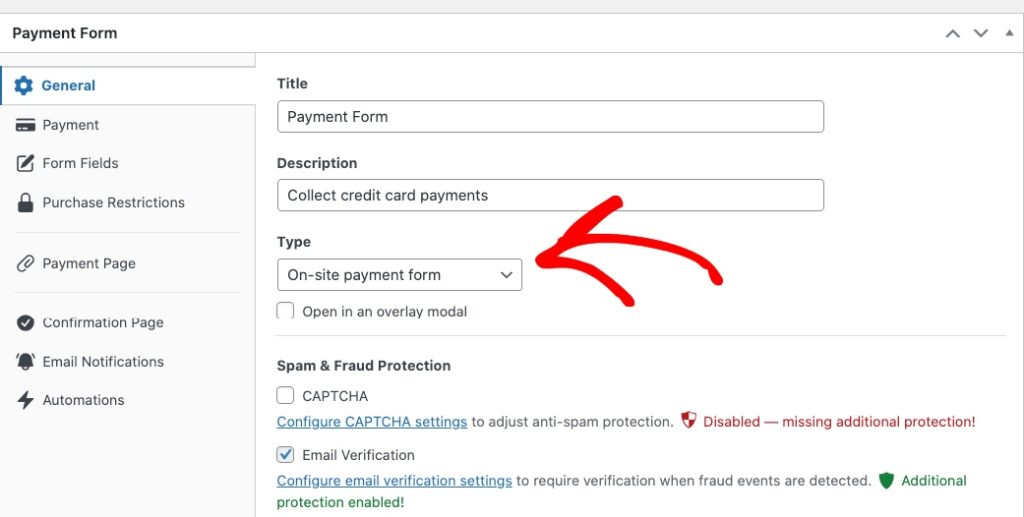
Be sure to select On-site payment form for the form Type from the General tab.
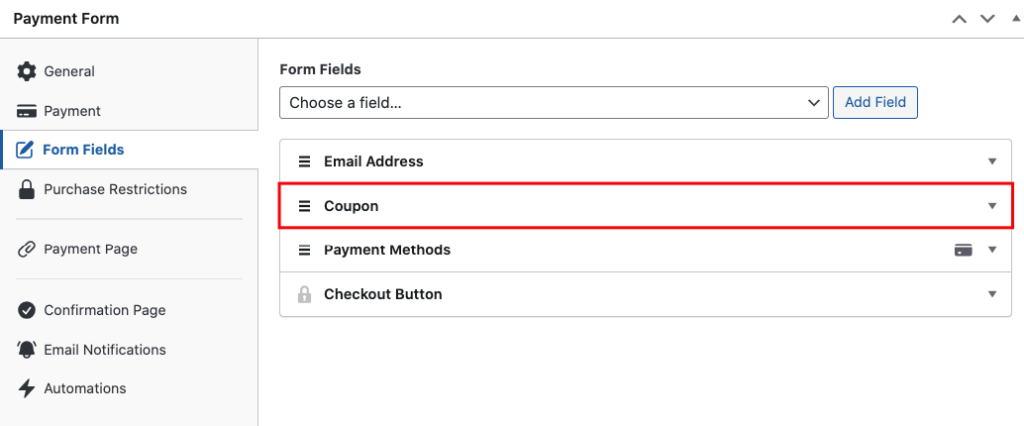
Because we’ve added a coupon code to the exit intent popup in MonsterInsights, we’ll need to ensure that a coupon field exists on the payment form.
While still editing the form, go to the Form Fields tab, select the Coupon field, then click Add Field.
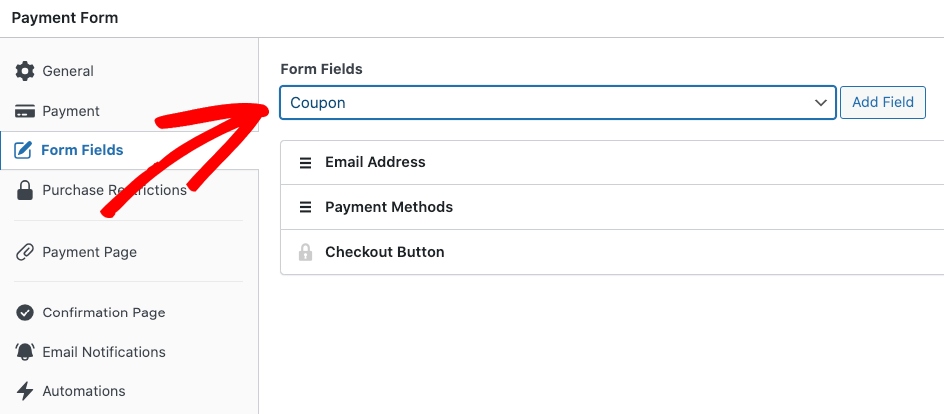
Finally, move the coupon field above the Payment Methods field, then click Publish.
Step 4: Creat a Coupon Code
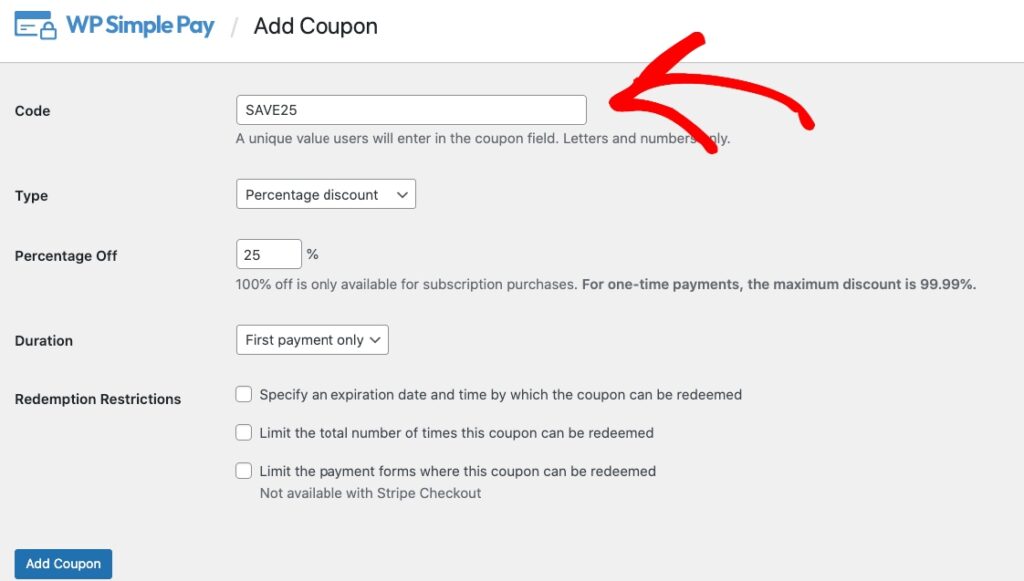
When you add a coupon code to WP Simple Pay, it also gets saved to your Stripe account.
To do this, go to WP Simple Pay » Coupons, then click Add New.
Here, we’re just going to add the 25% off discount code SAVE25. When you’re finished, click Add Coupon.
If you own a WP Simple Pay Plus or higher license, you can also enable coupon codes to work with recurring payments.
Step 5: Add the Payment Form and Exit Intent to a Page
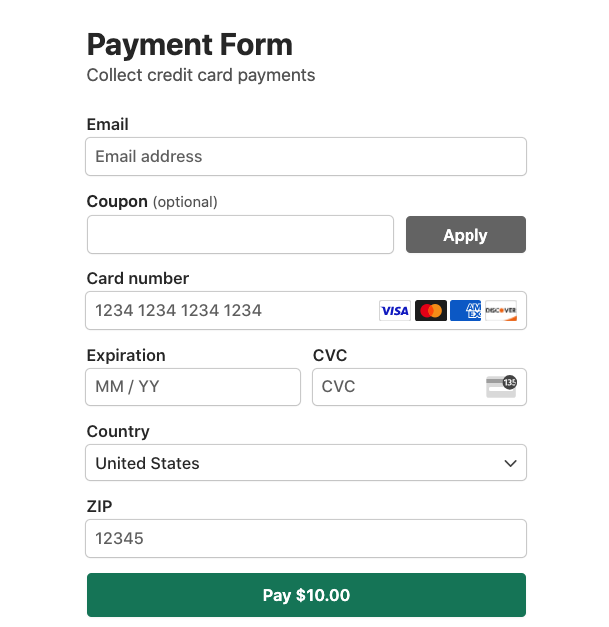
While editing an existing page or creating a new one, click on the plus + icon at the top, find the WP Simple Pay block, then select it to add this block to the WordPress block editor.

Next, select the payment form from the block’s dropdown menu. Then, you can preview your form, publish it, and visit your page to see it in action.
Now, let’s go back to OptinMonster » Campaigns, then click Edit Campaign under your campaign.
Next, go to Display Rules » Conditions, click the first conditional dropdown, then change it to Exit Intent. .
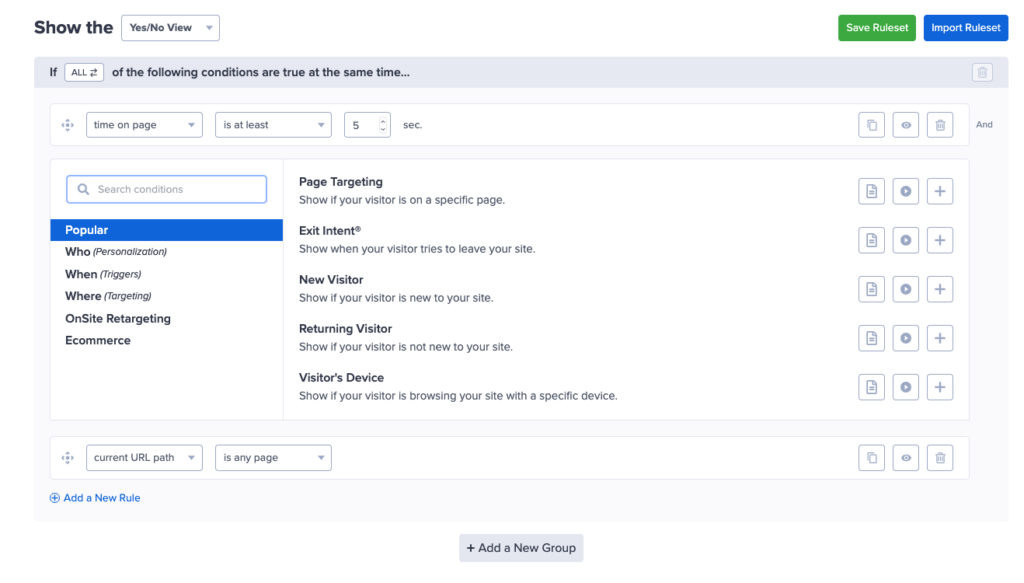
For the Exit Intent Sensitivity, go ahead and select Medium.
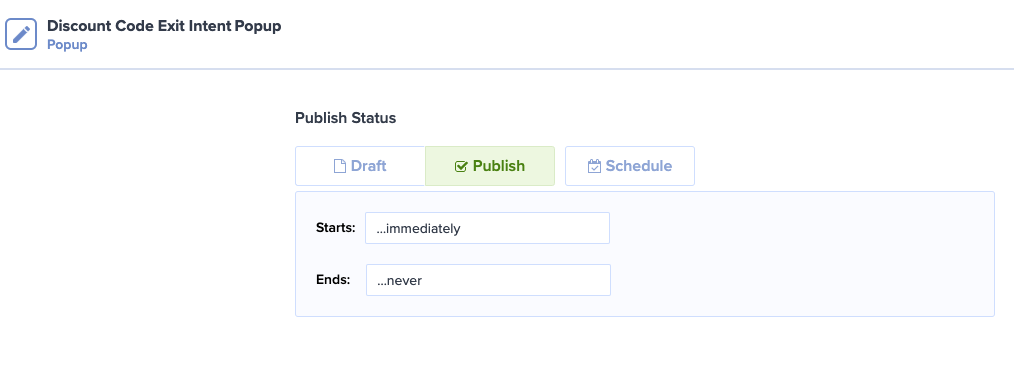
Now, click Save, click on the Publish tab, and then the Schedule tab, and click Save again. This will ensure that your exit intent popup is scheduled.
Finally, open the payment page and test out moving your mouse outside the browser window.
You should now see your coupon code exit intent popup appear!
There you have it! We hope this article has helped you learn how to reduce checkout abandonment with an exit intent popup with a coupon code.
If you liked this article, you might also want to check out our guide on how to maximize coupons on your WordPress site.
What are you waiting for? Get started with WP Simple Pay today!
To read more articles like this, follow us on X.
Disclosure: Our content is reader-supported. This means if you click on some of our links, then we may earn a commission. We only recommend products that we believe will add value to our readers.


Leave a Reply