
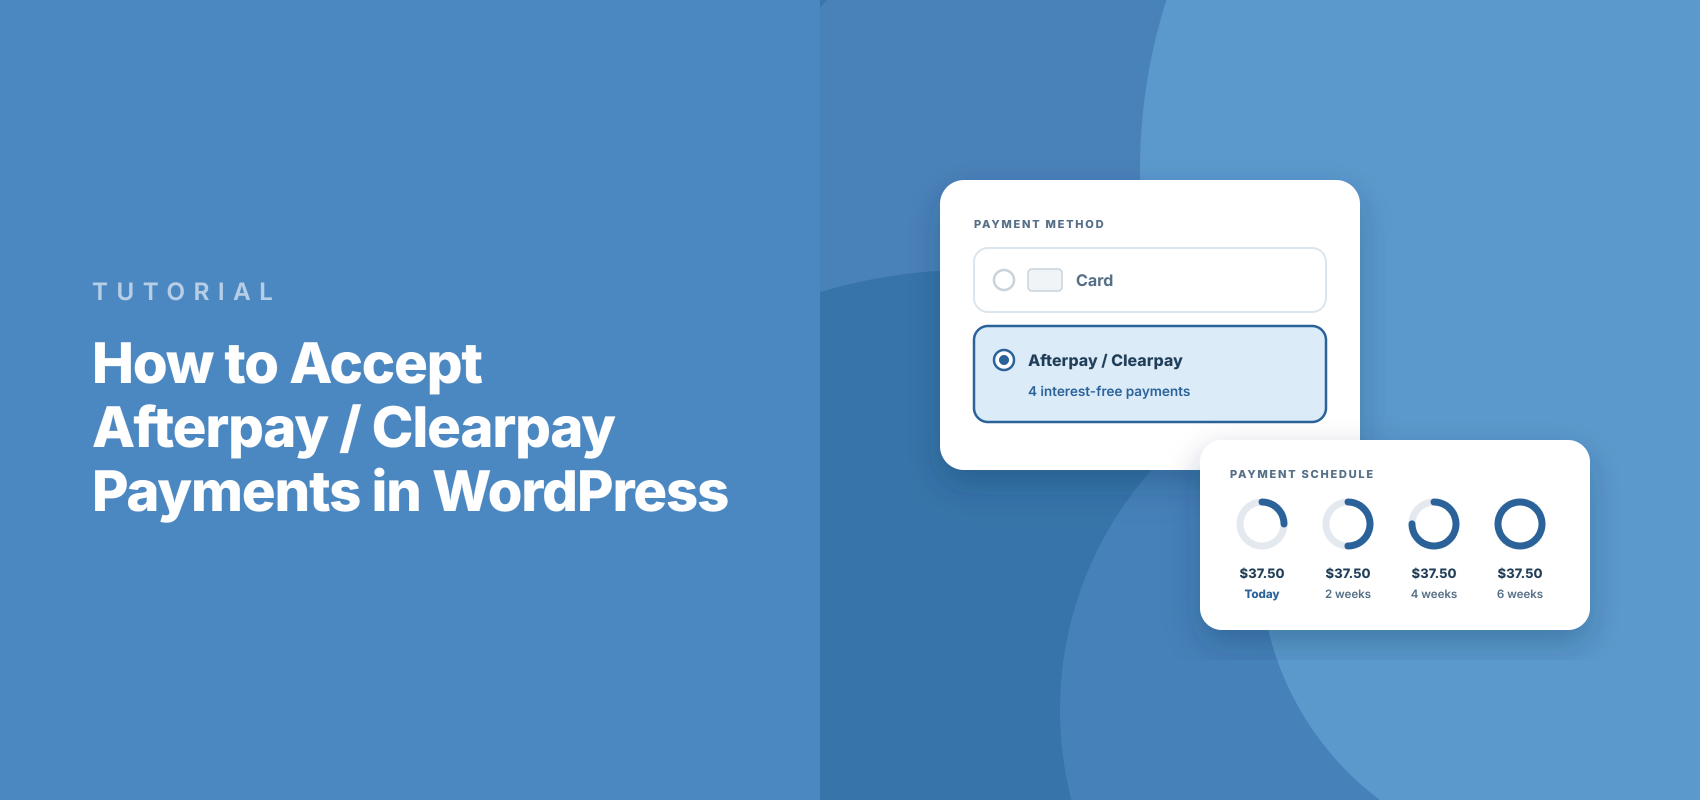
How to Accept Afterpay / Clearpay Payments in WordPress
Last updated on

Afterpay (known as Clearpay in the UK) lets your customers book or buy today and pay over four smaller installments, while you get the full amount upfront. For a service business, that can be the difference between a client saying “let me think about it” and booking on the spot.
The best part is that you don’t need a WooCommerce store or a separate Afterpay merchant account to offer it. You can accept Afterpay payments in WordPress straight through WP Simple Pay with a single payment form.
In this article, we’ll show you how to accept Afterpay payments in WordPress, step by step, without writing any code.
What Is Afterpay and How Does It Work?
Afterpay is a buy now, pay later (BNPL) payment method. Your customer picks it at checkout, logs in to their Afterpay account (or creates one), and chooses how they’d like to pay.
For most orders, that means four interest-free payments spread two weeks apart, which Afterpay calls Pay in 4. In the US, Afterpay also offers monthly plans for bigger purchases.
Stripe pays you the full amount right away. Afterpay then takes care of collecting the installments from your customer.
In the UK, the same service goes by Clearpay. WP Simple Pay picks the right name for you based on your Stripe account’s country, so UK sites see Clearpay (buy now, pay later) and everyone else sees Afterpay (buy now, pay later).
Why Offer Afterpay on Your WordPress Site?
From our experience, people rarely hesitate over the service or product itself. They hesitate at paying the whole amount in one go, and that’s where Afterpay helps.
Here’s what it changes for your business:
- Bigger purchases feel smaller. A $450 consultation reads very differently as four payments of $112.50. That can turn a “maybe next month” into a booking today.
- You get paid in full right away. There’s no waiting on installments to trickle in. Stripe deposits the full amount, minus its fee, on your normal payout schedule.
- Missed payments aren’t your problem. Afterpay covers losses from customer fraud or missed repayments. You won’t be chasing anyone for the third installment.
- Customers approve every payment themselves. Shoppers have to log in to Afterpay to confirm the purchase. That extra step helps cut down on fraud and on “I don’t recognize this charge” disputes.
- You don’t need a shopping cart. Afterpay runs on a regular payment form, so you can add it to a services page, a booking page, or a product landing page.
All of that sounds great, but Afterpay does come with a few rules worth checking before you set anything up.
Where Afterpay Works (and Where It Doesn’t)
Afterpay is available to Stripe accounts in five countries. Each one has its own currency and order range:
| Country | Currency | Order range (Pay in 4) |
|---|---|---|
| Australia | AUD | $1 to $4,000 |
| Canada | CAD | $1 to $2,000 |
| New Zealand | NZD | $1 to $4,000 |
| United Kingdom (Clearpay) | GBP | £1 to £1,200 |
| United States | USD | $1 to $2,000 |
In the US, orders between $400 and $4,000 can also use Afterpay’s 6- or 12-month plans. Those monthly plans do charge the customer interest.
A few more house rules apply:
- Customers have to be in your country. Afterpay only supports domestic sales, so a US Stripe account can only offer it to US customers.
- One-time payments only. Afterpay doesn’t work with subscriptions or recurring payments.
- Some businesses can’t use it. Stripe doesn’t allow Afterpay for donations, alcohol, pre-orders, or business-to-business sales. Nonprofits can look at installment payment plans instead.
- Totals outside the range hide Afterpay. If an order total falls outside those ranges, WP Simple Pay quietly removes Afterpay from the form. In the US, the cutoff is $4,000, the top of the monthly plan range, and your other payment methods still show.
If your business fits those rules, you’re ready to set it up.
Accept Afterpay Payments With WP Simple Pay
We recommend WP Simple Pay for adding Afterpay to WordPress without a shopping cart.
WP Simple Pay is the #1 Stripe payments plugin for WordPress. It lets you accept one-time and recurring payments without setting up a shopping cart, and it adds Afterpay to any payment form with one toggle.
Here are the features that make it a good fit for Afterpay:
- Buy now, pay later through Stripe (Professional plan or Elite plan). Afterpay and Affirm both run through the Stripe account you already have. There are no extra applications or merchant accounts to manage.
- Required fields added for you. When you save an on-site or overlay form with Afterpay turned on, WP Simple Pay adds an Address field and sets it to collect a shipping address. You don’t have to remember Afterpay’s requirements yourself.
- Three form types. You can show Afterpay on an on-site form, in an overlay modal, or on Stripe Checkout. Our guide to embedded vs overlay vs Stripe Checkout forms explains the differences.
- No additional 3% transaction fee. WP Simple Pay Pro doesn’t add a fee on top of Stripe’s own processing fee. Stripe still charges its standard fee on every payment.
With that, let’s see how you can use WP Simple Pay to accept Afterpay payments in WordPress.
Step 1: Install and Activate WP Simple Pay
To start, you’ll need WP Simple Pay Pro on the Professional plan or the Elite plan, since those are the plans that include Afterpay. You’ll also need a Stripe account, but you can create one during setup.
Once you’ve downloaded the plugin, install and activate it like any other WordPress plugin. Our WP Simple Pay installation guide walks you through it if you need a hand.
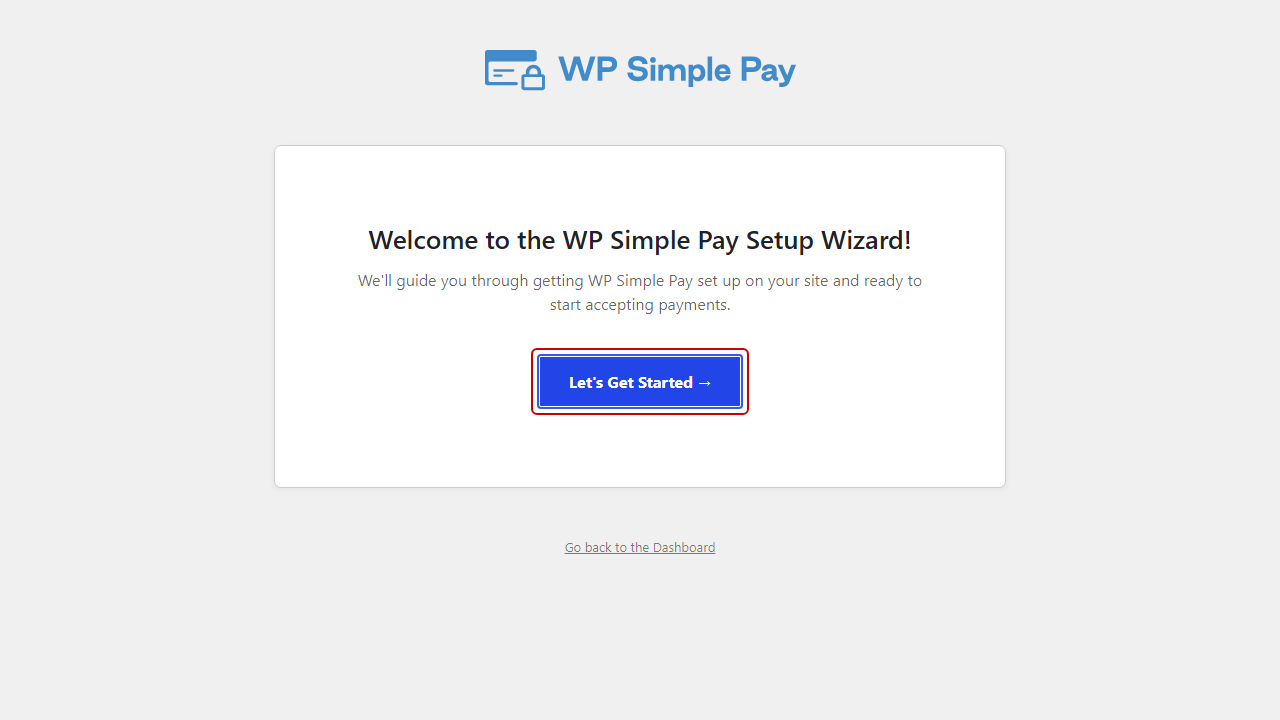
After activation, the setup wizard opens on its own. Go ahead and click Let’s Get Started to begin.
Step 2: Connect WordPress to Stripe
Next, the wizard asks you to connect WP Simple Pay to Stripe. Click Connect with Stripe, then sign in with the email address on your Stripe account.
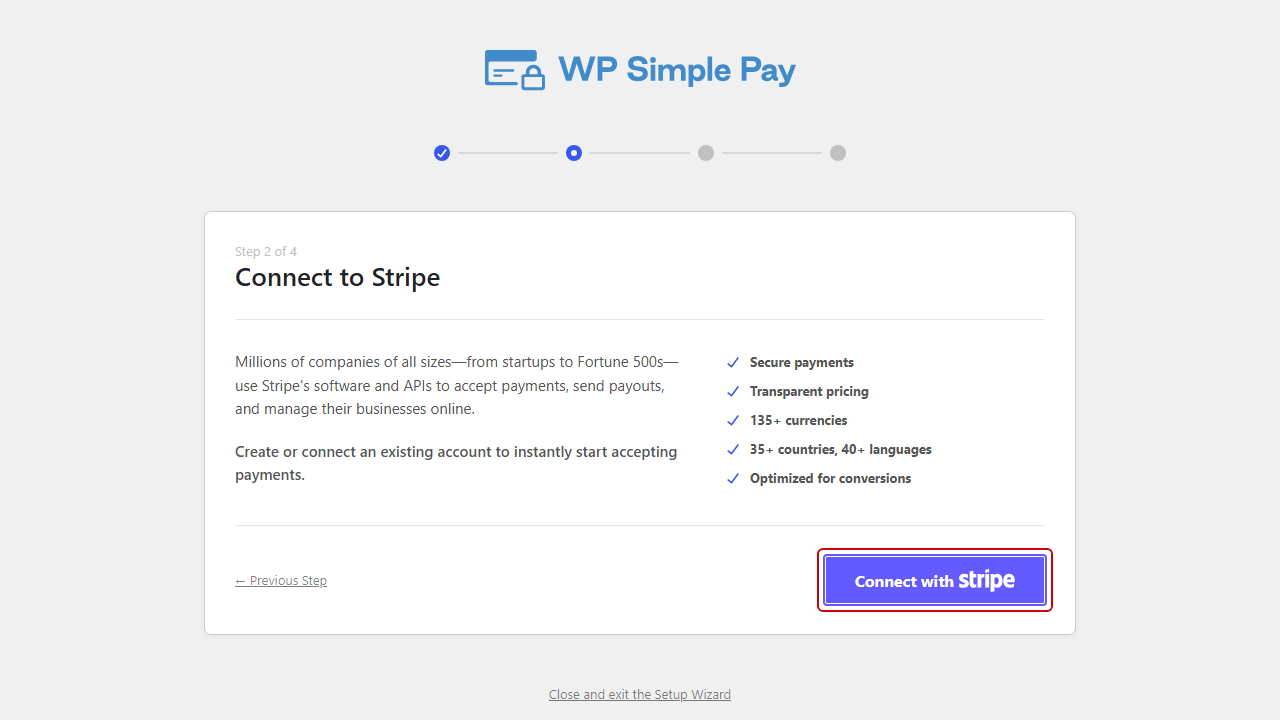
If you’re new to Stripe, you can create an account from that same screen. Make sure the account’s country is one of the five Afterpay supports, since that’s what decides whether Afterpay shows up later.
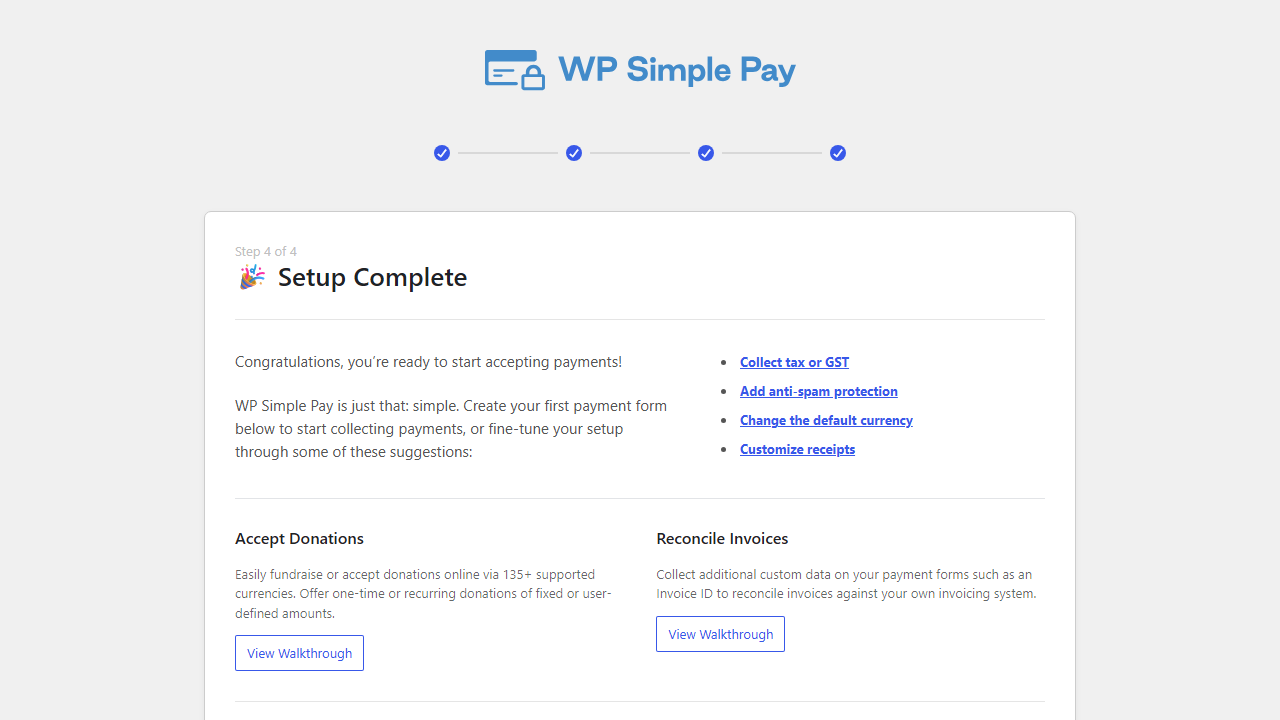
Once you’re connected, you’ll see a 🎉 Setup Complete message. That means your site can now take Stripe payments.
Step 3: Turn On Afterpay in Your Stripe Dashboard
Afterpay also needs to be switched on inside Stripe itself. To do that, log in to your Stripe Dashboard and open your payment method settings.
From there, find Afterpay / Clearpay in the list and click the Enable button.
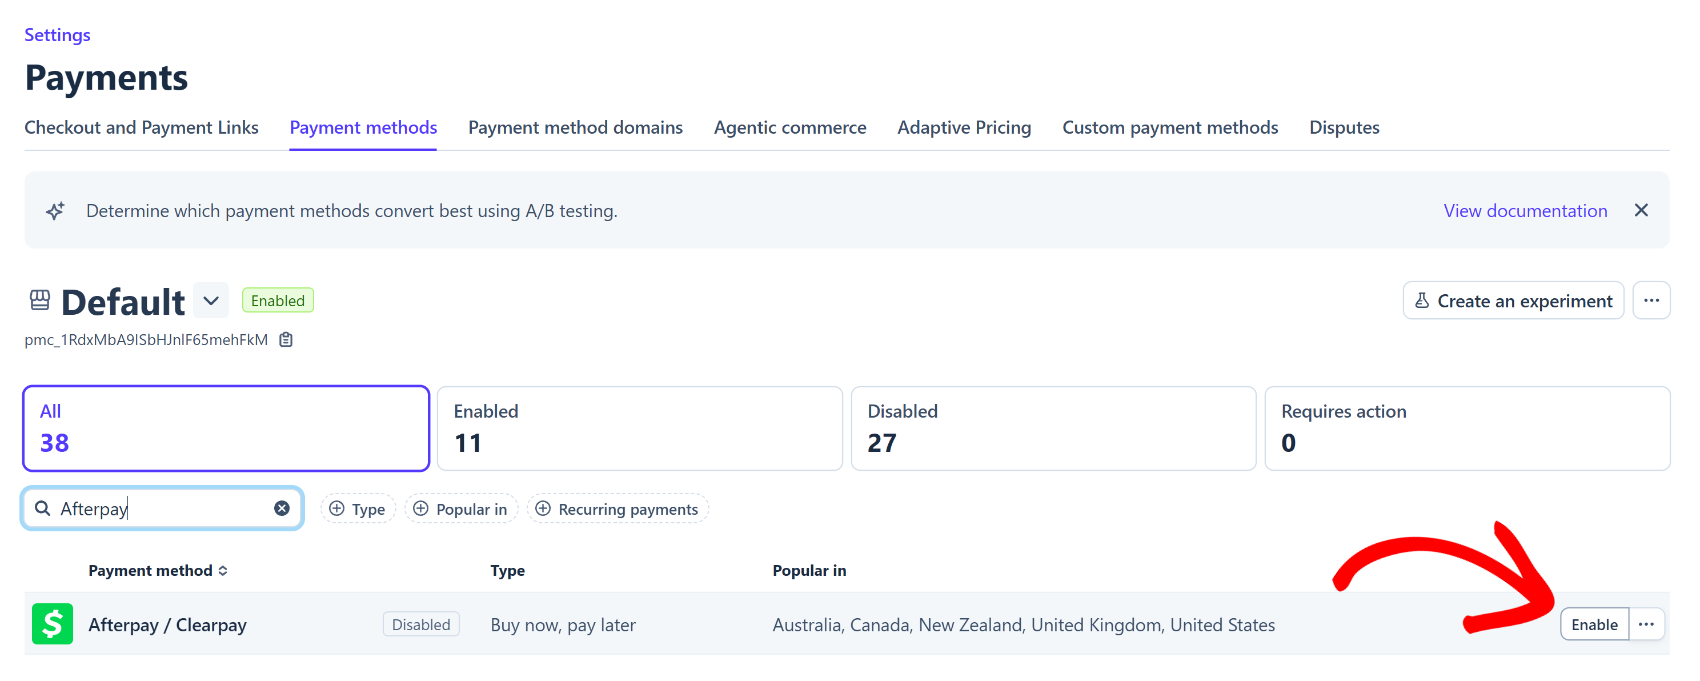
Stripe may review your account after you turn it on to confirm your business is eligible. That’s normal, and it’s why the house rules above are worth checking first.
Step 4: Create a Payment Form and Add Afterpay
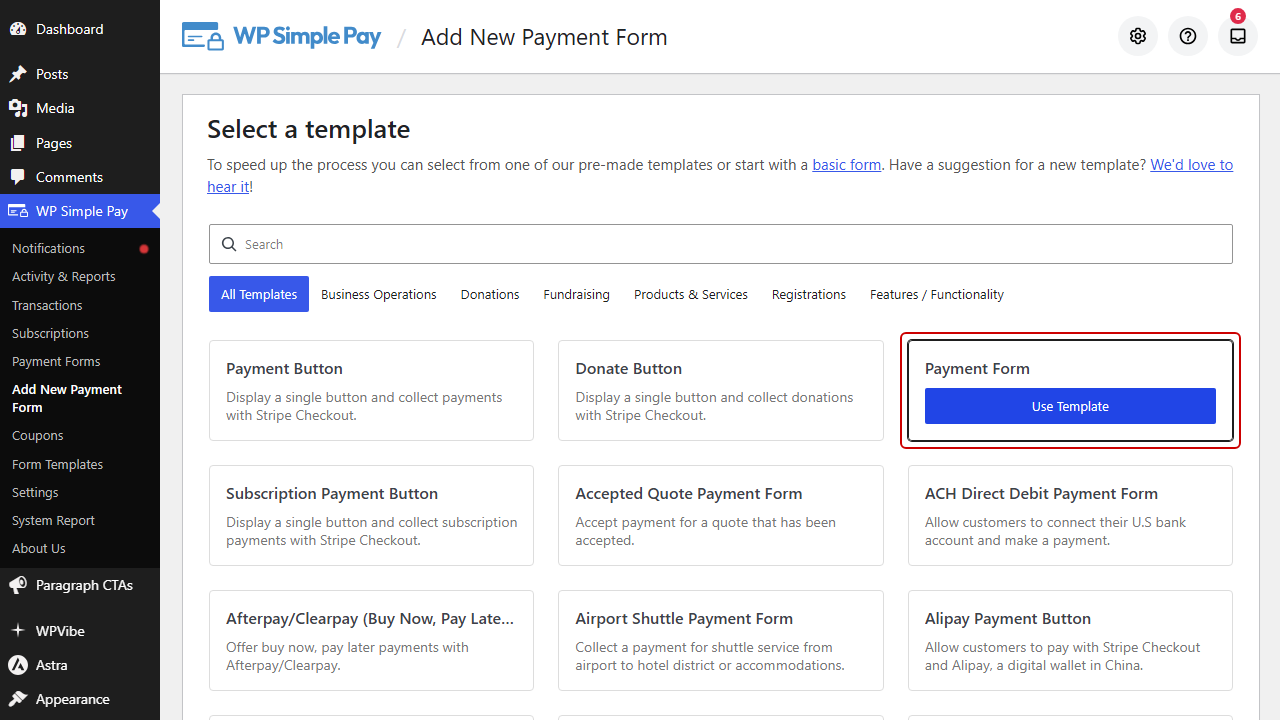
Back in WordPress, go to WP Simple Pay » Add New Payment Form. This opens the template library.
Next, find the Payment Form template and click Use Template.
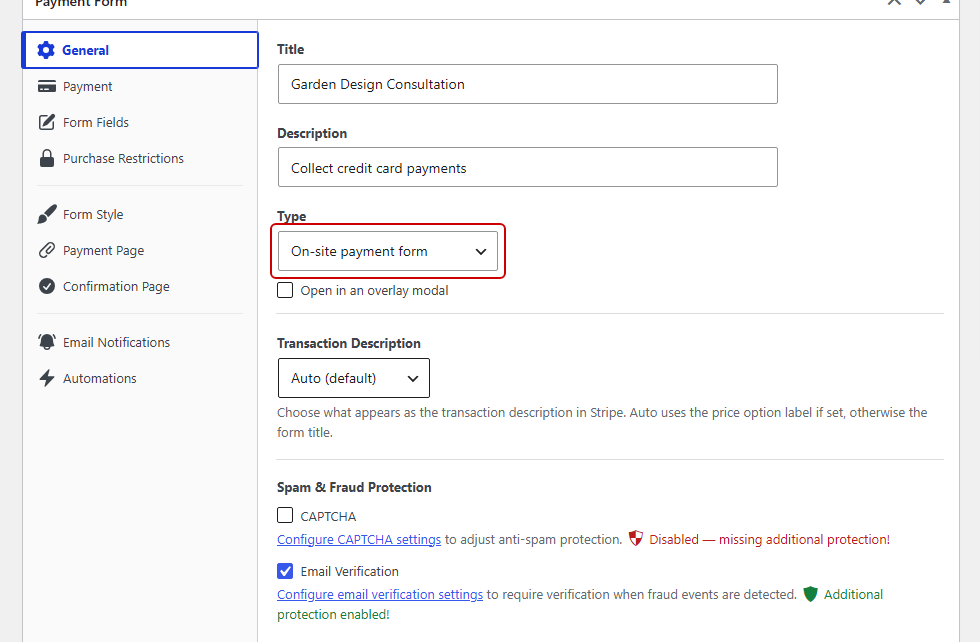
On the General tab, give your form a title. We’ll call ours Garden Design Consultation.
Then choose a form type from the Type dropdown. We’ll use On-site payment form so customers pay without leaving your site, but Afterpay also works with Off-site Stripe Checkout form and the Open in an overlay modal option.
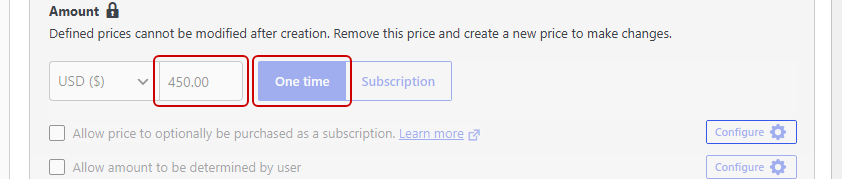
Now open the Payment tab and set your price. We’ll use $450.00, which sits well inside Afterpay’s US range.
Keep the One time button selected instead of Subscription, since Afterpay doesn’t support subscriptions. Also leave Allow purchasing multiple price options turned off, because WP Simple Pay removes Afterpay from forms that allow multiple line items.
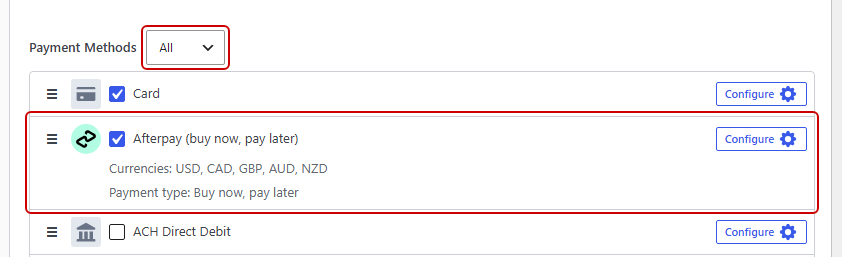
After that, scroll down to the Payment Methods list. It starts on the Popular filter, which hides Afterpay, so switch the dropdown next to the heading to All.
Then turn on Afterpay (buy now, pay later). On a UK Stripe account, you’ll see Clearpay (buy now, pay later) instead.
We’d also keep Card turned on so customers who’d rather pay in full still can. You can learn more about letting customers choose a payment method if you’d like to add others.
When everything looks good, click Publish. WP Simple Pay then adds an Address field to your form and sets it to Shipping, because Afterpay requires a shipping address on every order.
To see it, open the Form Fields tab. The Billing and Shipping choice stays locked while Afterpay is turned on.
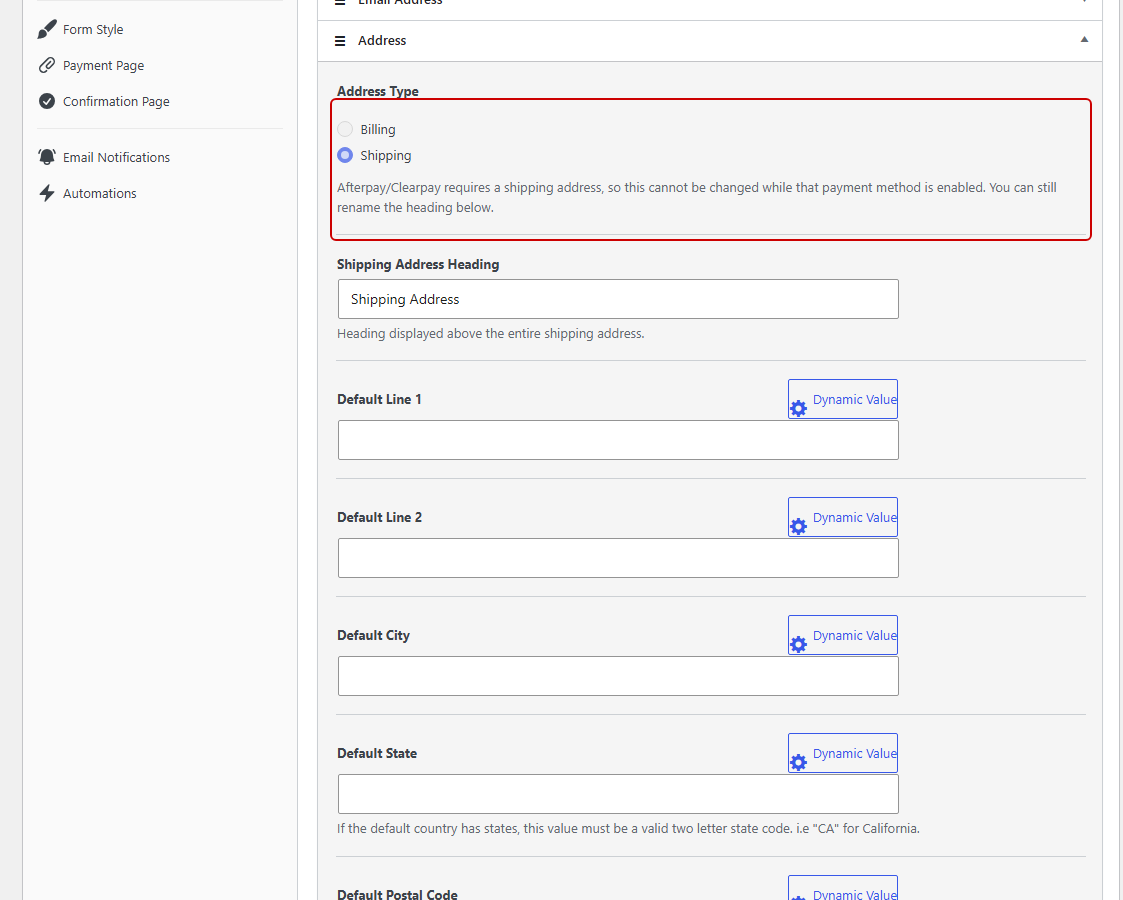
You can still rename the field’s heading, so something like “Your address” works fine for a service business. If you change it, click Update to save.
If you’d like to make that field quicker to fill in, see our guide on how to autocomplete shipping and billing addresses.
Step 5: Embed and Test Your Afterpay Form
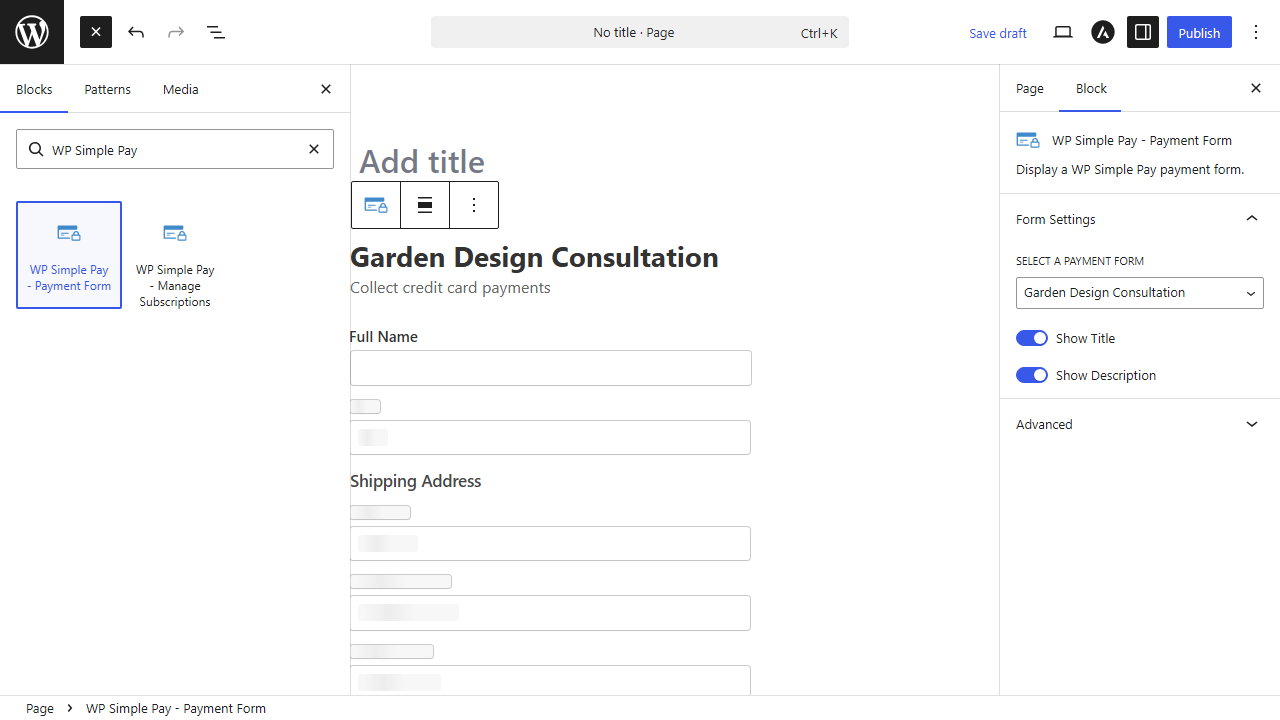
With your form published, open the page where you’d like it to appear. Click the + icon and search for the WP Simple Pay – Payment Form block.
Then add the block and pick your Garden Design Consultation form from its dropdown. When you’re done, publish the page.
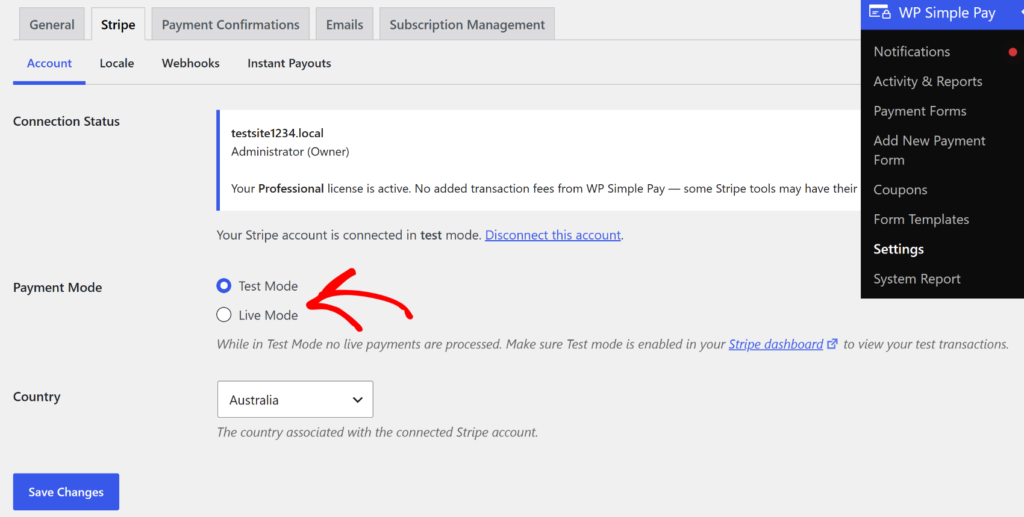
Before you share the page, switch WP Simple Pay to test mode. You’ll find the Test Mode option under WP Simple Pay » Settings » Stripe » Account, and our guide to testing Stripe payments in WordPress covers the rest.
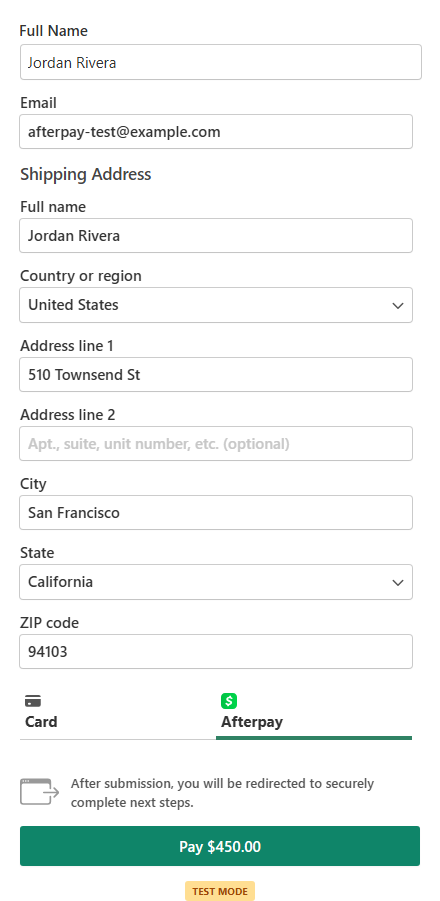
For your first test, open your page and fill in a name, an email address, and a shipping address in your own country. Then choose Afterpay and click the Pay button.
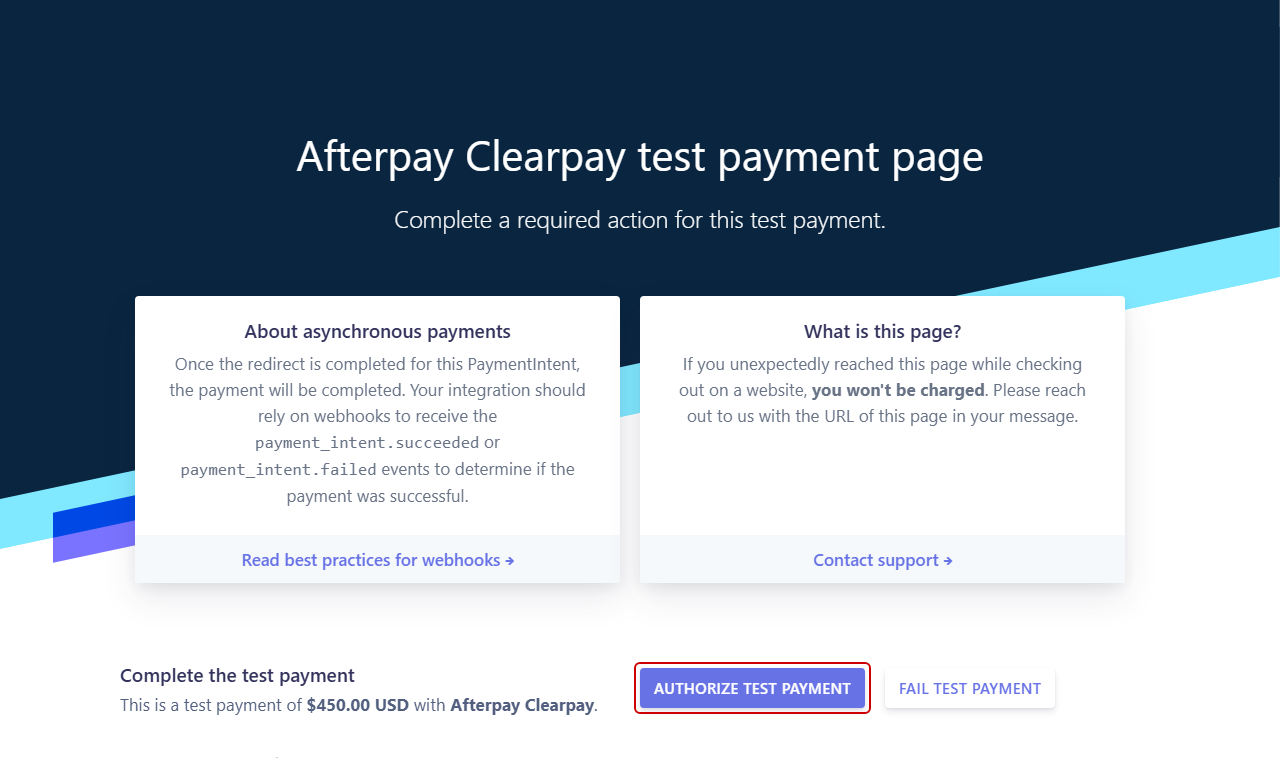
Stripe sends you to an Afterpay test page, where you can authorize the test payment. After that, you’ll land back on your form’s confirmation page.
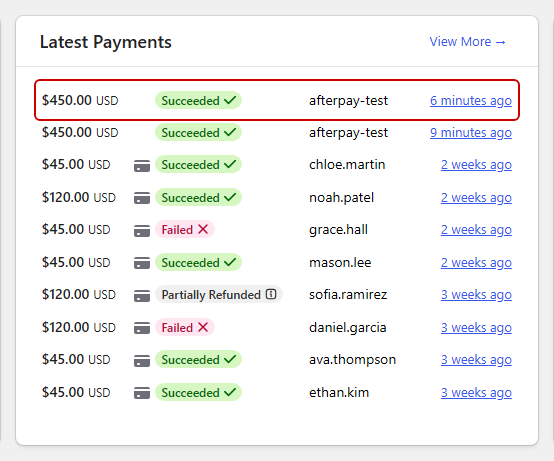
To confirm it went through, head to WP Simple Pay » Activity & Reports. If the $450.00 test payment appears there, Afterpay is working.
For a second test, reload the page and choose Card instead. Pay with Stripe’s test card number 4242 4242 4242 4242, any future expiry date, and any CVC, so you know customers who’d rather pay in full can still check out.
Once both tests pass, switch to Live Mode under WP Simple Pay Settings.
Bonus: Show Afterpay Messaging in Your Customers’ Language
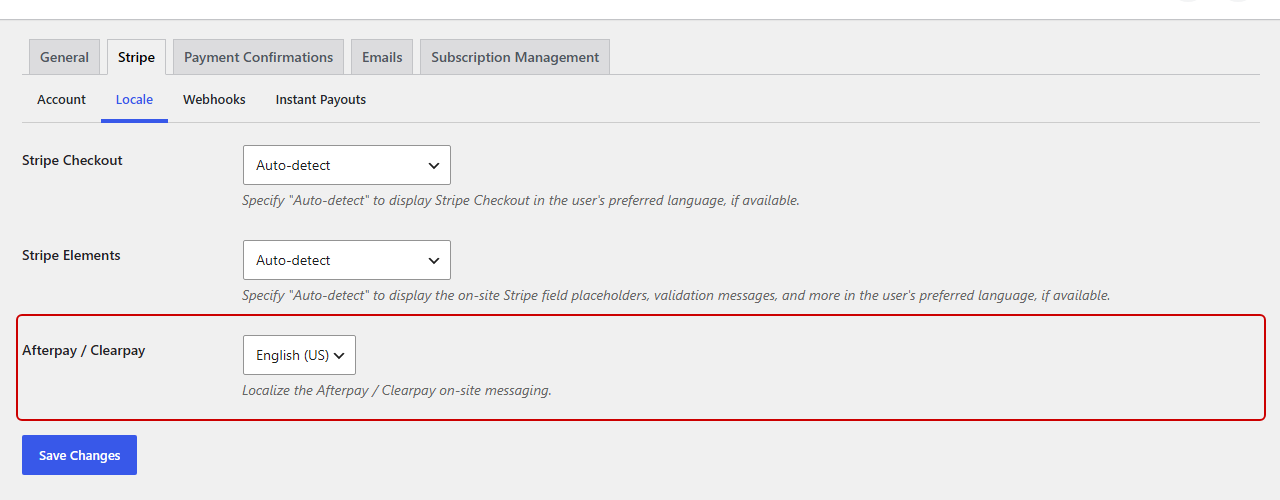
WP Simple Pay can also show Afterpay’s on-site messaging in the language your customers expect. To set it, go to WP Simple Pay » Settings » Stripe » Locale.
From there, pick a language from the Afterpay / Clearpay dropdown. You can choose English (AU), English (CA), English (NZ), English (UK), English (US), French, Italian, or Spanish.
If you sell higher-priced services in the US or Canada, you might also want to accept Affirm payments in WordPress alongside Afterpay. Affirm also needs the Professional plan or the Elite plan, and it works on orders of $100 or more.
Frequently Asked Questions
1. Do I need WooCommerce to accept Afterpay in WordPress?
You don’t need WooCommerce to accept Afterpay in WordPress. WP Simple Pay adds Afterpay to a regular payment form and processes it through your existing Stripe account.
There’s no shopping cart to set up and no separate Afterpay merchant account to apply for.
2. Can I use Afterpay for subscriptions or recurring payments?
Afterpay only works with one-time payments because Stripe doesn’t support it for subscriptions. If you’d like customers to pay over time on a schedule you set, WP Simple Pay’s installment payment plans are a better fit.
3. Can nonprofits accept donations with Afterpay?
Nonprofits can’t use Afterpay for donations because Stripe lists donations as a prohibited category for Afterpay. Recurring donations or installment payment plans are good alternatives for donors who’d like to spread out a larger gift.
4. Why isn’t Afterpay showing on my payment form?
Afterpay needs the Professional plan or the Elite plan, a Stripe account in one of its five supported countries, and Afterpay turned on in your Stripe Dashboard.
It also disappears when the order total is outside Afterpay’s range, the price is a subscription, or Allow purchasing multiple price options is turned on.
5. What’s the difference between Afterpay and Clearpay?
Afterpay and Clearpay are the same buy now, pay later service under two names.
It’s called Clearpay in the UK and Afterpay in Australia, Canada, New Zealand, and the US. WP Simple Pay shows the right name automatically based on your Stripe account’s country.
Conclusion
That’s it! You’ve added Afterpay to a WordPress payment form, so your customers can split their purchase into four payments while you get paid in full upfront.
You may also want to see our guides on how to add buy now, pay later to your WordPress site and use Stripe and Klarna on WordPress.
Ready to start accepting payments? Get started with WP Simple Pay today.
Disclosure: Our content is reader-supported. This means if you click on some of our links, then we may earn a commission. We only recommend products that we believe will add value to our readers.

Leave a Reply