Nonprofit Donations: 7 Tips to Drive Traffic to Your Forms
Last updated on

More traffic is rarely what a struggling donation page needs. I know that sounds backwards, but once the gifts start arriving, the harder problem is that nothing tells you which of your channels produced them.
So I’d always start with measurement before reach. Once you can see which channels drive traffic to your donation forms, every tip below stops being a guess and turns into a decision you can back with real numbers.
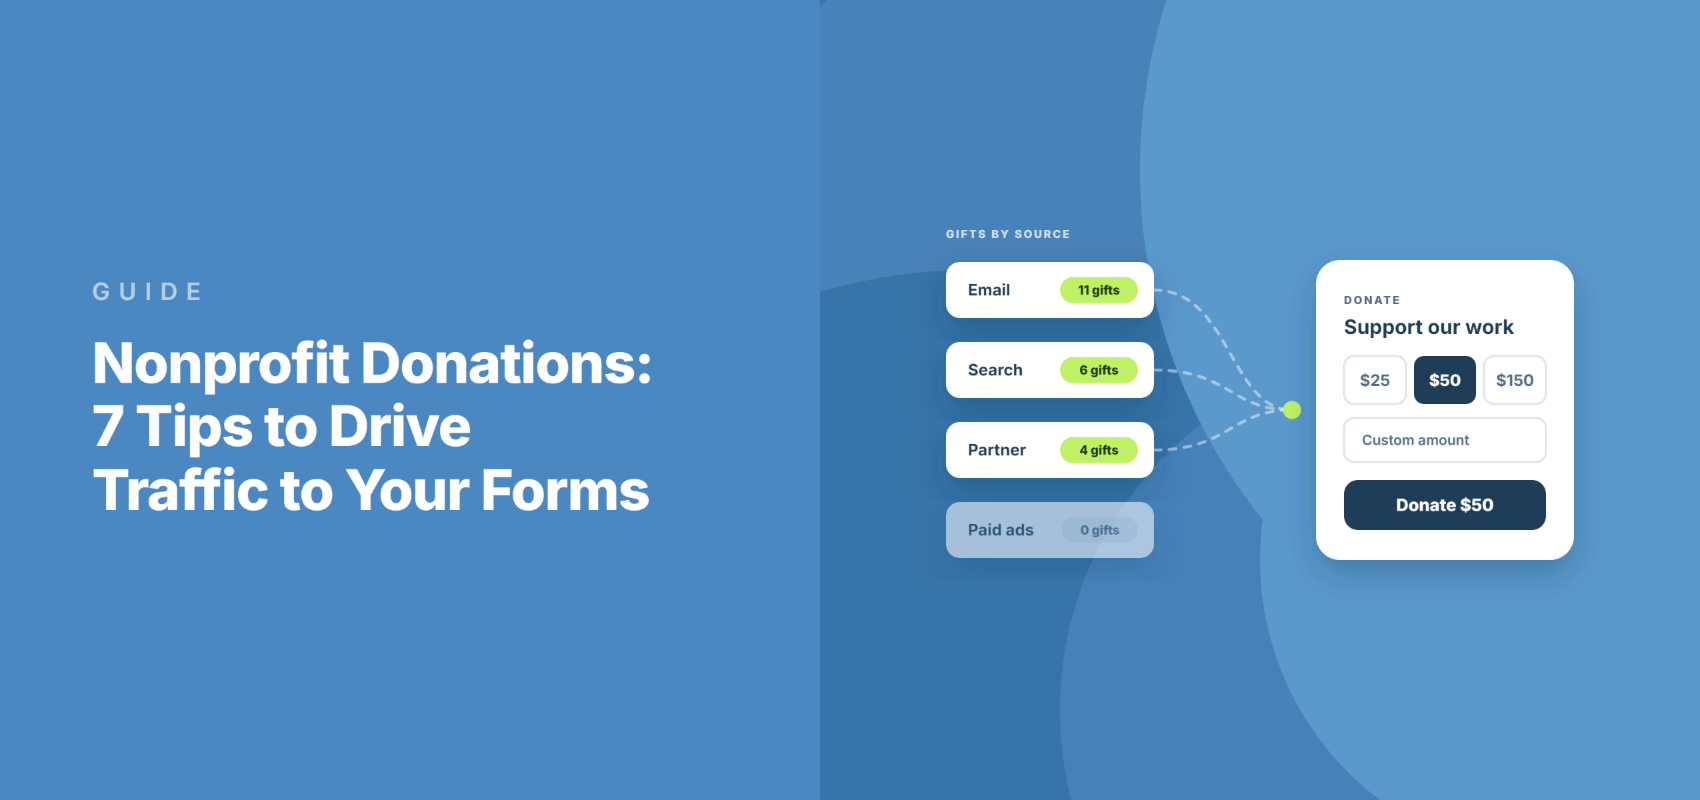
The organizations I’ve watched raise more are almost always the ones running the form on their own site. That’s because a hosted platform won’t tell you that eleven of last month’s gifts came from a single email, and none came from the paid ads you’re still paying for.
In this article, I’ll show you 7 tips to drive traffic to your nonprofit donation forms. You’ll also see how suggested amounts lift your average gift, and which channels to try first when you only have a few hours a week.
- Give People a Reason to Land on Your Site
- Optimize the Pages That Bring In Strangers
- Host the Donation Form on Your Own Site
- Set Suggested Amounts, and Have a Reason for Each One
- Run Cross-Promotions With Organizations That Share Your Donors
- Use Social and Email as Traffic, Not as the Destination
- Spend on Paid Ads Only Once the Form Converts
1. Give People a Reason to Land on Your Site
First things first. Almost nobody wakes up wanting to browse nonprofit websites.
People show up because something specific pulled them in, so your job is to give them that something.
More often than not, your best-performing page won’t be the donation form at all. It’ll be a short story about one person you helped, written in plain language, with a photo and a line about what changed for them.
A story like that gives supporters a reason to visit. It also gives them a reason to forward the link to a friend, and that’s the kind of traffic you can’t buy.
Stories, short videos, and progress updates all tend to beat a general mission statement. They give people one concrete thing to react to.
Now, where you publish matters too. Posting on social media is fine, but a piece on your own website keeps pulling in search traffic for years, and you can put a donation form right next to it.
2. Optimize the Pages That Bring In Strangers
That brings us nicely to search.
Search traffic is the cheapest traffic a small nonprofit will ever get. The catch is that it only works for pages that answer a question someone is actually typing into Google.
Most people who’d happily give to your cause have never heard your organization’s name, so they won’t search for it. They search for the problem instead.
That looks like “food bank volunteer [city]” or “how to help a family facing eviction.” A page that answers that question is how they find you.
So you don’t need to optimize every page on your site. I’d focus on two kinds of pages: content that answers those outside questions, and the donation landing pages those posts link to.
Everything else can stay good enough. Your time is better spent on the handful of pages that bring in new people.
For those pages, check three things. Each one should load quickly, have one clear heading that matches what people search for, and link to your donation form inside the body text, not only in a menu.
3. Host the Donation Form on Your Own Site
Okay, this next one is the tip that makes the other six measurable. It’s also the one small organizations skip most often.
Hosted donation platforms are quick to set up, and I get why people start there. But they come with three costs you’ll feel later.
You’re usually stuck with their template, and many take a platform cut on top of normal card processing fees. On top of that, you rarely get to see which of your own pages or emails produced each gift.
That last one is the real problem. Without it, you’re guessing which tip to repeat next month.
Running the form on your own WordPress site fixes all three. With WP Simple Pay, you build the donation form in the form builder, embed it on any page, and every gift goes straight into your own Stripe account.
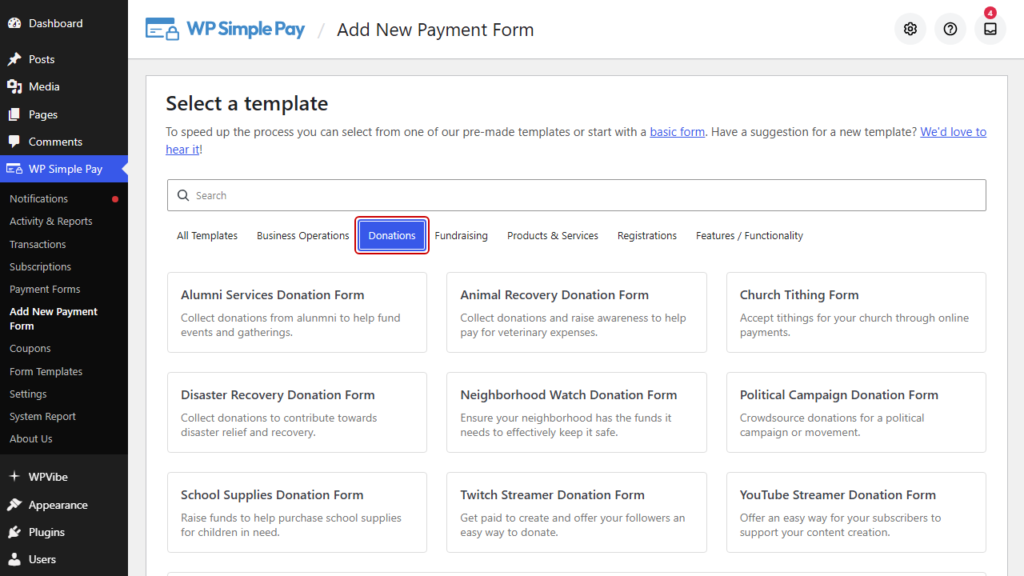
To get started, head to WP Simple Pay » Add New Payment Form. Then filter the template picker to the Donations category to see the donation templates.
While you’re in the builder, you can also turn any form into its own distraction-free landing page. That comes in handy for tips 5 through 7, since each campaign will want its own URL.
The Payment Pages documentation walks you through how those pages work.
To see where your donors actually come from, I pair the form with MonsterInsights. That way, your traffic sources sit right in the WordPress dashboard next to everything else.
One more thing if you’re a registered nonprofit. Stripe offers a discounted processing rate that you have to apply for, and it covers donations only, not product or ticket sales.
You’ll find the details in the nonprofit fees documentation.
4. Set Suggested Amounts, and Have a Reason for Each One
Once the form lives on your site, the biggest single win is the numbers you put on it.
An empty amount box makes donors do math. And people who have to do math tend to close the tab.
Three suggested tiers usually work well, as long as each one is tied to something a donor can picture. Here’s how an adult-literacy program might set them up:
- $25 covers one workbook for one learner. This is the entry tier, so a first-time donor has somewhere comfortable to land.
- $50 covers a month of materials, and it’s set as the default. That one choice does more work than the other two combined, because most donors stick with the default instead of trading down.
- $150 funds a full tutoring cycle. Not many people will pick it, but having it there makes $50 feel modest instead of generous.
Making the middle tier the default is a deliberate choice. Set it too low and you quietly cap your average gift.
Set it too high, and people drop into the custom amount box, where they usually enter less.
Here’s how to set this up yourself. First, open the Payment tab of the form builder, then click Add Price under Price Options for each tier you want.
You’ll notice a checkbox called Allow purchasing multiple price options while you’re there. Leave it unchecked.
It sounds like the setting for offering several tiers, but it actually lets a donor buy several of them in one transaction through Stripe Invoices. Turning it on also removes buy now, pay later methods from your form.
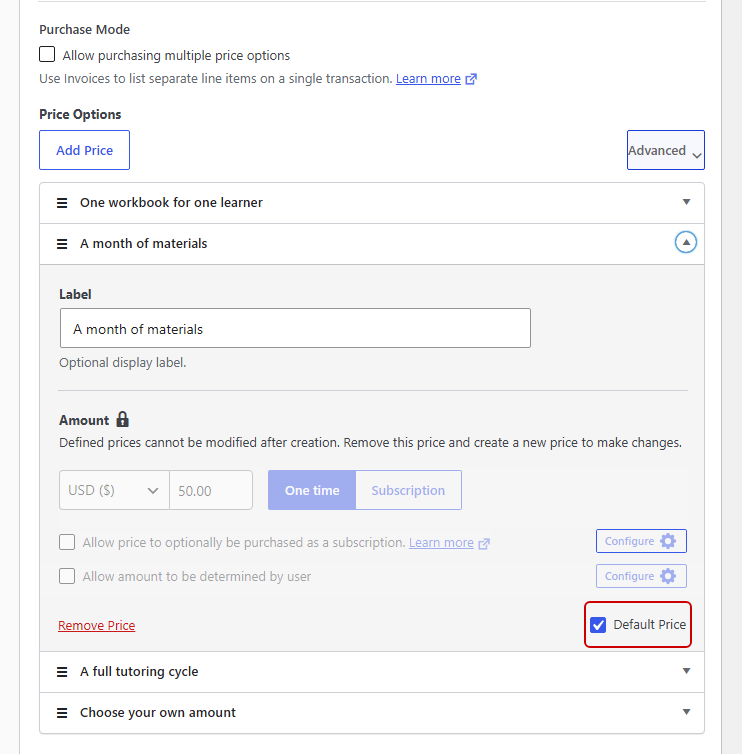
After that, expand the tier you want pre-selected and check Default Price. Only one price option can have it, which is why it’s worth thinking about which one gets it.
I’d also leave a Custom Amount option in place. Monthly donors often want an odd number like $15 that none of your tiers cover.
One heads-up before you try it. The Custom Amount Input field needs a price option that allows user-defined amounts, so add that price option first and the field second.
If you want to dig deeper, the guide on setting suggested donation amounts covers the details. And the basics of an effective donation page covers what belongs around the amounts.
5. Run Cross-Promotions With Organizations That Share Your Donors
Now that your form is ready for visitors, let’s talk about where to find more of them.
A cross-promotion puts your form in front of people who already give to causes like yours. That’s a much warmer audience than anything you can buy.
The pairing has to make sense, though. An animal shelter and a low-cost vet clinic share donors, and so do a food bank and a community kitchen.
Two causes that are only loosely related usually don’t work as well, because there isn’t much donor overlap.
Keep it simple to start. Each organization writes one email and one social post about the other.
Both should point to a dedicated landing page. That way, you can tell afterward which partner sent what.
And if you end up running several causes or partner campaigns at once, you don’t need a separate form for each. The guide on multiple causes on one donation form shows you how to set that up.
6. Use Social and Email as Traffic, Not as the Destination
Next up, social media and email.
Social media is great for reach and not so great for conversions. So I’d treat it as a way to move people toward a page you control, rather than the place where the giving happens.
A good rhythm is to share stories two or three times a week and make a direct ask about once a month. The ratio matters more than how often you post, because an account that only ever asks gets muted fast.
Email is where the money really is, though. Even a list of a few hundred people tends to bring in more donations per send than a social post.
The emails that do best are tied to something happening right now, instead of a general appeal.
Even on a small list, it’s worth splitting people into groups. New subscribers get the story of your organization, and existing donors get updates on what they’ve already funded.
Lapsed donors get something different: a small, specific ask with a deadline.
For more on this, check out the guide on using email campaigns to collect donations. And if people are already on your site but leaving without giving, targeted popups are worth testing before you spend anything on ads.
7. Spend on Paid Ads Only Once the Form Converts
That leads us to the last tip, and it’s last on purpose.
Paying for visitors when your form doesn’t convert well only makes the problem more expensive.
So wait until your donation page has a conversion rate you can measure before you spend anything. Then start small, with search ads for the same queries your content already ranks for, since you already know those searchers care.
Before you pay full price, check whether you qualify for the Google Ad Grants program. Plenty of registered nonprofits are eligible for free search advertising, and that changes the math completely.
Whichever route you take, send every campaign to its own landing page with its own URL. Otherwise, you can’t tell paid traffic from organic, and you’re back to guessing.
What Happens After the Donation Is Collected
Getting a gift feels great. But most fundraising advice stops at the thank-you page, and that’s where a lot of small organizations quietly lose repeat donors.
There are two different documents in play here, and people mix them up all the time.
The per-transaction receipt goes out right away and confirms one gift. The annual giving summary goes out once a year, adds up everything a donor gave, and it’s the one they actually need at tax time.
WP Simple Pay takes care of the per-transaction side through its email notifications. You can also change the subject line for each form, so a donation receipt doesn’t read like a product invoice.
The email documentation covers the available email types.
The annual summary is a different job. It means matching up twelve months of one-time and recurring gifts for every donor.
That gap between “payment collected” and “books reconciled” is where an accounting tool like LedgerPort comes in. It handles the recurring-gift reconciliation and giving summaries that a payment form was never built to do.
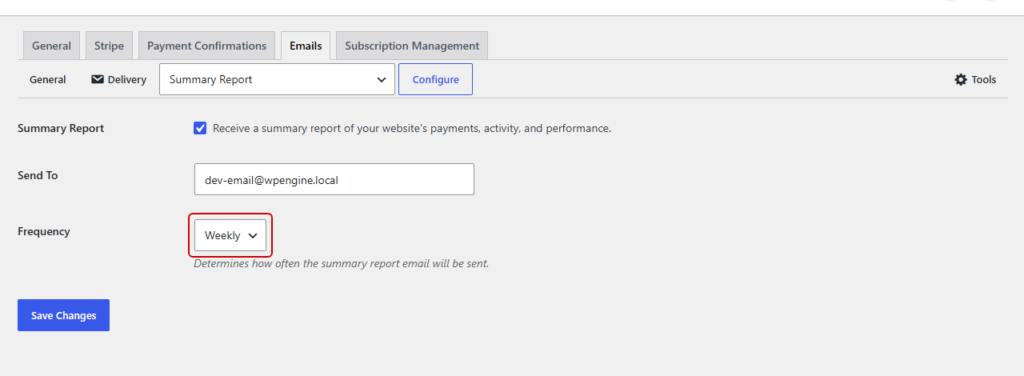
Finally, you can keep an eye on how things are going without logging in at all. Head to WP Simple Pay » Settings » Emails, enable the Summary Report, and set its Frequency to Weekly or Monthly.
If you want to go further with measurement, the guide on fundraising analytics covers what’s worth tracking.
Frequently Asked Questions
1. How much should I suggest as a default donation amount?
Start with your current average gift and set the default slightly above it. Offer three tiers, pre-select the middle one, and tie each to something concrete the money buys. Most donors accept the default, so a default set too low quietly caps your average gift for the whole campaign.
2. Do recurring donations need separate receipts?
Yes. Each recurring charge generates its own per-transaction receipt, because each one is a separate payment. Donors also need an annual giving summary that totals everything they gave across the year, which is a different document from those individual receipts and the one most donors want at tax time.
3. Is it better to use a hosted donation platform or my own website?
Your own site, in almost every case. Hosted platforms are faster to launch but usually limit your template, may take a cut on top of card processing fees, and rarely show you which page or email produced each gift. Owning the form keeps the attribution data that makes your other fundraising work measurable.
4. Do nonprofits get lower payment processing fees?
Sometimes. Stripe runs a discounted rate that registered nonprofits can apply for, and it applies to donations only, not to product or ticket sales. You have to apply rather than receive it automatically, so check your eligibility before assuming the standard rate.
5. How long before these tips show results?
Email and cross-promotions can bring in gifts within days, because they reach people who already know you. Search traffic from content usually takes a few months to build. Run the fast channels first, so you have conversion data before spending on paid ads.
Final Thoughts
Before you go chasing more visitors, get the basics in place. Put the form on your own site, give it thoughtful suggested amounts, and make sure you can see where each gift came from.
Once that’s done, everything you put into email, partnerships, and ads becomes something you can measure, instead of something you hope is working.
Ready to own your donation form? Get WP Simple Pay and build yours this afternoon.
I hope this article helped you learn 7 tips to drive traffic to your nonprofit donation forms. You may also want to see our guides on tips to collect more donations on your website and the best WordPress donation and fundraising plugins.
What are you waiting for? Get started with WP Simple Pay today!
To read more articles like this, follow us on X.
Disclosure: Our content is reader-supported. This means if you click on some of our links, then we may earn a commission. We only recommend products that we believe will add value to our readers.