
How to Create Recent Sale Notification Popups in WordPress
Last updated on

Do you want to create recent sale notification popups for your WordPress site?
Allowing your visitors to see that others are purchasing your products or services can motivate them to buy from your site.
In this article, we’ll show you how to easily automate recent sale notification popups on your site in WordPress to improve your social proof.
Creating Social Proof Popup Notifications
The best way to create recent sale notifications for your site is to use a Stripe payments plugin for WordPress that supports a no-code integration with a social proof plugin.
WP Simple Pay is the #1 Stripe payments plugin for WordPress that lets you accept payments on your site without having to set up a shopping cart. One of the best parts about the plugin is that it supports seamless integrations with several third-party plugins, including TrustPulse, the best social proof plugin for WordPress.
Additionally, WP Simple Pay works with Zapier, a powerful automation solution, allowing you to automate your social proof notifications each time a customer makes a purchase using one of your payment forms.
Additional WP Simple Pay features include:
- Multiple Payment Methods: Offer 10+ payment methods on your site, including traditional credit and debit cards, ACH Direct Debit, Apple Pay / Google Pay / Microsoft Pay, Buy Now, Pay Later services, Cash App Pay, and more.
- Custom Email Confirmation Messaging: Send your customers customized email confirmation messages and receipts for individual payment forms.
- Advanced Drag & Drop Form Builder: Easily create payment forms for all types of products, services, fundraisers, registrations, and more in minutes.
- Fee Recovery: Remove the 3% Stripe processing fee to accept the full payment amount.
- And more…
What is TrustPulse?

TrustPulse is a powerful social proof app that is being used by over 10,000 businesses to boost their social proof and increase conversions.
Using TrustPulse and Zapier’s Stripe + TrustPulse integration, you can set up automatic recent sale notification popups for your site without code.
You can also use the plugin to show who and when a visitor has made a purchase on your site to help prove that your site is safe and that your products are legit.
TrustPulse lets you leverage FOMO (fear of missing out) with its “On Fire” Notifications that reveal how many people have made a purchase during a specific timeframe.
The software even features customizable design options and analytics to help you track which pages and campaigns are performing the best.
How to Create Recent Sale Notification Popups
Step 1: Install and Activate WP Simple Pay in WordPress
The first thing you’ll need to do to create payment forms and automate recent sale notification popups on your site is install and activate WP Simple Pay.
Simply visit the pricing page and choose a plan.
Next, you’ll need to download the plugin from your purchase receipt email or from your WP Simple Pay account.
After you’ve downloaded the plugin, go to your WordPress dashboard, navigate to Add New under Plugins, and then Upload Plugin.
Click Choose File and find the WP Simple Pay .zip file on your computer. Then, click Install Now. When the installation is complete after a few seconds, press the Activate Plugin button.
If you need help with this step, see our detailed guide on how to install the plugin.
Go ahead and click on Let’s Get Started.

If you didn’t see the setup wizard, simply head over to WP Simple Pay » Settings » Advanced tab and click the Launch Setup Wizard button.
2: Connect WordPress to Stripe
To connect your WordPress site to Stripe, click on Connect with Stripe.

Next up, enter the email address you use for your Stripe account and connect it to your site. If you don’t have a Stripe account, you can easily create one by entering your email address and completing the registration.
Upon completing this process, you’ll be shown a success page that says, “Setup Complete.” Next, click on Create a Payment Form.

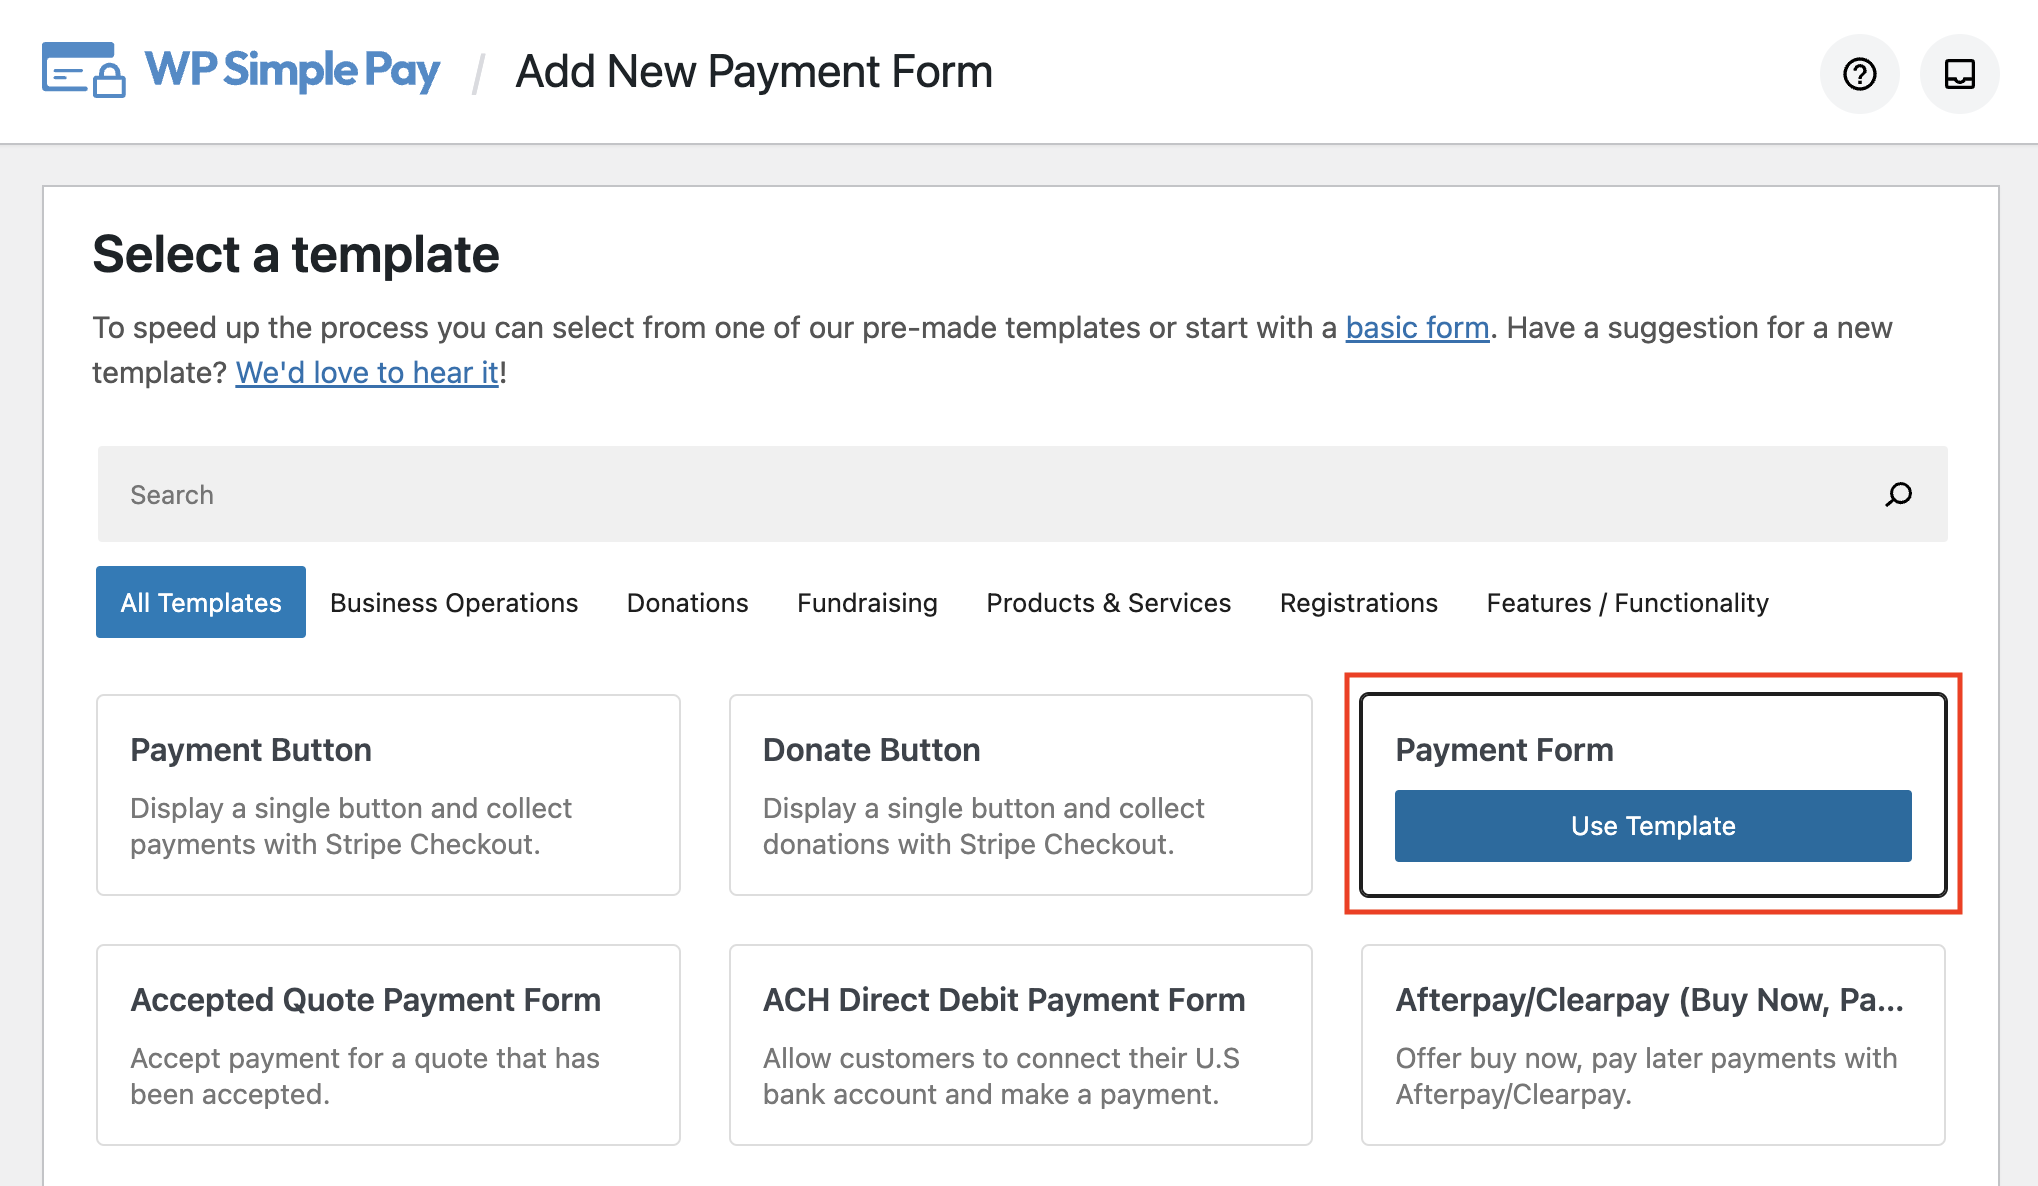
Step 3: Create a Payment Form
You should now be on the payment form templates page, where you can see that there are tons of different pre-built templates available.
For the purpose of this tutorial, go ahead and choose the basic Payment Form.
Next, in the General tab, you can add the title and description for your form.
You’ll also need to choose an on-site payment form for your form Type to ensure that customers stay on your site to complete their transactions.
Click on the Payment tab to add your pricing options and amounts. Go ahead and choose a one-time payment rather than a subscription payment.
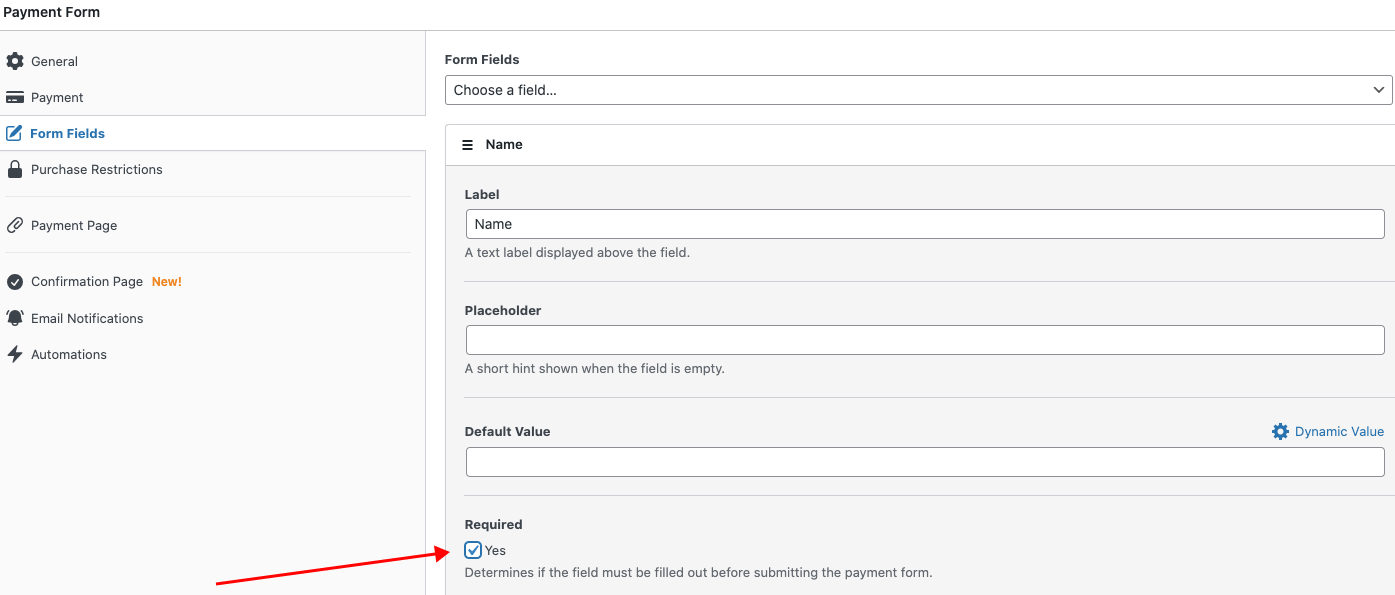
From the list of payment method options, check the boxes next to the ones you want to offer your customers and then click on the Form Fields tab. Be sure to add Name and check the box for Required.
When you’re finished, go ahead and click Publish.
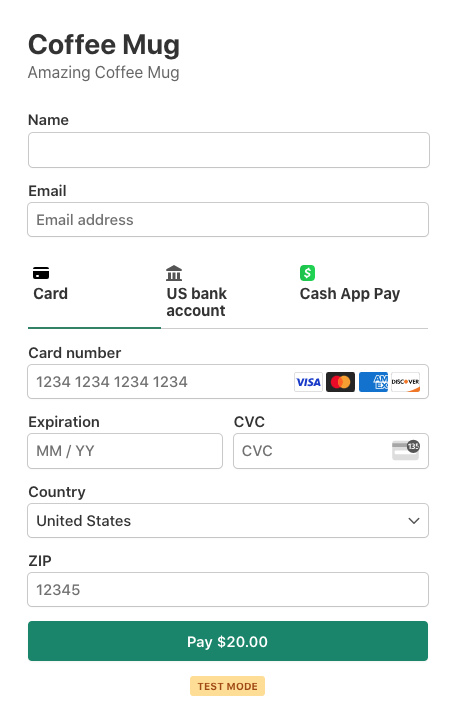
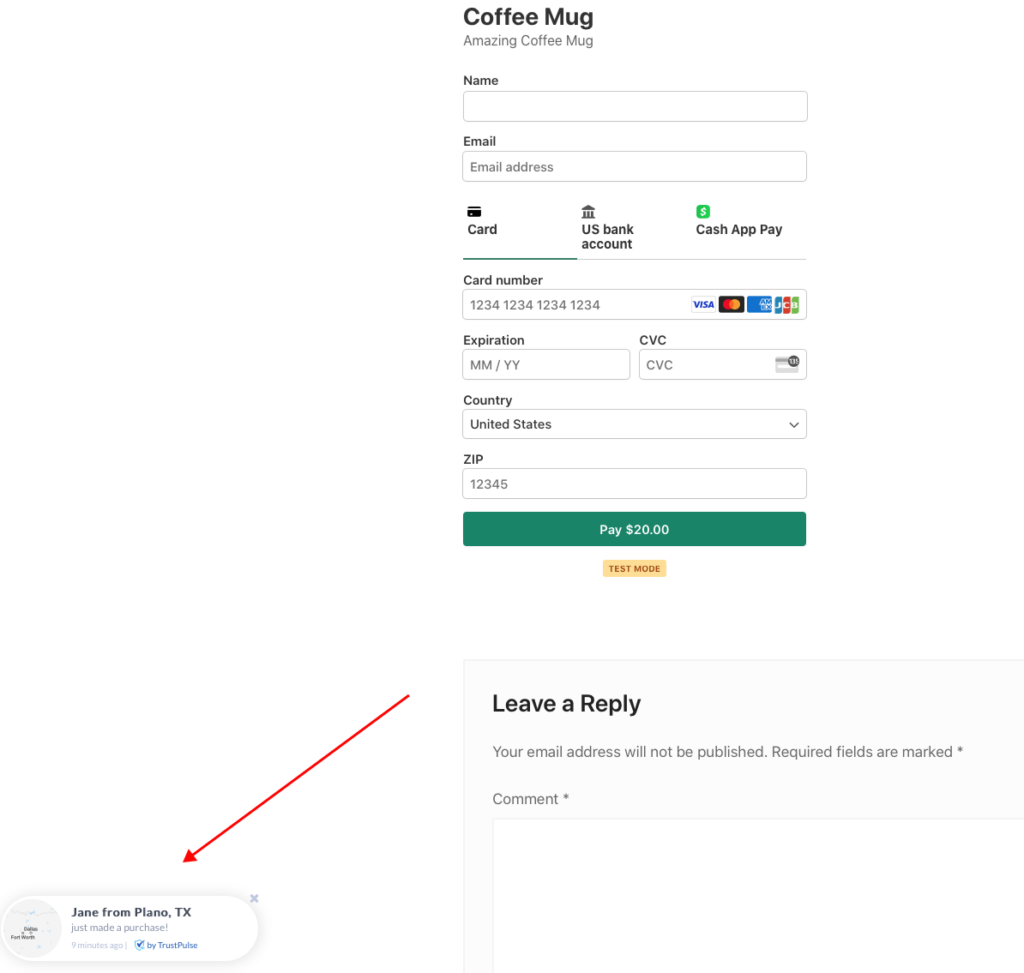
Your form should look something like the one below.
Step 4: Publish Your Payment Form on Your Site
Now that you’ve created your payment form, you’ll need to add it to your site. Simply go to the page or the post and click on the + icon to bring up the WP Simple Pay block. Choose the form you just created from the dropdown menu and click on Update or Publish.

Step 5: Install and Activate TrustPulse in WordPress
Now that you’ve created and published your WP Simple Pay payment form on your site, you’ll need to install and activate the TrustPulse plugin in WordPress.
Simply navigate to Plugins → Add New in the WordPress admin dashboard and enter TrustPulse in the search field provided. Once the installation is complete after a few seconds, click on the Activate button.
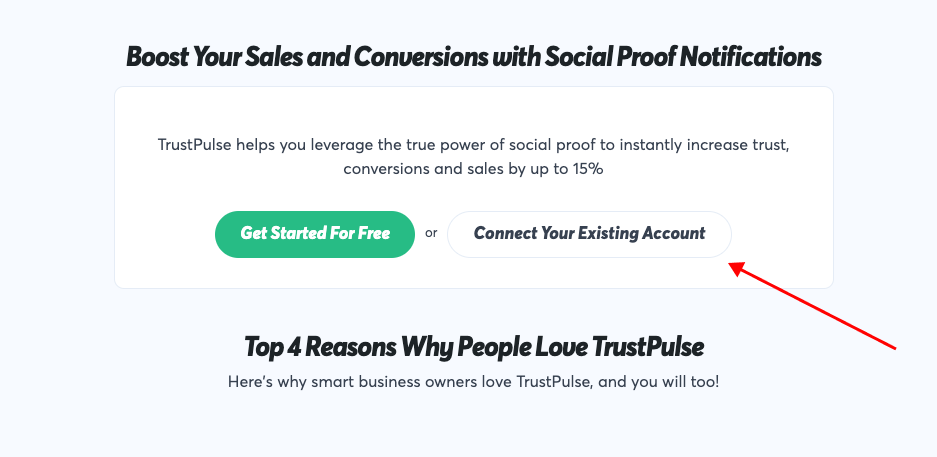
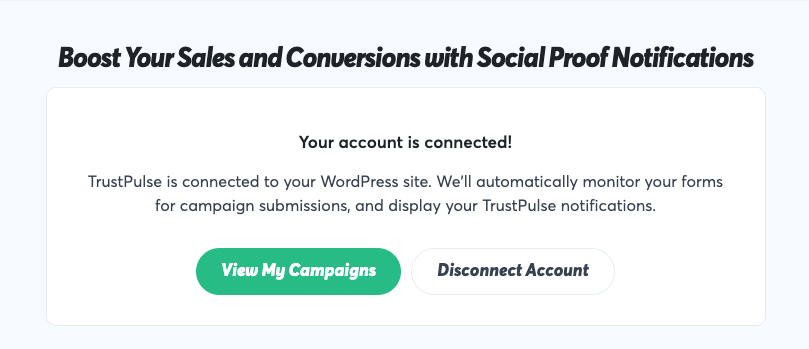
On the next screen, you’ll be asked to connect your existing account to automatically integrate the plugin with your site. Go ahead and click on Connect Your Existing Account.
On the next screen, you will see a message confirming that your site is connected.
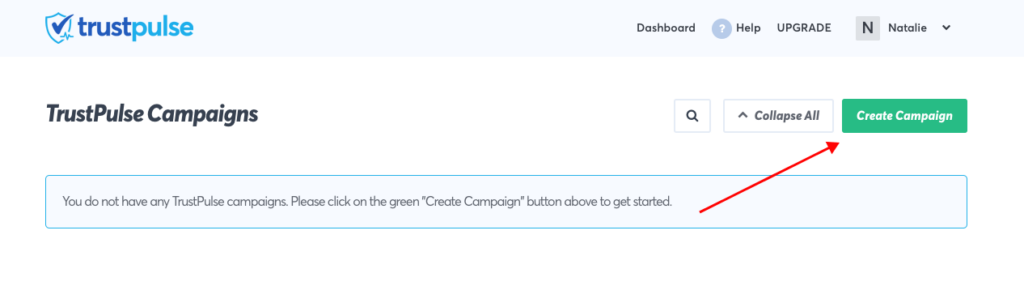
Now that you’ve connected your site to TrustPulse, click on View My Campaigns. You will be redirected to your TrustPulse dashboard.
Step 6: Create a Social Proof Campaign in TrustPulse
To create a social proof campaign, click on Create Campaign and customize your recent sale notification.
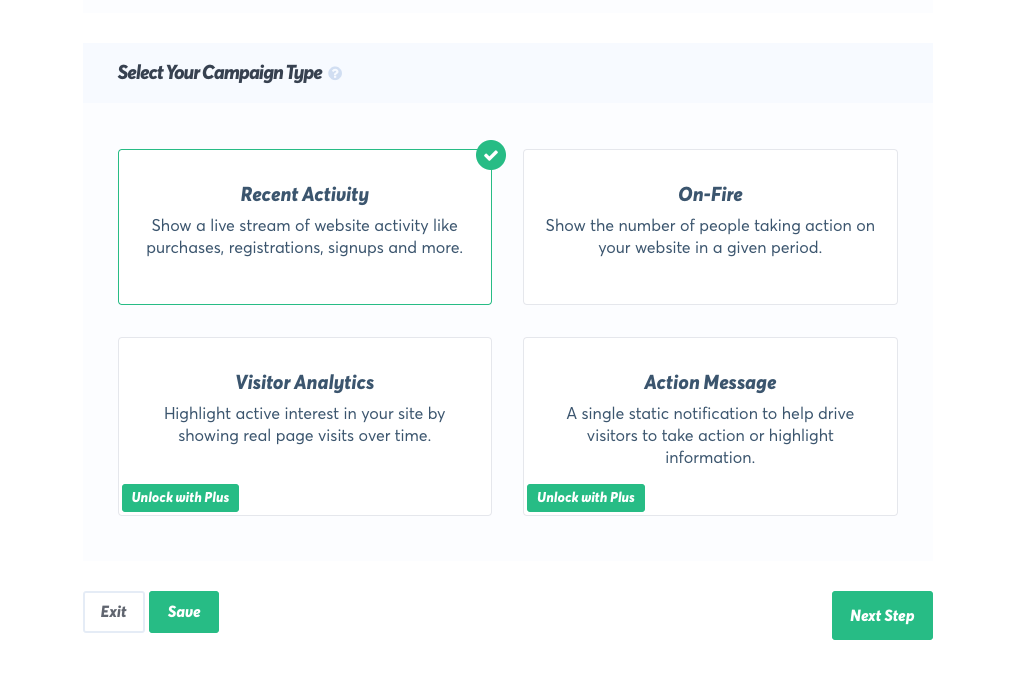
From here, go ahead and add a title for your campaign and select your connected site from the dropdown menu. Next, select Recent Activity for the Campaign Type since we’re creating a recent sale notification, and click on Next Step.
You should now be on the Appearance & Design page. Here is where you can choose where you want your notifications to display in addition to several other display settings.
Once you’re finished, click on Next Step.
For Capture Activity, leave it set to AutoMagic for now and click on Next Step.
The last step before publishing your campaign is configuring your Display Rules. You’ll notice that you can customize the duration of the notification popup, what pages to display it on, and for how long. When you’re finished, click on Next Step.
To ensure that your site is connected properly, click on Check Now.
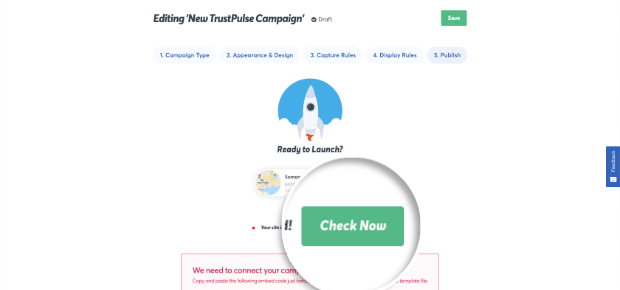
TrustPulse will confirm if the embed code is correctly added to your site. Go ahead and click on Launch your TrustPulse Campaign.

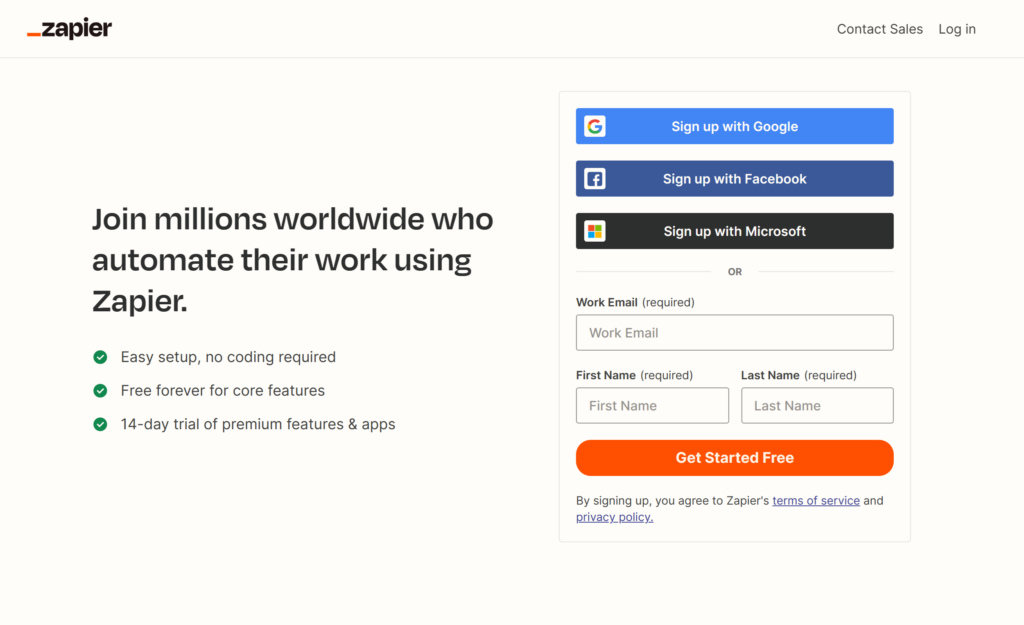
Step 7: Create a Zapier Account
Now that you’ve created a TrustPulse campaign, you’ll need to create a Zapier account if you don’t already have one. This will allow you to connect your payment forms with TrustPulse and ensure that your campaign runs each time a purchase is made on your site.
Just go to the homepage and sign up using your email address, and your first and last name.
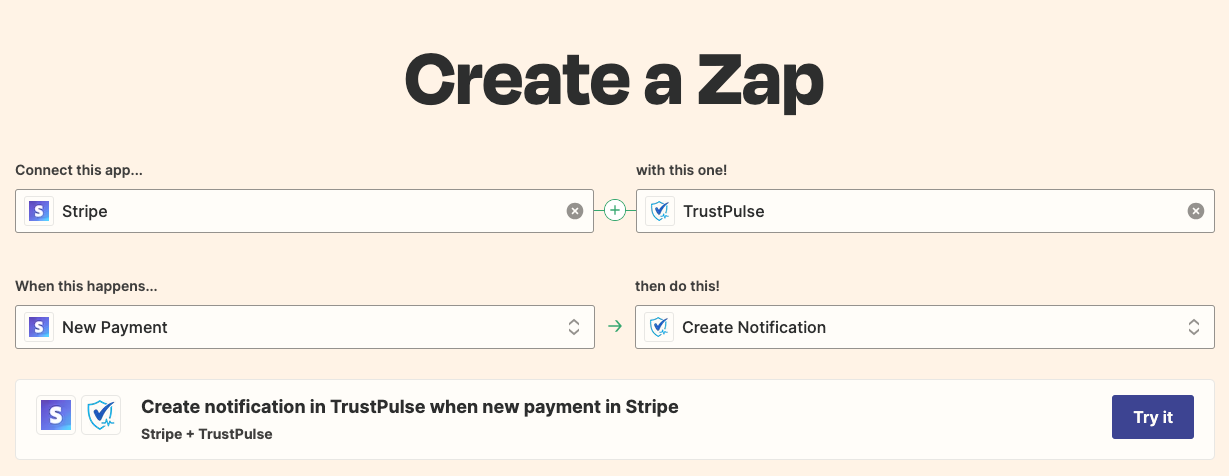
Step 8: Create a Zap
Zapier allows you to create tons of different automations (Zaps) for your site and you can easily customize them in the dashboard once your account has been created.
To create a zap that will allow you to display your TrustPulse campaign for purchases made using your WP Simple Pay payment form, simply enter the following and then click on Try it.
On the next screen, you’ll be asked to sign in to your Stripe account. You’ll need to use the same account you used when you set up WP Simple Pay.
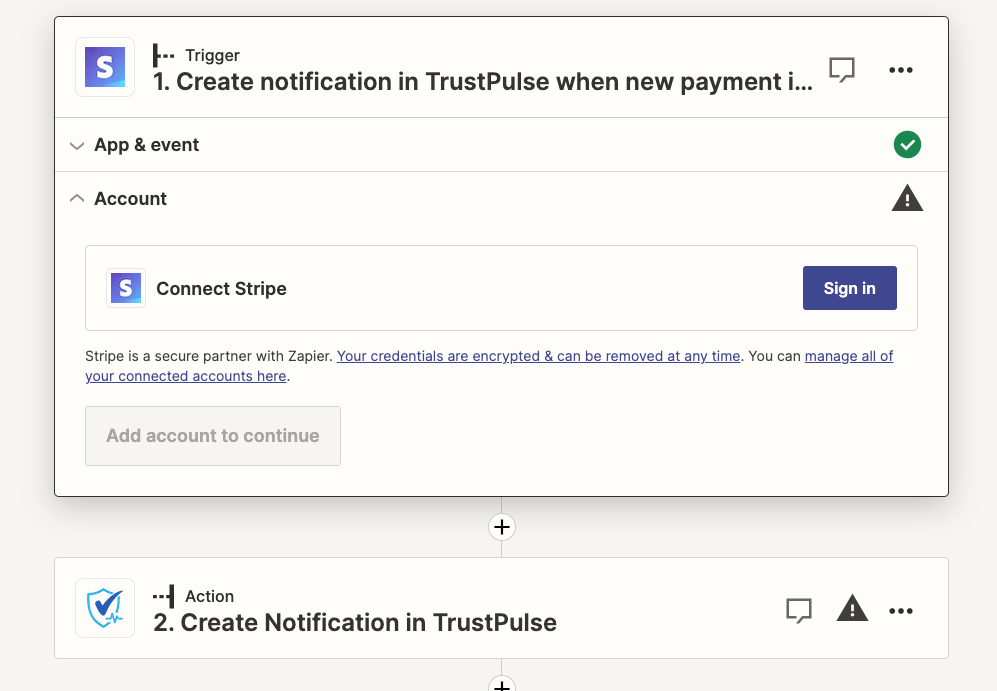
Once your Stripe account is connected, click on Continue.
Now that you’ve created your Trigger, you’ll need to create your Action. First, you’ll be asked to sign in to your TrustPulse account. Click on Sign in.
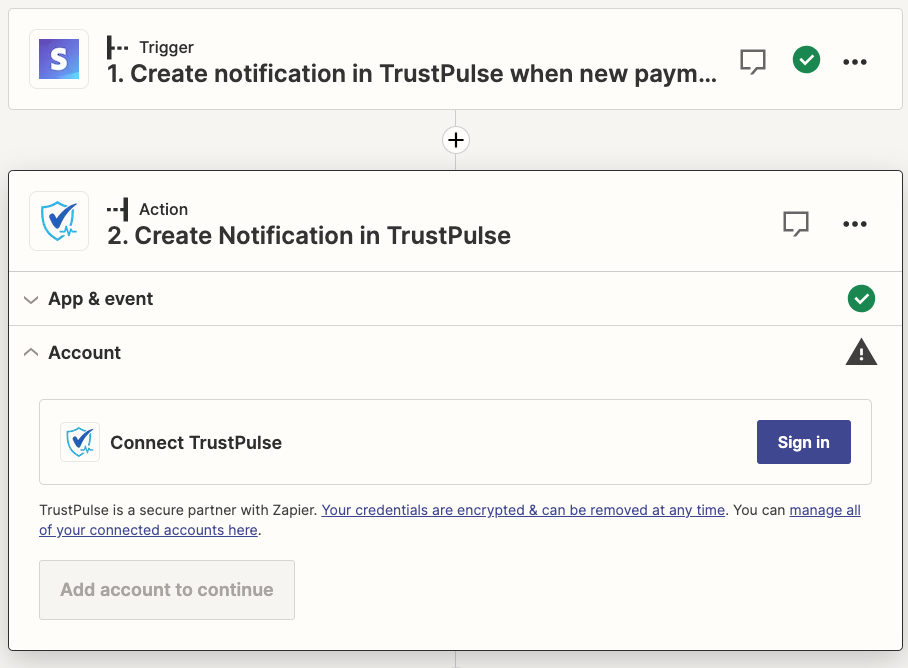
On the next screen, Zapier will request your TrustPulse API Key. Click on your dashboard.
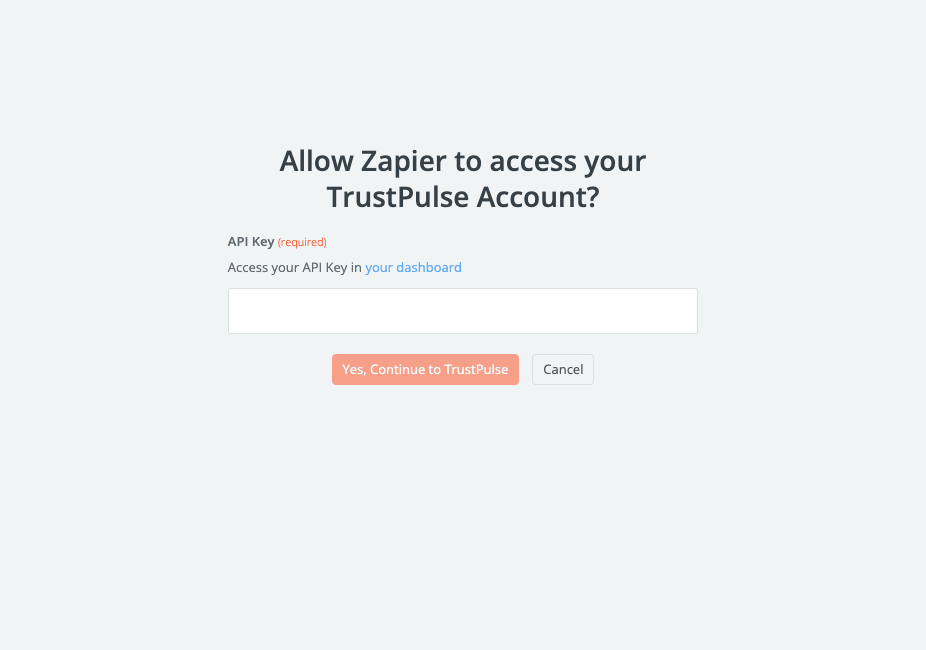
Next, scroll down in your TrustPulse dashboard until you find your API Key and copy it. Then, paste it back into the field provided and click on Yes, Continue to TrustPulse.
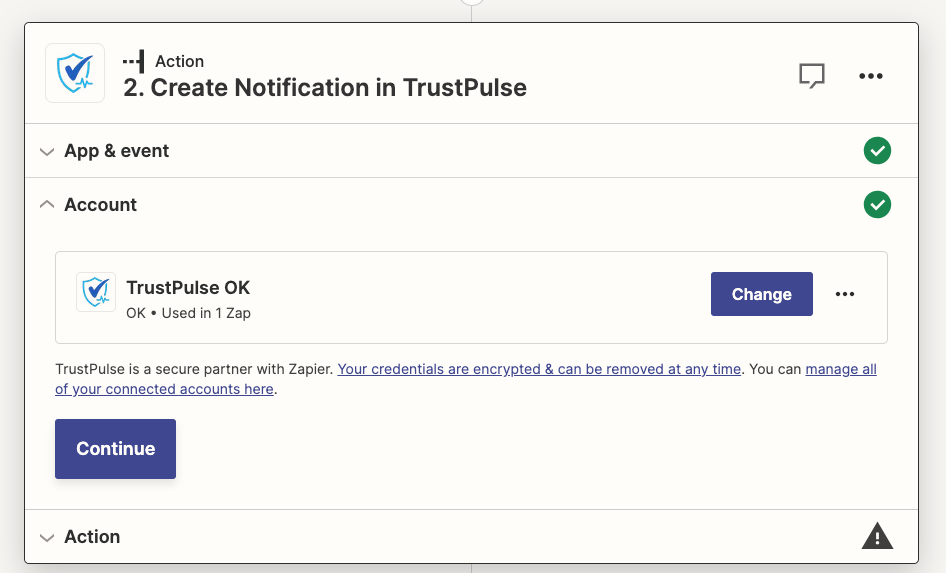
You’ll be redirected back to the Zap editor page. There should be a green check to let you know that your TrustPulse account is now connected. Go ahead and click on Continue.
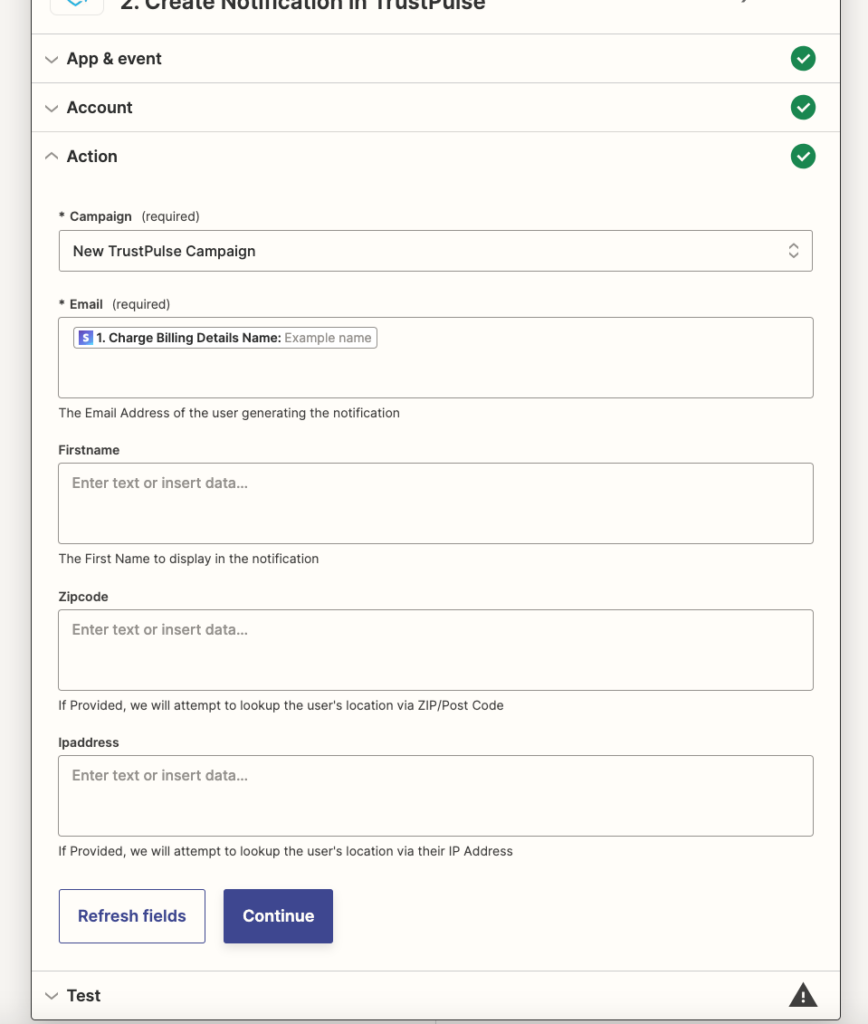
Next, choose the campaign you created in TrustPulse from the dropdown menu, add Charge Billing Details Name to the email field, and click on Continue.
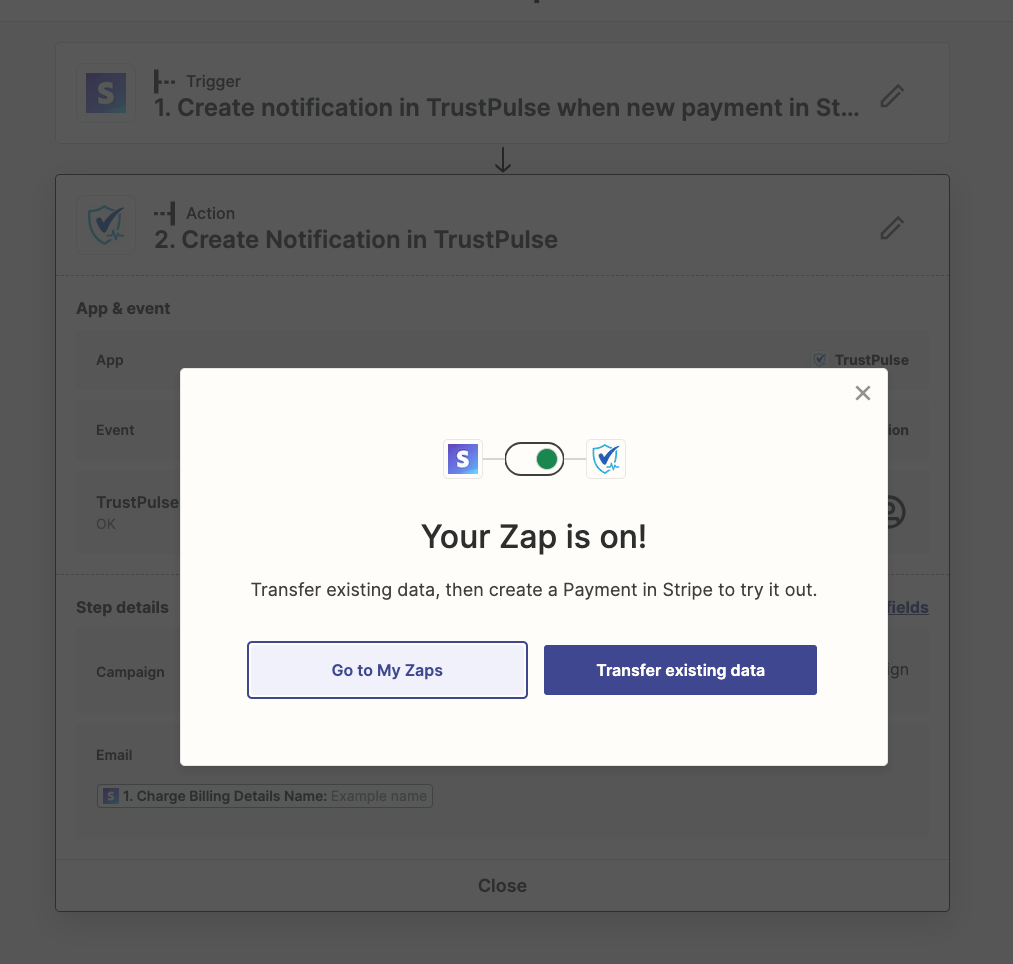
On the next screen, you’ll see a confirmation message that your zap is on. Go ahead and click on Transfer existing data.
Step 9: Test Your Automation
Now that you’ve set up your recent purchase notification automation, it’s highly recommended that you complete a test purchase using your payment form to ensure that your notification is running smoothly.
Not sure how to complete a test transaction? See our detailed guide for more information.
After your test payment is successfully completed, you should see the recent sale notification popup on your site.
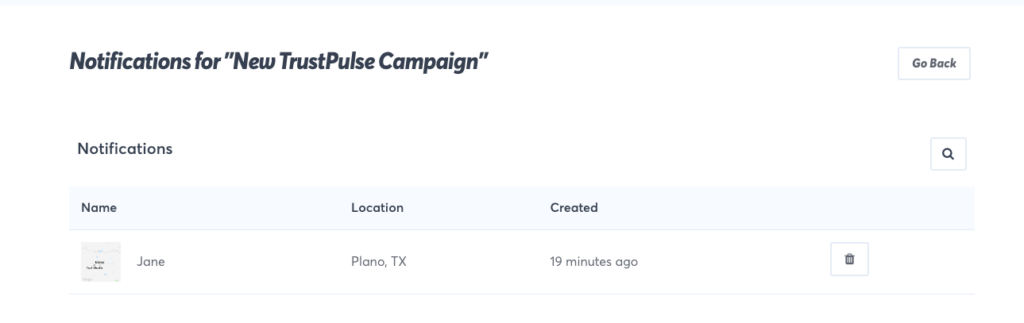
You can also check on the notifications in your TrustPulse dashboard. Just go to the campaign, and click on the notifications icon.

Next, you’ll see the customer’s name and location listed for the recent sale notification.
That’s it! We hope this article has helped you create recent sale notification popups for your site to boost social proof.
If you liked this article, you might also want to check out How to Automate Social Proof Posts on Facebook Pages.
What are you waiting for? Get started with WP Simple Pay today!
To read more articles like this, follow us on X.
Disclosure: Our content is reader-supported. This means if you click on some of our links, then we may earn a commission. We only recommend products that we believe will add value to our readers.


Leave a Reply