How to Sell Your Services Online in WordPress (Easy Way)
Last updated on
Do you want to sell your services online with your WordPress site? Selling online is easy whether you only take full-time gigs or want to sell services as a side hustle.
In this article, we’ll show you how to sell services online with WordPress (step by step).
Selling Services Online Through a WordPress Site
To sell services online through your WordPress site, you’ll need to do is to publish a page that promotes your services and accept payments via a payment button or a payment form. Depending on what you want to sell, your payment form would also look different.
For example, if you’re a web design agency that also sells a reseller hosting package to your clients, you might need to create 2 payment forms, one that accepts payment for the design and the other that accepts a recurring payment for the reseller hosting.
Essential Payment Form Elements to Sell Services
No matter what you’re selling, your payment form tool should have the ability to add the following elements.
- Choose from a service: Best for businesses that offer multiple services.
- Quantity: The ability to multiply the amount based on the specified quantity.
- Recurring billing: Charge on a regular basis automatically without having to send invoices manually.
- Collect additional info: Collecting additional info from your customers comes in handy if you need customer input to offer a custom service.
WP Simple Pay is the best Stripe plugin that lets you easily create a payment form for any purposes, including selling services online. It comes with tons of built-in form templates, including a few templates for selling services.
Aside from offering all the above elements, WP Simple Pay also comes bundled with advanced tools for selling premium services, such as
- Installment payments: Allow your customers to pay in installments, which enables you to make your services affordable for most of your potential customers.
- Buy Now Pay Later: It is a type of short-term financing, supported by services like Klarna / AfterPay, that allows your customers to pay in installments. This way, you get full amount upfront without having to wait until all the installment payment completes.
- Setup fees: Allow customers to buy a subscription plan for your services and require them to make a one-time setup fee.
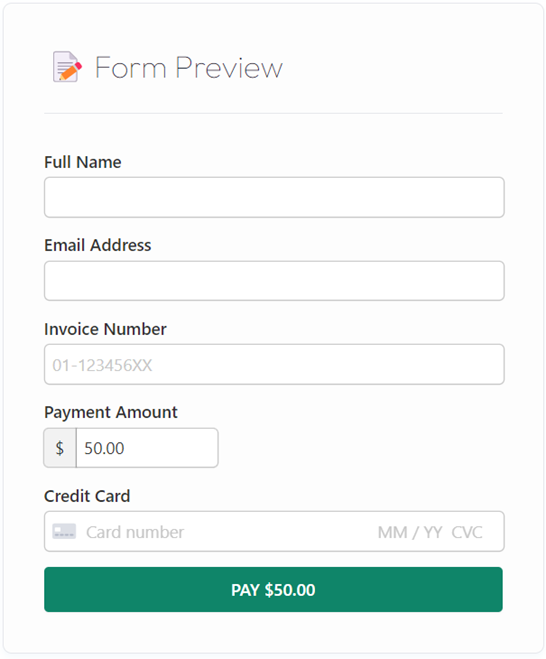
Here’s the form we’re going to create with this tutorial.
Step 1: Install and Activate WP Simple Pay
To sell services on your WordPress site, you’ll need to install and activate WP Simple Pay.
After purchasing the WP Simple Pay plugin, download it from your purchase email receipt or from your WP Simple Pay account and install it by going to your WordPress backend.
If you want to install WP Simple Pay via FTP, follow this guide.
Remove the additional 3% fee!
Most Stripe plugins charge an additional 3% fee for EVERY transaction
…not WP Simple Pay Pro!
After activating the plugin, you’ll be directed to the setup wizard. In the setup wizard, you can connect your website with a Stripe account. Then, click Let’s Get Started.

If you didn’t see the setup wizard, simply head over to WP Simple Pay » Settings and then click on the Stripe tab where you can find the Connect with Stripe button. Just click on it to connect your Stripe account to your site.
Step 2: Connect WordPress to Stripe
To connect your WordPress site to Stripe, you’ll first need to create a Stripe account.
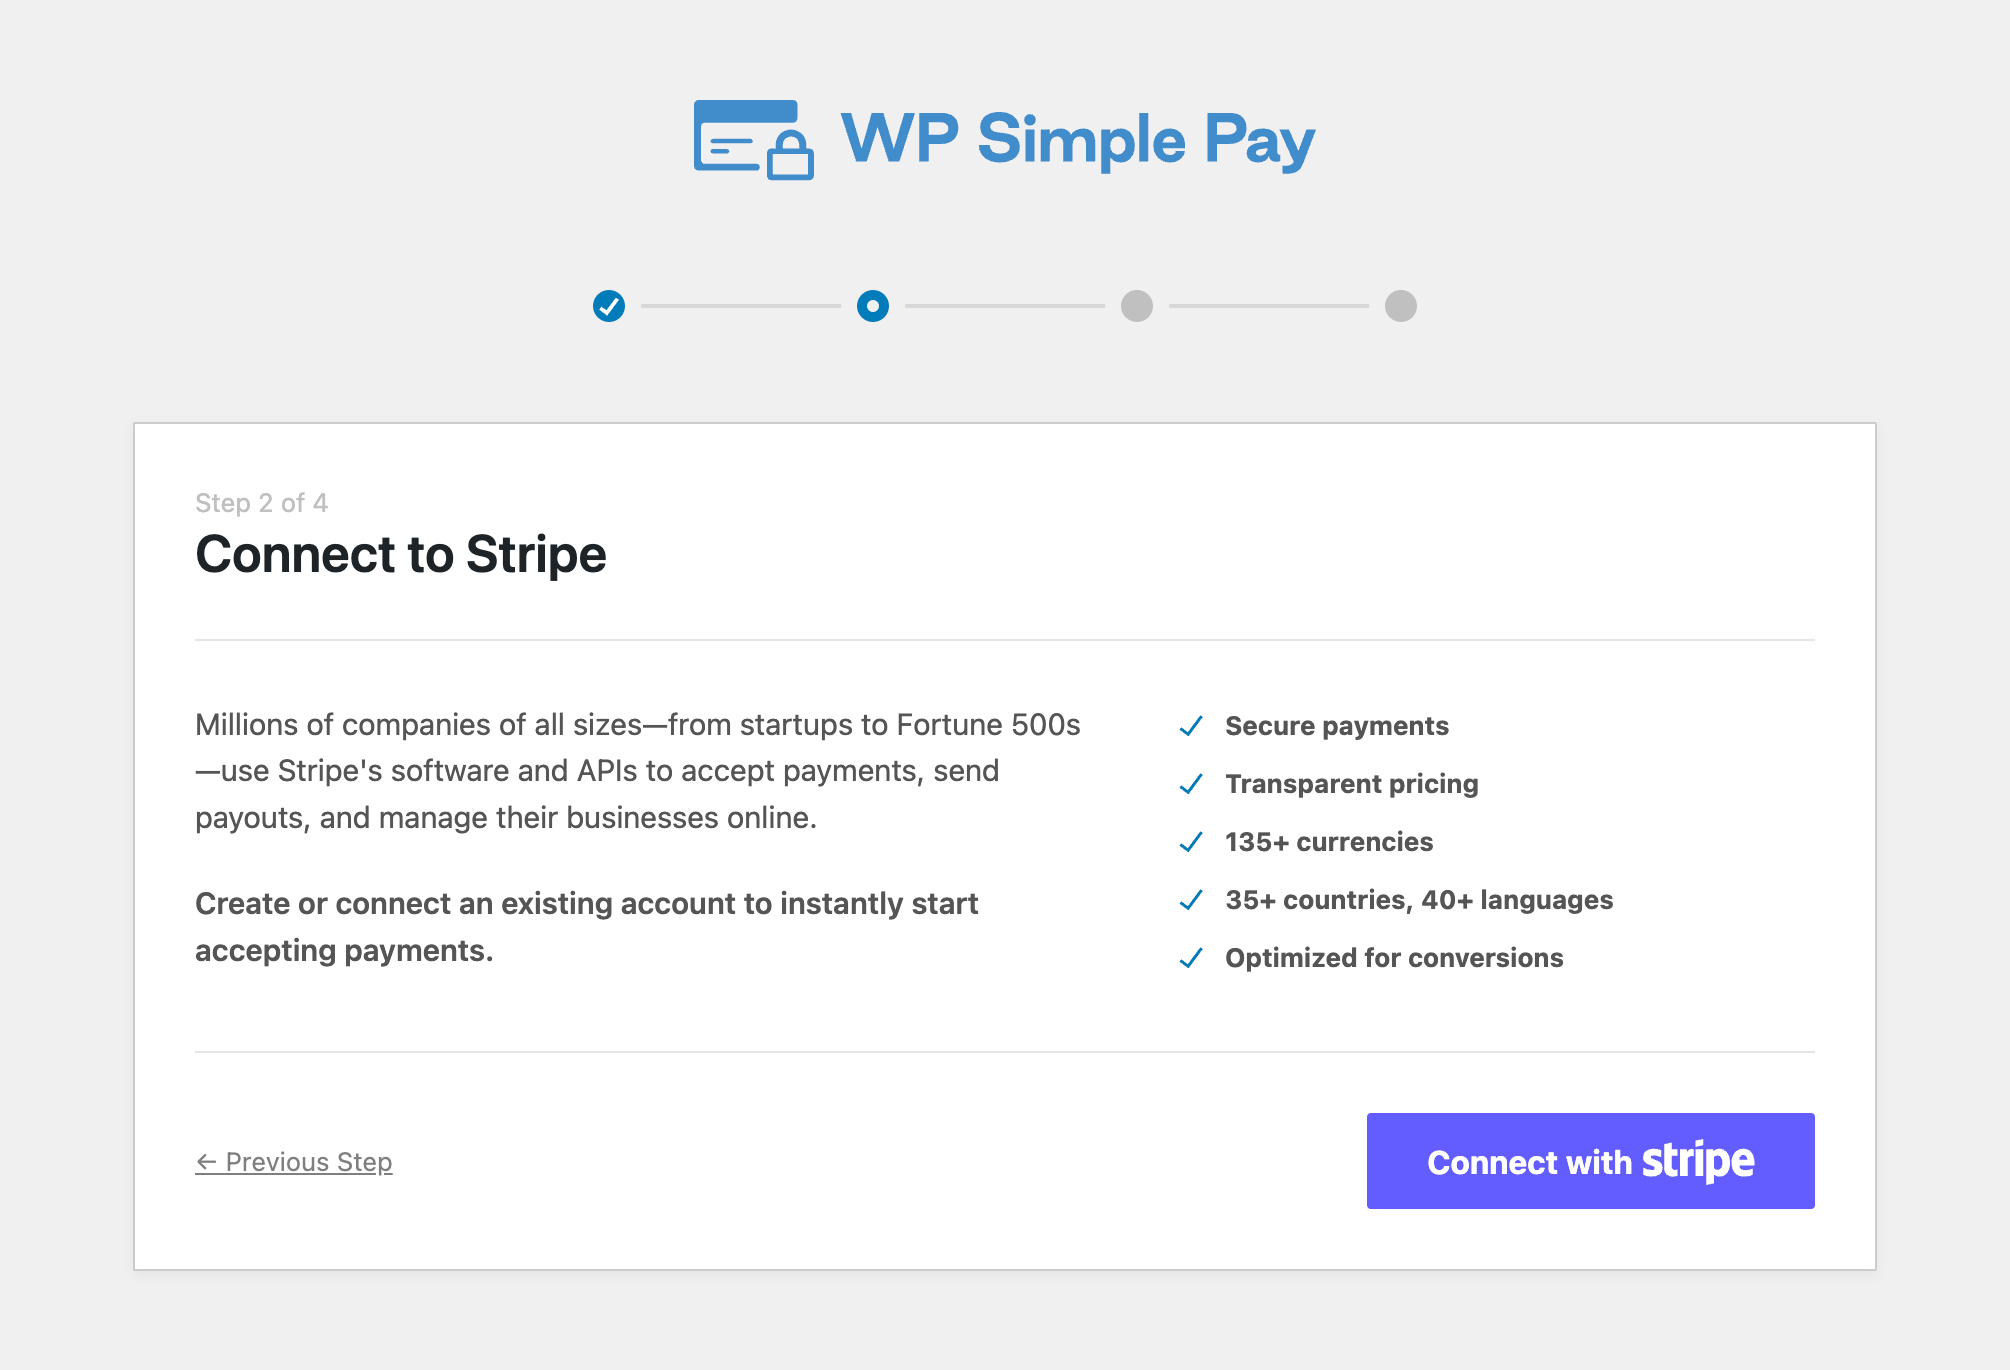
The best thing is that our setup wizard guides you through the Stripe integration process, step by step, without having to leave your WordPress dashboard. Click Connect with Stripe.
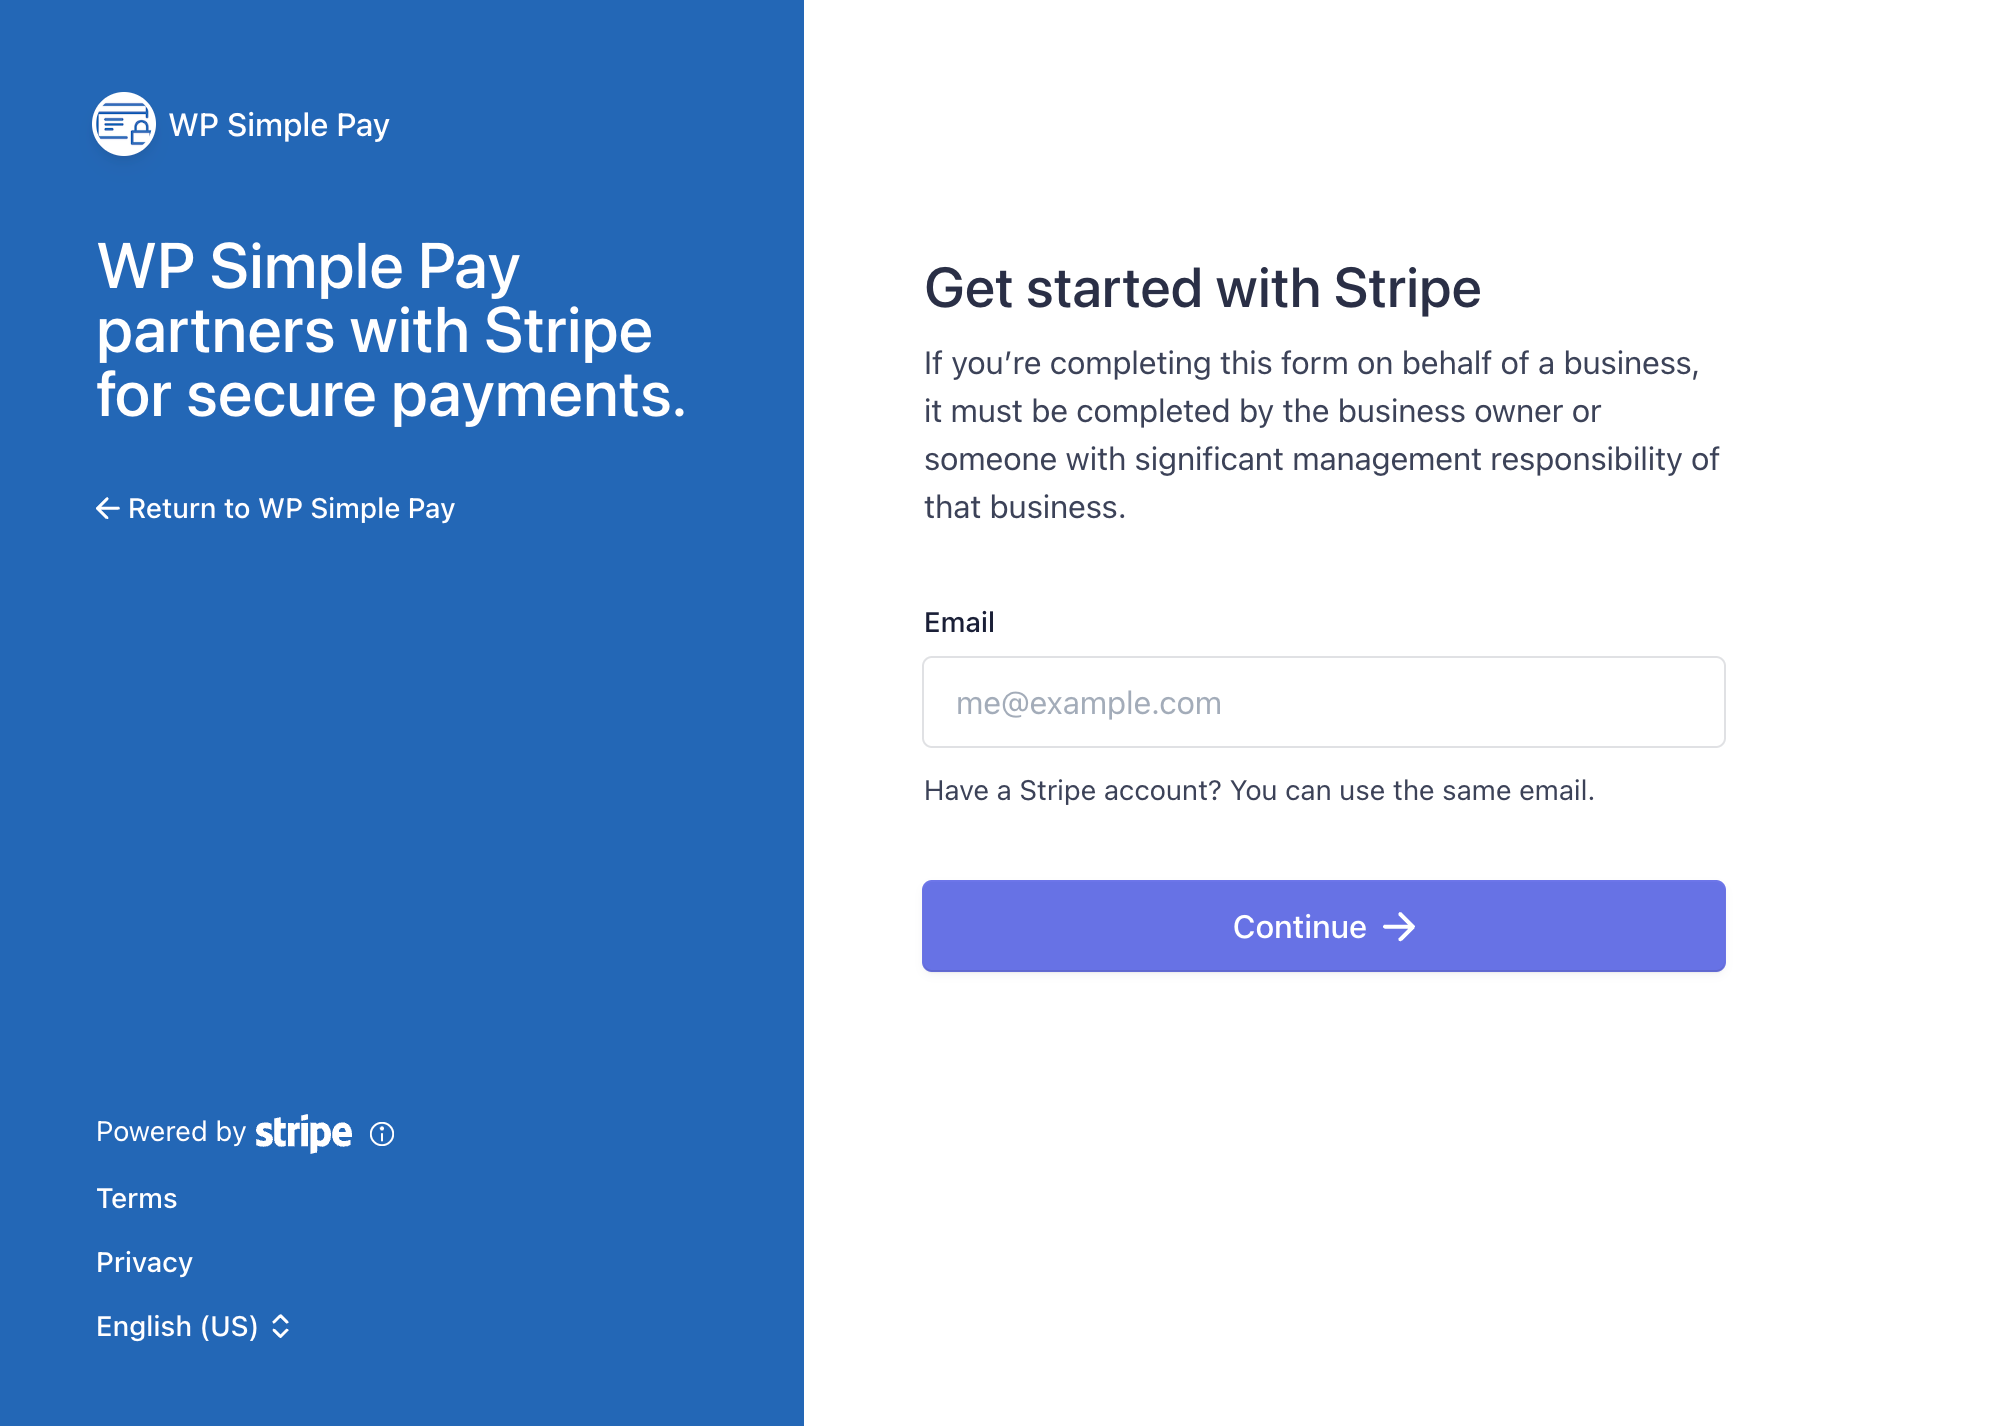
Now, enter your email address and start creating a Stripe account if you don’t have one already. Otherwise, link your existing account to your site.
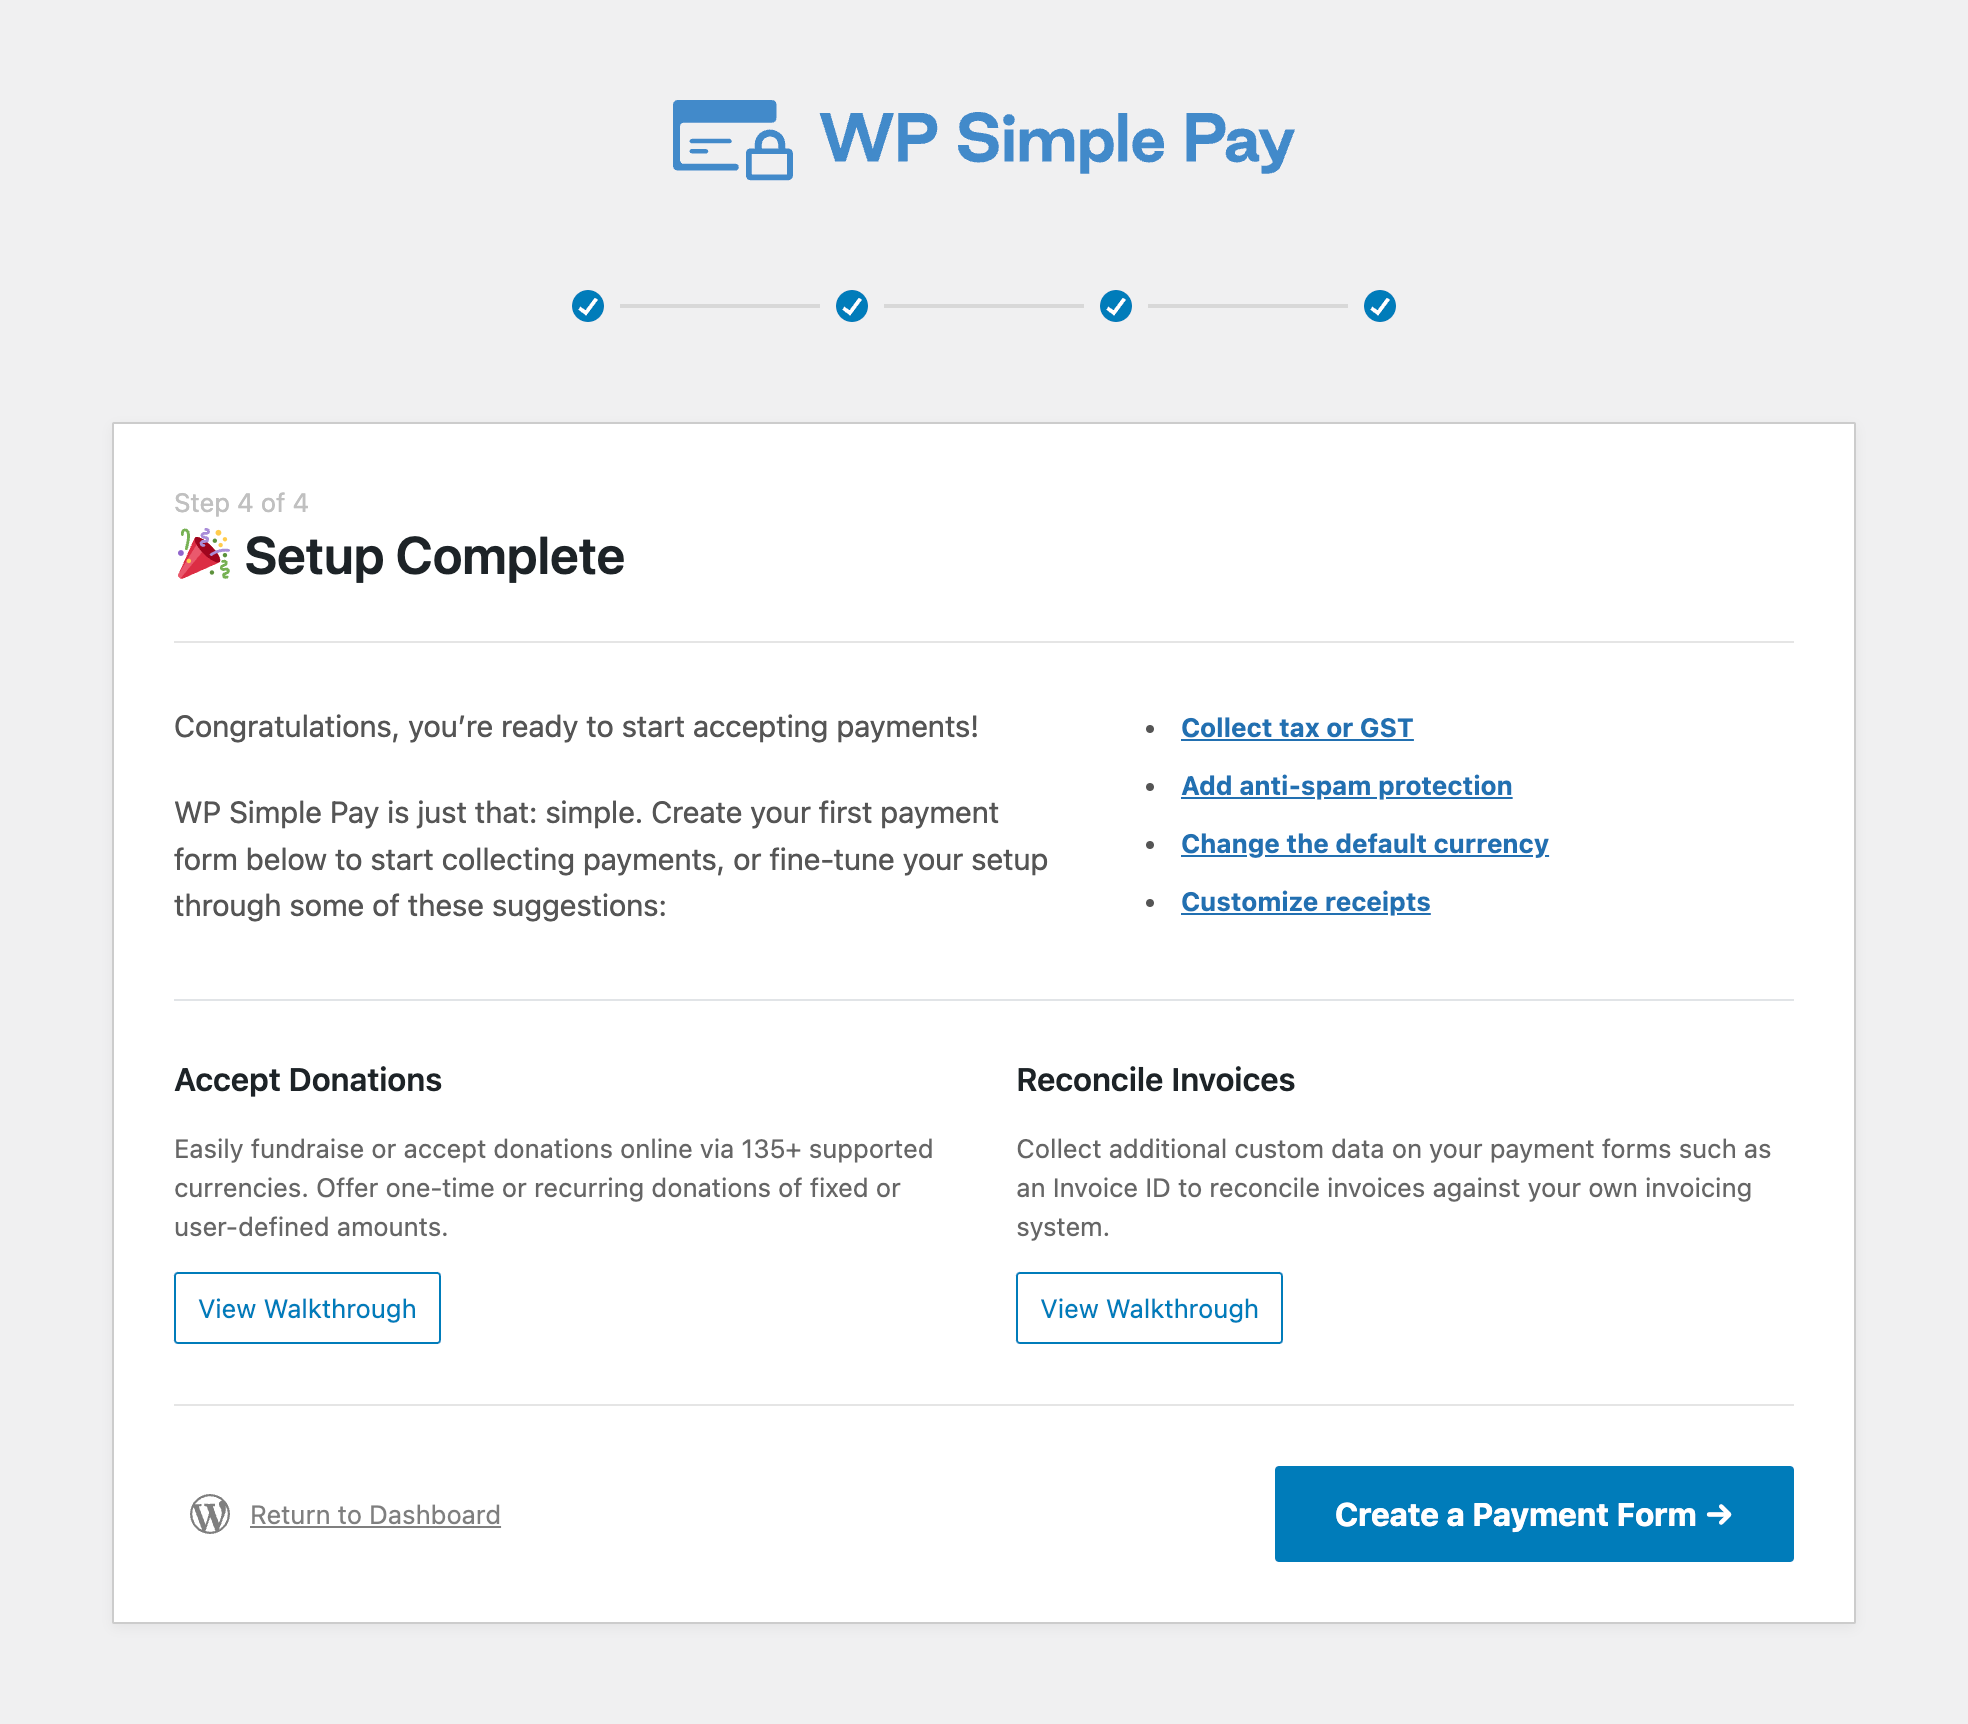
Upon completing this process, you’ll be shown a success page that says Setup Complete. Now you can go ahead and create a payment form by clicking on the button Create a Payment Form.
Step 3: Create a Payment Form to Sell Your Service
WP Simple Pay comes with tons of different payment form templates to choose from.
Every template is highly customizable, but choosing the right template gives you a heads start and you don’t always have to build it from scratch.
In the form templates library, you can enter service in the search bar, and you’ll see all the available payment form templates related to services.
Before choosing a template, you can preview each one by hovering over it and clicking View Demo. Each form template comes preselected with different form fields. Once you find the right template that suits your needs, you can return to the templates library and click the Use Template button by hovering over the template you liked.
For this tutorial, we’ll choose the Business Consultation Fee Payment Form template. This template is the best choice for you if you want to allow users to specify the payment amount manually.
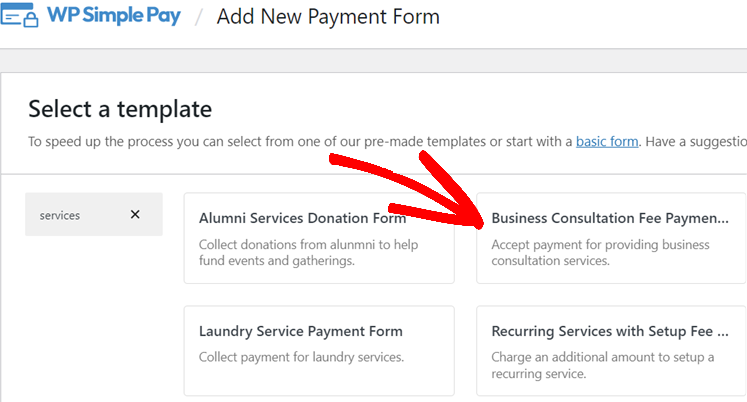
After selecting a template, you can add, remove or customize any form fields per your needs.
Step 4: Configure the Form to Accept Payments
Once your preferred template is selected, the next step is to configure it based on your needs.
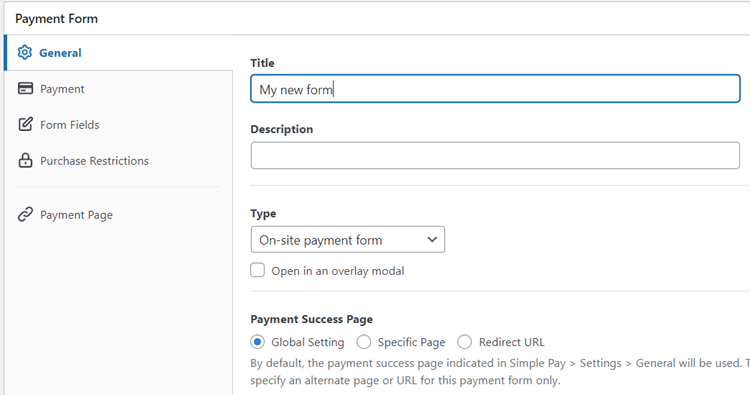
You can start by specifying the name and description of your form. WP Simple Pay lets you host the form either on your own site or on Stripe.com. You can choose where you want to host the form in the Type dropdown. For more details, check out this post on selecting the right payment form types.
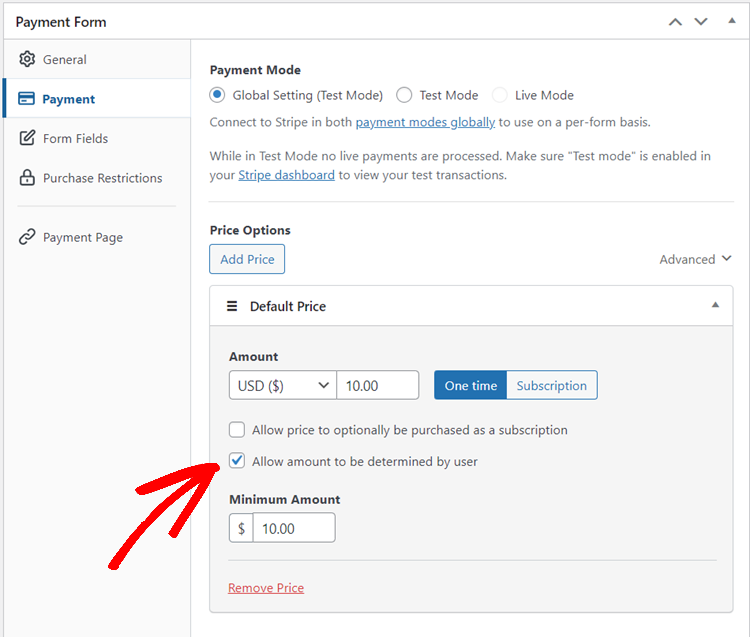
Next, click on the Payment option on the left, and you’ll be able to customize the currency, amount, and even choose between one-time and subscription payment.
The template we’ve selected preselects the checkbox Allow amount to be determined by user. If you don’t want to let users specify the amount, you can uncheck this option.
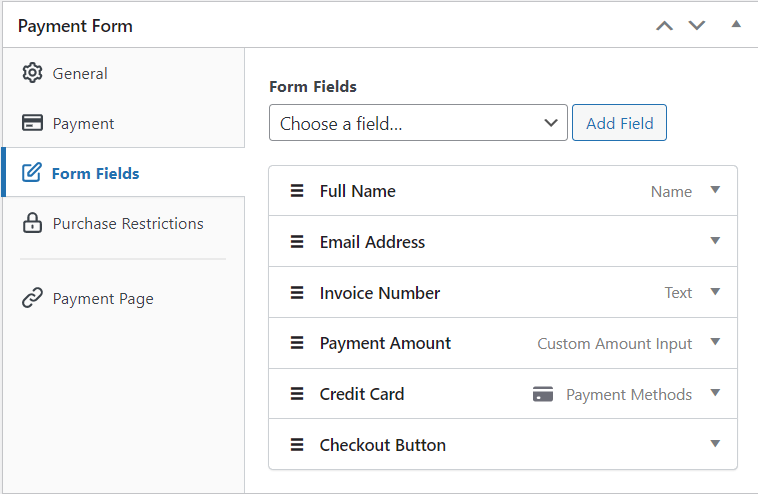
In the Form Fields option, you can add, remove or customize any existing form fields the way you want.
Our template also preselects a text field option and labeled it as Invoice number. Feel free to remove it or customize the label. Or even add additional fields from the dropdown.
If you want, you can also convert this form into a full-fledged payment landing page and remove any distractions from the form. The best thing about this landing page is that it’s independent of your theme, so it doesn’t comprise any theme elements like headers, footers, navigation menu, etc.
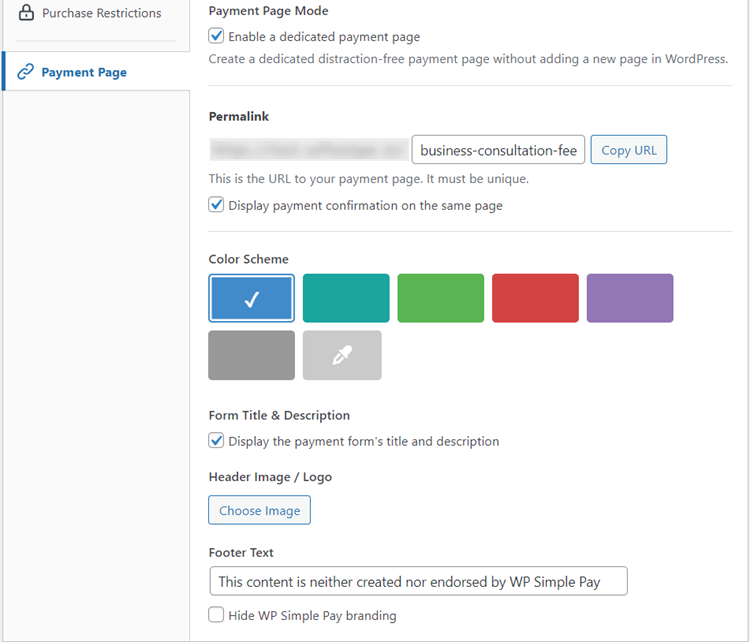
To convert this service payment form into a landing page, all you need to do is to click the Payment Page on the left and then select the checkbox Enable a dedicated payment page. You’ can find several customizable landing page elements like header, colors, URLs, and more.
Step 5: Add the Payment Form to a Page
Now that your service payment form is ready to accept payments online, it’s time to embed it on your website.
Make sure you test the form first before it goes live. You can toggle your entire site or individual payment forms between test and live modes (read more about Test mode).
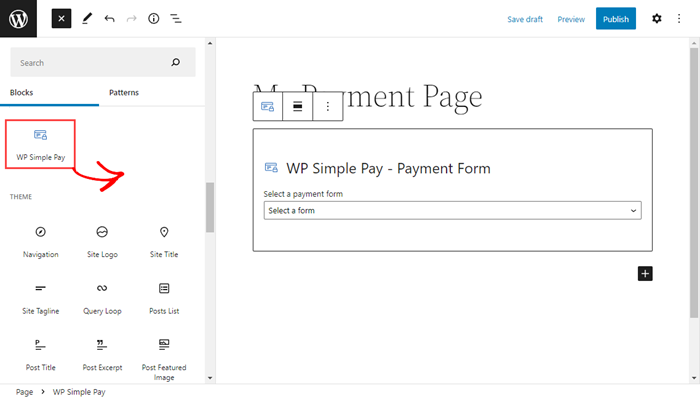
To embed the form, go to the post or page where you want to publish it. Then click on the + icon to add the WP Simple Pay block. Then choose a form you just created. And then, click Publish or Update.
That’s it!
We hope this article helped you learn how to sell your services online with WordPress.
If you liked this article, you might also want to check out how to sell a single product online with WordPress (with smart inventory management).
What are you waiting for? Get started with WP Simple Pay today!
To read more articles like this, follow us on X.
Disclosure: Our content is reader-supported. This means if you click on some of our links, then we may earn a commission. We only recommend products that we believe will add value to our readers.


Leave a Reply