How to Limit Purchase Quantity in WordPress (Step by Step)
Last updated on
Do you want to set a purchase limit for the product you’re selling on your site?
Selling a product with limited availability is a challenge. You might want to stop taking orders as soon as your product is sold out.
In this article, we’ll show you the EASIEST way to set a purchase limit for your products and services on your WordPress site.
Setting a Purchase Limit in WordPress
If you’re selling a single product or a service on your site with limited availability, you most likely don’t need a full-fledged shopping cart. All you need to do is to create and publish an order form and start selling your products or services on your site.
WP Simple Pay is the BEST way to sell single products or services on your site. It comes with a wide variety of pre-built payment form templates, so you can quickly launch a payment form without a hassle.
It is indeed one of the best Stripe plugins for WordPress which supports multiple payment methods, such as Google Pay/Apple Pay, ACH Direct Debit, and more.
WP Simple Pay makes it easy to set a limit for purchase quantity on your WordPress payment forms. It lets you stop taking orders for a certain product variable that has been gone out of stock. Take a look at the screencast below.
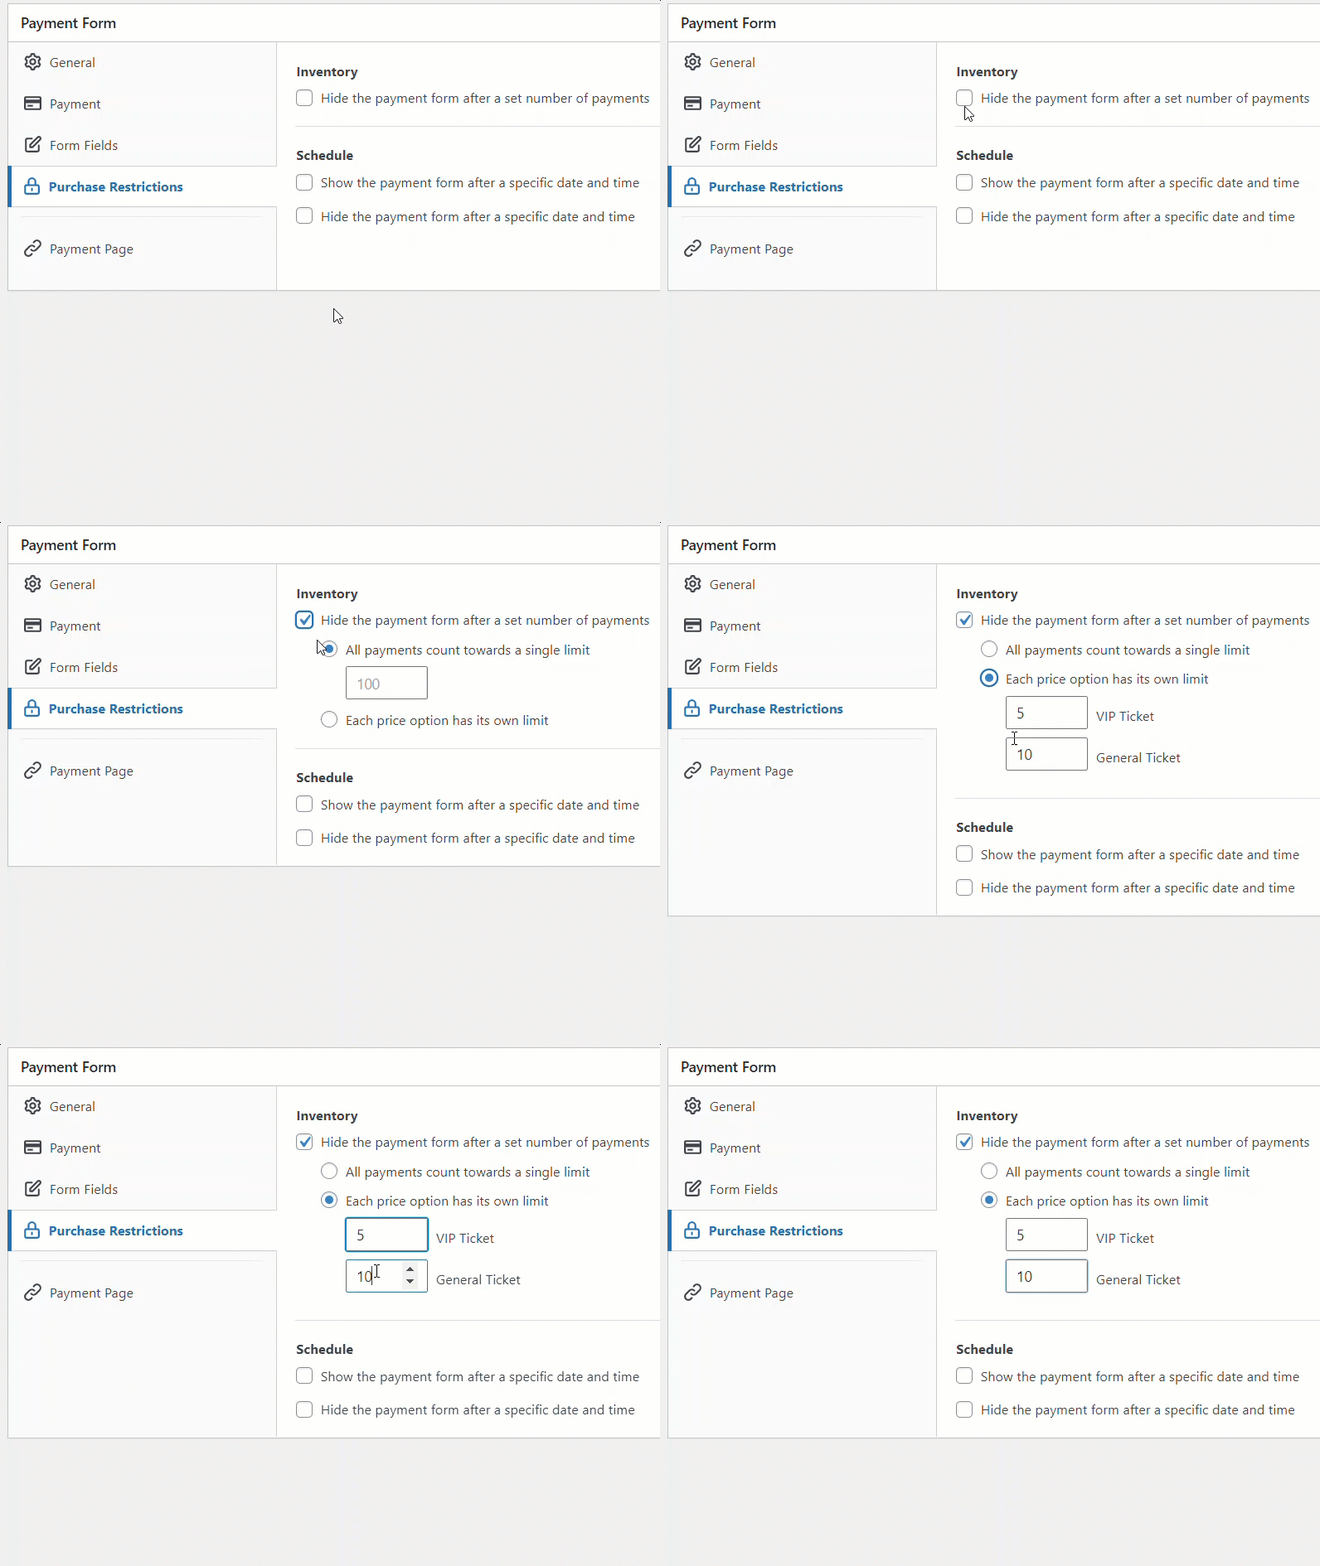
Now that you know how WP Simple Pay handles purchase limits, it’s time to create an order form with purchase limits enabled.
Here’s the form we’re going to create with this tutorial.
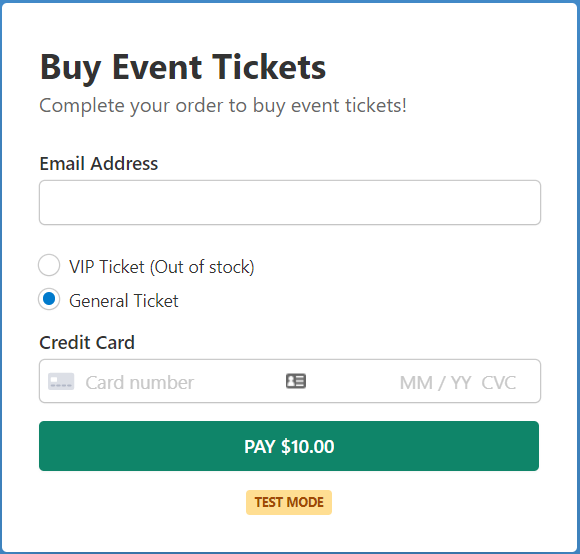
As you can see, this form automatically stops taking orders and displays an out-of-stock notice as soon as the product variable is sold out.
Step 1: Install and Activate WP Simple Pay
To sell a product and limit its purchase quantity, the first thing you’ll need to do is to install WP Simple Pay.
After purchasing the WP Simple Pay plugin, download it from your purchase email receipt or from your WP Simple Pay account.
Then install the plugin on your site by logging into your WordPress admin panel. Then navigate to Add New under Plugins, and then Upload Plugin. Click Choose File and find the WP Simple Pay .zip file on your computer. Click Install Now. When the upload is complete, press the Activate Plugin button.
If you want to install WP Simple Pay via FTP, follow this guide.
Remove the additional 3% fee!
Most Stripe plugins charge an additional 3% fee for EVERY transaction
…not WP Simple Pay Pro!
After the plugin is activated, you’ll be directed to the setup wizard. The setup wizard walks you through Stripe integration process, so you can connect your Stripe account with your site. Click Let’s Get Started.
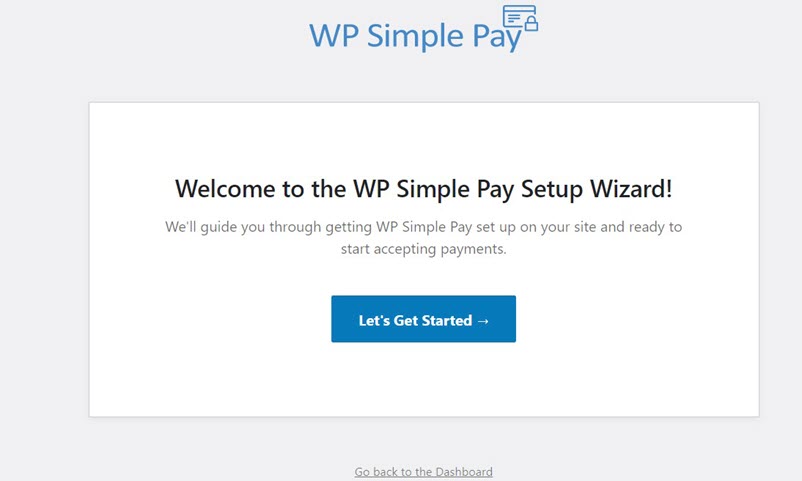
If you didn’t see the setup wizard, simply head over to WP Simple Pay » Settings and then click on the Stripe tab, where you can find the Connect with Stripe button. Just click on it to connect your Stripe account to your site.
Step 2: Connect WordPress to Stripe
You can proceed with the setup wizard to connect your WordPress site to Stripe. Click Connect with Stripe.
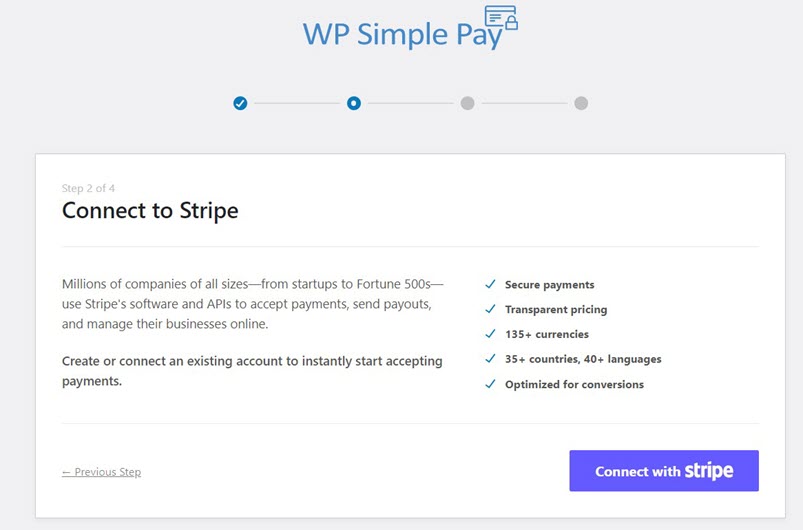
Next up, you’ll be asked to create a Stripe account or connect an existing Stripe account with your site. Make sure NOT to select the Skip this form option unless you’re setting up WP Simple Pay on a test site. Selecting the Skip this form option will create a temporary Stripe account that cannot be recovered or moved to Live Mode.
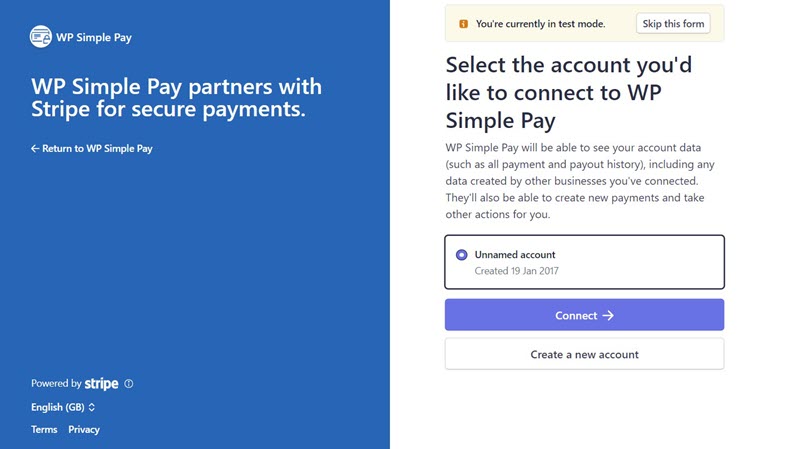
After successfully connecting Stripe with your site, it’s your turn to create an order form and limit purchase quantity for your products. Click on the button Create a Payment Form.
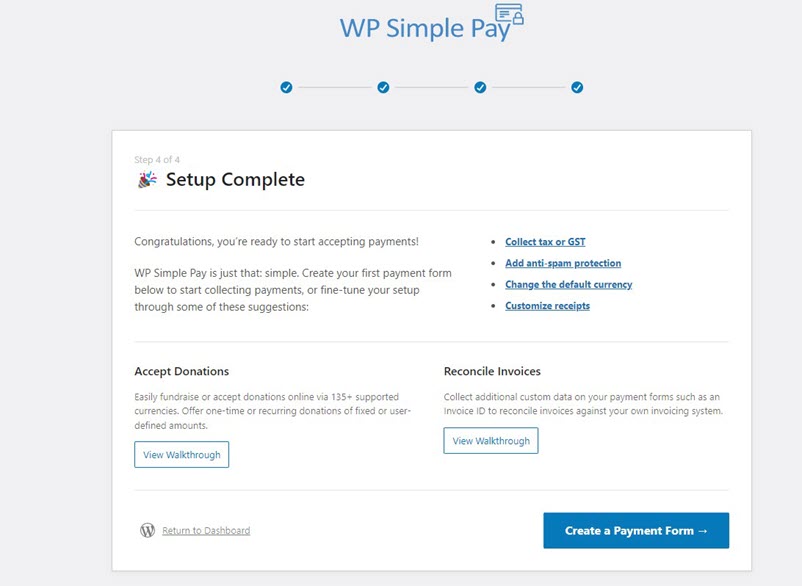
Step 3: Create an Order Form
As soon as you click the Create a Payment Form button in the setup wizard, you’ll be directed to the form templates library. Here you can see tons of different of pre-built form templates.
Although you can choose any template you wanted, in this tutorial, we’ll choose a simple template called Payment Form.
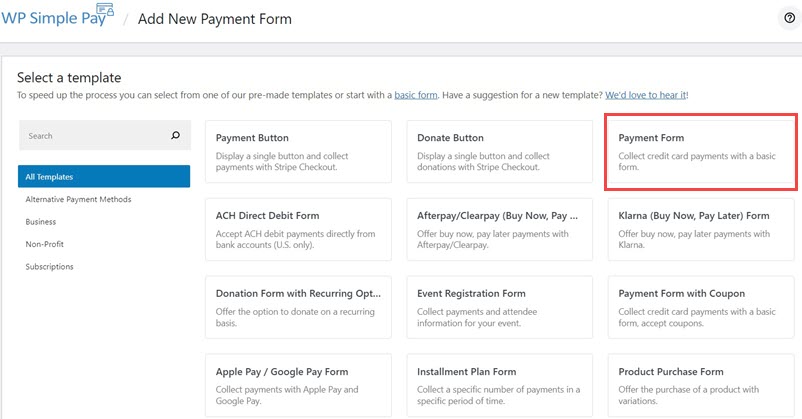
Step 3: Configure Your Order Form
After selecting your preferred form template, you’ll be shown a General settings page where you can configure your payment form the way you want.
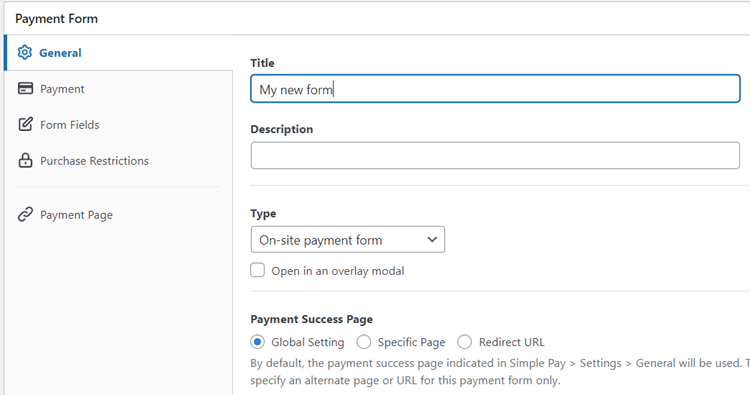
Here, you can change the title, description, and form type based on your needs.
If you want to host the payment form on your own site, choose On-site payment form under Type. Alternatively, to host the form on Stripe’s checkout page, choose Off-site Stripe checkout. To know more about choosing a Type, check out this post on selecting the right payment form types.
Next up, click on the Payment tab, where you can configure Price Options. With WP Simple Pay’s payment forms, you can offer multiple price options within a form.
By default, you’ll find that only 1 price option is added for $10.
For the sake of this tutorial, we’re adding 2 price options, which are labeled as VIP Ticket and General Ticket.
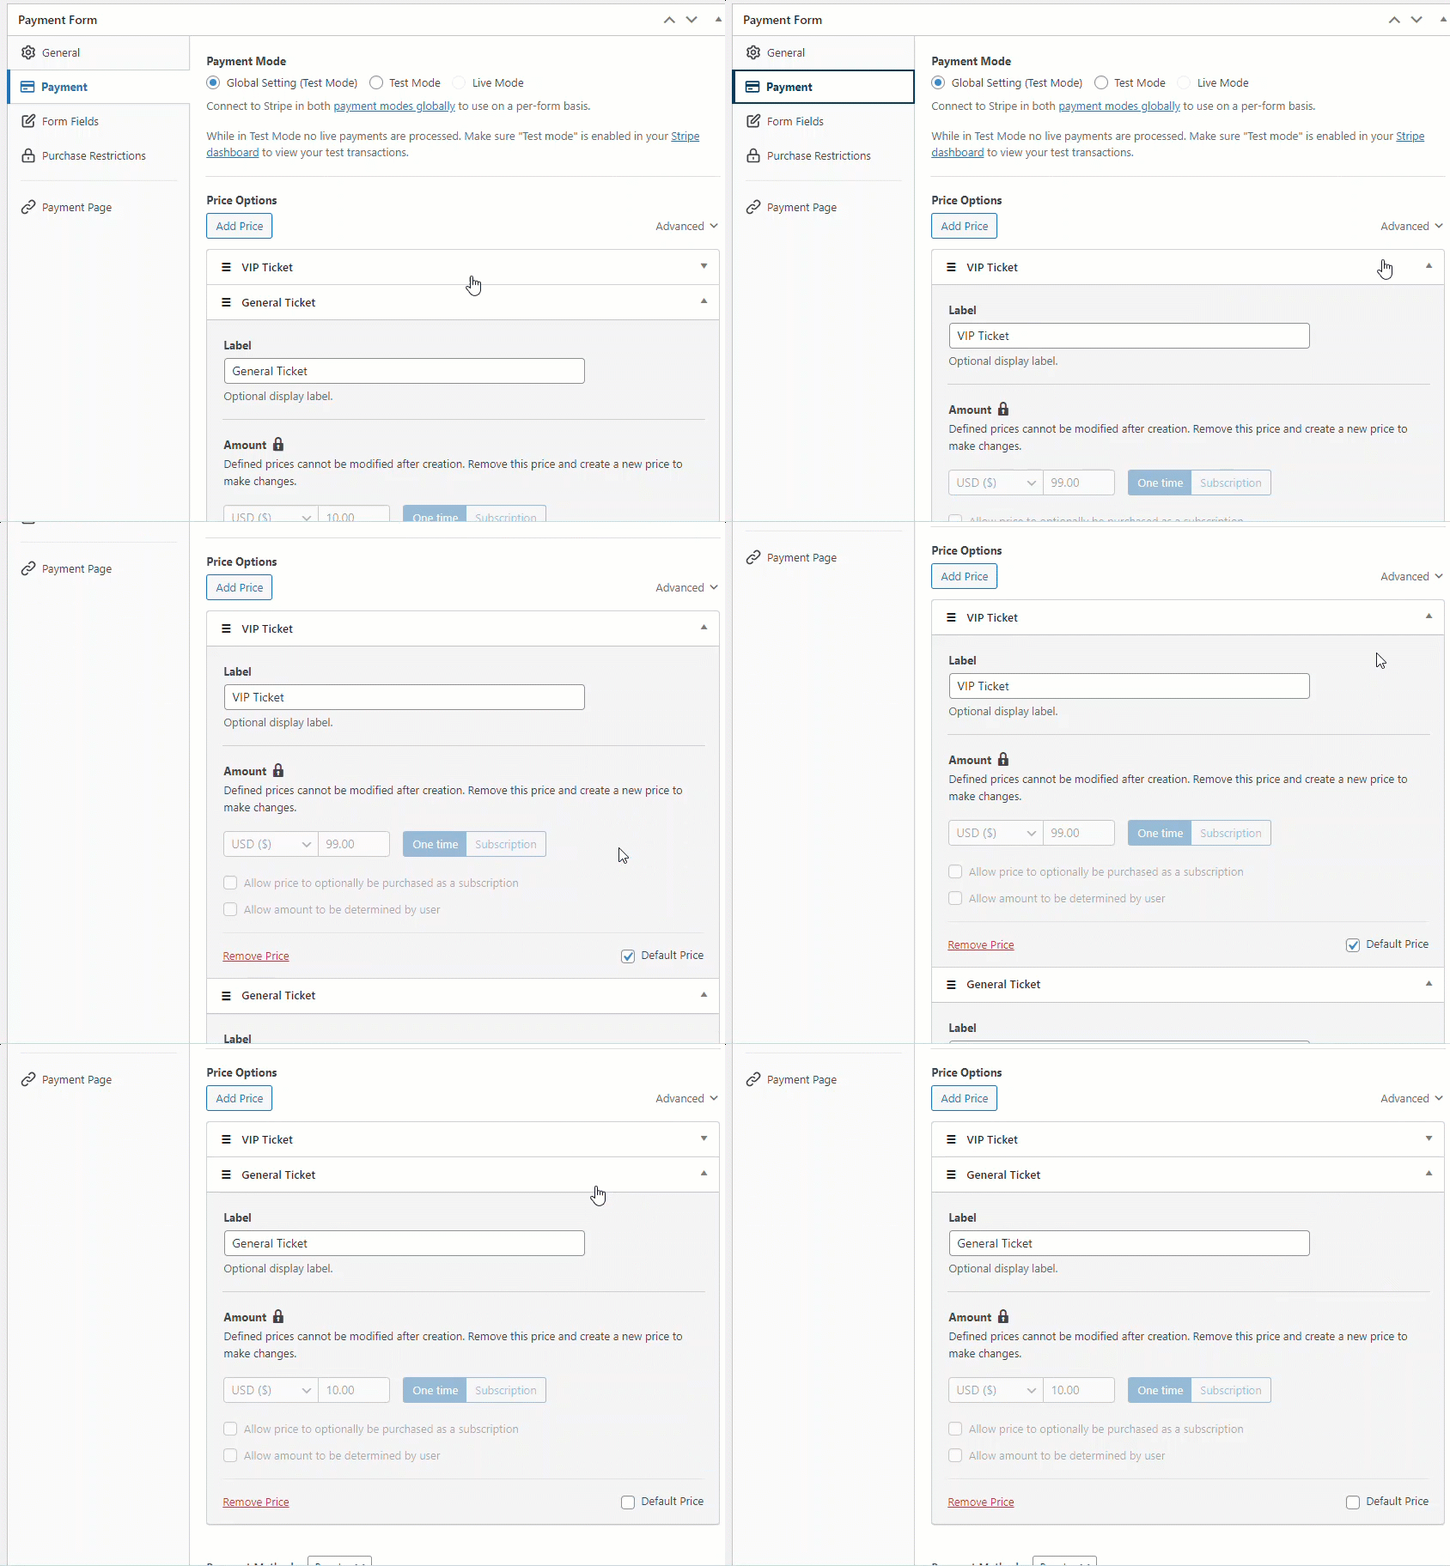
VIP Ticket is our most premium product with a very limited availability and costs $99, whereas General Ticket is worth $10, which is our most affordable product.
Feel free to make the necessary changes in the price options and then navigate to Form Fields, where you can add or customize the form fields.
Step 4: Limit the Purchase Quantity
Next up, let’s limit the purchase quantity of the price options you’ve added.
To do so, click Purchase Restrictions on the left. WP Simple Pay lets you restrict purchases in 2 ways. You can either set a default limit for all price options on your Stripe payment form or configure separate limit for each price option.
As you can see in the screencast below, selecting the Inventory checkbox will show you 2 options as mentioned above.

Let’s select the checkbox Each price option has its own limit and configure the purchase limit for each option.
Your customers can’t buy a product if its purchase limit has been reached. Take a look at how the form would look like when one of the price options has gone out of stock.

Publish your form and see how it looks on the frontend. You can then make a test payment and figure out if it works as intended.
Step 5: Add the Payment Form to a Page
After making a test payment, it’s time to embed your form on your website.
Make sure to turn your form into live mode before making the form live on your site (read more about Test and Live modes).
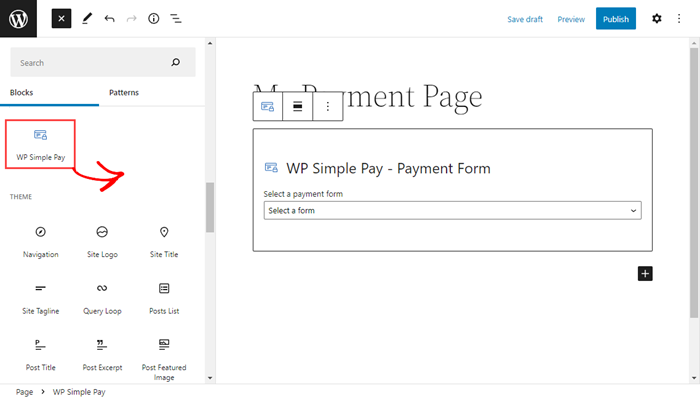
To embed the form, go to the post or page where you want to publish it. Then click on the + icon to add the WP Simple Pay block. Then choose a form you just created. And then, click Publish or Update.
That’s it!
We hope this article helped you learn how to limit purchase quantity in WordPress.
If you want to enable multiple payment methods, check out our article on how to allow users to select a payment method.
Get started with WP Simple Pay and start limiting purchase quantity.
To read more articles like this, follow us on Facebook and Twitter.
Disclosure: Our content is reader-supported. This means if you click on some of our links, then we may earn a commission. We only recommend products that we believe will add value to our readers.


Leave a Reply