How to Limit Purchase Quantities in WordPress (Easy Way)
Last updated on
Do you want to limit purchase quantities for multiple pricing options on your WordPress site?
Offering customers a payment form that allows them to purchase multiple quantities not only enhances their checkout experience but also boosts your average order value. Furthermore, the ability to limit purchase quantities helps prevent overbooking event registrations and ensures you don’t sell out-of-stock items.
In this article, we’ll show you the easiest way to set up purchase quantity limits in WordPress.
How to Set Up Quantity Limits
When it comes to setting up purchase quantity limits, the best approach is to use a Stripe payments plugin for WordPress that lets you not only create payment forms with multiple pricing and quantity options but also allows you to control the minimum and maximum purchase limits for each price option.
WP Simple Pay is the #1 Stripe payments plugin for WordPress. It allows you to easily accept online payments without setting up a complicated shopping cart. One of the best parts about the plugin is that it lets you create payment forms with multiple price and quantity options so that customers can purchase multiple items in one transaction.
In addition, it lets you easily configure purchase limits for individual price options directly from the form builder.
A few additional features include:
- Multiple Payment Methods: Accept 10+ payment methods, including credit and debit cards, ACH Direct Debit, digital wallets, and more.
- Advanced Payment Form Builder: The plugin’s advanced no-code payment form builder allows you to create payment forms in minutes.
- Customized Confirmation Pages and Emails: Create custom messages for your confirmation pages and emails.
- Fee Recovery: Pass the additional Stripe processing fee on to your customers.
- And more…
Now that you know a little more about WP Simple Pay, let’s take a step-by-step look at how easy it is to create a payment form with purchase quantity limits.
Remove the additional 3% fee!
Most Stripe plugins charge an additional 3% fee for EVERY transaction
…not WP Simple Pay Pro!
Step 1: Install and Activate WP Simple Pay
To begin limiting purchase quantities on your WordPress site, the first thing you’ll need to do is install and activate WP Simple Pay.
Visit the pricing page and select the best plan for your needs. Next, upload the .Zip file from your purchase confirmation email to your WordPress site.
If this is your first time installing a plugin, no worries! See our detailed guide on how to install WP Simple Pay.
Once you’ve activated the plugin, its setup wizard will walk you through connecting your Stripe account.
Go ahead and click on Let’s Get Started.

If you didn’t see the setup wizard, simply head over to WP Simple Pay » Settings » Advanced tab and click the Launch Setup Wizard button.
2: Connect WordPress to Stripe
To connect your WordPress site to Stripe, click on Connect with Stripe.
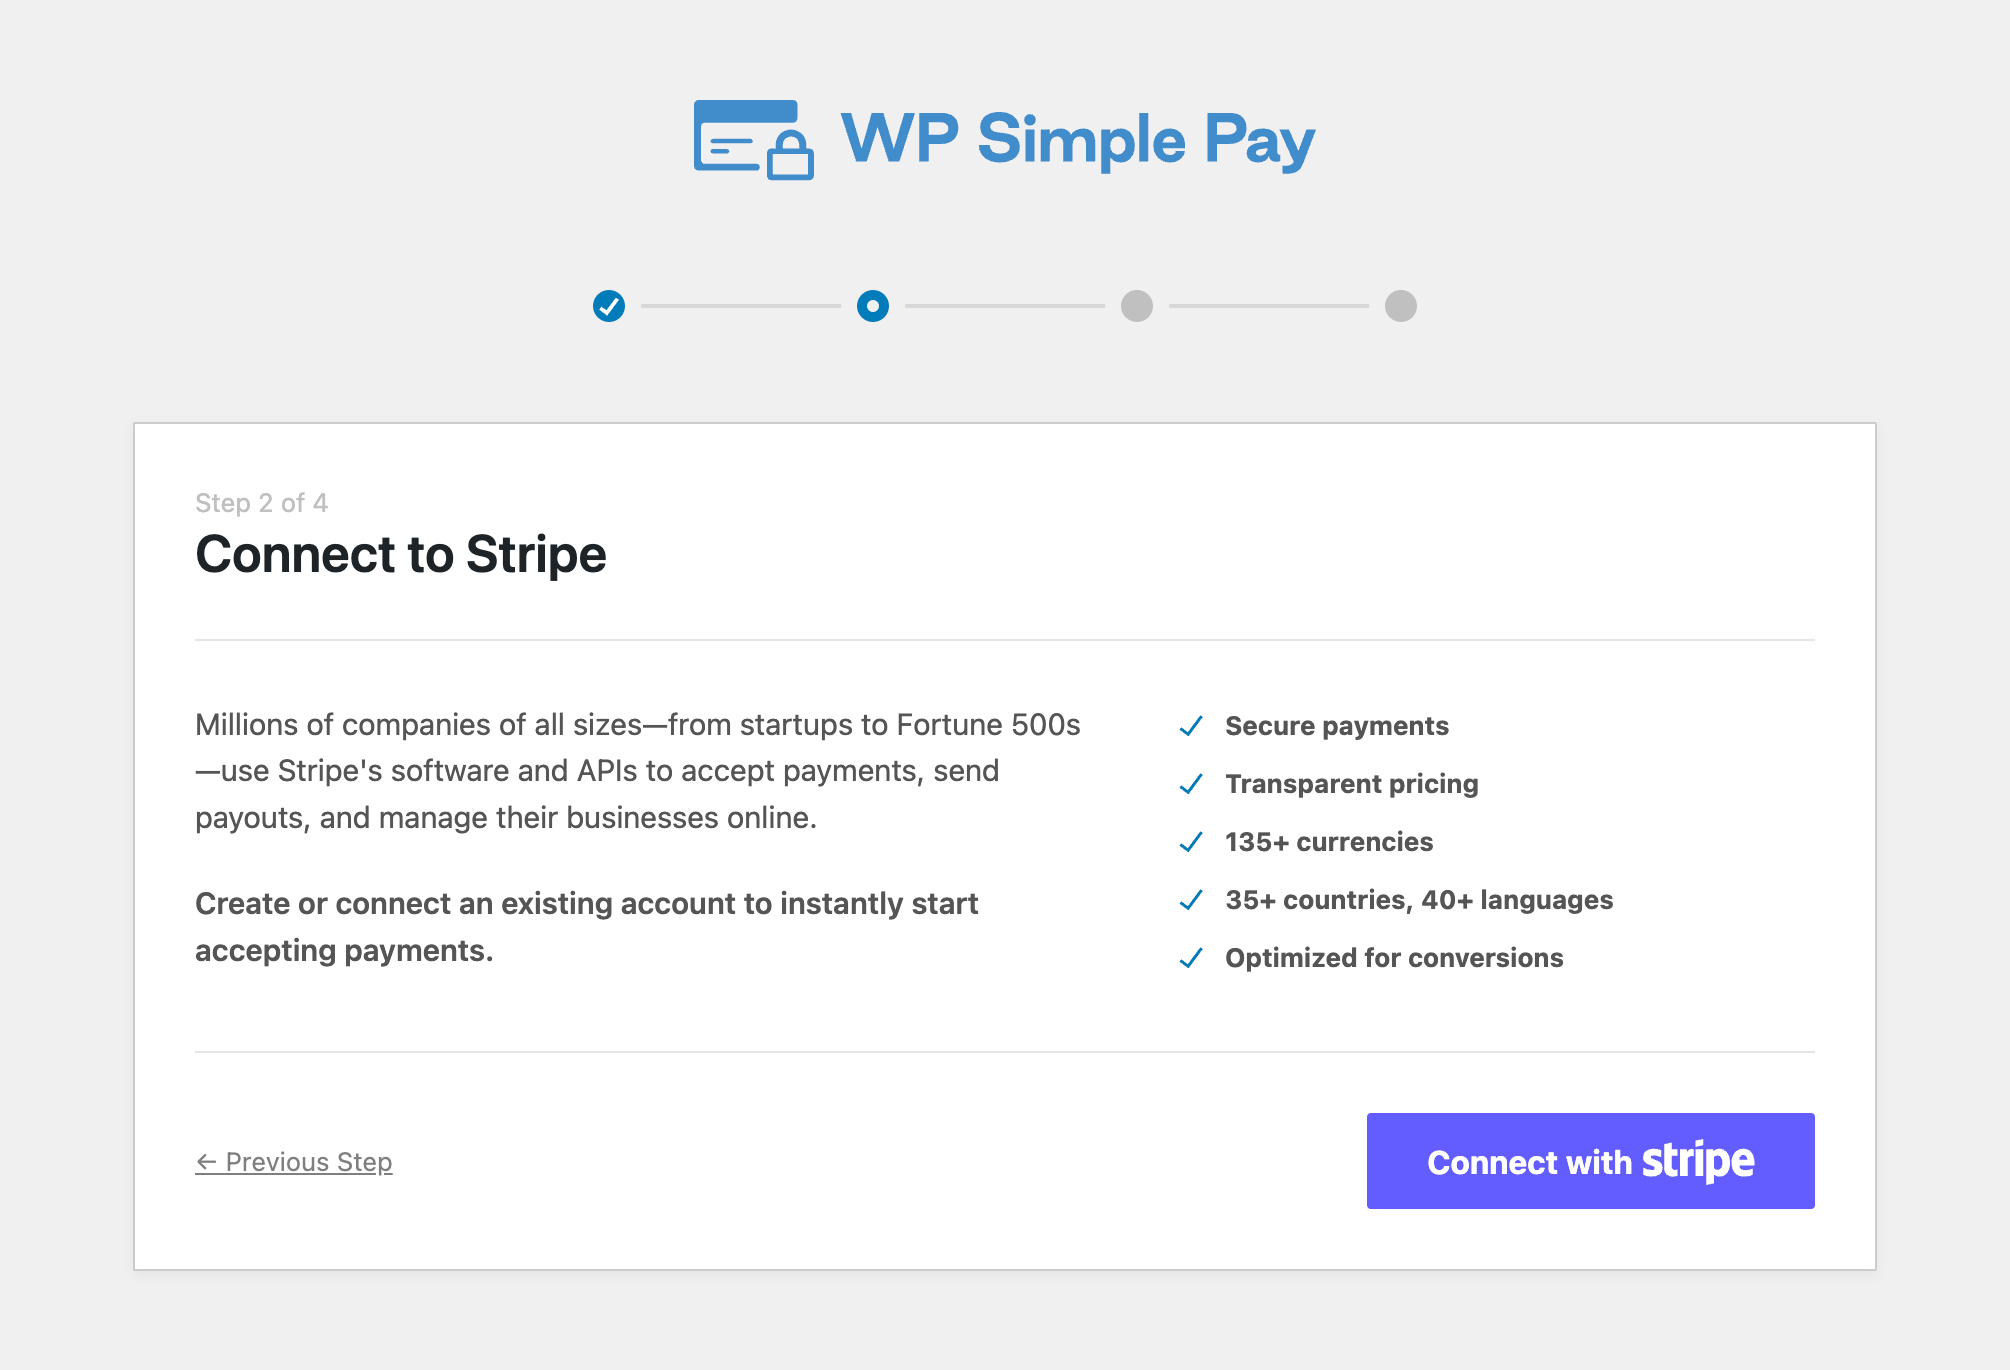
Next up, enter the email address you use for your Stripe account and connect it to your site. If you don’t have a Stripe account, you can easily create one by entering your email address and completing the registration.
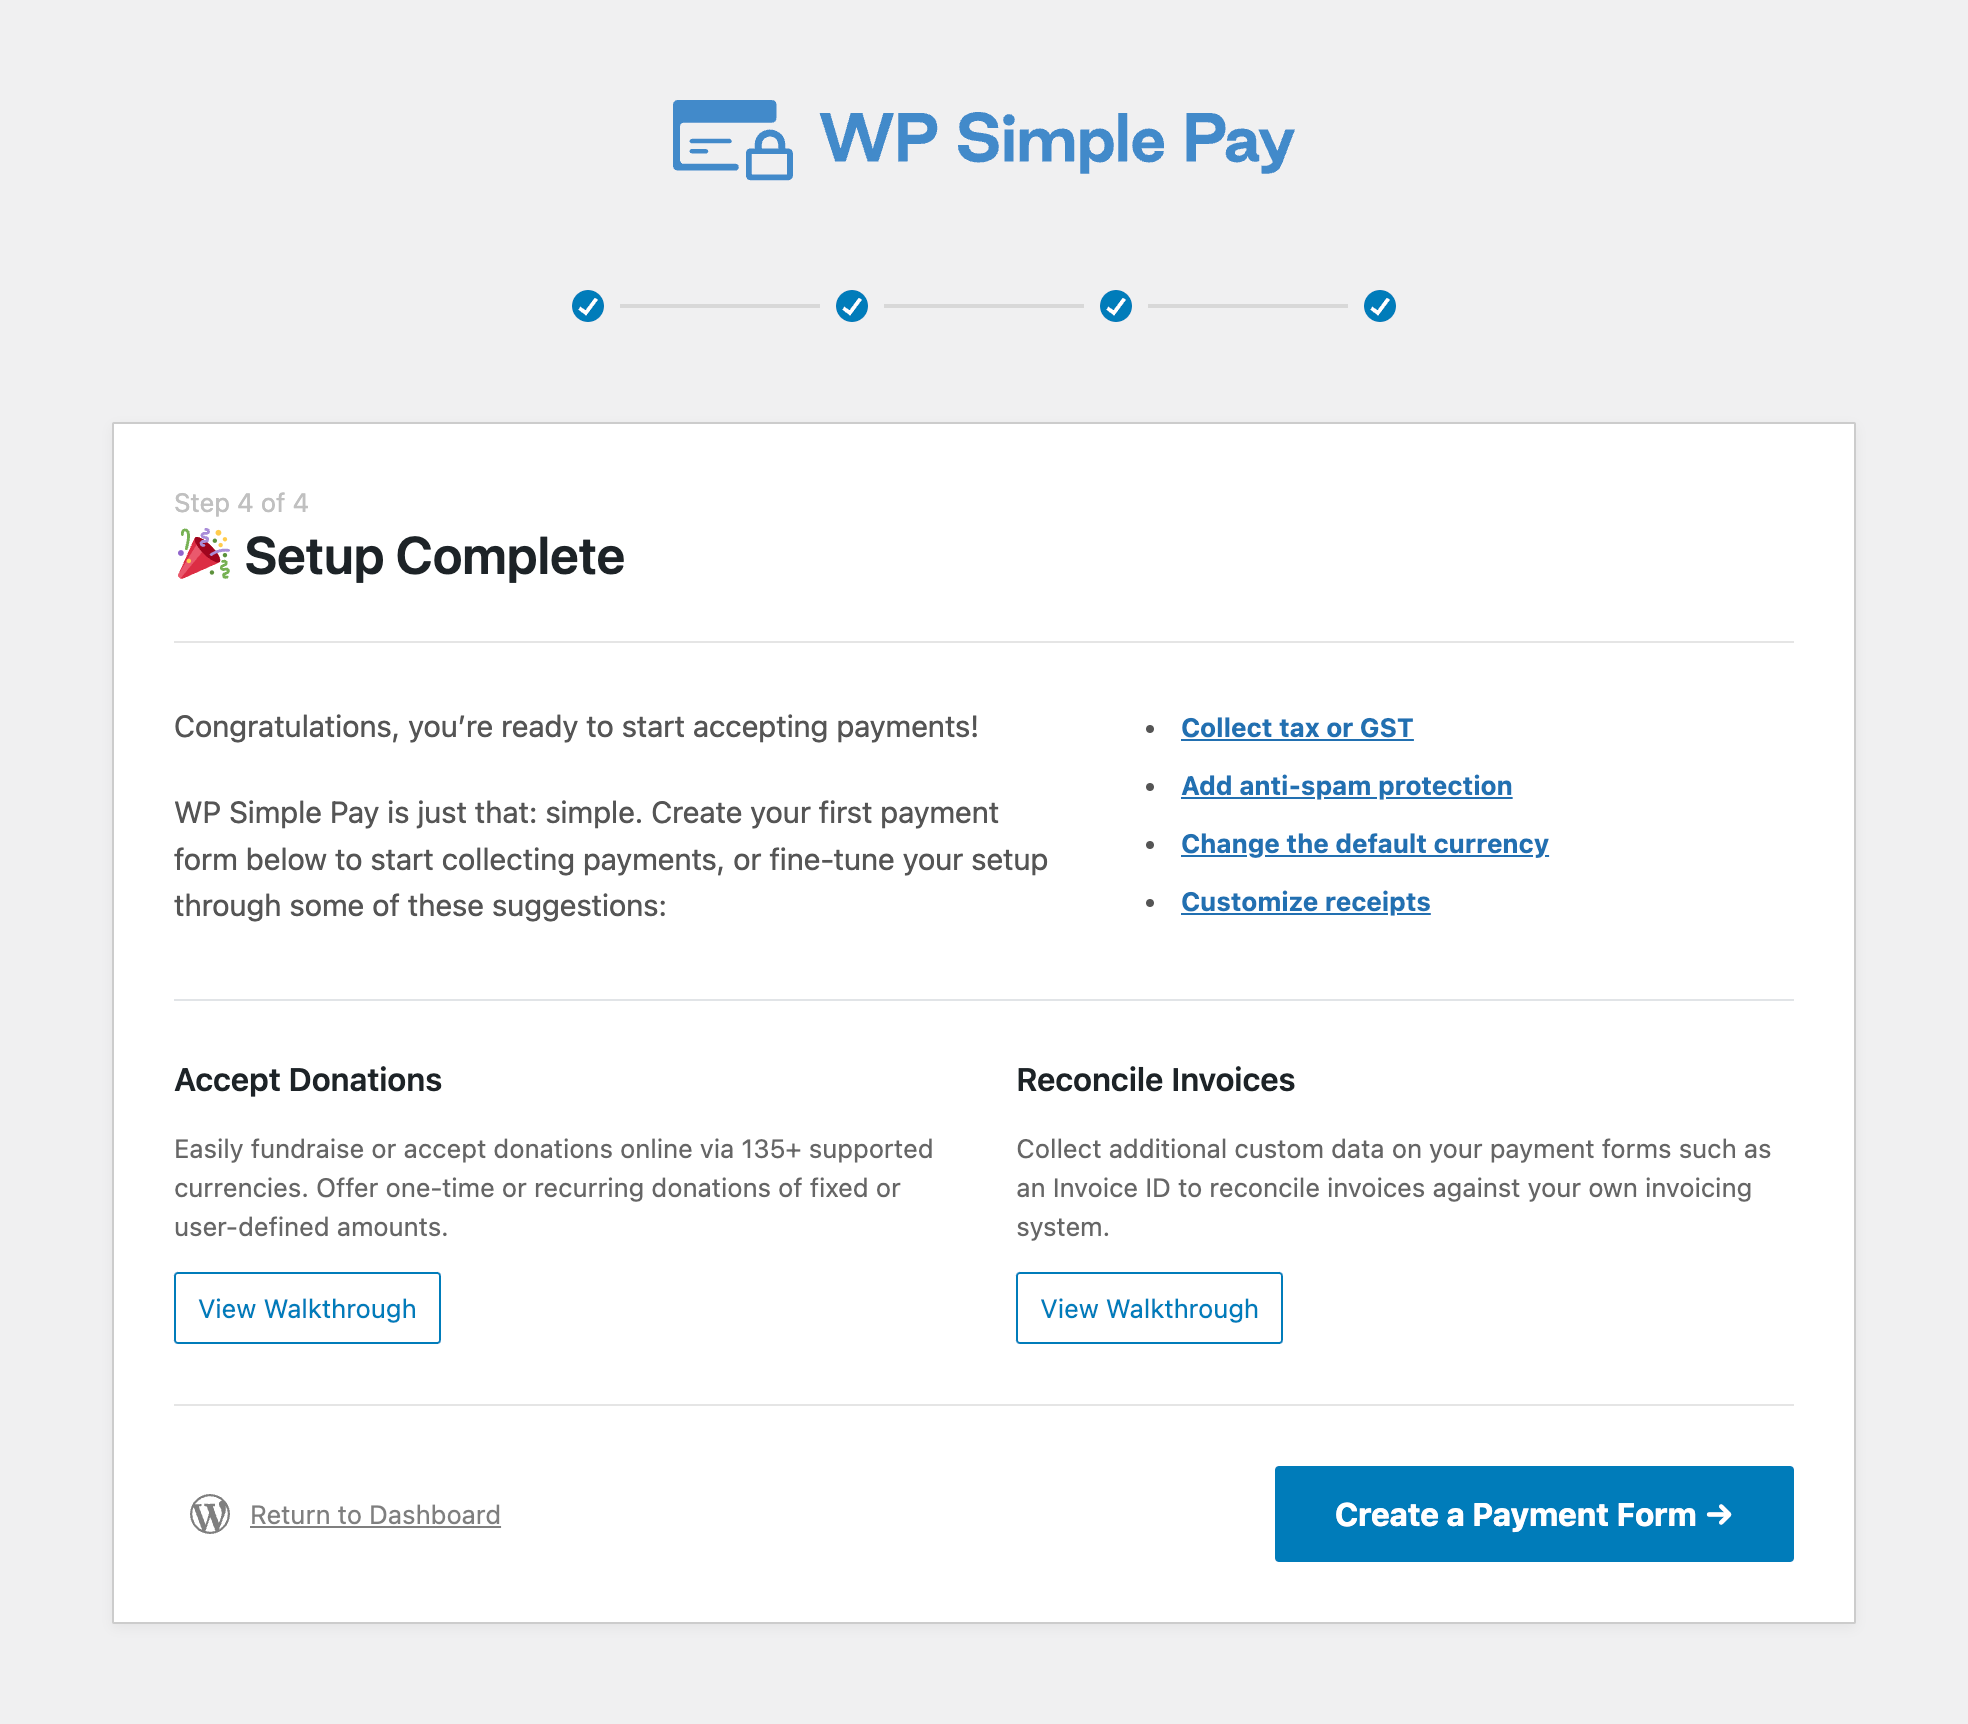
Upon completing this process, you’ll be shown a success page that says, “Setup Complete.” Next, click on Create a Payment Form.
Step 3: Create a Payment Form with Purchase Quantity Limits
So far, you’ve installed and activated WP Simple Pay on your site and connected it to your Stripe account.
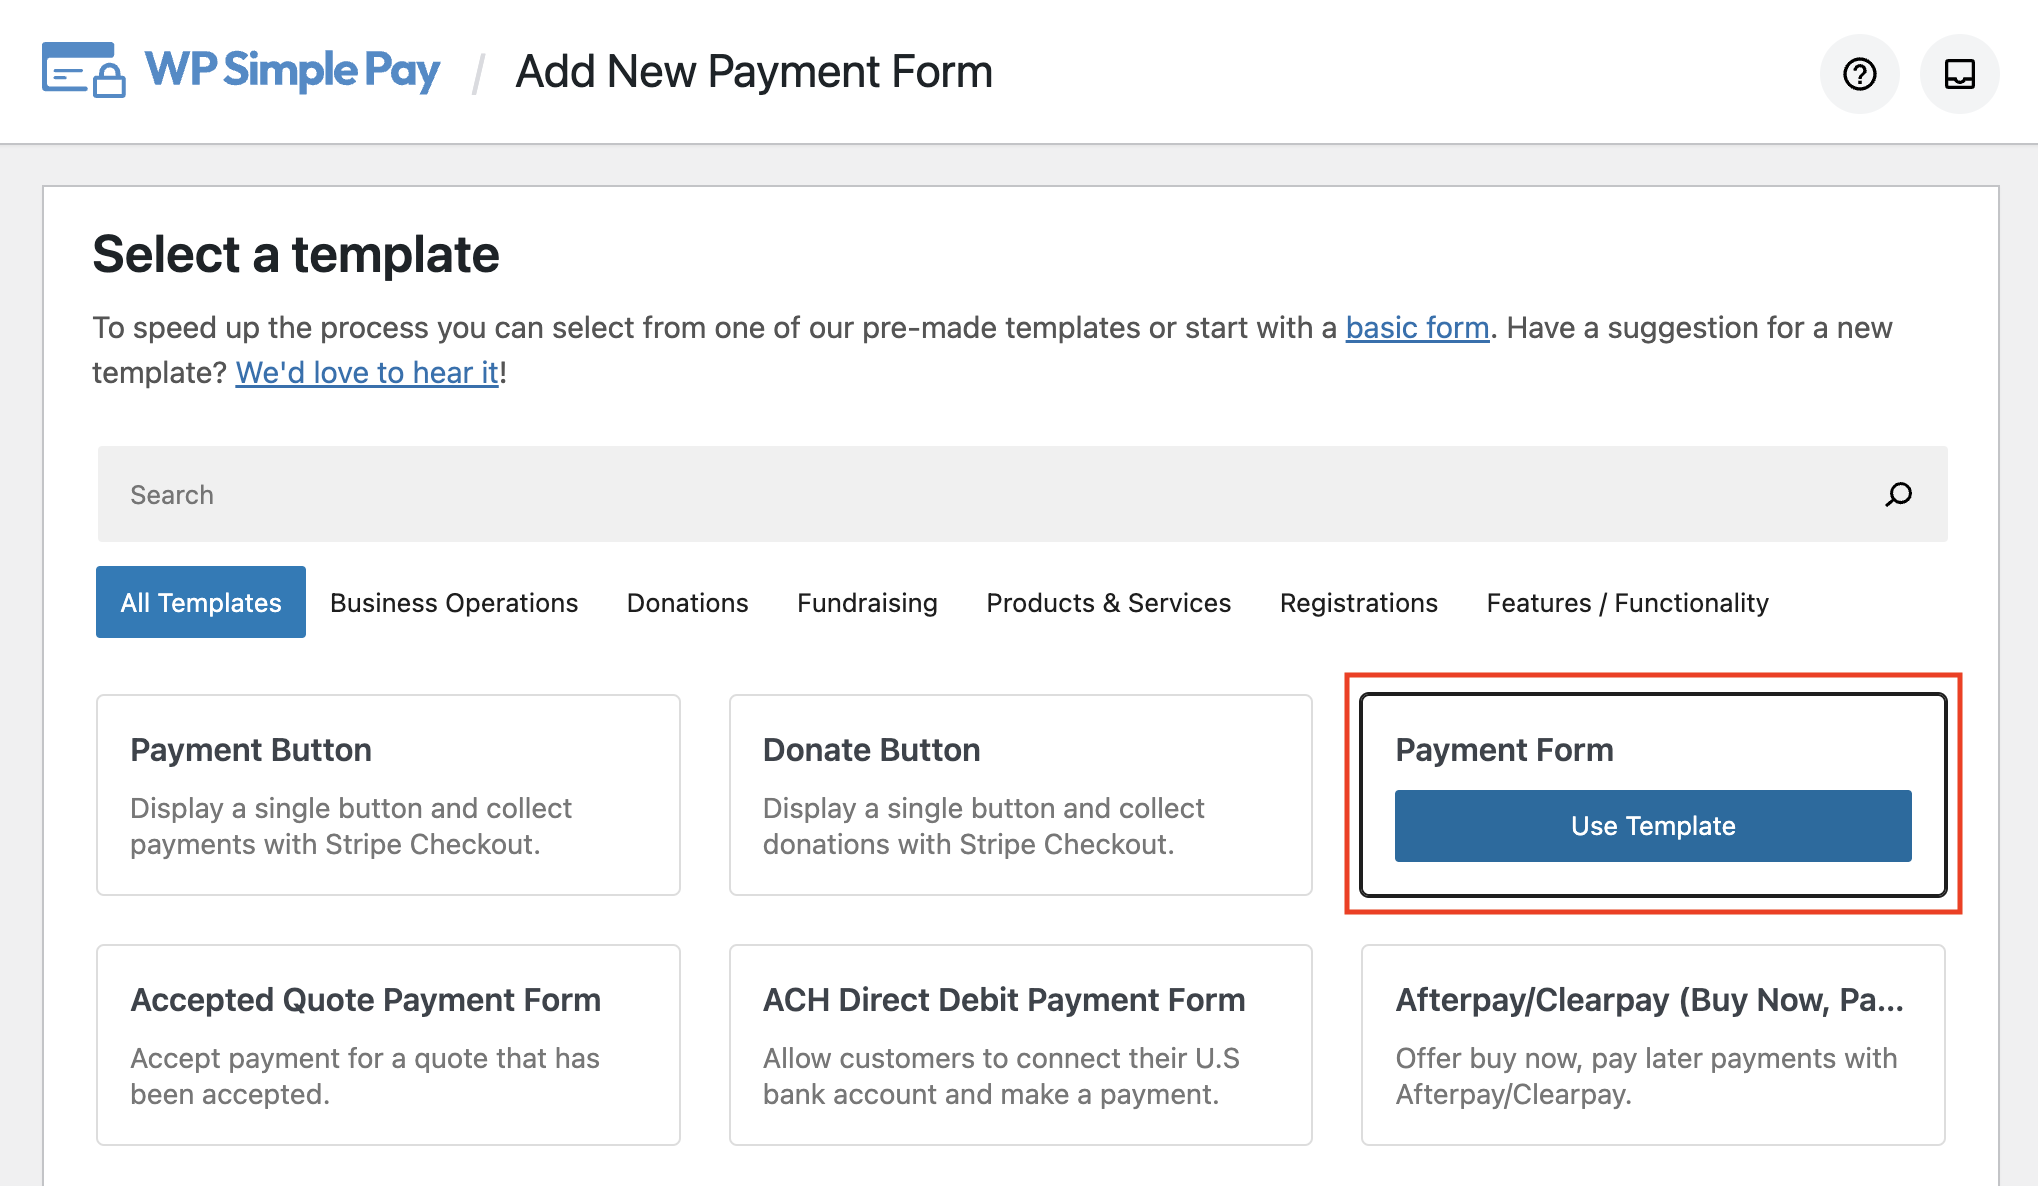
You should now be on the pre-built templates library page, where you’ll notice several different types of forms that are available to help you create payment forms quickly.
For the purpose of this tutorial, go ahead and choose the Payment Form template.
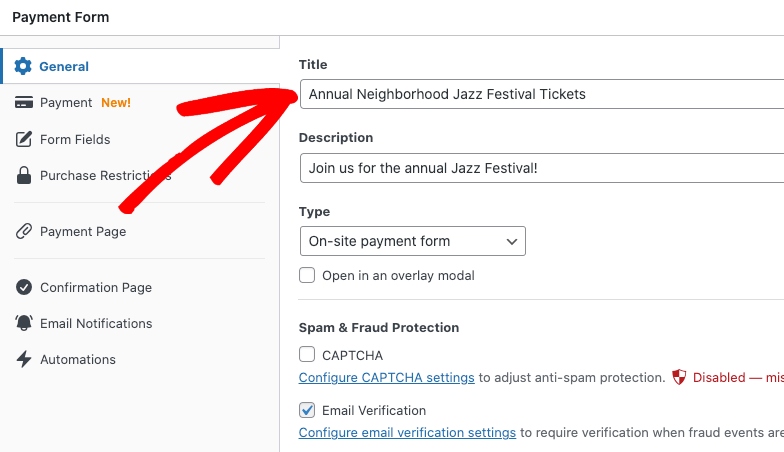
Next, from the General tab, enter the title and description of your form. Be sure to keep On-site payment form selected for the form Type. This ensures that your customers are able to complete their transactions directly on your site, reducing checkout abandonment.
Next, in the Payment tab, go ahead and check the box next to Allow purchasing multiple price options below the Purchase Mode section.
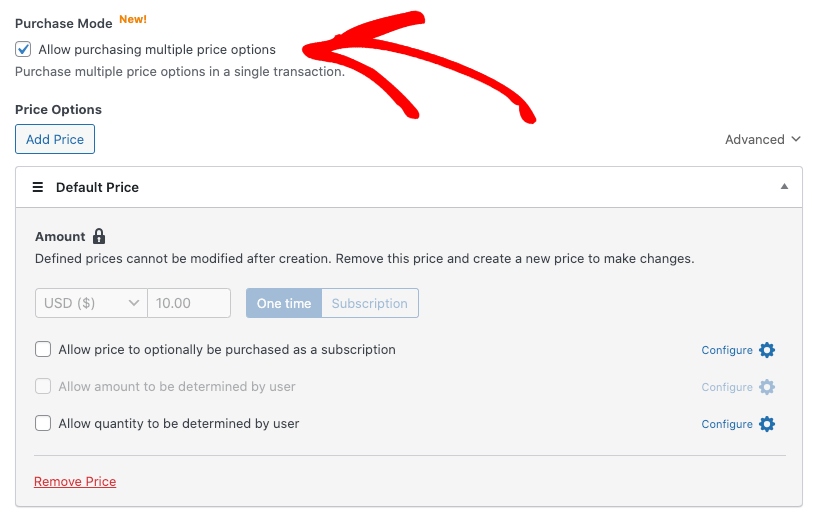
One of the best parts about WP Simple Pay is that it lets you add various price amounts and options to a single payment form. This means that if you sell things like concert tickets and event registrations, you can allow customers to select their desired amounts with ease.
Simply click on the Add Price button and enter the Label and its price amount. Then, check the box next to Allow quantity to be determined by user.
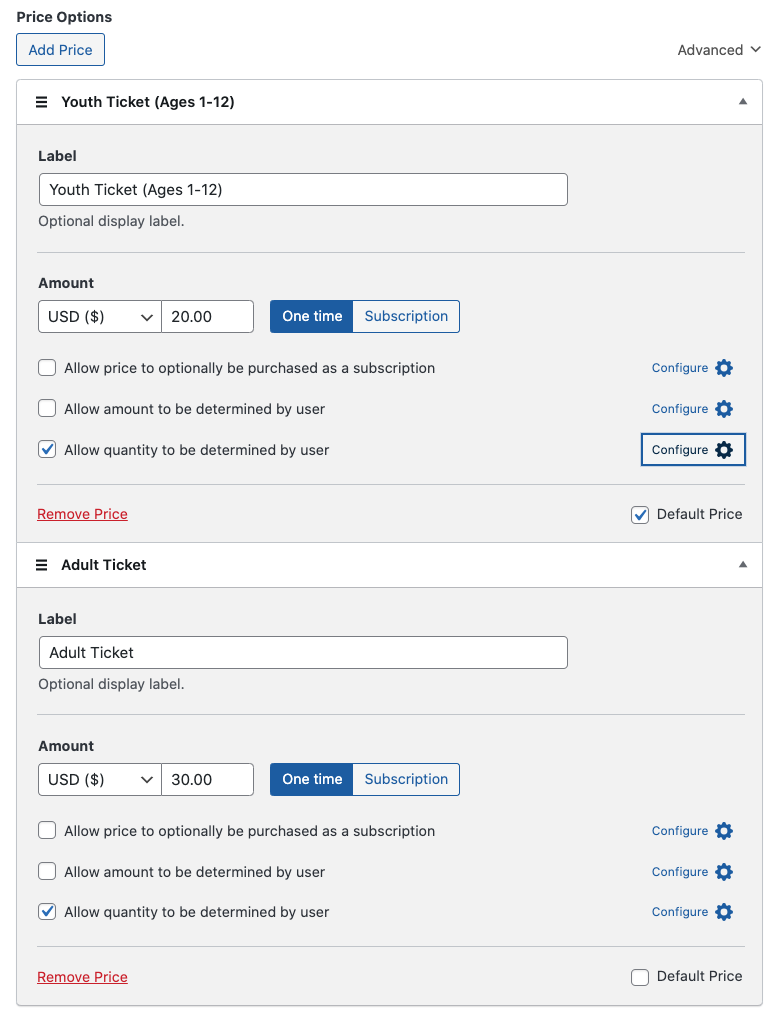
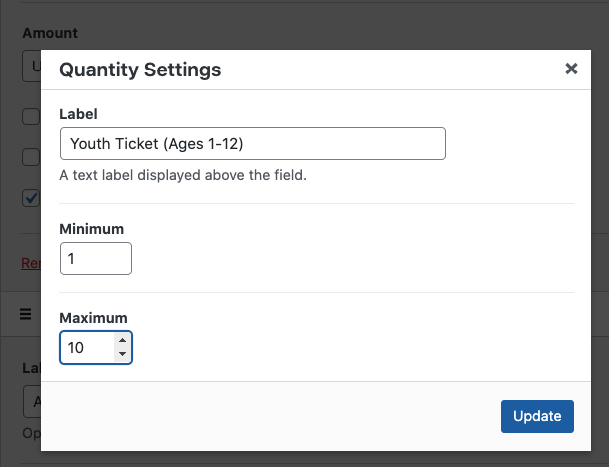
When you’ve finished adding each of your pricing options, click on the Configure icon for each of them. Next, simply add the Minimum and Maximum amounts for each price.
Now that you’ve configured the purchase limits for each of the price options, scroll down and select the payment methods you want to offer customers. For this tutorial, we’ve chosen Cards, ACH Direct Debit, and Cash App Pay.
To expand your reach and increase conversions, we highly suggest offering digital wallets as a payment method. Simply click on the Configure icon next to Card and check the box for Enable Apple Pay, Google Pay, and Microsoft Pay mobile wallets.

Next, click on the Form Fields tab and feel free to add, edit, or remove custom form fields.
Once you’ve finished configuring the form fields, go ahead and click on Publish.
Step 4: Publish the Payment Form
Now that you’ve created your payment form, it’s time to publish it on your site.
Simply go to the page or post where you want the form and click on the + icon. Next, enter WP Simple in the search field and choose the payment form you just created from the dropdown menu.
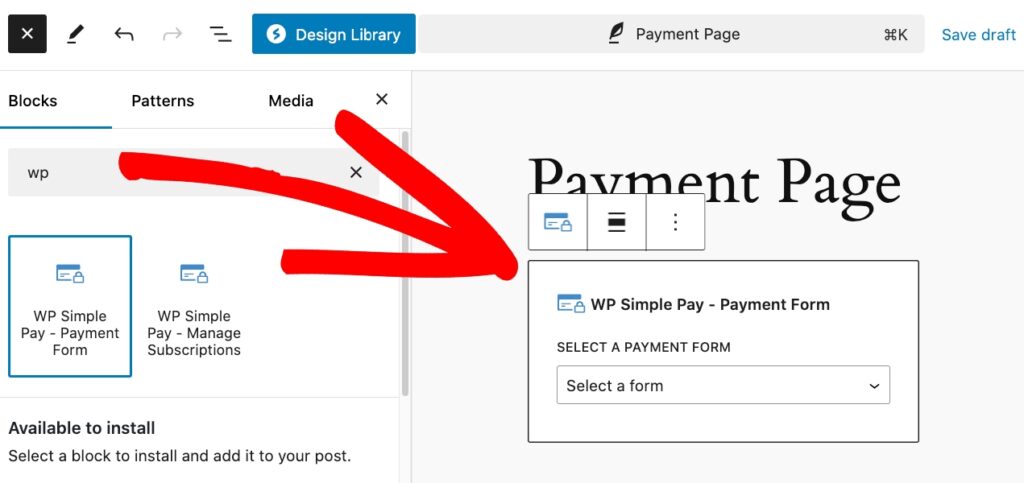
Be sure to click on Update or Publish. The payment form should be displayed on the page like the one below:
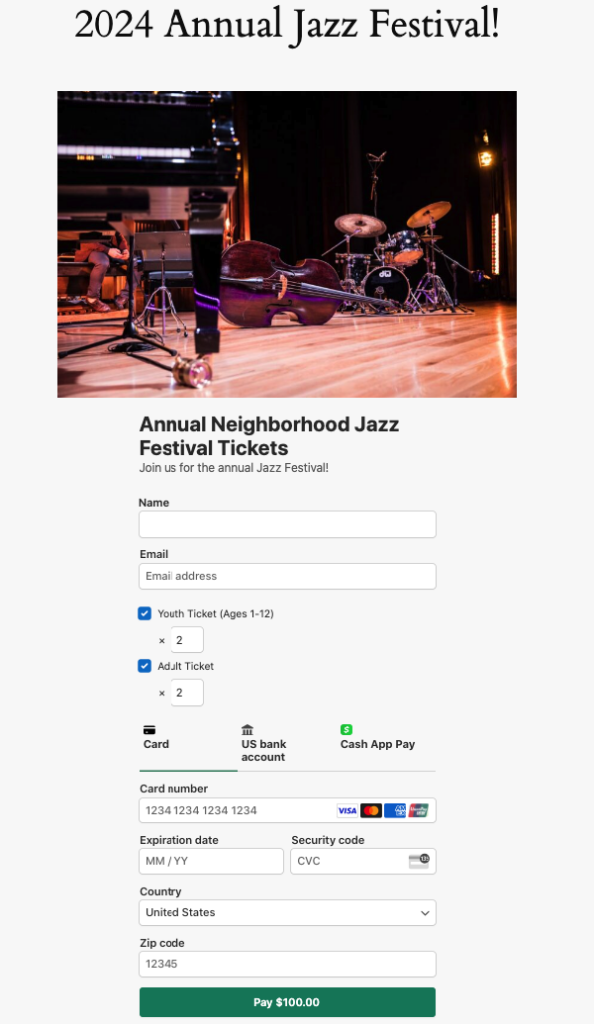
You’ve now successfully configured purchase limits using the Purchase Mode feature, ensuring that you don’t sell unavailable tickets or out-of-stock items!
If you liked this article, you might also want to check out our guide on how to accept payments during a set date range in WordPress.
What are you waiting for? Get started with WP Simple Pay today!
To read more articles like this, follow us on X.
Disclosure: Our content is reader-supported. This means if you click on some of our links, then we may earn a commission. We only recommend products that we believe will add value to our readers.


Leave a Reply