How to Create a Payment Page Abandonment Recovery Campaign in WordPress
Last updated on
Do you want to recover lost revenue and increase conversions?
Using a browse abandonment recovery campaign, you can automatically remind users about their incomplete purchases and bring them right back to the payment page on your site that hosts your payment form.
In this article, we’ll show you how to create a browse abandonment recovery campaign to help you easily bring back online shoppers who haven’t finished buying from you.
What is Payment Form Abandonment?
Payment form abandonment occurs when a customer begins the checkout process but leaves before completing the purchase. A complicated and time-consuming checkout process is often to blame, while a lack of payment method options and security concerns are also major factors in whether a visitor converts.
With browse abandonment push notifications, you can re-engage lost customers and encourage them to complete their purchases. The best part is that you can configure when to automatically send them. You can also add custom messages about a particular product or service and even offer targeted discounts.
Sending Browse Abandonment Push Notifications
Push notifications are short messages or alerts sent by a website to a user’s device. Unlike eNewsletters, which can often be ignored or sent straight to Spam, push notifications are almost impossible to miss because they are displayed directly on the user’s browser or device.
You can use them to…
- Send updates about new features or products
- Promote new content
- Notify customers about sales
- Send reminders about abandoned forms
- Keep customers up to date regarding order status
Sending a payment page abandonment push notification has never been easier, thanks to PushEngage, the best WordPress push notification plugin.
It lets you easily create triggered campaigns to drive more traffic to your site, bring back old customers, and promote sales, ultimately helping you increase revenue and grow your business.
While you can set up push notifications for all types of use cases, for the purpose of this tutorial, we’ll be creating a Browse Abandonment Recovery Campaign. This campaign will target subscribers who have browsed and abandoned your payment page with follow-ups, reminders, offers, coupons, and discounts.
How to Send a Browse Abandonment Notification
Let’s examine how easy it is to create a browse abandonment reminder notification for your site.
Step 1: Create a PushEngage Account
To create your first push notification, you’ll need to create a PushEngage account.
Simply visit the pricing page and choose the best plan for your needs. To create form abandonment campaigns, you’ll need to purchase the Premium plan. It offers advanced personalization, unlimited campaigns, up to 100,000 subscribers, and more.
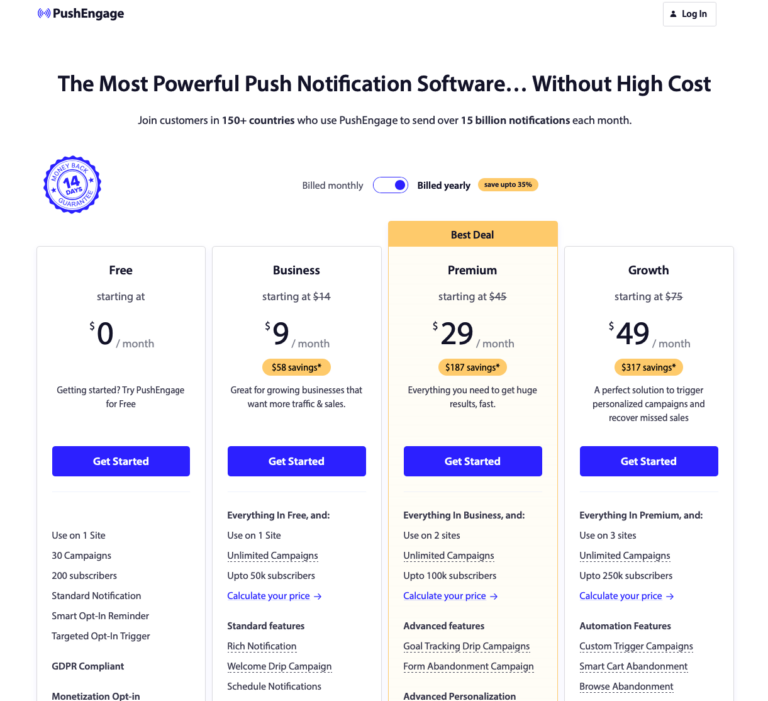
First, click on the Get Started button and sign up for a PushEngage account.
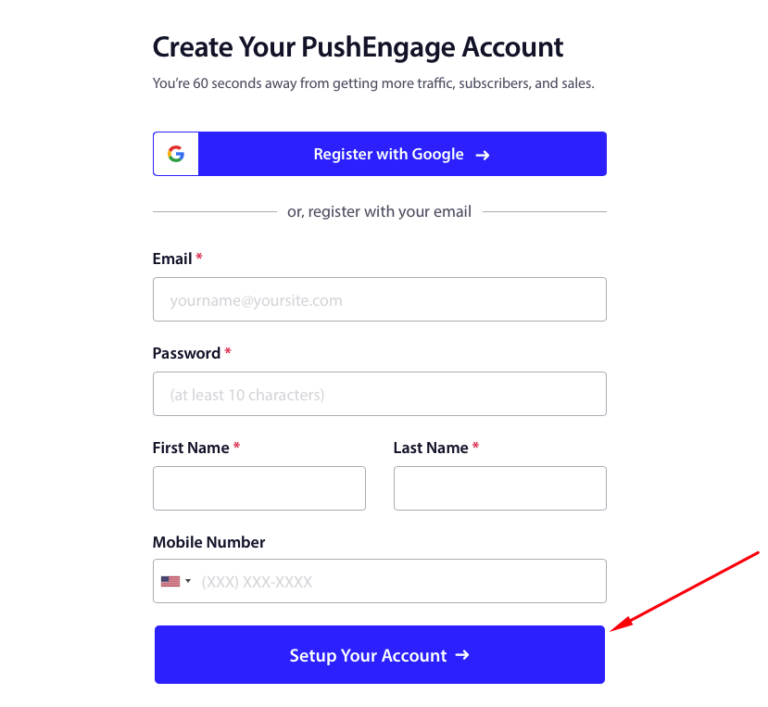
Once you’ve finished entering your e-mail, password, and additional information, click on the Setup Your Account button.
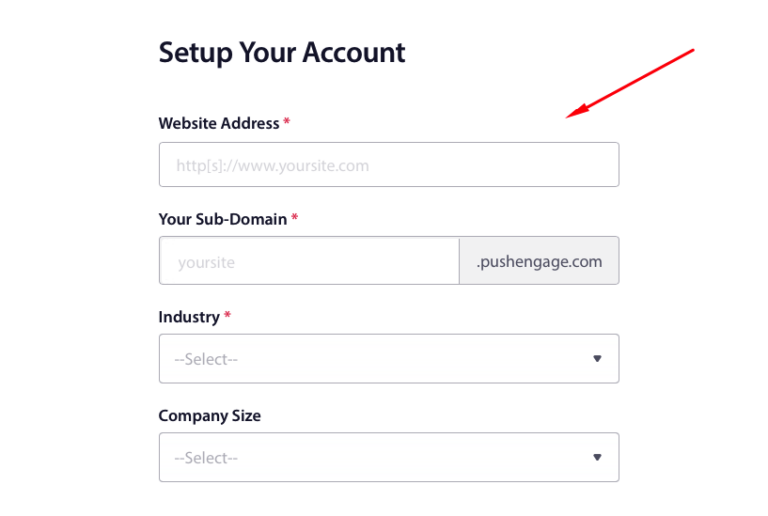
To complete the setup of your account, enter the requested information about your site and business.
Once your site has been connected to your account, you’ll be directed to the onboarding page. Here is where you’ll need to enter your site name, URL, icon, and time zone. Also, it’s a good idea to toggle the switch to Enable Geolocation.
Next, go ahead and click on the Save and Continue button.
You’ll be asked to select WordPress as your website type and to install the PushEngage plugin on your site. Click on the Install PushEngage WordPress Plugin button.
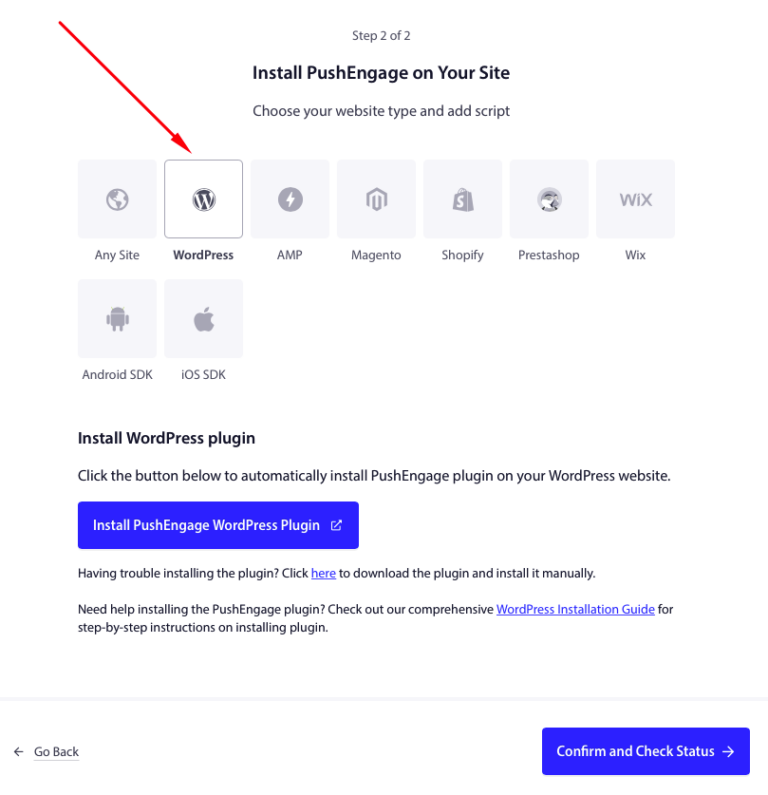
Your WordPress admin will launch in a new tab. Select Install Now and Activate after a few seconds.
The next step prompts you to claim your free account or connect an existing one. In the modal window, simply choose your site from the dropdown menu.
Next, click on the Let’s Get Started button.
When the plugin is installed and your account is connected, you’ll see a success message. Go ahead and click on the Create a Campaign button.

Step 2: Create a Triggered Campaign
Now that you’ve finished setting up your PushEngage account and connecting the plugin to your WordPress site, it’s time to create a browse abandonment push notification campaign.
First, navigate to the PushEngage Dashoard and go to Campaign » Triggered Campaigns and click on Create New Triggered Campaign.

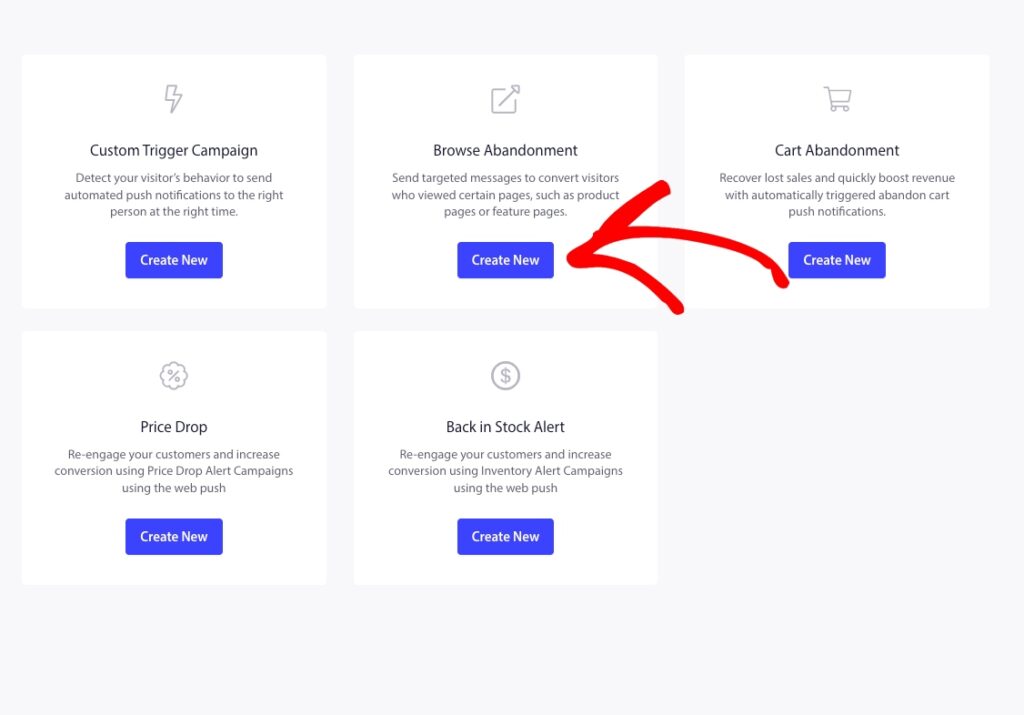
Next, select the Browse Abandonment template and click on Create New. Browse abandonment campaigns allow you to trigger a notification when visitors exit the payment page that hosts the payment form on your site.
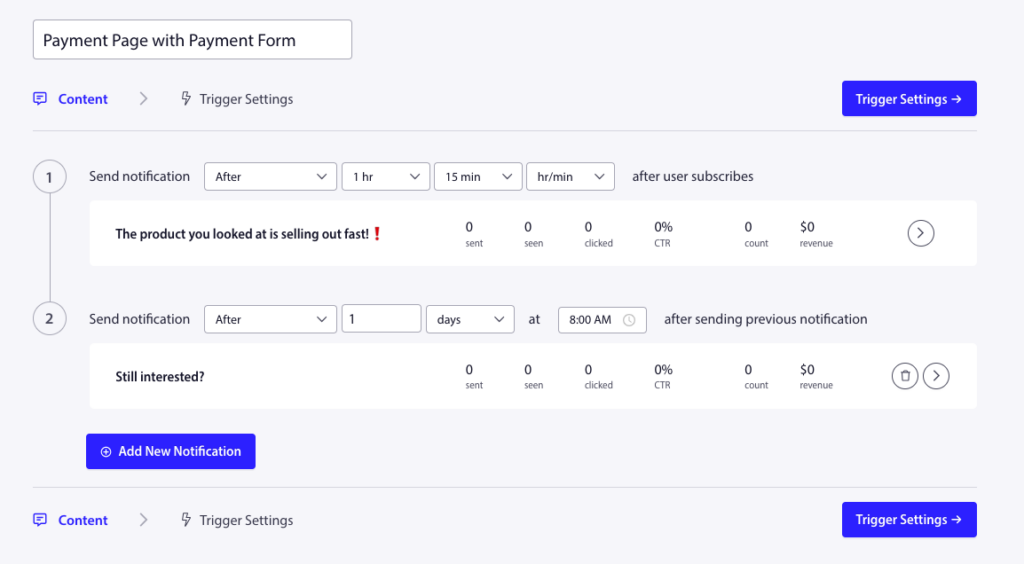
Next, you can configure the entire sequence of push notifications along with a delay in between each notification.
This particular campaign will send the reminder notification 15 minutes after the user subscribes, and one day after sending the previous notification. You can enter a custom message that reminds the visitor about the product they browsed on your payment page.
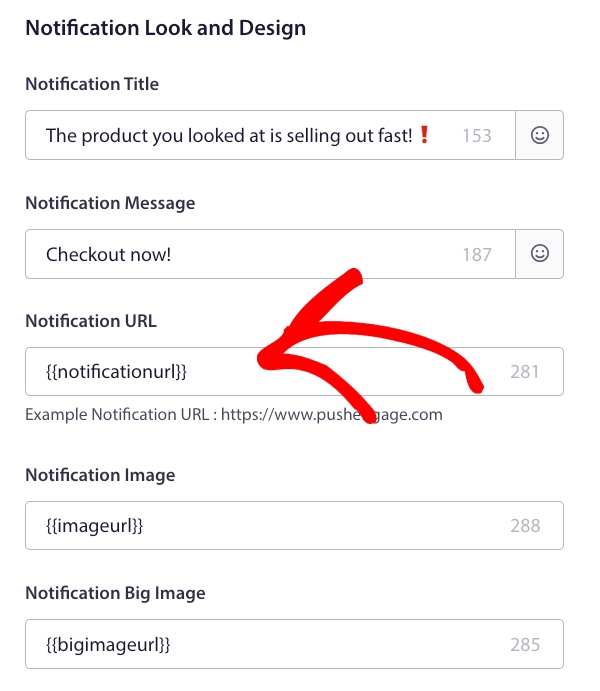
Be sure to enter the URL of your payment page in the Notification URL field to ensure that the user is redirected to the payment form once they click on the notification. You can also upload an image of the product.
Once you’ve finished configuring the content of your notifications, click on Trigger Settings.
Here, you’ll notice that the conditions for a browse abandonment campaign have been pre-configured into the sequence.

Next, click on the Integration Code button to get the code snippet you need to embed the browse abandonment campaign on your site.
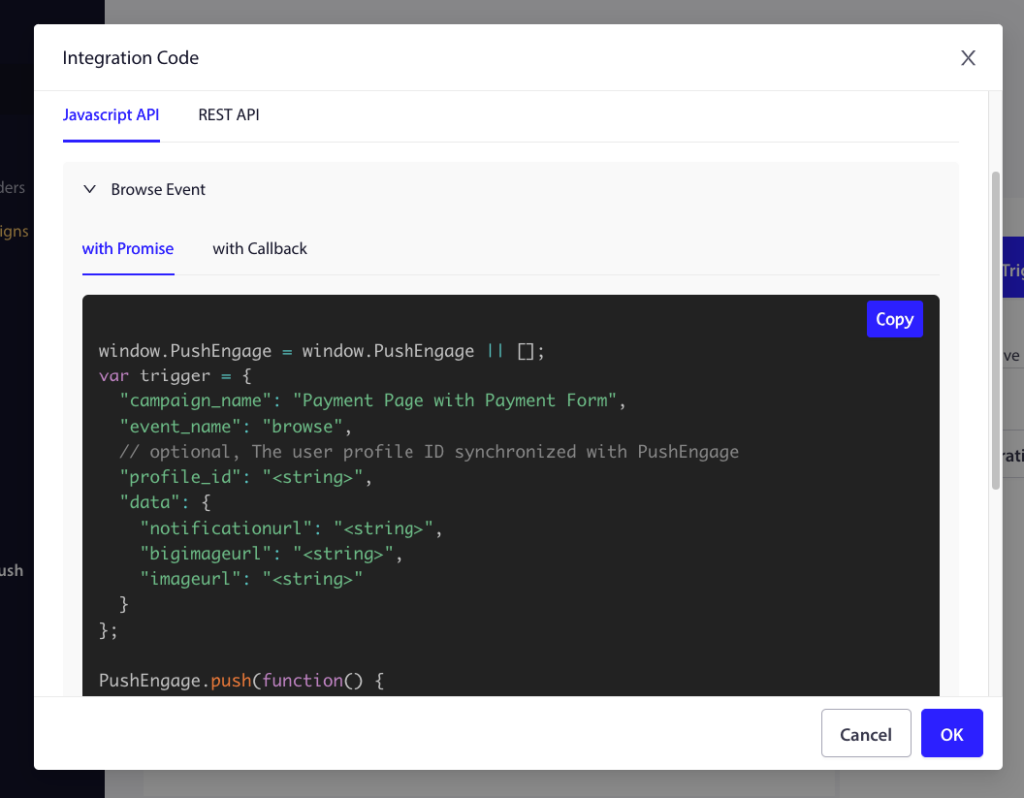
Then, copy the code and paste it into your site. You want to paste that code into the HTML <head> section of the page that you want to track. Finally, click on the Activate Triggered Campaign button.

There you have it! We hope this article has helped you learn how to create a browse abandonment push notification campaign.
If you liked this article, you might also want to check out our guide on how to send push notifications from your WordPress site.
What are you waiting for? Get started with WP Simple Pay today!
To read more articles like this, follow us on X.
Disclosure: Our content is reader-supported. This means if you click on some of our links, then we may earn a commission. We only recommend products that we believe will add value to our readers.


Leave a Reply