How to Easily Collect FPX Payments in WordPress (Step by Step)
Last updated on
Do you want to collect FPX payments in WordPress?
Financial Process Exchange (FPX) is an online popular payment processing method based in Malaysia. If you want to expand your reach in Malaysia, you might want to consider enabling FPX payments on your site.
In this article, we’ll explain how to add the FPX payment option to your site.
Why FPX Payments?
FPX is the most popular online payment method in Malaysia that processes around 90 million transactions annually.
One of the benefits of enabling FPX is that the risk of fraud or unrecognized payments is low because the customers are required to authenticate the payments with their bank.
To complete a payment, FPX redirects customers to their online banking site, where they must perform two-step authorization. The exact customer experience varies depending on their bank.
Creating a Form that Accepts FPX Payments
With WordPress, the easiest way to accept FPX payments is with WP Simple Pay.
WP Simple Pay is one of the best Stripe payment plugins for WordPress that lets you create many types of payment forms without having to write any code or set up a shopping cart.
WP Simple Pay supports payment methods like credit card payments, ACH direct debit, Google Pay/Apple Pay, and more.
So let’s dive in and create an FPX payment form with WP Simple Pay.
Table of Contents
- Step 1: Install and Activate WP Simple Pay
- Step 2: Connect Stripe With Your Site
- Step 3: Create an FPX Payment Form
- Step 4: Embed FPX Payment Form in WordPress
Step 1: Install and Activate WP Simple Pay
First, you’ll need to purchase a WP Simple Pay license.
Remove the additional 3% fee!
Most Stripe plugins charge an additional 3% fee for EVERY transaction
…not WP Simple Pay Pro!
After purchasing WP Simple Pay Pro, you’ll need to download the plugin from your purchase receipt email or from your WP Simple Pay account.
Next, you’ll need to upload, install and activate the plugin on your WordPress site. If you need more assistance here, just head to our step-by-step installation guide.
Once WP Simple Pay is activated, a setup wizard should appear automatically. During this process, you’ll need to copy your license key from your purchase receipt email or from the Licenses area of your account.
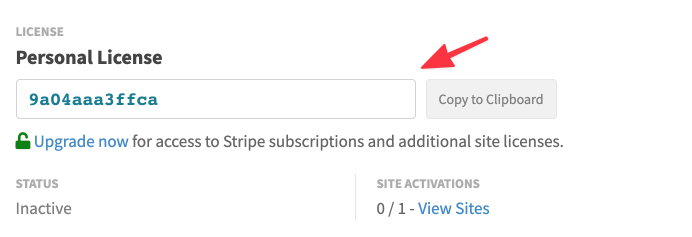
Simply copy and paste this value into the license key field in the setup wizard, then click Activate and Continue.
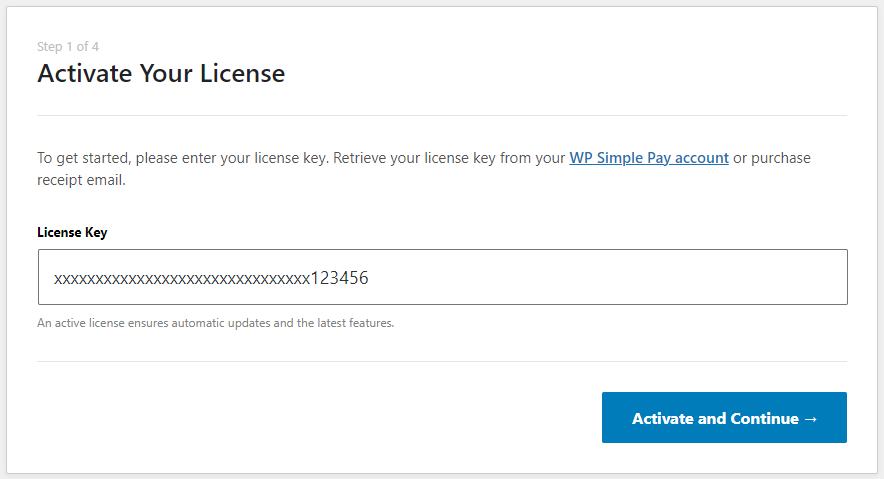
Step 2: Connect Your Stripe Account
On the next screen of the setup wizard, you should see a Connect with Stripe button.
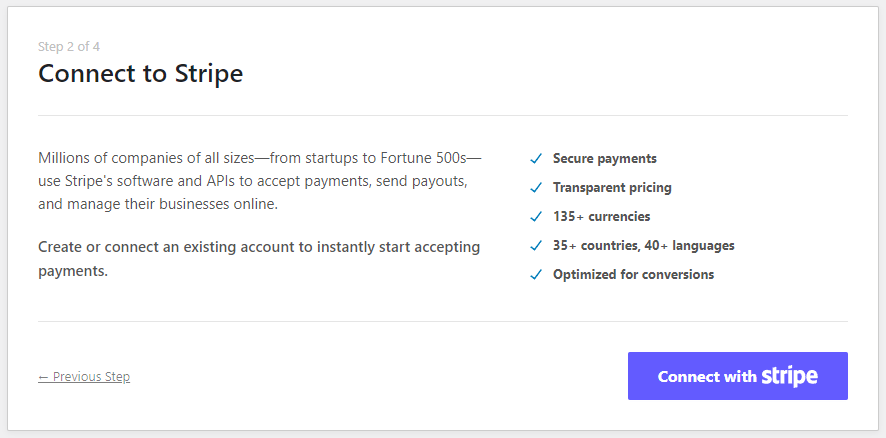
When you click this button, you’ll be taken to Stripe, where you’ll be directed to log in and connect to your existing Stripe account or create a new Stripe account. We also recommend staying in Test mode until you’ve completed setting up your payment form.
Step 3: Create an FPX Payment Form
After a couple more steps, the setup wizard should be complete. Click Create a Payment Form on the last setup step.
If you’ve already closed the setup wizard, on the left-hand menu, find and click on WP Simple Pay » Add New to create a payment form.
Now you’ll be asked to choose from an existing template to create a form. Let’s choose Multiple Payment Methods Form.
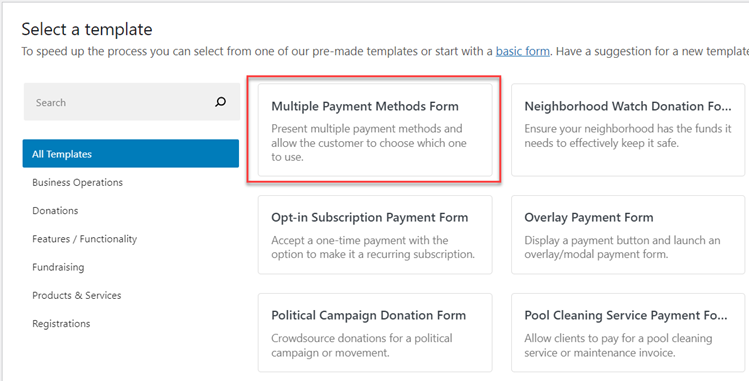
Then go ahead and configure your form settings. You can provide a name and description for your form. You can also choose between an on-site and off-site payment form. If on-site payment form is selected, your form will be hosted on your own site. Otherwise, your payment form will be hosted on Stripe.com.
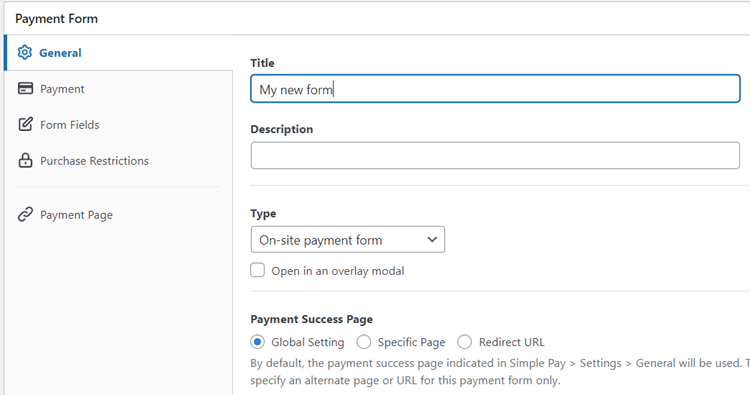
For more details, check out on-site vs. off-site checkout form.
Next up, click on the Payment tab, where you’ll need to configure price options and payment methods. Make sure to enable FPX. If you want, you can also enable other payment methods too. For more details, check out how to allow users to select their preferred payment method.
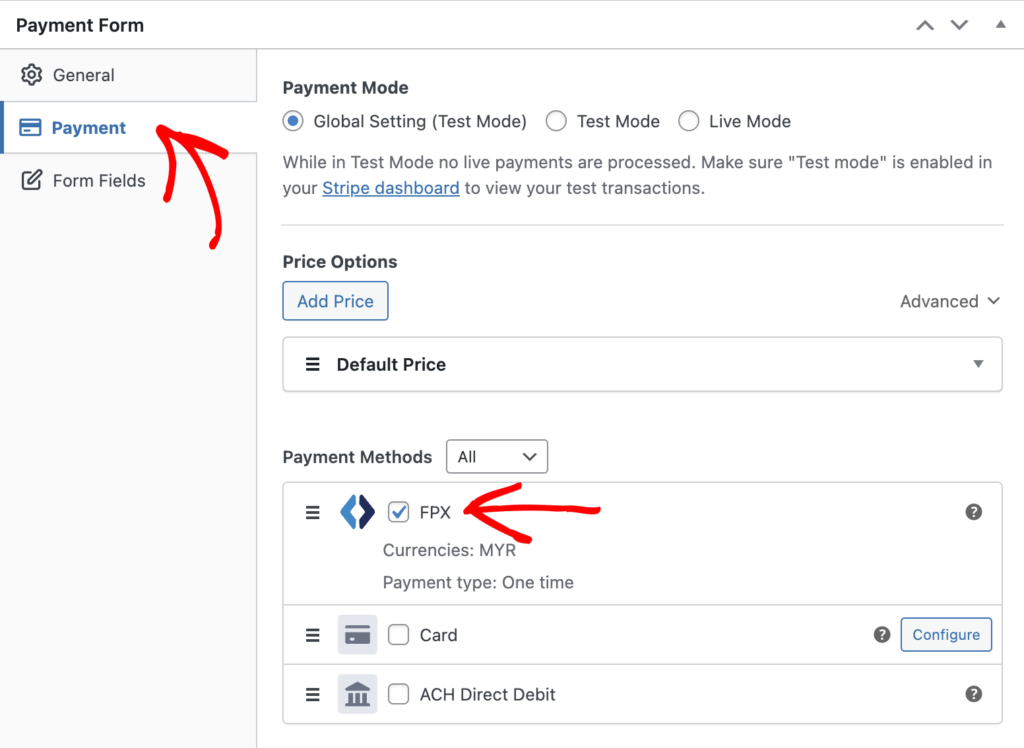
Make any other settings changes you need, including on the Form Fields tab, then you can test out the form by clicking Preview.
After you’ve fully configured your payment form, click Publish to have it ready to add to a page.
Step 4: Embed FPX Payment Form in WordPress
We’re almost done! Now let’s embed your FPX payment form on your WordPress site.
Before you do that, it’s recommended that you edit your payment form and review all your settings. As always, we also recommend leaving the form in Test mode until a few transactions process as intended. You can toggle your entire site or individual payment forms between test and live modes (read more about Test mode).
While editing an existing page or after creating a new page, click on the plus (+) sign at the top, find the WP Simple Pay block, then select it to add this block to the WordPress block editor.
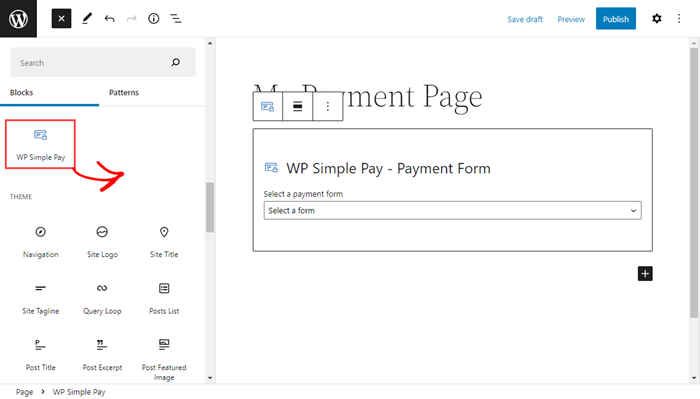
After that, select your payment form from the block’s dropdown menu. Next, you can preview your form, publish it, then visit your page to see it in action.
That’s it!
We hope you learned how to enable FPX payments in WordPress. You might also want to check out our guide on setting up automatic tax calculations for online payments in WordPress.
Start using WP Simple Pay today and enable all the advanced Stripe features on your site.
To read more articles like this, follow us on Facebook and Twitter.
Disclosure: Our content is reader-supported. This means if you click on some of our links, then we may earn a commission. We only recommend products that we believe will add value to our readers.


Leave a Reply