
How to Customize Stripe Payment Confirmation in WordPress
Last updated on

Do you want to customize Stripe payment confirmation in WordPress?
With the right Stripe plugin for WordPress, you can dynamically display payment details on the confirmation page and customize it the way you want.
In this article, we’ll show you how to create a custom confirmation page for Stripe payments in WordPress.
Creating a Custom Stripe Payment Confirmation Page
Using a Stripe WordPress plugin is the easiest way to create a custom Stripe payment confirmation page. Take a look at a few benefits…
- Easy: It’s SUPER EASY to create a custom confirmation page with a plugin. You don’t have to be a developer or a Stripe expert to build it.
- Either use global confirmation or individual one: You can use a separate confirmation page for individual payment forms if needed.
- No Stripe logging in needed: Customize the confirmation page with WordPress without logging into the Stripe dashboard.
- Auto-populate: Auto-populate payment details on the confirmation page with smart tags.
- Endless customizable options: You can add as many details as you want on your confirmation page, like images, social media profiles, and more.
To create a custom Stripe success page, all you have to do is to install the WP Simple Pay plugin. Follow the step-by-step guide below to start creating a confirmation page.
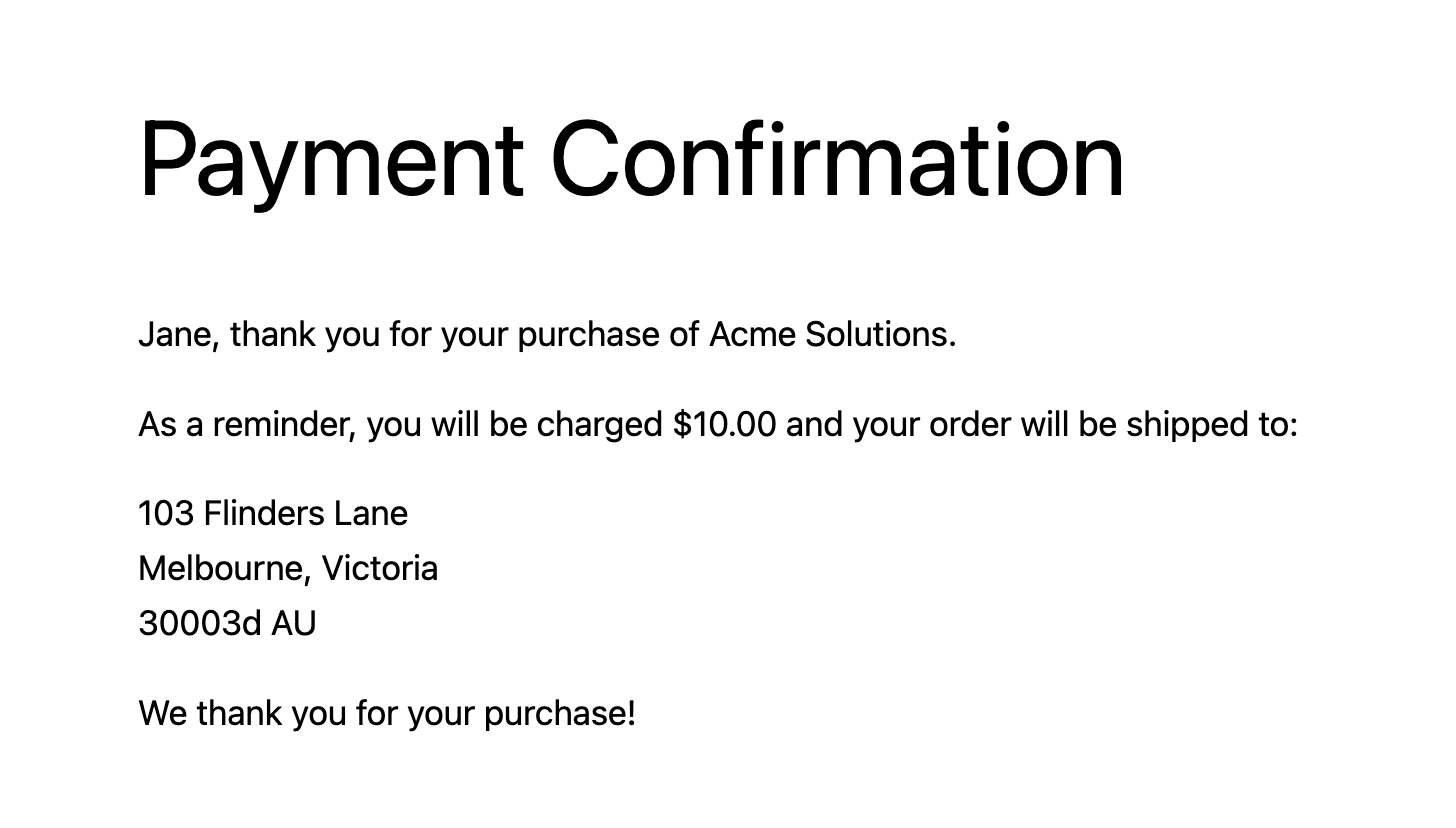
With this tutorial, you can create personal and flexible payment confirmation page such as:

The above message will display something like this on the confirmation page:
Step 1: Install and Activate WP Simple Pay
To show a custom Stripe payment confirmation page on your WordPress site, you’ll need to install WP Simple Pay.
WP Simple is one of the best WordPress Stripe plugins that lets you accept payments from Stripe-supported payment methods, such as Google Pay / Apple Pay, ACH Direct payment, credit card payments, and more.
Remove the additional 3% fee!
Most Stripe plugins charge an additional 3% fee for EVERY transaction
…not WP Simple Pay Pro!
After purchasing the WP Simple Pay plugin, download it from your purchase email receipt or from your WP Simple Pay account.
To install it, go to your WordPress backend, navigate to Add New under Plugins, and then Upload Plugin. Click Choose File and find the WP Simple Pay .zip file on your computer. Click Install Now. When the upload is complete, press the Activate Plugin button.
If you want to install WP Simple Pay via FTP, follow this guide.

If you didn’t see the setup wizard, simply head over to WP Simple Pay » Settings » Advanced tab and click the Launch Setup Wizard button.
2: Connect WordPress to Stripe
To connect your WordPress site to Stripe, click on Connect with Stripe.

Next up, enter the email address you use for your Stripe account and connect it to your site. If you don’t have a Stripe account, you can easily create one by entering your email address and completing the registration.
Upon completing this process, you’ll be shown a success page that says, “Setup Complete.” Next, click on Create a Payment Form.

Step 3: Customize Stripe Payment Confirmation
With WP Simple Pay, you can either customize the payment confirmation globally, which will be applied to all forms by default. Or you can choose the payment confirmation page individually for each payment form that you create.
Let’s take a look at how to change the default confirmation page first.
Step 3. a) Change the Default Confirmation Page
To change the default confirmation page, navigate to WP Simple Pay » Settings and then click on Payment Confirmations. On this page, you can see 3 options as follows:
- Payment Success Page
- Payment Failure Page
- Payment Cancelled Page
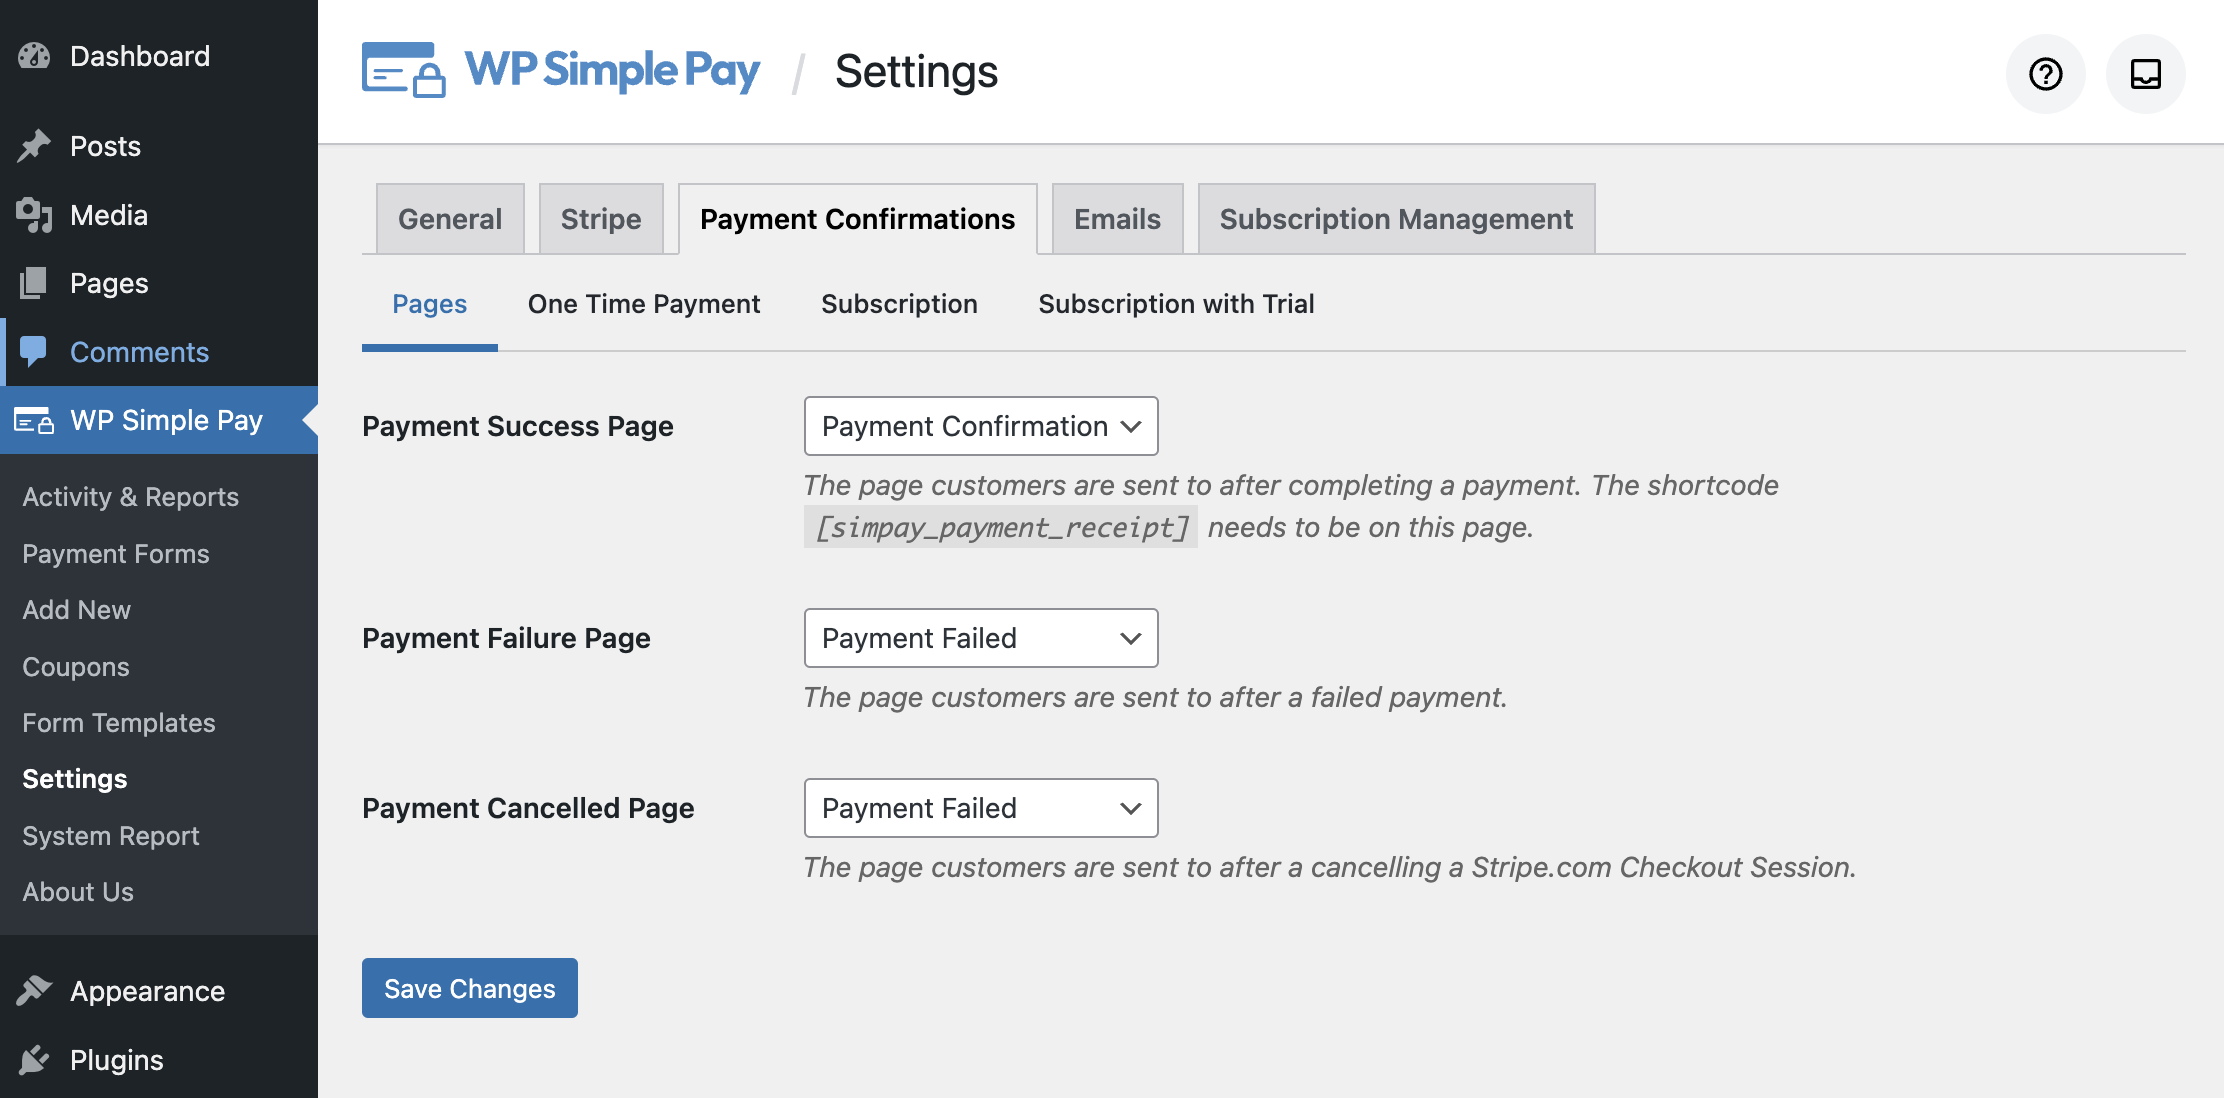
As soon as the WP Simple Pay plugin is installed and activated, the plugin automatically creates 2 pages on your site: Payment Confirmation and Payment Failed. These 2 pages are also automatically configured to show when a payment is succeeded or failed/cancelled.
To change the success page, feel free to choose from the existing pages from their respective dropdown menu. On your confirmation page, you can dynamically display payment details, like total amount, recurring amount, next invoice date, and more.
WP Simple Pay lets you customize one-time payment, subscription, and subscription with trial separately. We’ll take a look at how to customize the payment information on the confirmation page in Step 4.
Step 3. b) Choose a Separate Confirmation Page for a Form
WP Simple Pay lets you use a separate confirmation page for each form if needed. To choose a different confirmation page for a specific payment form, select the payment form that you want to update by going to WP Simple Pay » Payment Forms and then click on the payment form from the list.
Next, on the General settings page, you can configure the Payment Success Page. By default, Global Setting is chosen. Choose Specific Page to select a separate confirmation page for your form.
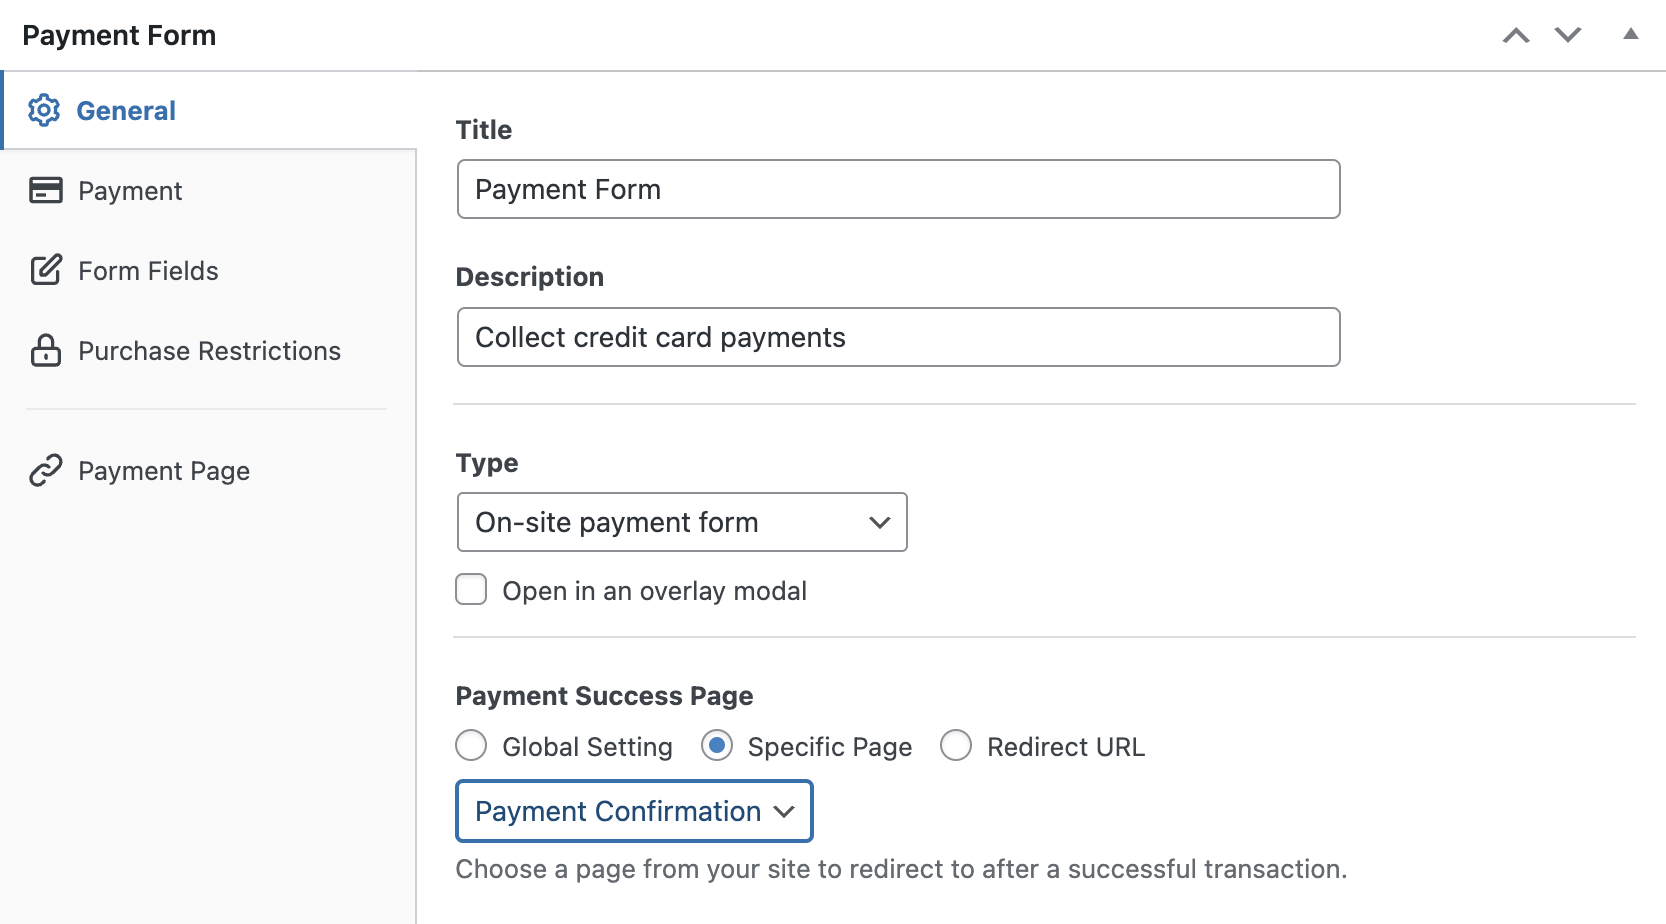
Then, click Publish or Update to update your form.
Step 4: Customize the Payment Details Info
WP Simple Pay makes it easy to customize the auto-populated payment info on your confirmation page. Simply navigate to WP Simple Pay » Settings and then click on Payment Confirmations. The plugin lets you customize one-time payment, subscription, and subscription with trial separately.
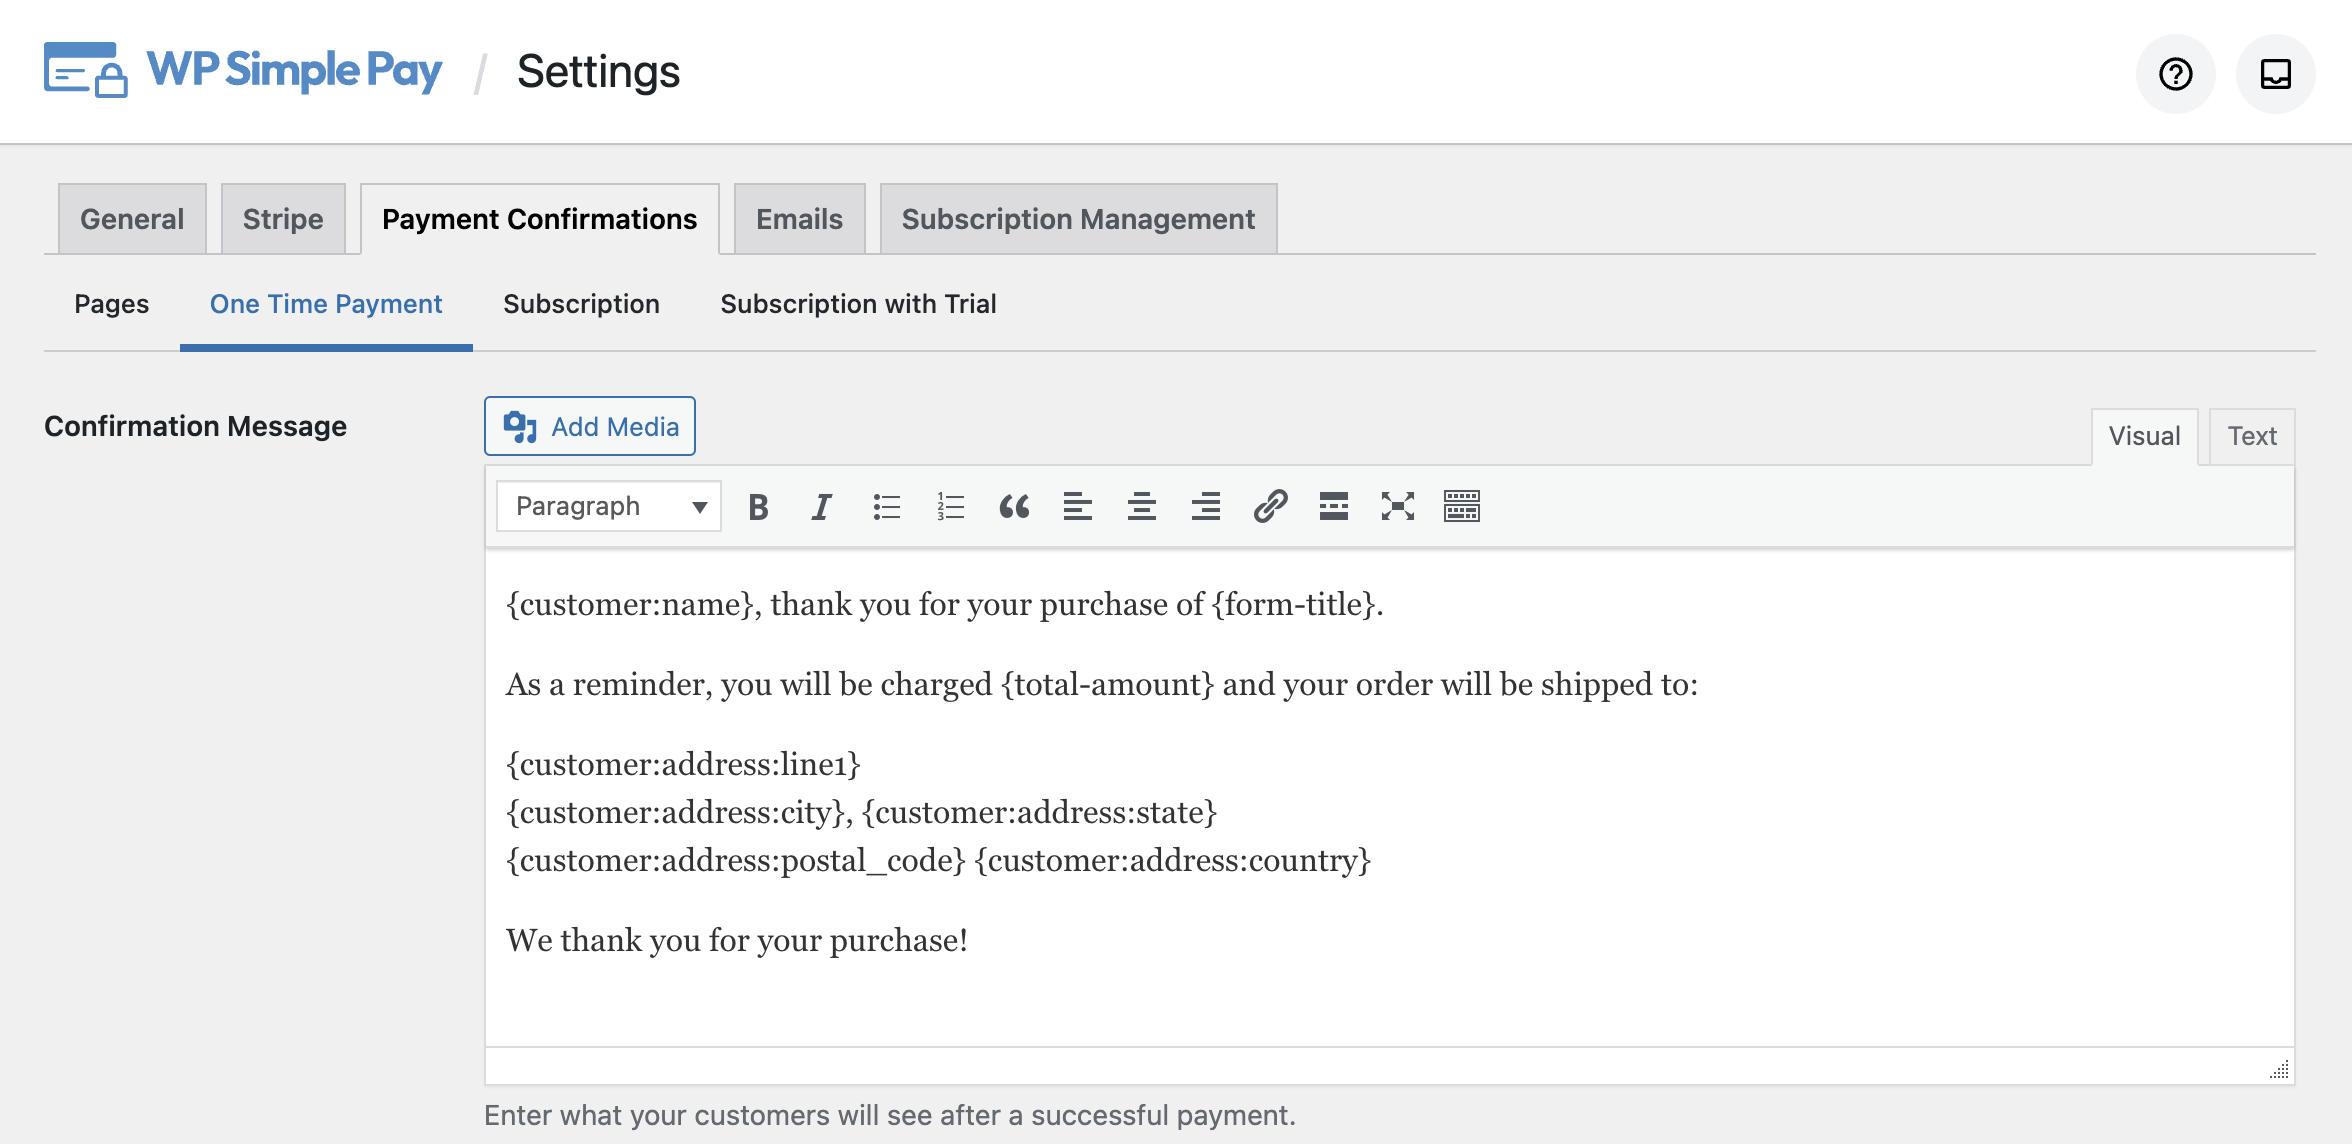
For example, if you click on the One Time Payment tab, you’ll see an editor where you can customize the payment details with the available smart tags.
Here are the available smart tags and what they do:
{form-title}
The form’s title.
{form-description}
The form’s description.
{total-amount}
The total price of the payment.
{customer-name}
The value of the Name form field.
{charge-date}
The charge date returned from Stripe.
{charge-id}
The unique charge ID returned from Stripe.
{payment-type}
The type of payment (one-time or recurring).
{card-brand}
The brand of the card used. Visa, Amex, etc.
{card-last4}
The last four digits of the card used.
{tax-amount}
The calculated tax amount based on the total and the tax percent setting.
{recurring-amount}
The recurring amount to be charged each period of the subscription plan.
{max-charges}
The total number of max charges set for an installment plan.
{trial-end-date}
The day the plan’s free trial ends.
{next-invoice-date}
The date the next invoice is due.
{update-payment-method-url}
URL to update the subscription’s payment method.
Similarly, you can update the details for Subscription and Subscription with Trial.
After making the changes, click Save Changes.
Bonus Step: Create a Payment Form
Now that you’ve set up a custom confirmation page for Stripe payments, it’s time to create a payment form and start accepting payments.
Here are a few guides to help you get started.
- Create a simple Stripe payment form
- Accept Google Pay/Apple Pay payments
- Accept Buy Now, Pay Later payments
That’s it!
We hope this article helped you learn how to easily customize Stripe payment confirmation in WordPress.
What are you waiting for? Get started with WP Simple Pay today!
To read more articles like this, follow us on Facebook and Twitter.
Disclosure: Our content is reader-supported. This means if you click on some of our links, then we may earn a commission. We only recommend products that we believe will add value to our readers.


Leave a Reply