
How to Avoid Overselling Your Inventory in WordPress
Last updated on

Have you been wondering if there’s a way to avoid overselling your inventory in WordPress?
The short answer is yes, there is!
In this article, we’ll show you how to easily avoid overselling your inventory in WordPress.
Avoiding Overselling Inventory in WordPress
Having complete control over your products, services, or time-sensitive events on your site is essential to ensuring an excellent customer experience and eliminating the need for you to process costly refunds.
Scheduling your payment forms and setting up specific purchase limits for individual price options allows you to avoid overselling out-of-stock or limited-edition products. As a result, your customers won’t be disappointed, and you don’t have to worry about manually updating your inventory on your site.
How to Avoid Overselling Inventory in WordPress
The easiest way to avoid overselling your inventory directly from your WordPress admin dashboard is to use a Stripe payments plugin that lets you set up payment form scheduling and inventory limits.
WP Simple Pay is the best Stripe payments plugin for WordPress that lets you easily accept payments and donations on your site without having to build a complicated shopping cart. It also lets you create payment forms for time-sensitive events, limited edition products, fundraisers, and just about anything else you can think of.
Using the plugin, you can easily configure specific date ranges for your payment forms as well as purchase quantity limits for specified price options.
WP Simple Pay comes with bundled tools and functionalities perfect for ensuring you don’t oversell your products or services:
- Multiple Payment Methods: Accept 10+ payment methods including credit and debit cards, ACH direct debit, Apple Pay / Google Pay / Microsoft Pay, Buy Now, Pay Later, Cash App, and more.
- On-site Payment Forms: Keep your users on your site longer by allowing them to check out directly on your site.
- Advanced Payment Form Builder: Easily create payment forms in minutes without having to learn any code.
- Custom Form Fields: Collect information from your customers to improve communications and the customer experience.
- Form Scheduling: Control when your forms start and stop accepting payments.
Without further ado, let’s take a look at how to easily avoid overselling your inventory in WordPress.
Remove the additional 3% fee!
Most Stripe plugins charge an additional 3% fee for EVERY transaction
…not WP Simple Pay Pro!
Step 1: Download and Activate WP Simple Pay in WordPress
To begin creating payment forms that help you avoid overselling your products, the first thing you’ll need to do is get the WP Simple Pay Pro plugin.
Simply go to the pricing page and choose between the Pro plan and Elite plan.
Once you are finished with the purchase of WP Simple Pay, you can download it from your purchase email receipt or from your WP Simple Pay account.
After it has been downloaded, go to your WordPress dashboard, navigate to Add New under Plugins, and then Upload Plugin.
Click Choose File and find the WP Simple Pay .zip file on your computer. Then, click Install Now. When the installation is complete after a few seconds, press the Activate Plugin button.
If you need help with this step, see our detailed guide on how to install the plugin.

If you didn’t see the setup wizard, simply head over to WP Simple Pay » Settings » Advanced tab and click the Launch Setup Wizard button.
2: Connect WordPress to Stripe
To connect your WordPress site to Stripe, click on Connect with Stripe.

Next up, enter the email address you use for your Stripe account and connect it to your site. If you don’t have a Stripe account, you can easily create one by entering your email address and completing the registration.
Upon completing this process, you’ll be shown a success page that says, “Setup Complete.” Next, click on Create a Payment Form.

Step 3: Create a Payment Form
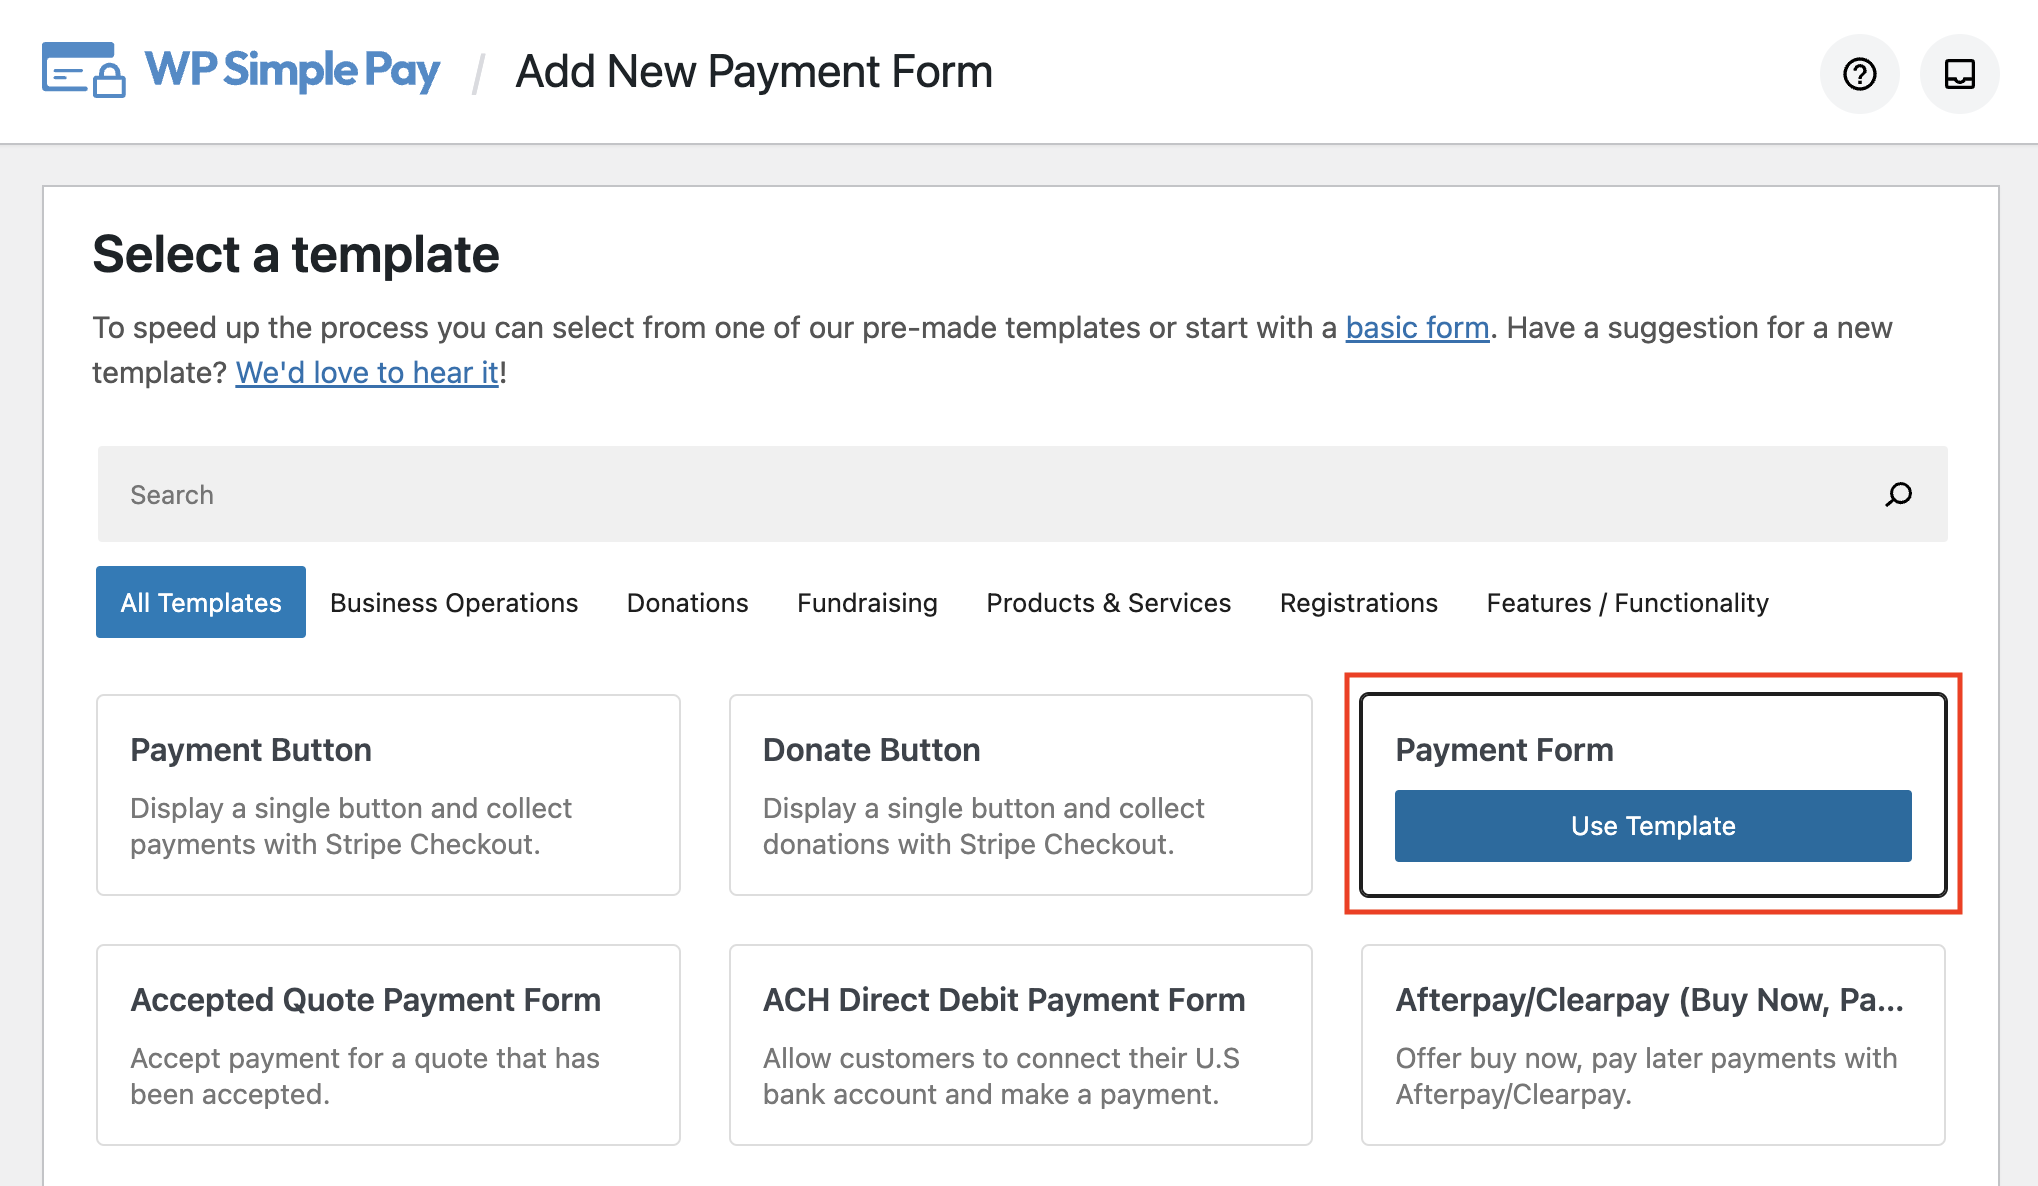
Once you click on the Create a Payment Form button, you’ll be directed to the payment form template library page, where you can choose from several different kinds of payment forms.
For the purpose of this tutorial, let’s choose the basic Payment Form.
Next, in the General tab, go ahead and enter your title and description and select On-site payment form for your form Type.
You can also configure your CAPTCHA settings here to protect against spam.
In the Payment tab, add the price to your form and choose between a one-time payment or a subscription.
For more information on setting up recurring payments, see our step-by-step tutorial.
You’ll notice there’s a list of available payment method options. For the sake of this tutorial, let’s go ahead and choose Card.
Next, click on the Form Fields tab. This is where you can add or remove custom fields to your form. Add Name, and Shipping Address and be sure to check the Required box for the Name field to ensure your customers fill it in during checkout.
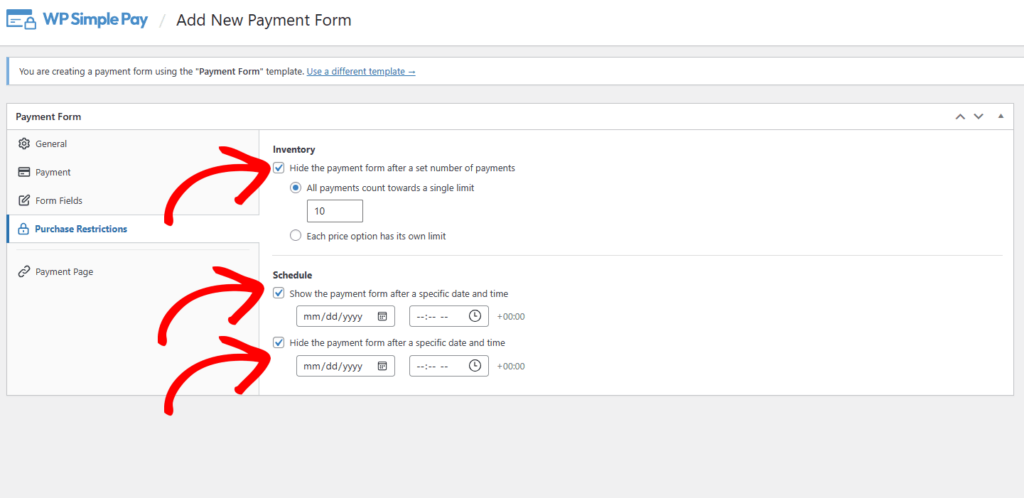
Step 4: Add Purchase Restrictions to Your Payment Form
Now that you’ve created your payment form, it’s time to configure purchase restrictions so you can avoid overselling your inventory.
Simply go to the Purchase Restrictions tab and enter your purchase limits and date ranges.
If you have different price options, you can set up individual limits based on the amount you have available.
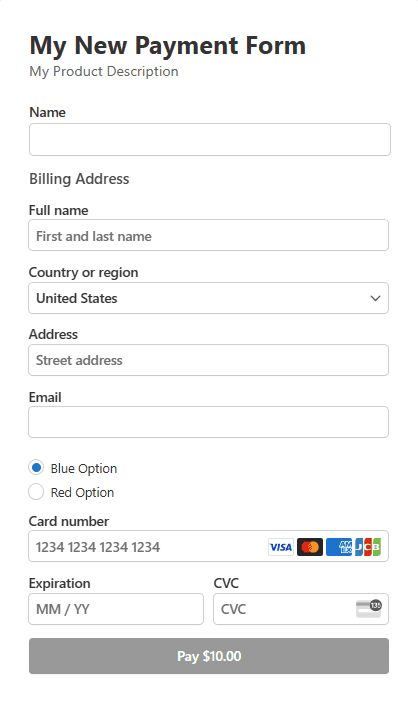
When you’ve finished adding your purchase restrictions, go ahead and click save. Be sure to preview your form. Once you’re happy with the outcome, publish your form.
It will look something like the one below:
Step 5: Add Your Payment Form to a Page
All you need to do now is embed your payment form to a page on your site. You can easily do this by going to the page or adding a new one that you want your form to be.
Then, click on the + icon to add the WP Simple Pay block. Choose the form you just created and click on Publish or Update.

There you have it! You’ve created a payment form with scheduling and purchase restrictions to help avoid overselling your inventory.
If you liked this article, you might also want to check out how to sell limited edition products in WordPress.
What are you waiting for? Get started with WP Simple Pay today!
To read more articles like this, follow us on X.
Disclosure: Our content is reader-supported. This means if you click on some of our links, then we may earn a commission. We only recommend products that we believe will add value to our readers.


Leave a Reply