
How to Accept Stripe Payments in Elementor (3 Easy Ways)
Last updated on

Are you using Elementor and wondering how to collect payments via Stripe on your site?
The free Elementor plugin doesn’t let you accept Stripe payments on your site without a third-party Stripe plugin or an integration.
Even though Elementor Pro comes with a Stripe button widget, it’s not intuitive and provides you with limited functionalities,
In this article, we’ll show you how to EASILY accept Stripe payments with the free or Pro Elementor plugin, the right way.
Downsides of Accepting Stripe Payments in Elementor
The problem with the default Stripe button widget in Elementor Pro is that it’s not at all an intuitive solution. To get it to work, you need to create an API key, copy and paste the code, and so on.
You’re also supposed to make adequate adjustments in your Stripe account for certain functions to work, like tax.
Even when it works, the functionalities you get are limited. For example, there is…
- No way to accept multiple payment methods supported by Stripe, like a direct bank transfer
- No support for advanced Stripe features, like recurring payments, Buy Now Pay Later, installment payments
- No way to customize email receipts the way you want
- No additional anti-spam measures to protect your Stripe account, like email verification for payments
- No way to view Stripe payment details in WordPress
Using WP Simple Pay, the best Stripe plugin for WordPress, is the EASIEST way to accept Stripe payments on your WordPress site.
It seamlessly integrates with both the free and paid Elementor versions and also supports advanced Stripe features like recurring payments, Buy Now Pay Later, installment payments, and more.
3 Ways to Add Stripe to Your Elementor Site
Here are 3 ways to accept Stripe payments on your WordPress site powered by Elementor.
- Embed a Stripe button: By adding a Stripe payment button, you can either redirect users to Stripe checkout or show an overlay payment form.
- Embed a Stripe Forms: Accept payments by embedding a payment form on your site.
- Using Elementor’s Widgets: Integrate WP Simple Pay with Elementor widgets like Button, Call to Action, and Pricing Table. With these widgets, you can accept one-time, recurring, or even installment payments.
Now let’s take a look at how to enable Stripe payments in Elementor with WP Simple Pay.
Step 1: Install WP Simple Pay on Your Site
First things first. Go ahead and install WP Simple Pay on your WordPress site.
After purchasing the WP Simple Pay plugin, download it from your purchase email receipt or from your WP Simple Pay account.
Then log into your WordPress admin panel and install the plugin on your site.
If you want to install it via FTP, follow this guide.
Remove the additional 3% fee!
Most Stripe plugins charge an additional 3% fee for EVERY transaction
…not WP Simple Pay Pro!
As soon as the plugin gets activated, you’ll be prompted to connect your Stripe account with your WordPress site.

Follow the on-screen guidance and connect your Stripe account with your site to start accepting payments.
Step 2: Create a Stripe Payment Button / Form
The next thing you’ll need to do is to create a Stripe payment button or a payment form.
To create a payment button or a form, head over to WP Simple Pay » Add New. Then choose from one of the payment form templates.
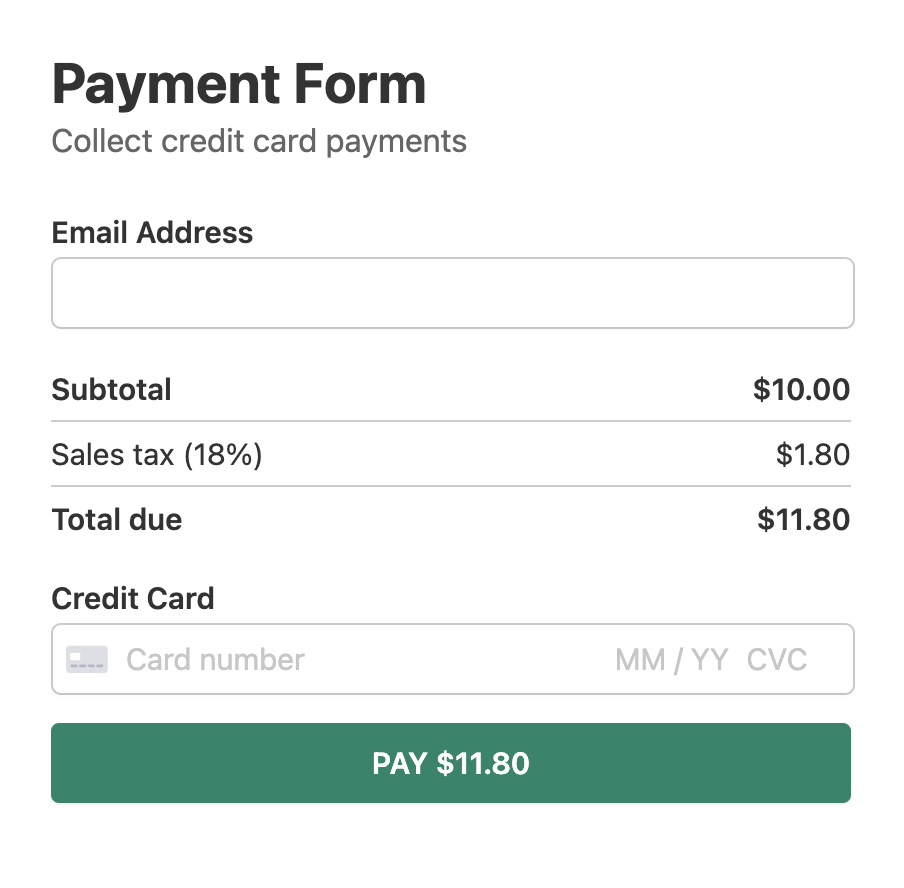
WP Simple Pay comes with loads of templates to choose from. You can preview the template before selecting it. When you find the right template, select it and configure it per your needs.
Each template comes preselected with specific options custom-tailored to different needs. For example, if you choose a donation form template, the preselected options would be tailored to raising funds for a non-profit organization, such as a radio button for donations with different amounts.

No matter which template you choose, you can always customize the options later on. For example, you can customize details like pricing options, payment methods, and more.
WP Simple Pay enables you to create and embed a button or a payment form on your website. If you decide to embed a button, then you can either redirect users to Stripe checkout or show an overlay payment form, where you can customers can submit their payment details.
When the form is ready, you can make some test payments and publish it on your site.
For more details on creating a payment form/button, you can check out how to accept Stripe payments with WordPress.
Step 3: Integrate Stripe With Elementor
With WP Simple Pay, you can accept Stripe payments in 3 ways on your Elementor-powered website.
- Add a payment button to your site and redirect users to Stripe checkout or show an overlay payment form when the button is clicked.
- Embed a payment form on your site by using the block editor or using a shortcode.
- Use the pricing table widget and integrate Stripe with the button.
Embed Your Stripe Buttons or Forms
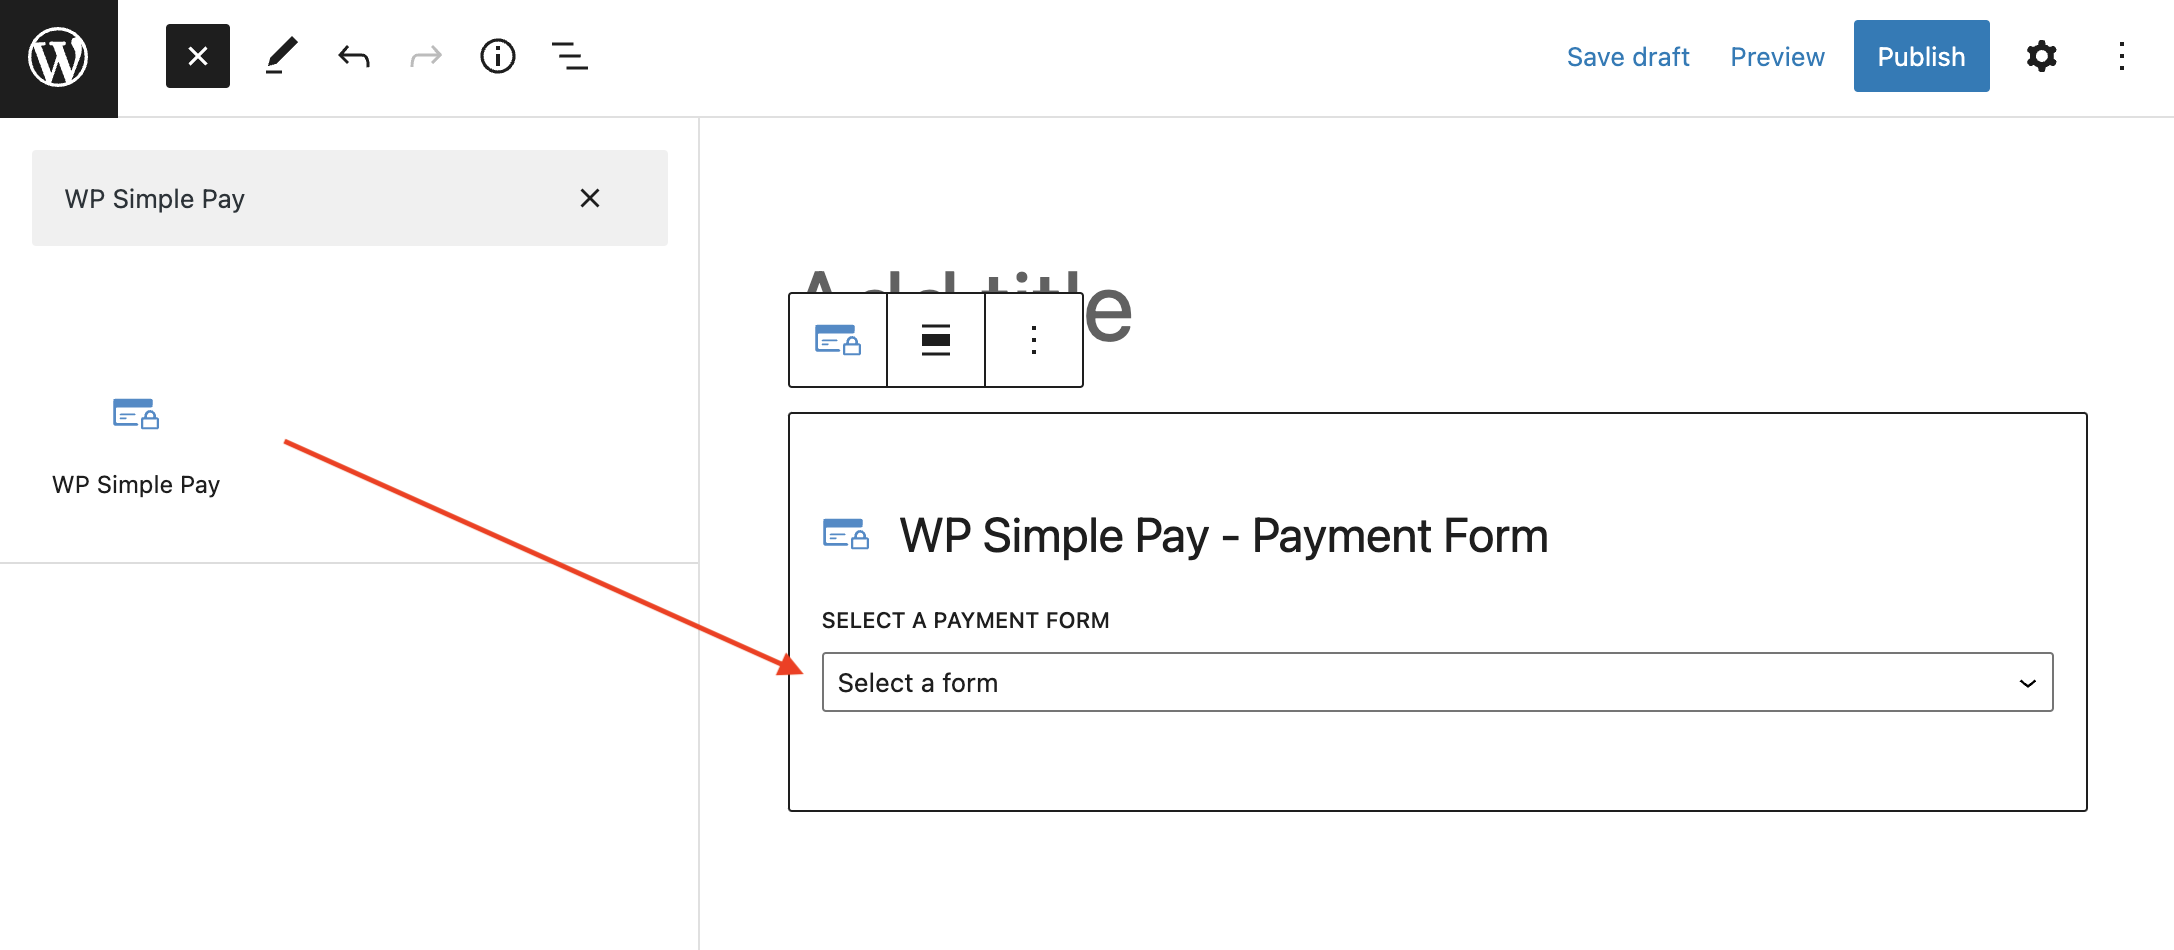
To embed the form or a button on the block editor, go to the post or page where you want to publish it. Then click on the + icon to add the WP Simple Pay block. Then choose a form you just created. And then, click Publish or Update.
Alternatively, you can use the form’s shortcode and paste it anywhere on your site where you want to embed it.
Embed Using Elementor’s Button, Call to Action or Pricing Table Widgets
If you’d rather embed a payment button with Elementor’s Button, Call to Action or Pricing Table widgets, all you need to do is to drag and drop the right widget where you want to embed it on your Elementor editor.

Then on the left, look for the WP Simple Pay option and choose the right button that you want to embed from the list.
That’s it!
We hope this article helped you learn how to integrate Stripe with Elementor, the right way.
If you liked this article, you might also want to check out how to accept recurring payments with WordPress.
What are you waiting for? Get started with WP Simple Pay today!
To read more articles like this, follow us on X.
Disclosure: Our content is reader-supported. This means if you click on some of our links, then we may earn a commission. We only recommend products that we believe will add value to our readers.


Leave a Reply