How to Generate More Consistent Revenue on Your WordPress Site (Easy Way)
Last updated on
Wondering how you can generate more consistent revenue on your WordPress site?
The benefits of earning a stable stream of income can propel your business in so many ways!
Letting customers or members enroll in recurring payment plans, whether weekly, monthly, or yearly, provides more than just a stable flow of income. This predictable revenue also enables you to make strategic decisions about your business’s future.
Additionally, if your business model is based on recurring products or services, getting customers to opt-in to payment plans is essential to your success.
In this article, we’ll show you an easy way to encourage customers to sign up for recurring payment plans on your WordPress site so you can generate consistent income for your business.
Offering Subscription Plans in WordPress
To generate consistent income on your WordPress site through subscriptions, you’ll first need to choose a WordPress payments plugin that supports automatic recurring payments.
WP Simple Pay, the best Stripe payments plugin, lets you easily create flexible subscription payment forms for products, services, memberships, registrations, and more.
One of the best parts about the plugin is that it also enables your customers to manage their own subscriptions directly from your site so that you don’t need to spend time manually renewing, cancelling, or updating payment details.
You can also use the plugin to set up customized cancelled subscription email messages to help you bring back lost customers.
On top of all that, these emails allow you to collect useful feedback to help you improve your products or services.
With WP Simple Pay, you can also…
- Gain more subscribers by offering free trial periods.
- Cover upfront costs for tailored services using a setup fee.
- Automatically bill subscribers weekly, monthly, or yearly.
- Increase average order value by offering flexible installment plans.
- And more…
Now that we’ve covered the benefits of offering subscription payments, let’s take a look at a crafty way to get your customers to subscribe to your products or services.
Step 1: Install and Activate WP Simple Pay
To get started, install and activate WP Simple Pay on your WordPress site. It’s super easy!
Once you’ve completed your purchase on the pricing page, you’ll need to download the .zip file from your account dashboard or your email confirmation. Next, simply upload the plugin to your WordPress site.
If this is your first time installing a plugin, don’t worry. Follow our step-by-step guide to installing WP Simple Pay.
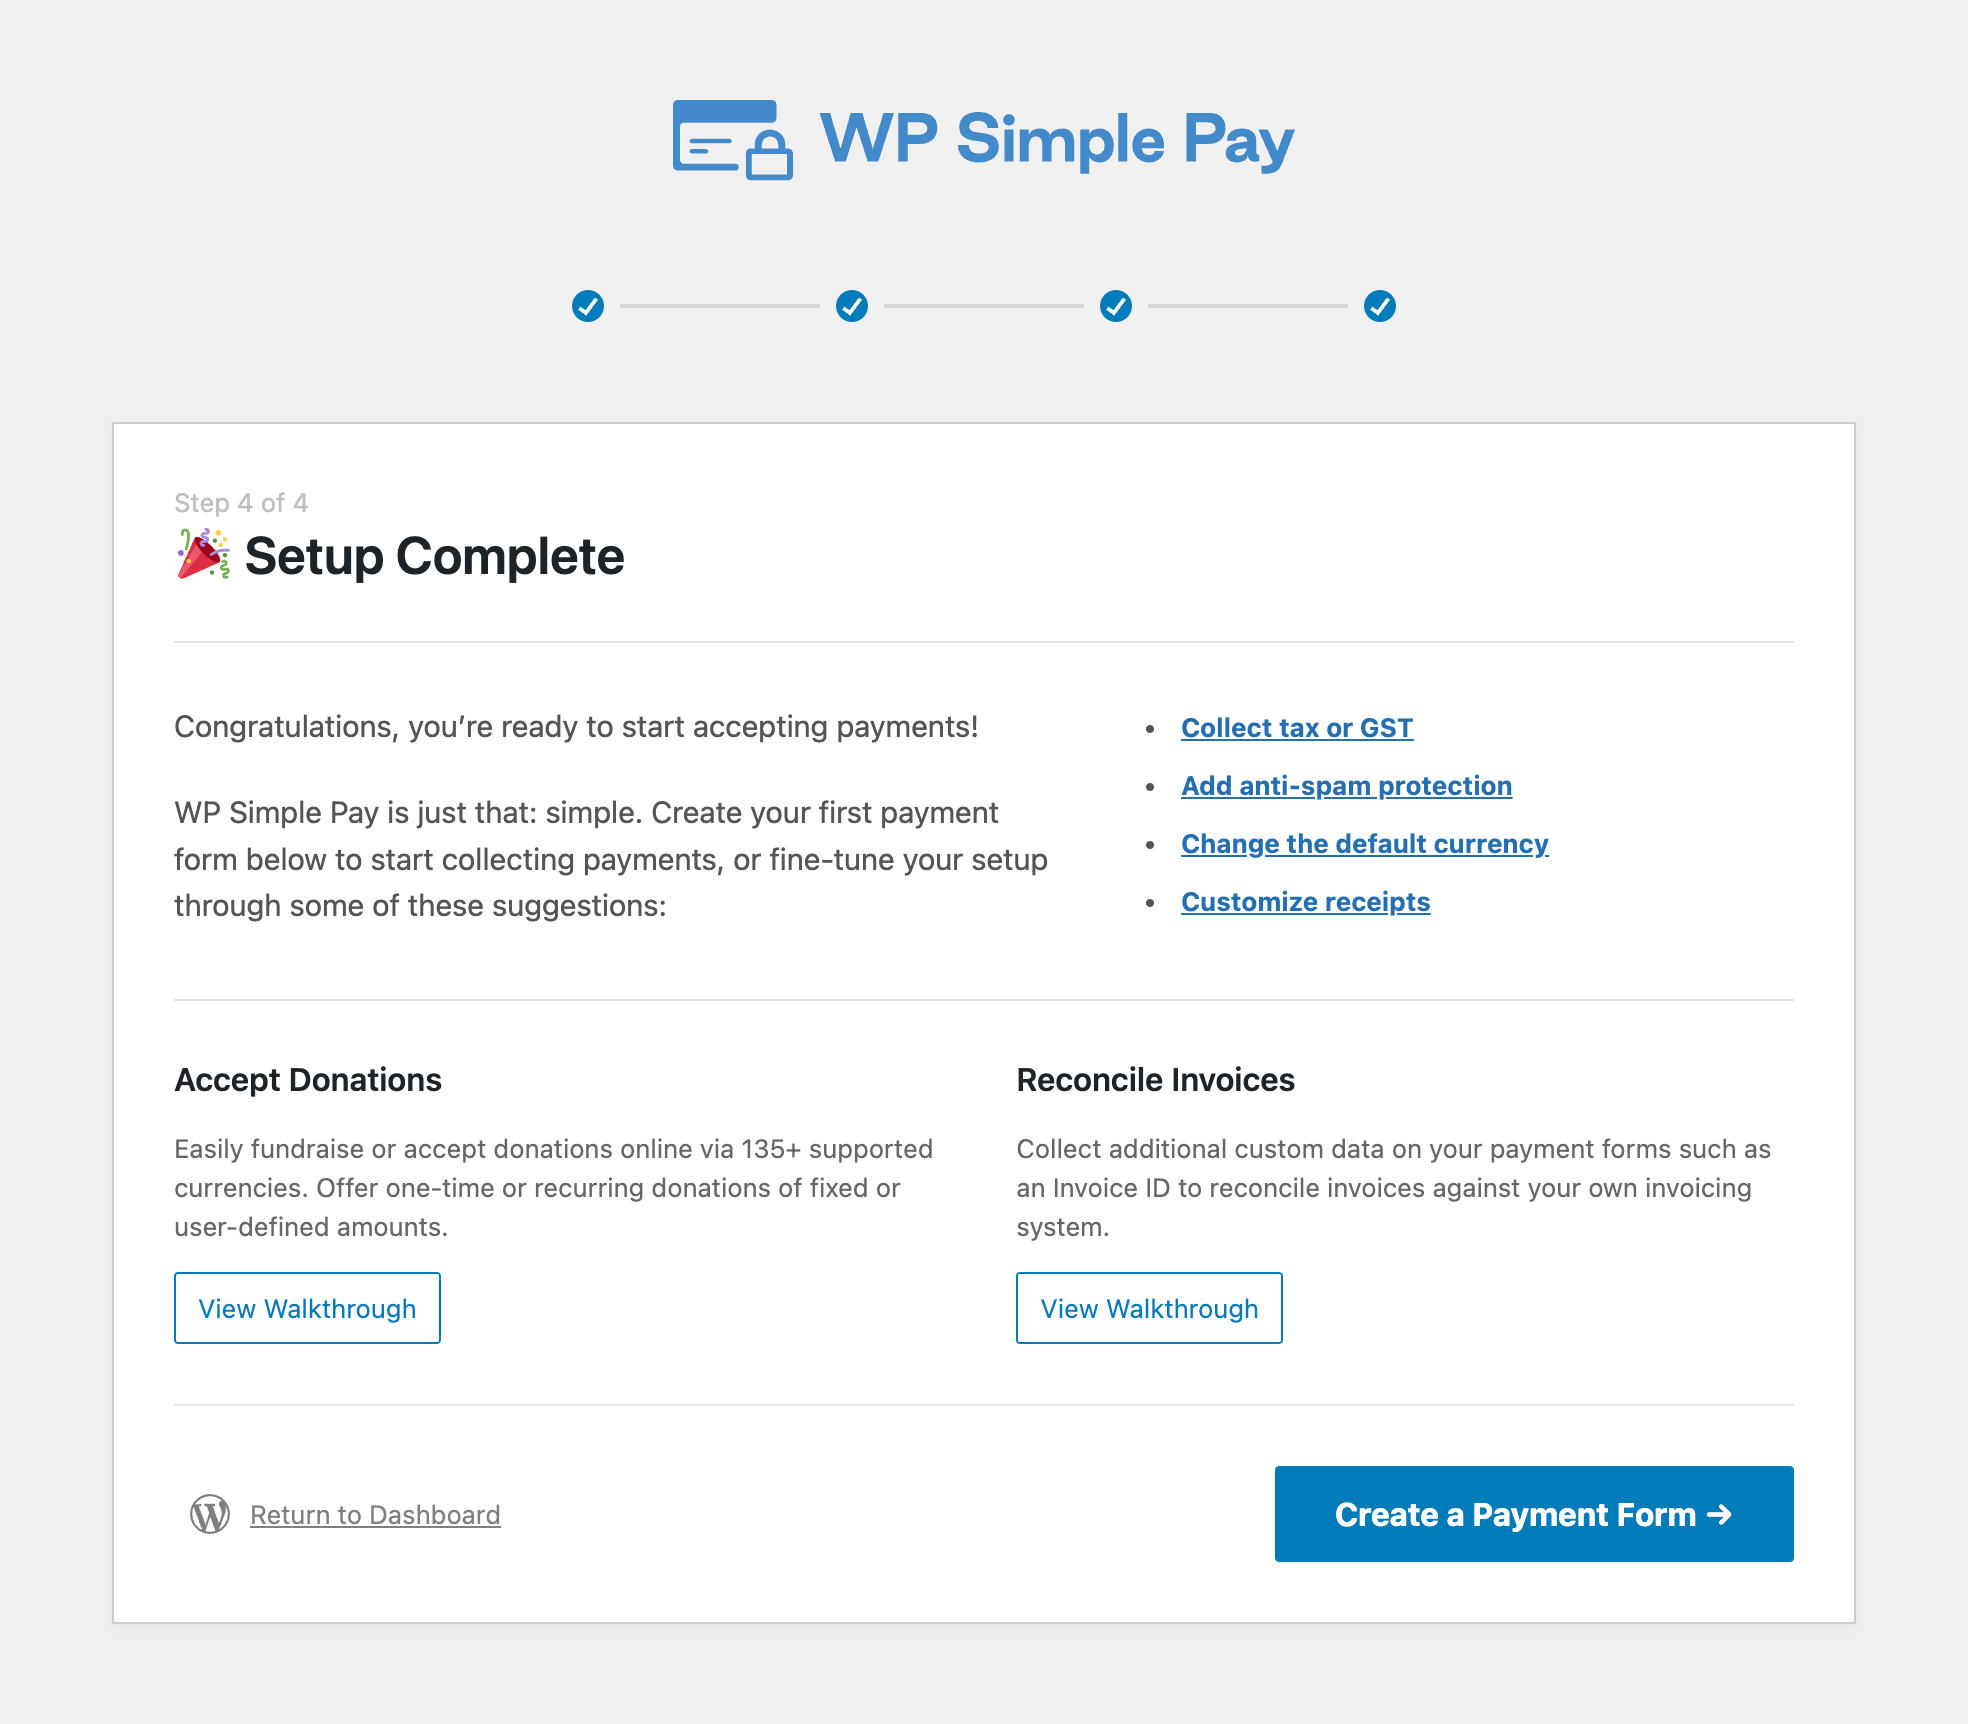
The plugin offers an advanced setup wizard that walks you through the setup process and gets your Stripe account connected in minutes.
Once you’ve completed a few easy steps, a success page will appear. Go ahead and click on the Create a Payment Form button.
Step 2: Create a Payment Form
Now that you’ve installed WP Simple Pay and connected your Stripe account, it’s time to create a payment form.
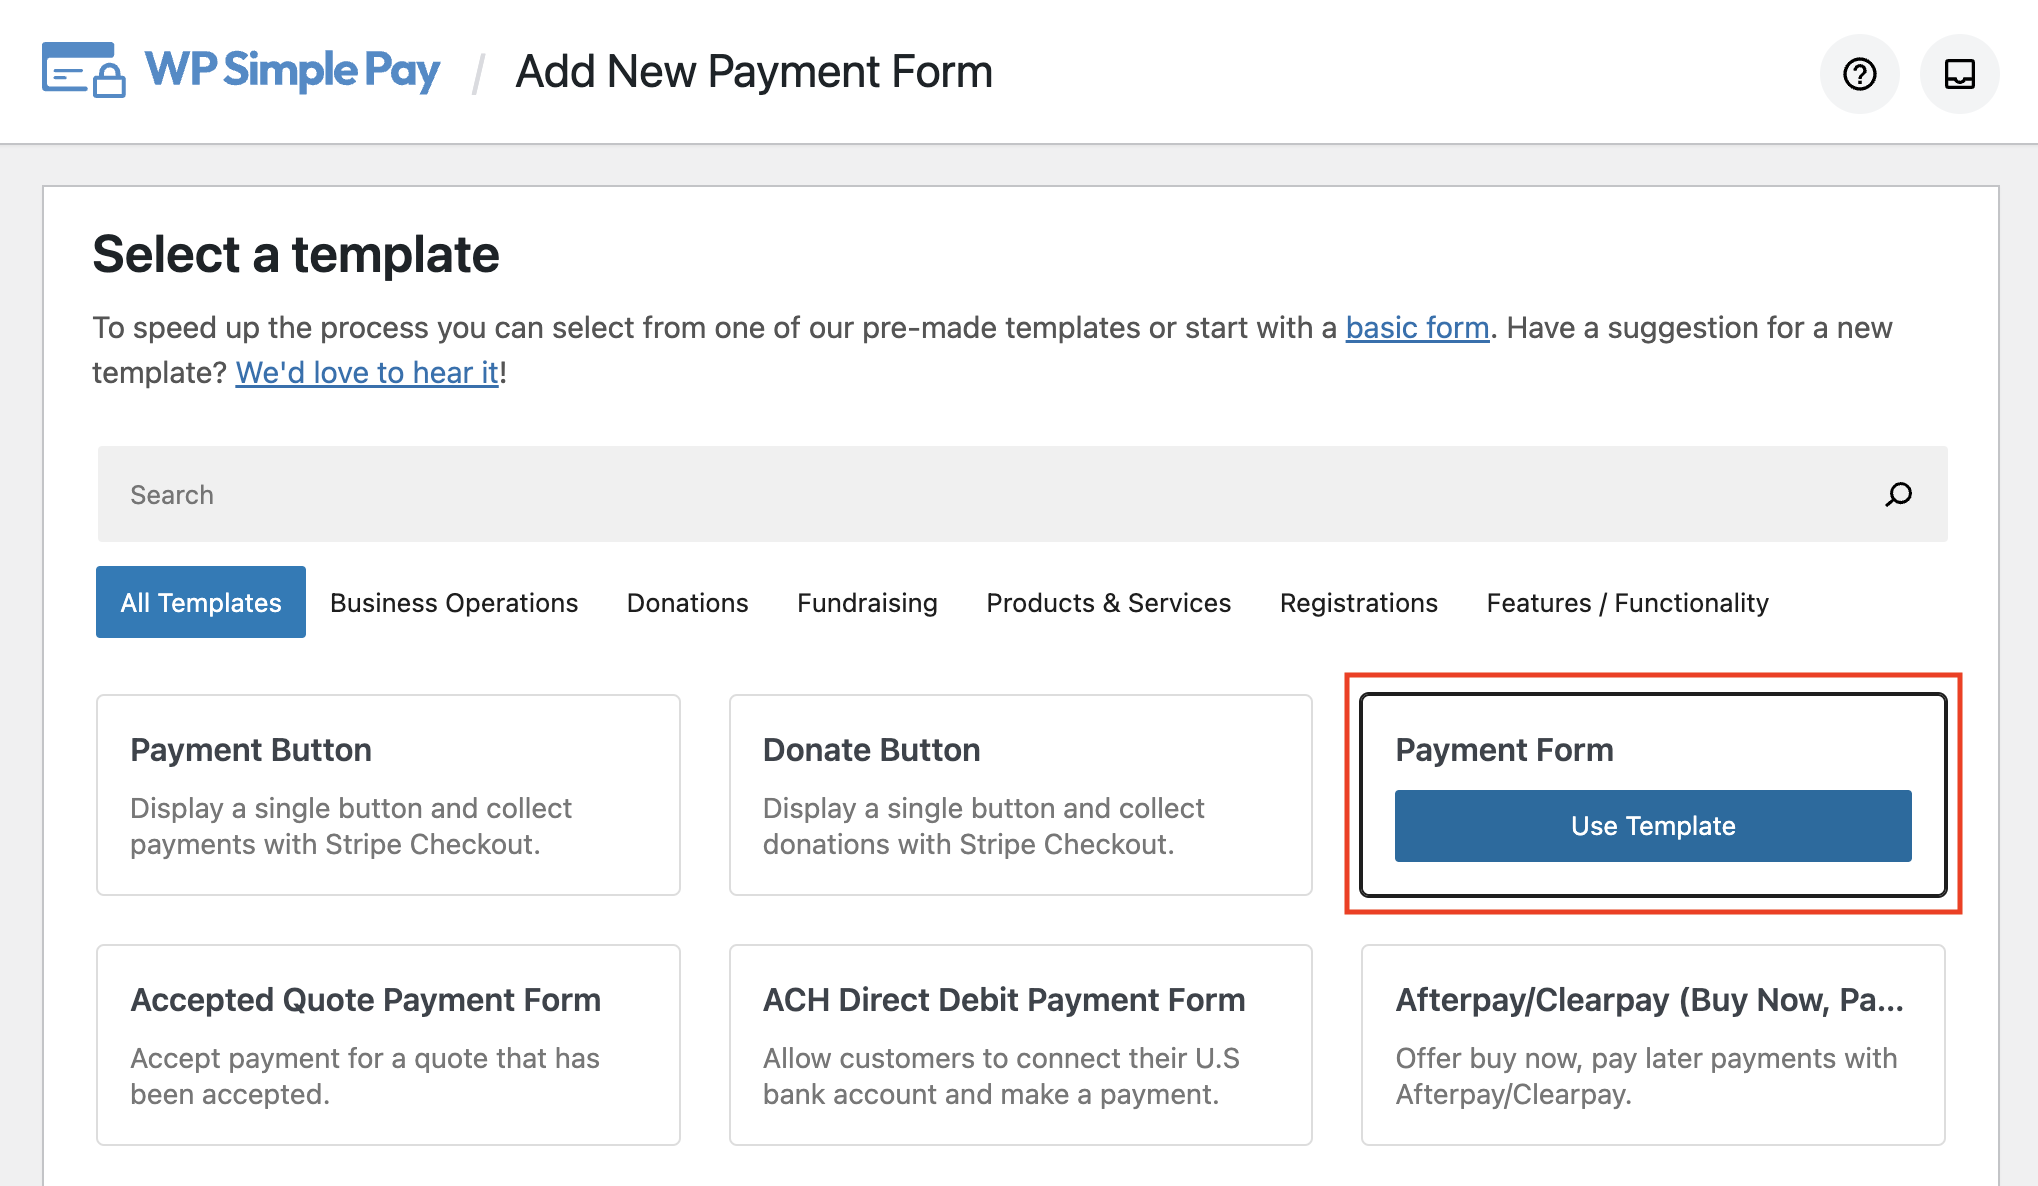
You’ll notice that there are several pre-built payment form templates available for you to choose from.
For the purpose of this tutorial, let’s choose the basic Payment Form.
Next, from the General tab, add the title and description of your form and leave the Type set to On-Site payment form.
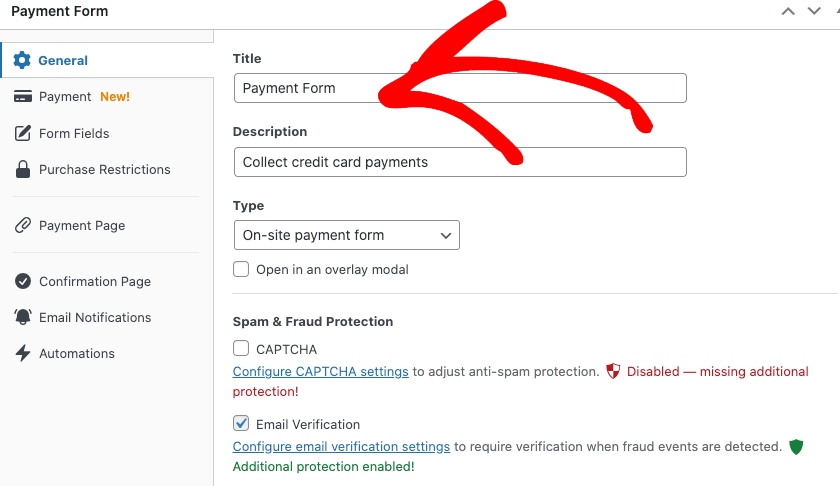
Once you’ve finished adding the title and description to your form, click on the Payment tab.
In the Payment tab, add your price options and amounts.
For the price amounts that you want to offer as a subscription, be sure to check the box next to “Allow price to optionally be purchased as a subscription.”
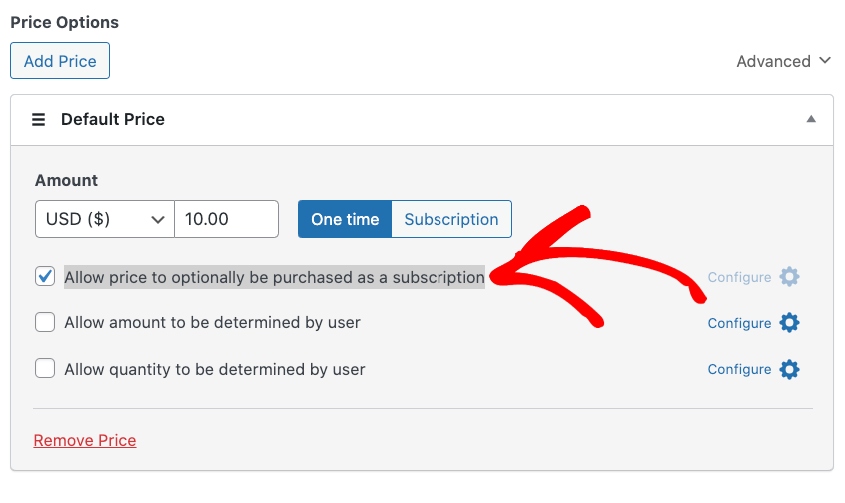
Next, click on the Configure icon to set up the frequency for recurring payments. In this case, we’ll leave the billing period on every 1 month. This is also where you can add a custom one-time Setup Fee that will be added to the first payment.

Once you’ve finished adding the price options to your form, scroll down and select the payment method options you want to accept.
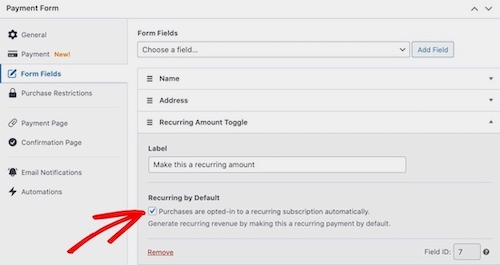
Then, move on to the Form Fields tab. Here, you’ll need to choose the Recurring Amount Toggle from the dropdown menu.
Next, be sure to check the box next to “Purchases are opted-in to a recurring subscription automatically.”
Click on the Save Draft button and preview your form.
Your form should look like the one below. You’ll notice that “Make this a recurring amount” is checked by default, encouraging customers to confirm their subscription with you.

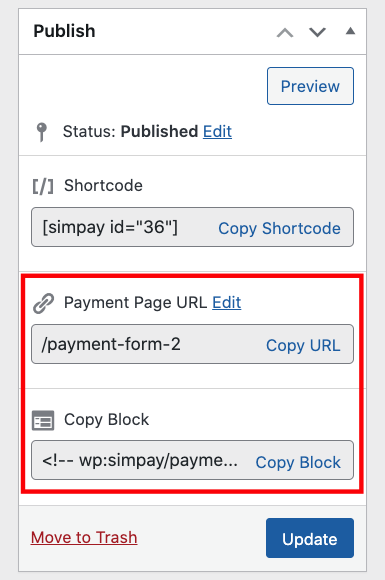
To add your form to your site, click on the Publish button. Then click on “Copy Block,” go to the page or post you want your form on, and paste it into the Block editor.
That’s it! We hope this article has helped you learn how to generate more consistent income using a default subscription opt-in checkbox on your payment form.
If you liked this article, you might also want to check out our guide on how to allow customers to manage their subscriptions in WordPress.
What are you waiting for? Get started with WP Simple Pay today!
To read more articles like this, follow us on X.
Disclosure: Our content is reader-supported. This means if you click on some of our links, then we may earn a commission. We only recommend products that we believe will add value to our readers.


Leave a Reply