
How to Enable reCAPTCHA on Your WordPress Payment Forms
Last updated on

Are you looking to add reCAPTCHA to your WordPress payment forms?
Most payment gateways, including Stripe, recommend you enable reCAPTCHA on your payment forms to avoid fraud.
In this article, we’ll show you how to add invisible reCAPTCHA to your payment forms. That way can offer a seamless experience to customers while also preventing spam submissions.
Why Enable reCAPTCHA in Stripe Payment Forms
Card testers often use automated scripts to verify if stolen card information is valid. This is usually done by making a small payment, which often gets declined or causes disputes.
A high decline rate on your payment form will make all your transactions look riskier, resulting in even legitimate payments getting declined on your site.
A successful fraud payment will lead to disputes, leading to debiting the disputed amount and a dispute fee from your Stripe account until the dispute is resolved.
Even though Stripe has many automated and manual controls in place to prevent card testing, they recommend adding an extra layer of protection, such as reCAPTCHA.
You can easily enable reCAPTCHA v3 with WP Simple Pay, which works invisibly on your website so you can fight spam bots without ever bothering your legitimate customers.
WP Simple Pay also provides support for hCaptcha, a popular alternative to reCAPTCHA.
WP Simple Pay is the best WordPress Stripe plugin that lets you accept payments on your WordPress site via credit cards, digital wallets like Google Pay and more. Check out the complete features of WP Simple Pay.
Step 1: Install WP Simple Pay on Your WordPress Site
To enable reCAPTCHA to combat spam payments, the first thing you’ll need to do is to install and activate WP Simple Pay on your site.
Remove the additional 3% fee!
Most Stripe plugins charge an additional 3% fee for EVERY transaction
…not WP Simple Pay Pro!
Just go to the pricing page, pick a plan, and create a WP Simple Pay account. Then download the plugin from your account and install it on your site by uploading it.
For a detailed guide, check out how to install WP Simple Pay
Step 2: Sign Up for reCAPTCHA
Navigate to WP Simple Pay » Settings and then under the General tab, click on Anti-Spam where you’ll find a big reCAPTCHA button. When you click on that button, the reCAPTCHA configuration settings will be shown.
Then click Sign Up for reCAPTCHA v3 button. You’ll now be prompted to register your site with Google to enable reCAPTCHA.

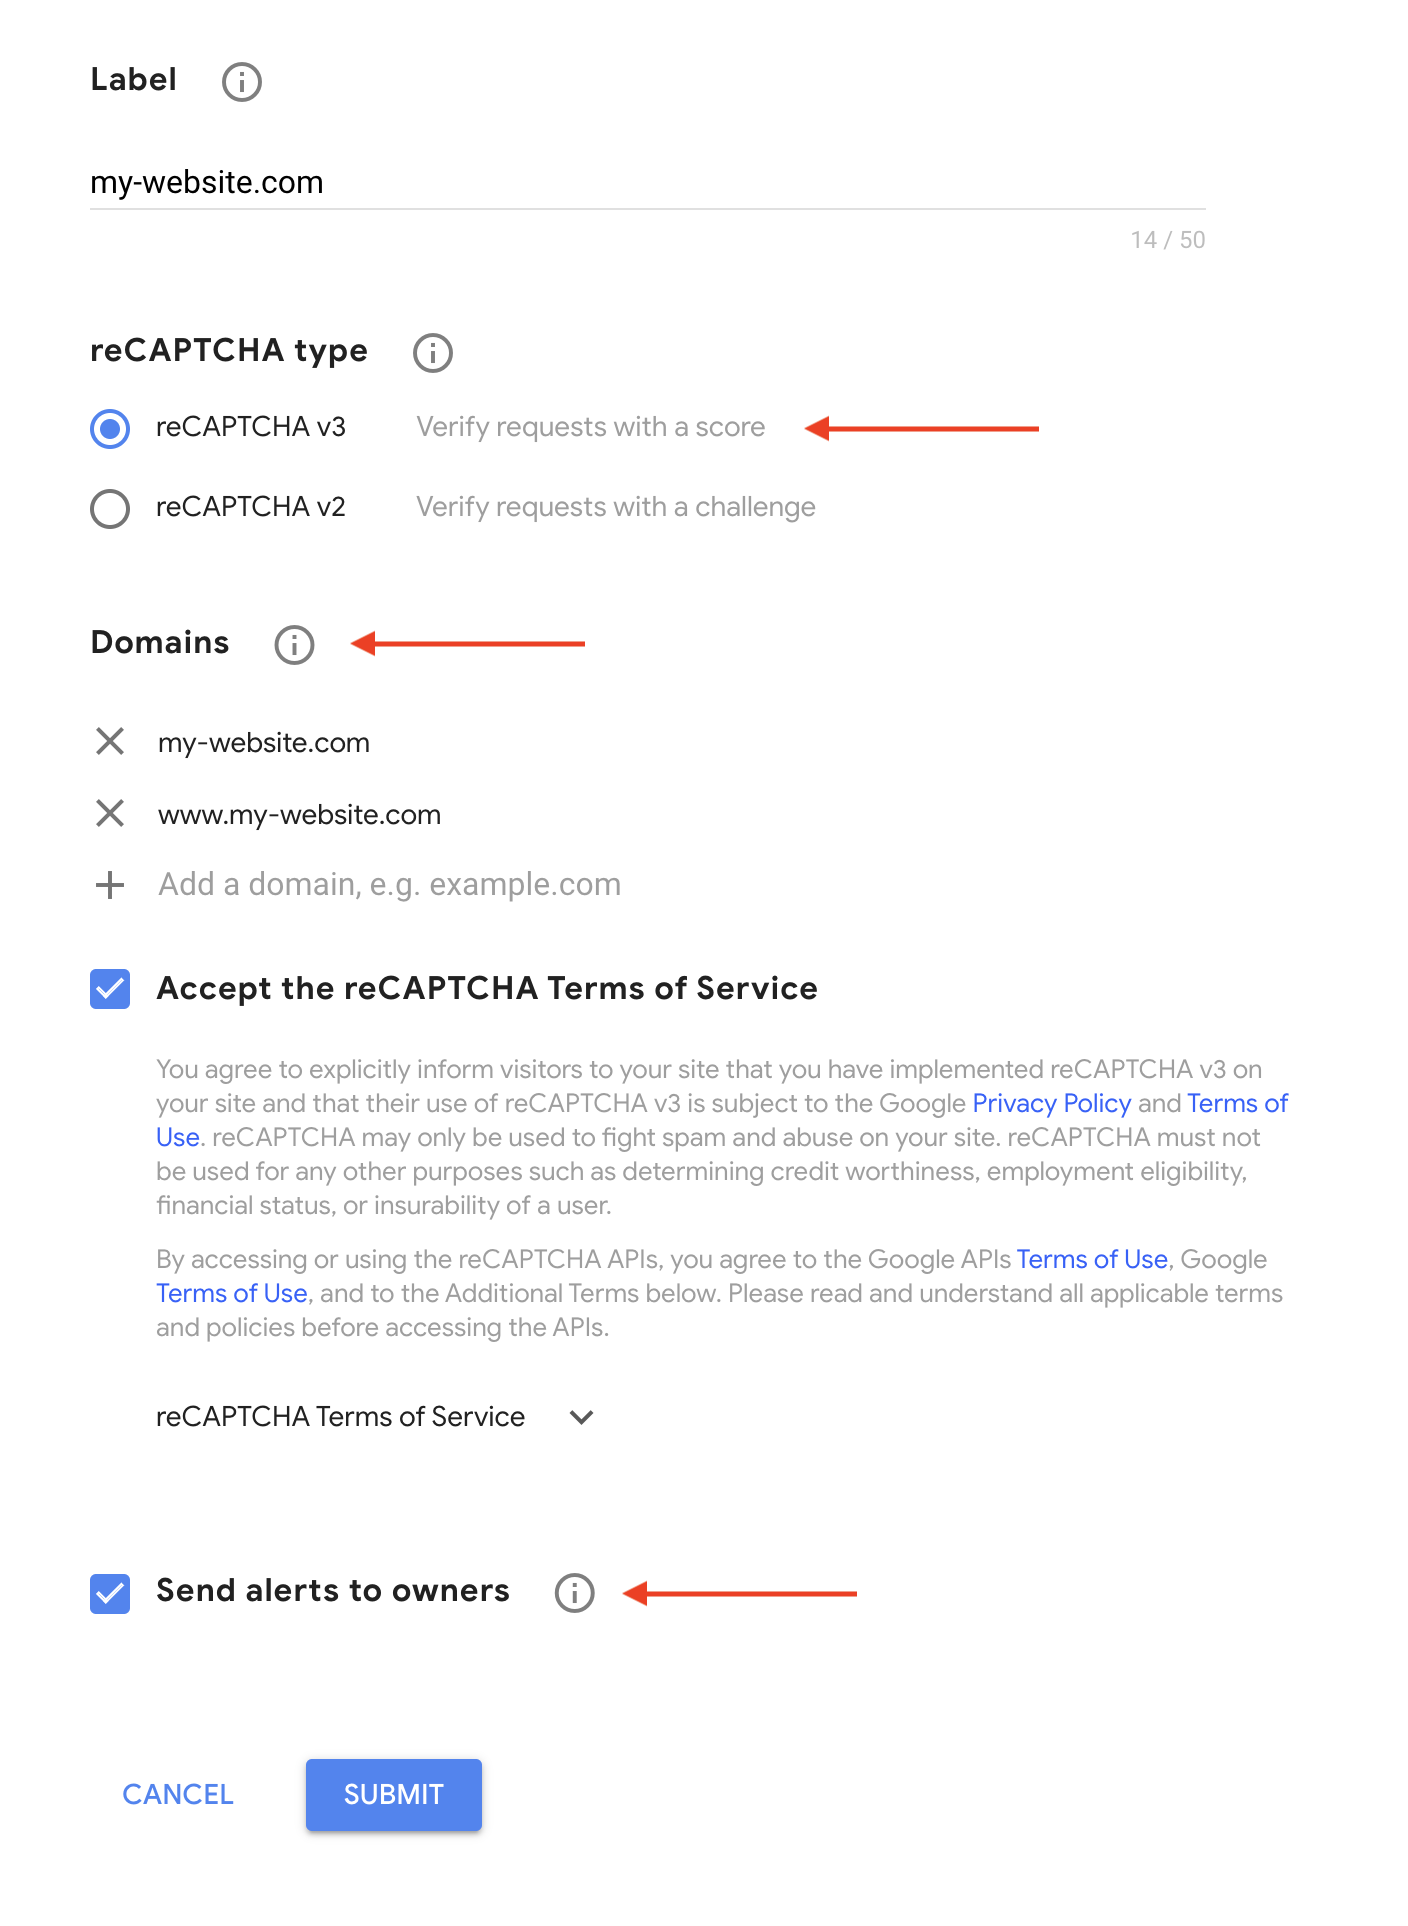
On the reCAPTCHA site, register your site by specifying a label and choosing a reCAPTCHA type. Make sure to choose v3 for invisible protection. Then enter your domain name, email address and accept their terms of service.
Once you saved these settings, you’ll be shown a site key and secret key that you need to copy to your WP Simple Pay’s reCAPTCHA page.
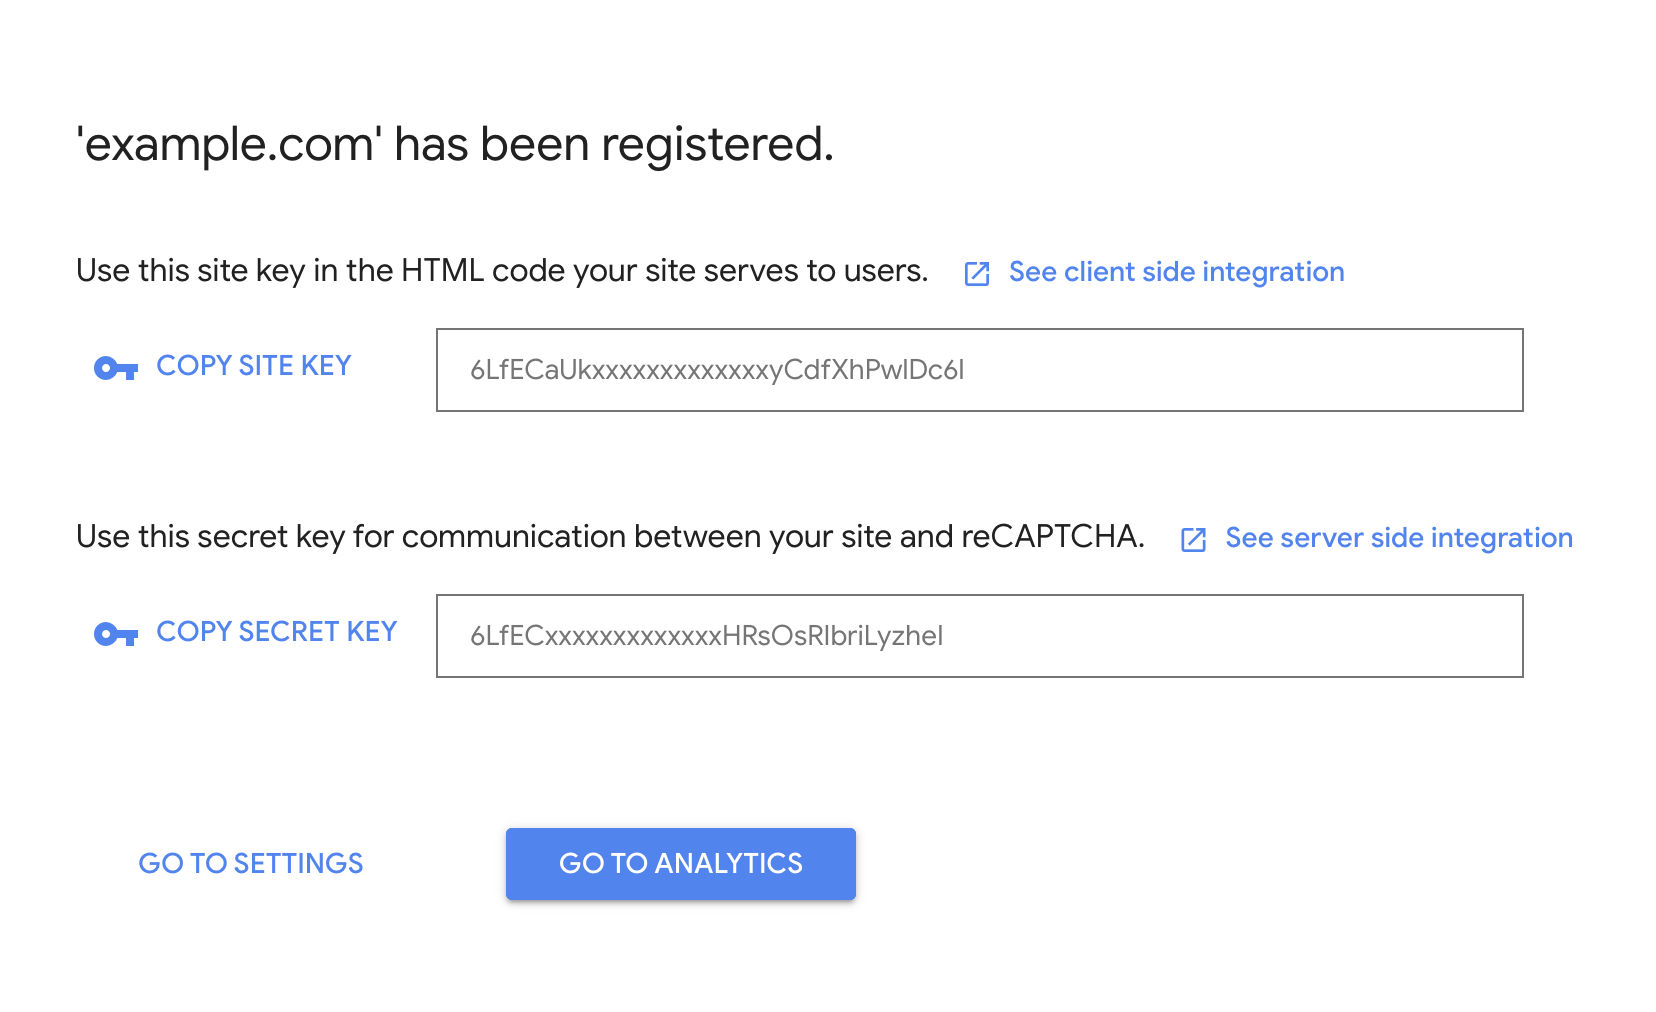
Go back to your site and copy Site Key and Secret Key. Choosing the Default Score Threshold would be fine for most websites but if you want to go with an aggressive approach in combating spambots, then choose Aggressive instead. Next, click Save Changes.
Step 3: Start Accepting Legitimate Payments
Now that you’ve enabled reCAPTCHA, you can rest assured that your site is protected from spambots. Go ahead and create payment forms to accept Stripe payments on your site.
Here are a few tutorials you can follow to get started:
Bonus Step: Enhance Payment Form Protection
So far, you’ve learned how to enable reCAPTCHA on your Stripe payment forms. Adding reCAPTCHA is one of the most efficient ways to combat automated scripts built for card testing.
That said, you can further increase payment form protection by implementing the below security best practices.
- Enable email verification: Enable email verification for on-site payment forms if multiple charges fail due to fraud.
- Require user authentication: Asking users to log in to complete the payment is a common strategy among eCommerce merchants. With WP Simple Pay, you can enable it with a single click.
- Regularly monitor your Stripe dashboard: Last but not least, regularly monitoring your Stripe dashboard helps you identify if there is any potential threat to your payment form and how they can be fixed.
For more details, check out how to protect your payment forms from card testing.
That’s it!
We hope this article helped you add reCAPTCHA to your WordPress payment forms with ease.
You might also want to check out the differences between setting up on-site vs. off-site Stripe checkout.
What are you waiting for? Get started with WP Simple Pay today to accept legitimate payments.
To read more articles like this, follow us on Facebook and Twitter.
Disclosure: Our content is reader-supported. This means if you click on some of our links, then we may earn a commission. We only recommend products that we believe will add value to our readers.


Leave a Reply