How to Create Your First Payment Form
In This Document
Now that you’ve installed WP Simple Pay, activated your license (if you purchased the Pro version), and connected your Stripe account, it’s time to create your first payment form.
Log in to your WordPress admin, then go to WP Simple Pay → Add New. This will launch the payment form template explorer. For this example, we will use the Payment Form template.
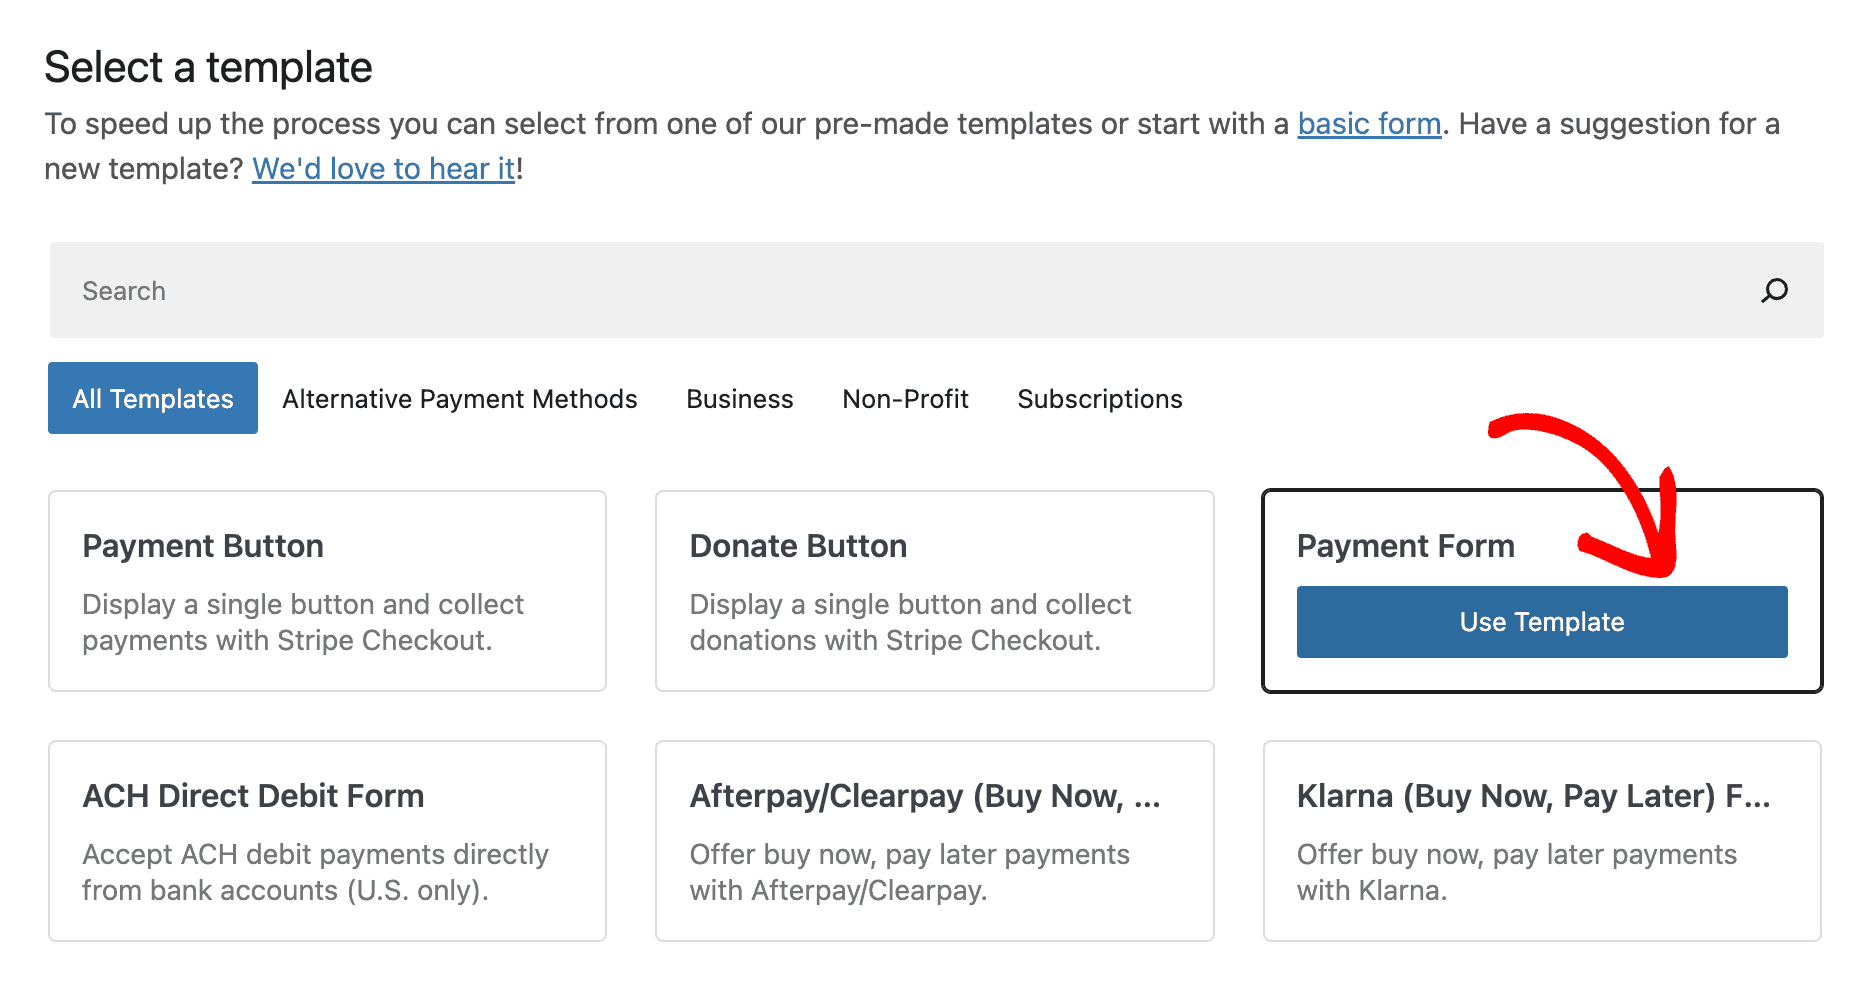
Click on “Use Template” and the payment form editor will open using the payment template defaults.
Customizing General Options
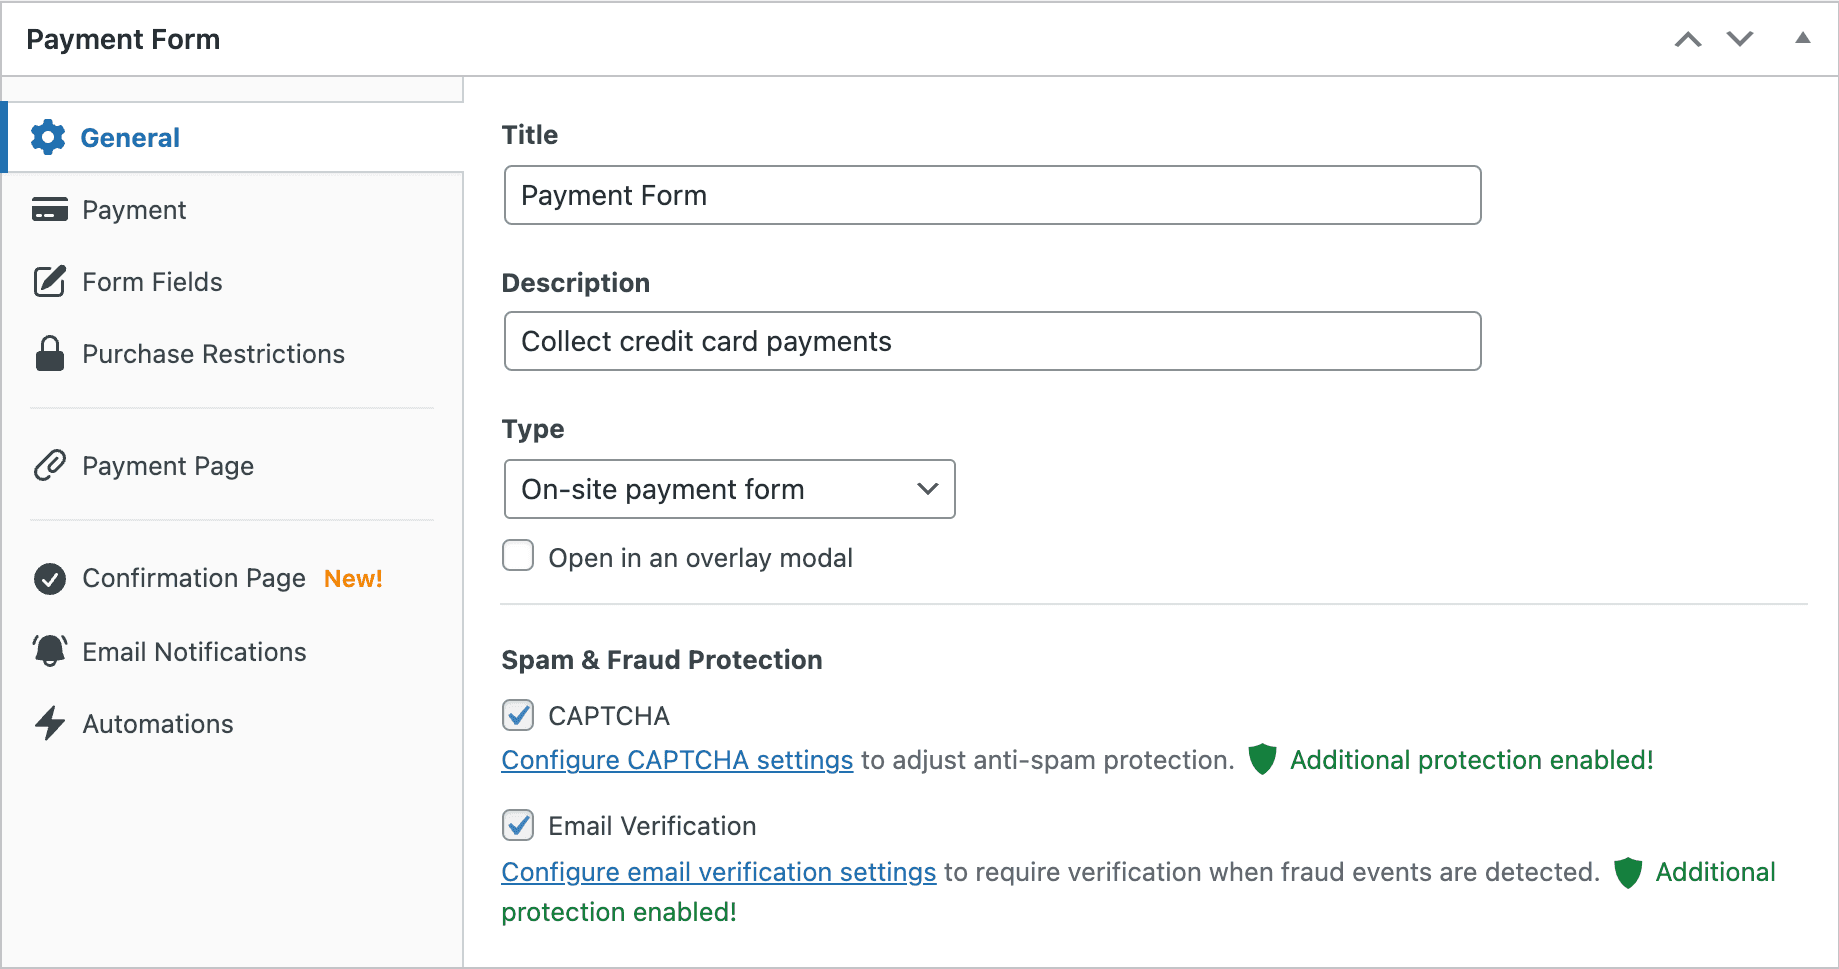
The General tab allows you to change the payment form’s Title, Description, Type, and Payment Confirmation settings.
Our selected Payment Form template creates an on-site embedded payment form and redirects users to the global confirmation page.
Customizing Payment Options
Select the Payment tab to adjust the available price options, and how your payment form accepts payments.
Go ahead and adjust the amount to be collected, or currency:
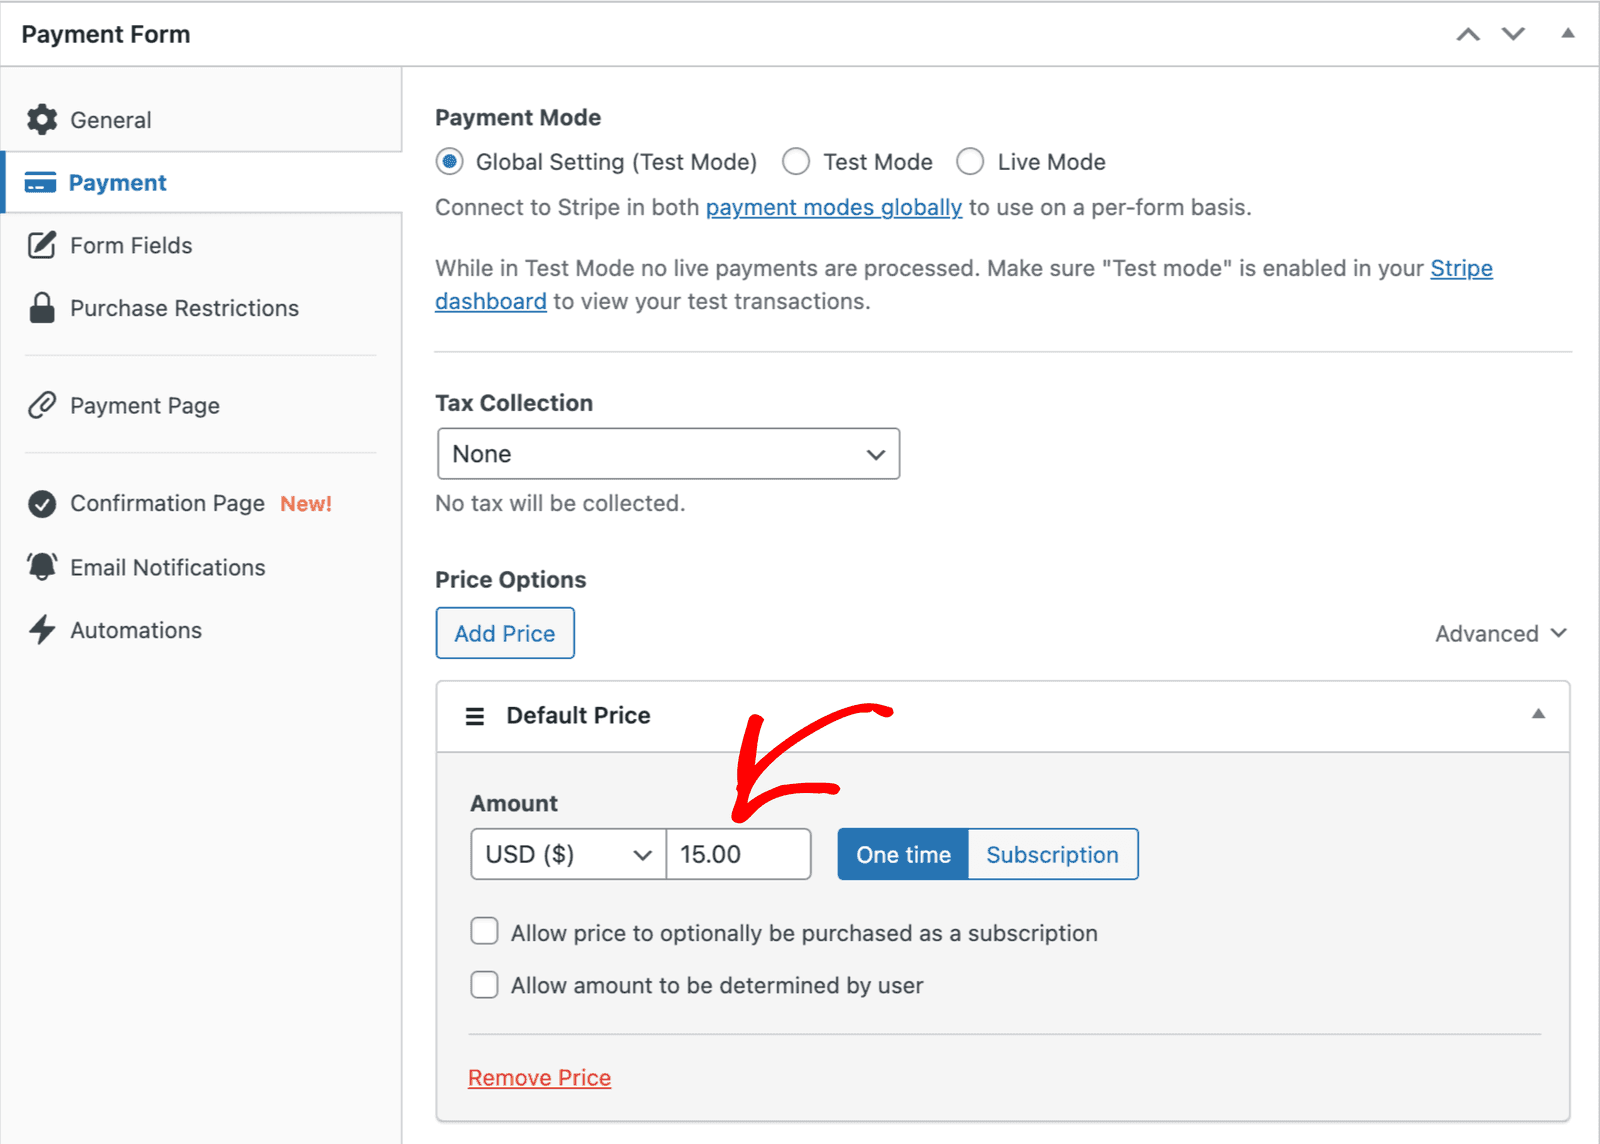
In this example, we will use a One-Time $15.00 amount. If you would like to offer more than one price option, click “Add Price” to add an additional price. When more than one price option is offered, you may optionally set a custom label that is displayed when the price selector is output:

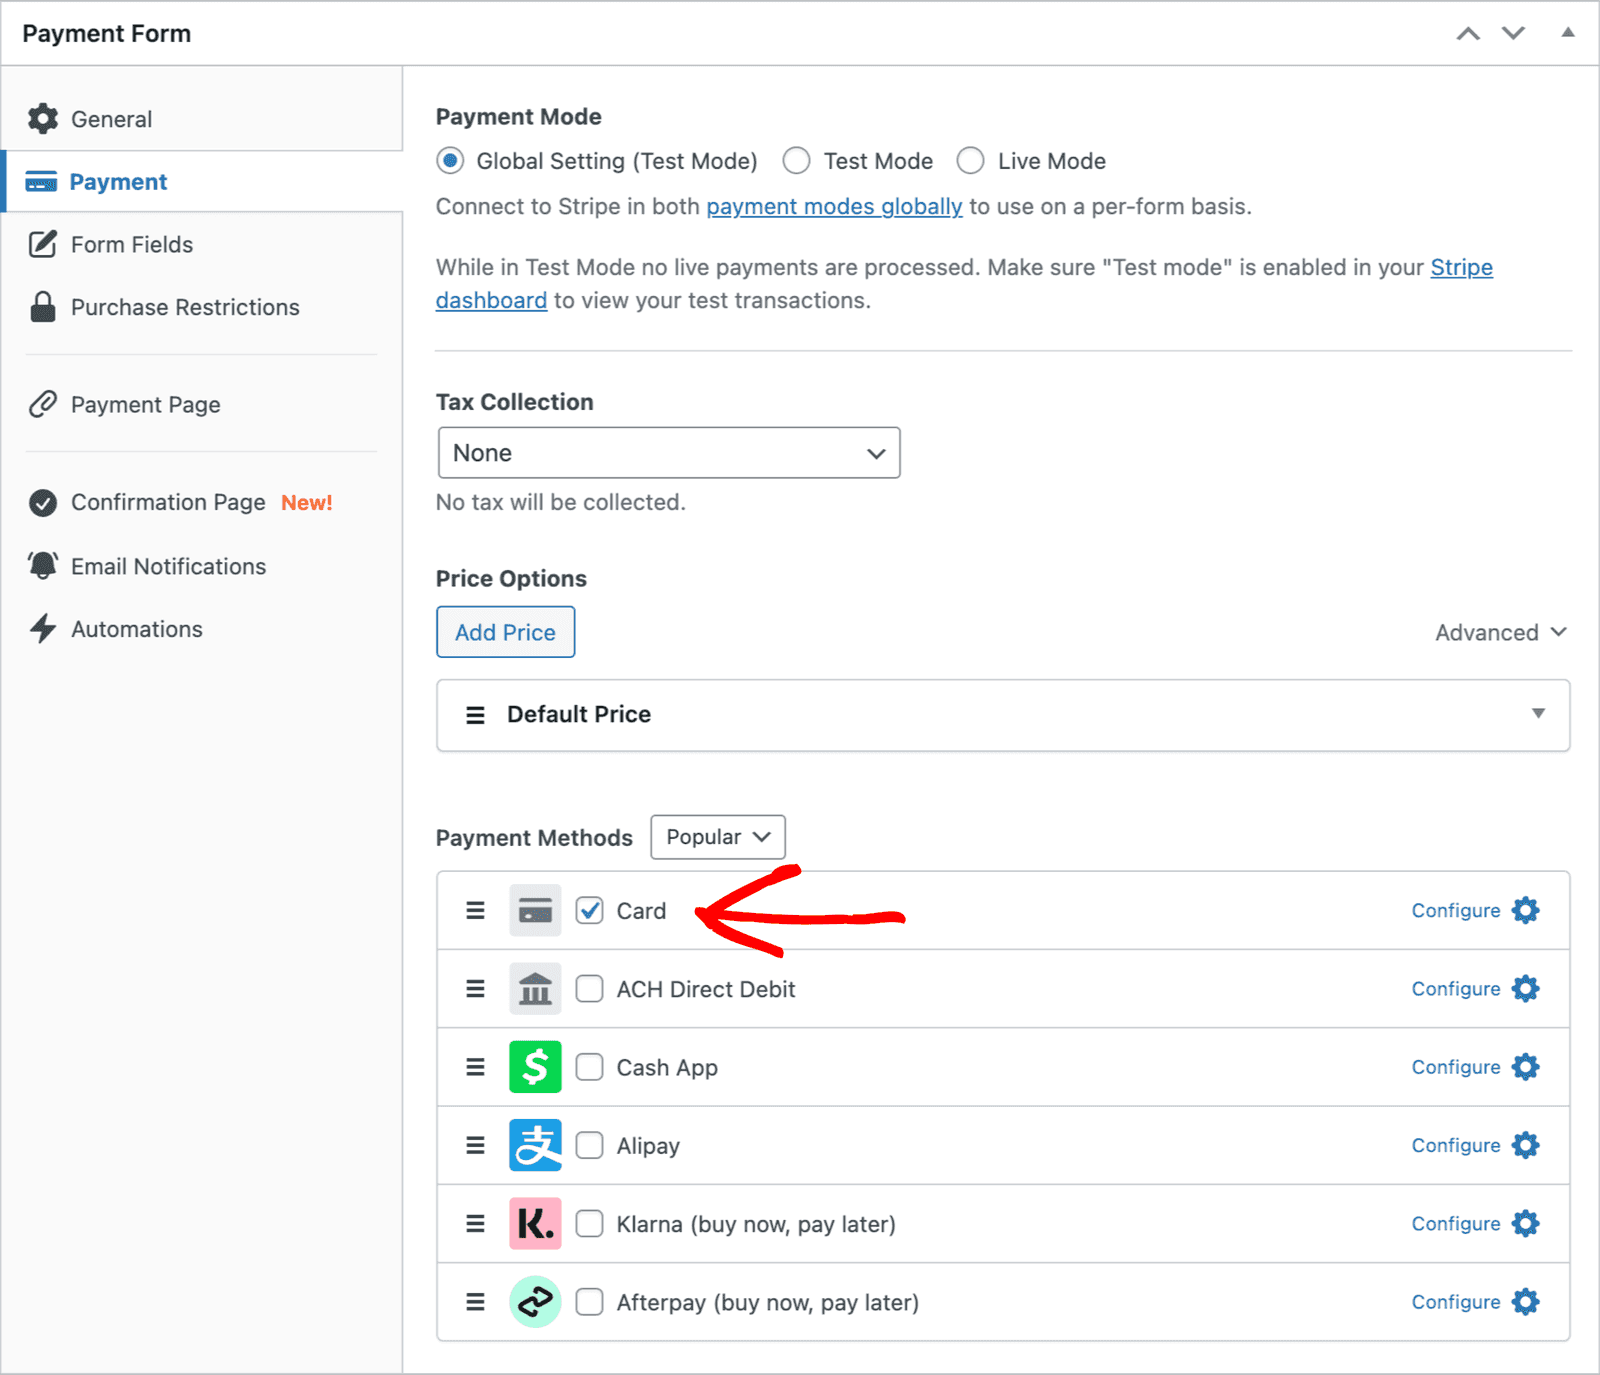
Next, enable the Payment Methods you would like to use to accept payments. To keep things simple for our first form, we will stick with a “Card” payment method:
Customizing Form Fields
Next, select the Form Fields tab. This is where you can add custom fields to facilitate additional data collection, or output more information about the purchase.
If you haven’t already, click the “Save Draft” button on the right side of the screen to save the form before proceeding.
When you selected the “Payment Form” payment template, these four fields were added to your form automatically:
- Email Address
- Price Selector
- Payment Method
- Checkout Button
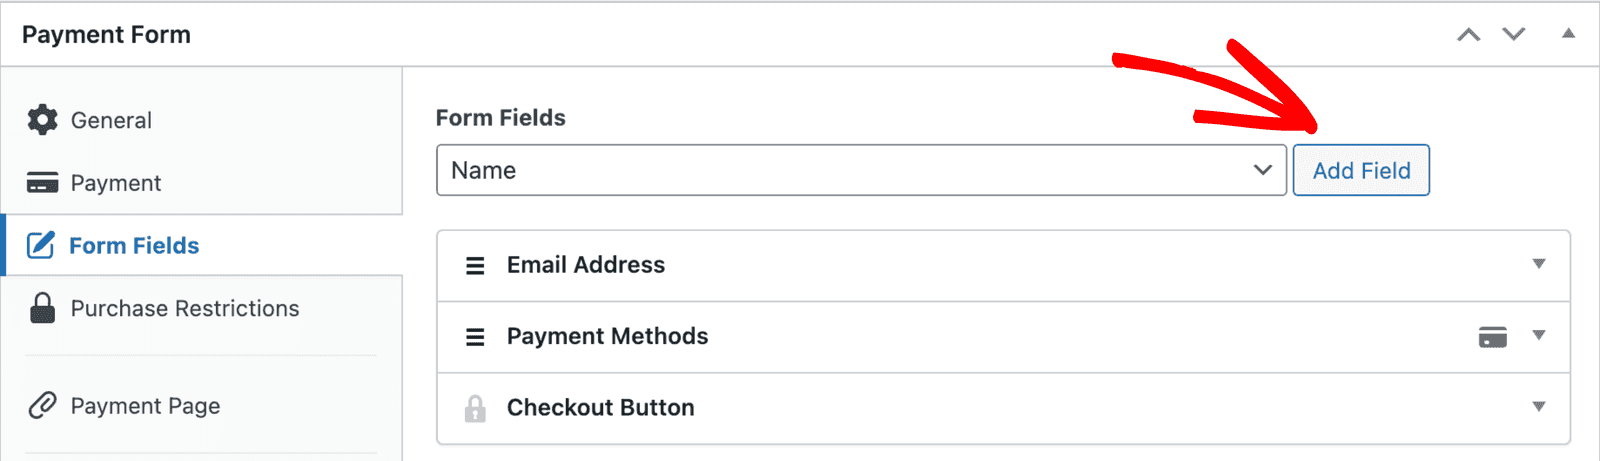
Let’s add one more custom field: a field to collect the customer’s name. Click Choose a field and select Name, then click Add Field to add it to the form.
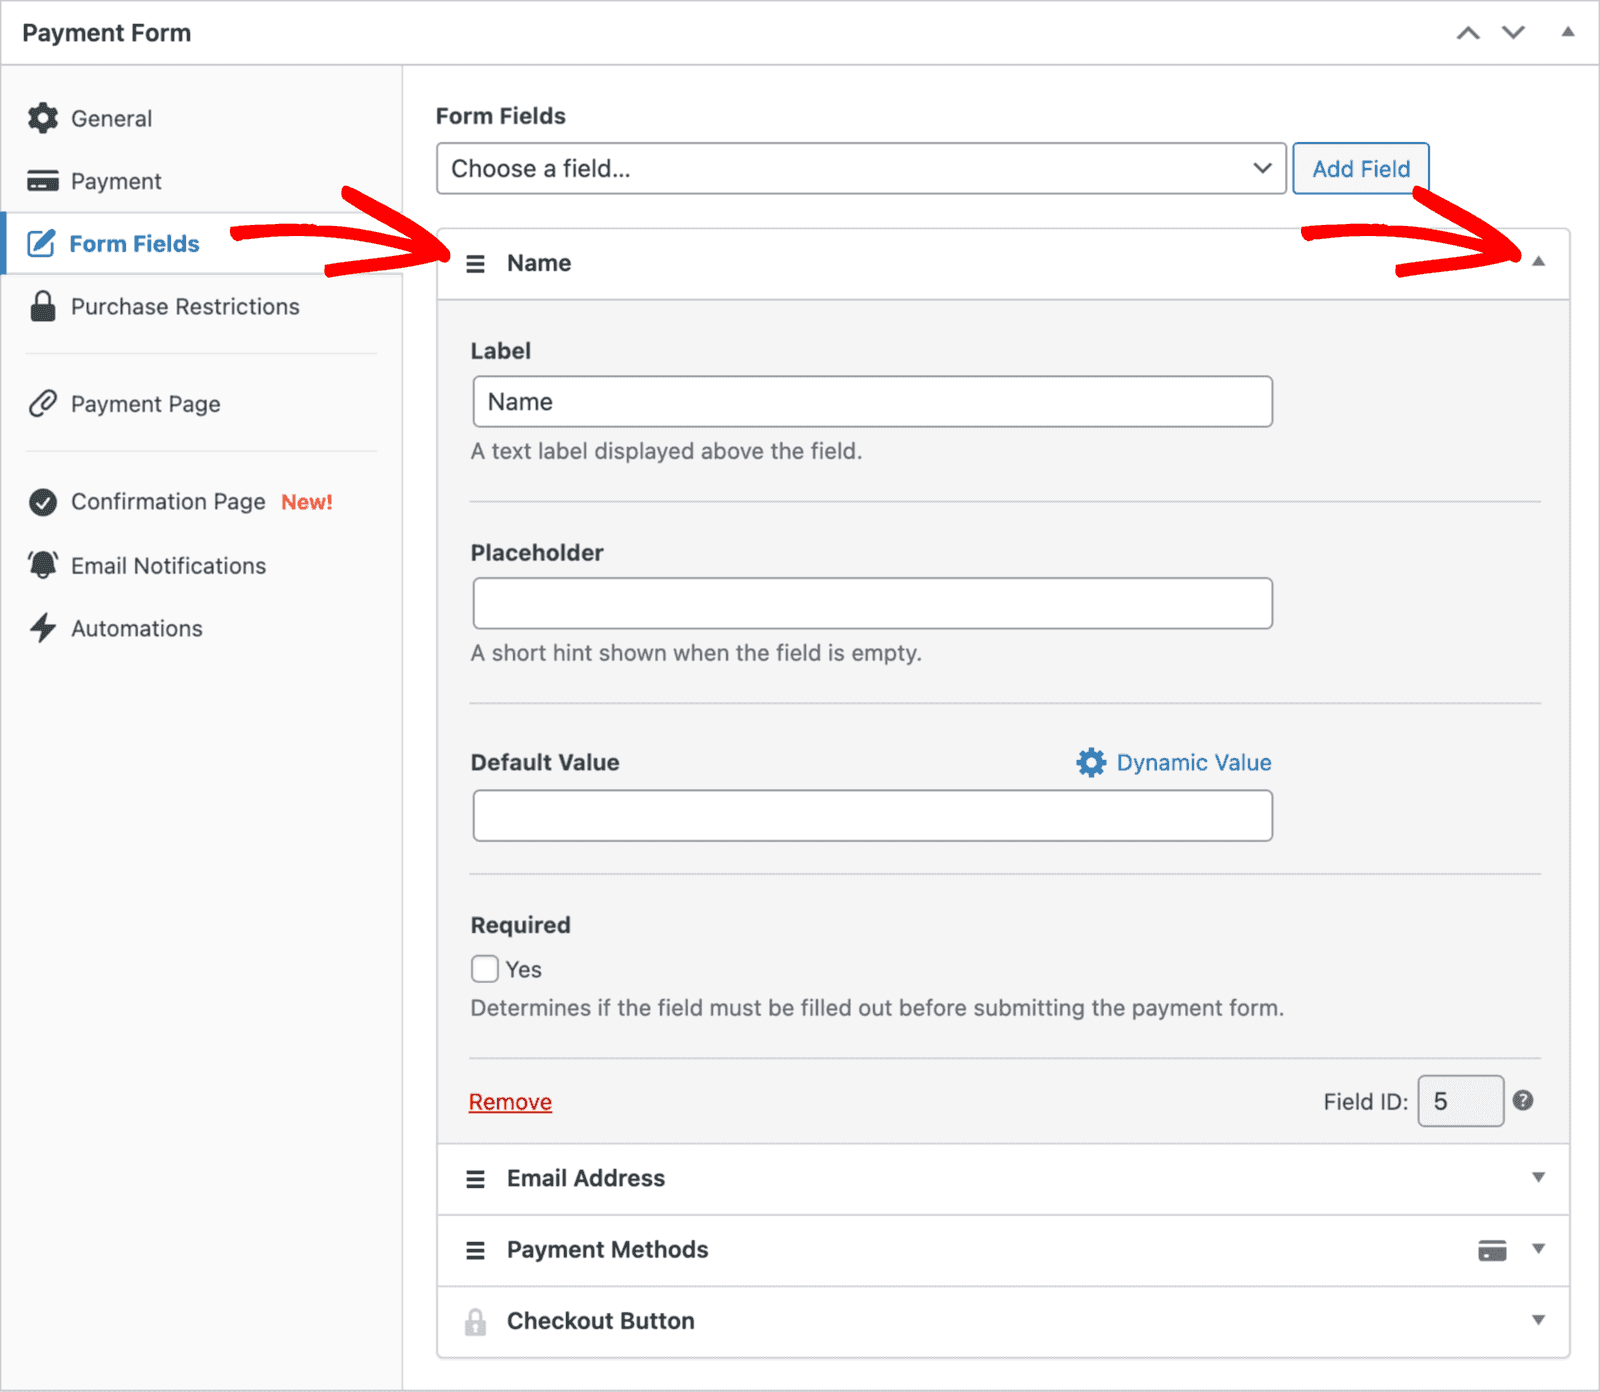
Using the drag handle on the left side of the custom field, move the “Name” field above the other custom fields. Additionally, we can set the Label setting to Full Name and mark the field as Required.
Review the “Custom Form Fields” documentation for more information about custom fields.
Advanced Form Features
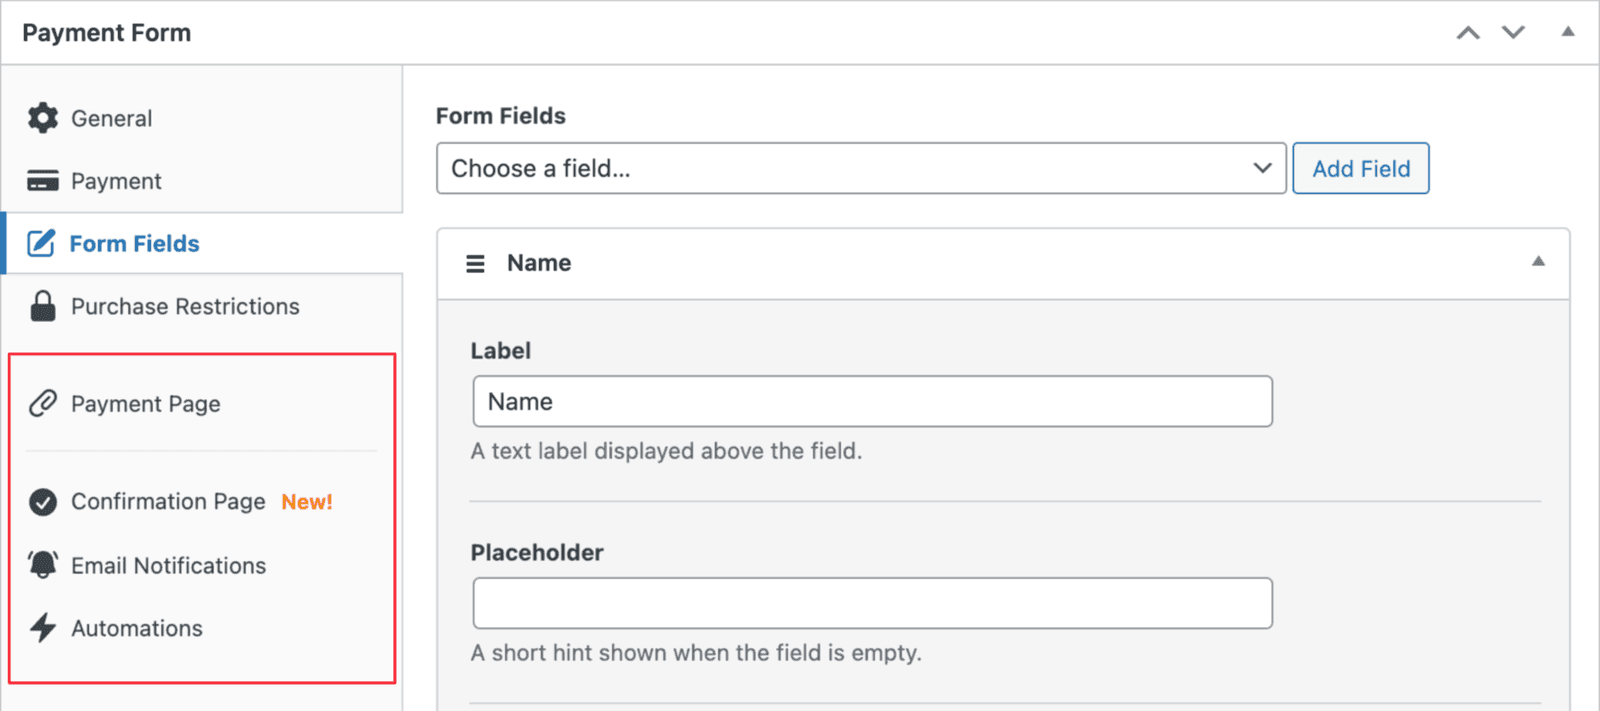
Since this is your first payment form, we will not discuss the advanced form features listed below. However, when ready, follow the links below to learn more about these features.
- Payment Page
- Confirmation Page (per form)
- Email Notifications (per form)
- Automations (example 1 Google Sheets) (example 2 Create a WordPress User)
Adding Your Payment Form to a Page
If you preview the payment form at this point, it should look similar to the form below. Of course, if you changed your form title and description previously, they will be different.

Once you like how your payment form looks, make sure it’s published so that you can add it to a page.
While editing an existing page or after creating a new page, insert a new block, search for the “WP Simple Pay” block, and select it to add it to the WordPress block editor.
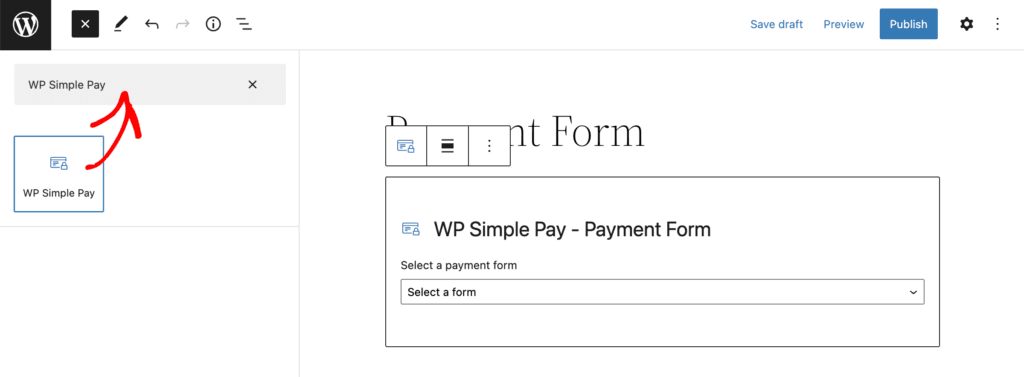
After the block is inserted, select which payment form you want to add to the page from a dropdown.
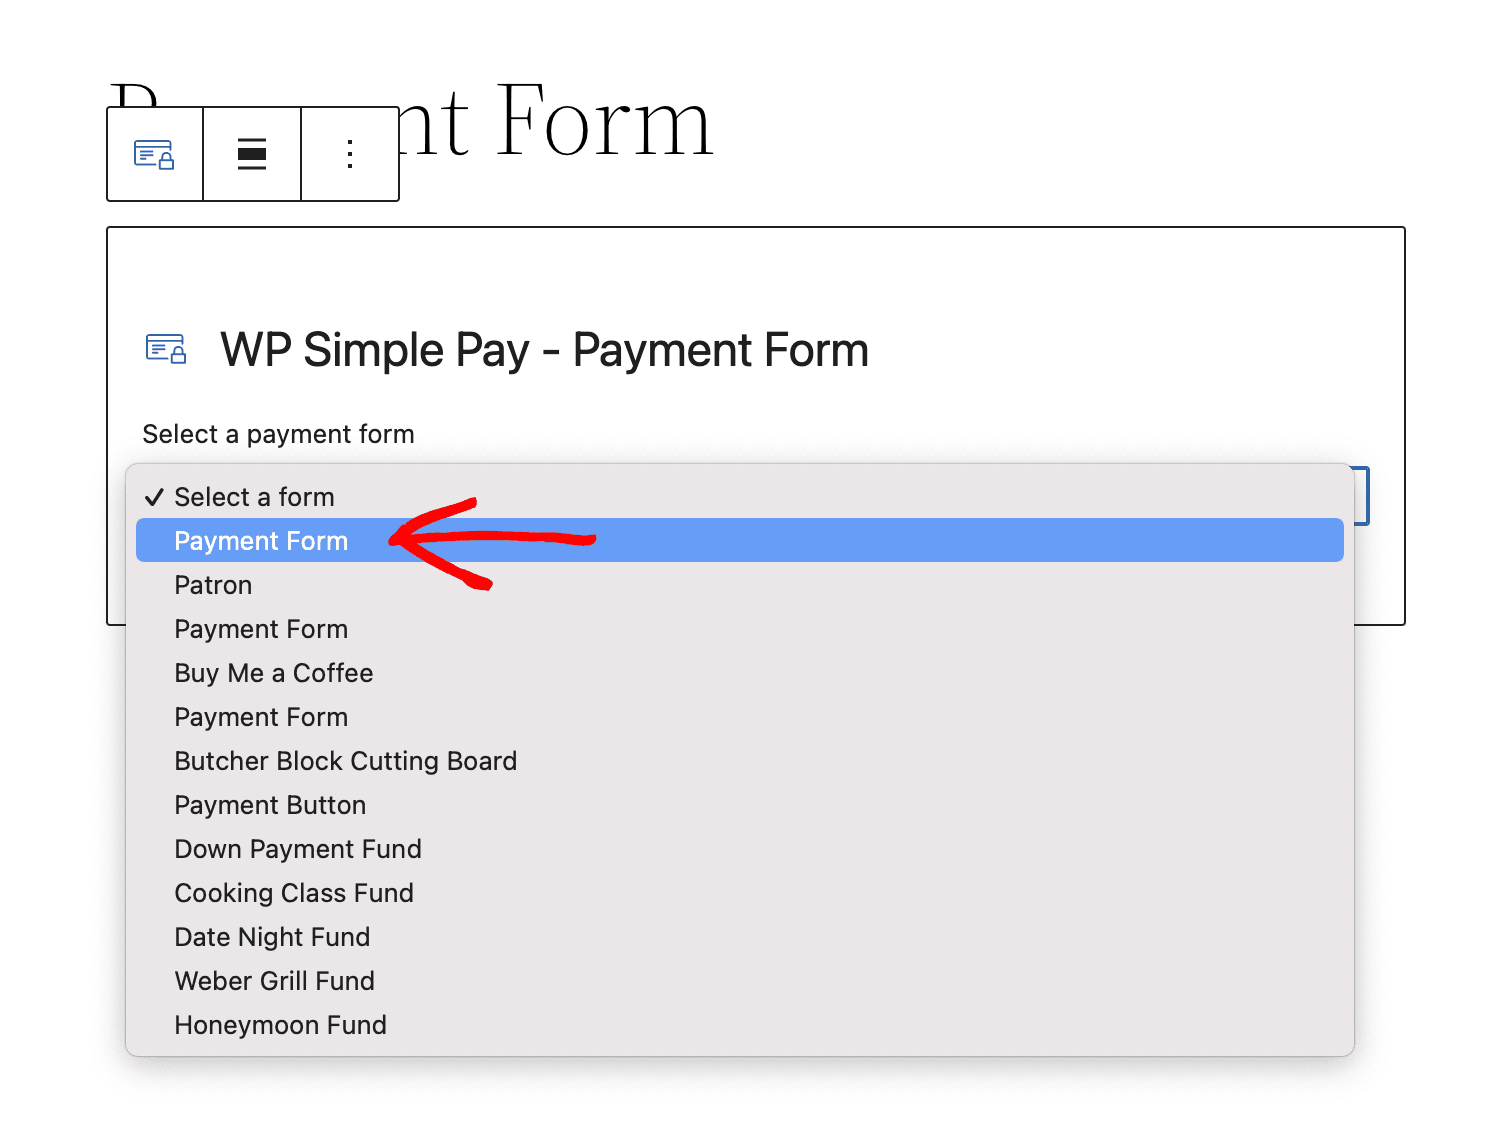
Once you select a payment form, a visual representation of the form will be displayed. You can then continue editing the page as needed.
Add a Form with the Classic Editor or Non-block Theme
If you’d like to add a payment form using the “classic editor”, or if you are using a theme that doesn’t support using blocks, you can copy the shortcode from the payment form list, and embed the shortcode on any page.

Making A Test Payment
You should still be in Test Mode unless you specifically disabled it. Read more about using Test Mode.
Now you are ready to view your form and make a test payment. In Test Mode, you can use any test card numbers Stripe provides.
NOTE: Stripe provides international test card numbers that should be used to properly reflect the appropriate ZIP/Postal code configuration for your country or locale. For example, the 4242-4242-4242-4242 test card number is considered a US-based number and will display a 5-digit ZIP Code field.
Once you’ve submitted the payment form, Stripe will process the test payment, and you will see the default payment confirmation page. Read more about customizing the payment confirmation display.
You’ve created & tested your first form! Now what? See our “What Happens After A Payment” article list to learn what you can explore next.
If you are satisfied with the results of testing your form, you can take your form live so that it can begin processing live payments.
Still have questions? We're here to help!
Last Modified: