Crea un account utente WordPress dopo il pagamento con Uncanny Automator
In Questo Documento
L'integrazione di WP Simple Pay con uno strumento di automazione può semplificare i tuoi processi post-pagamento e migliorare il coinvolgimento degli utenti sul tuo sito web. In questa guida, ti illustreremo il processo di creazione automatica di un account utente WordPress per i tuoi clienti dopo che avranno effettuato un pagamento utilizzando WP Simple Pay, senza scrivere codice.
Cos'è Uncanny Automator?
Uncanny Automator è un potente plugin di automazione per WordPress che semplifica e ottimizza i flussi di lavoro del sito web. Con Uncanny Automator, puoi creare facilmente sequenze automatizzate chiamate ricette collegando trigger, azioni e condizioni. Uncanny Automator si integra perfettamente con altri plugin e servizi popolari, consentendoti di automatizzare attività come l'invio di moduli, l'email marketing, l'aggiornamento dei ruoli utente e altro ancora.
Questa integrazione richiede una licenza Uncanny Automator Pro. La licenza Pro consente ricette illimitate, centinaia di trigger, centinaia di azioni e integrazioni con Google Sheets, Mailchimp, Slack, Zoom, ecc.
Crea una nuova ricetta Uncanny Automator
Dal menu Automator, seleziona Automator > Aggiungi nuova per creare una nuova ricetta. Successivamente creerai il tuo Trigger e la sua Azione/i associata/e.
Imposta il tuo Trigger
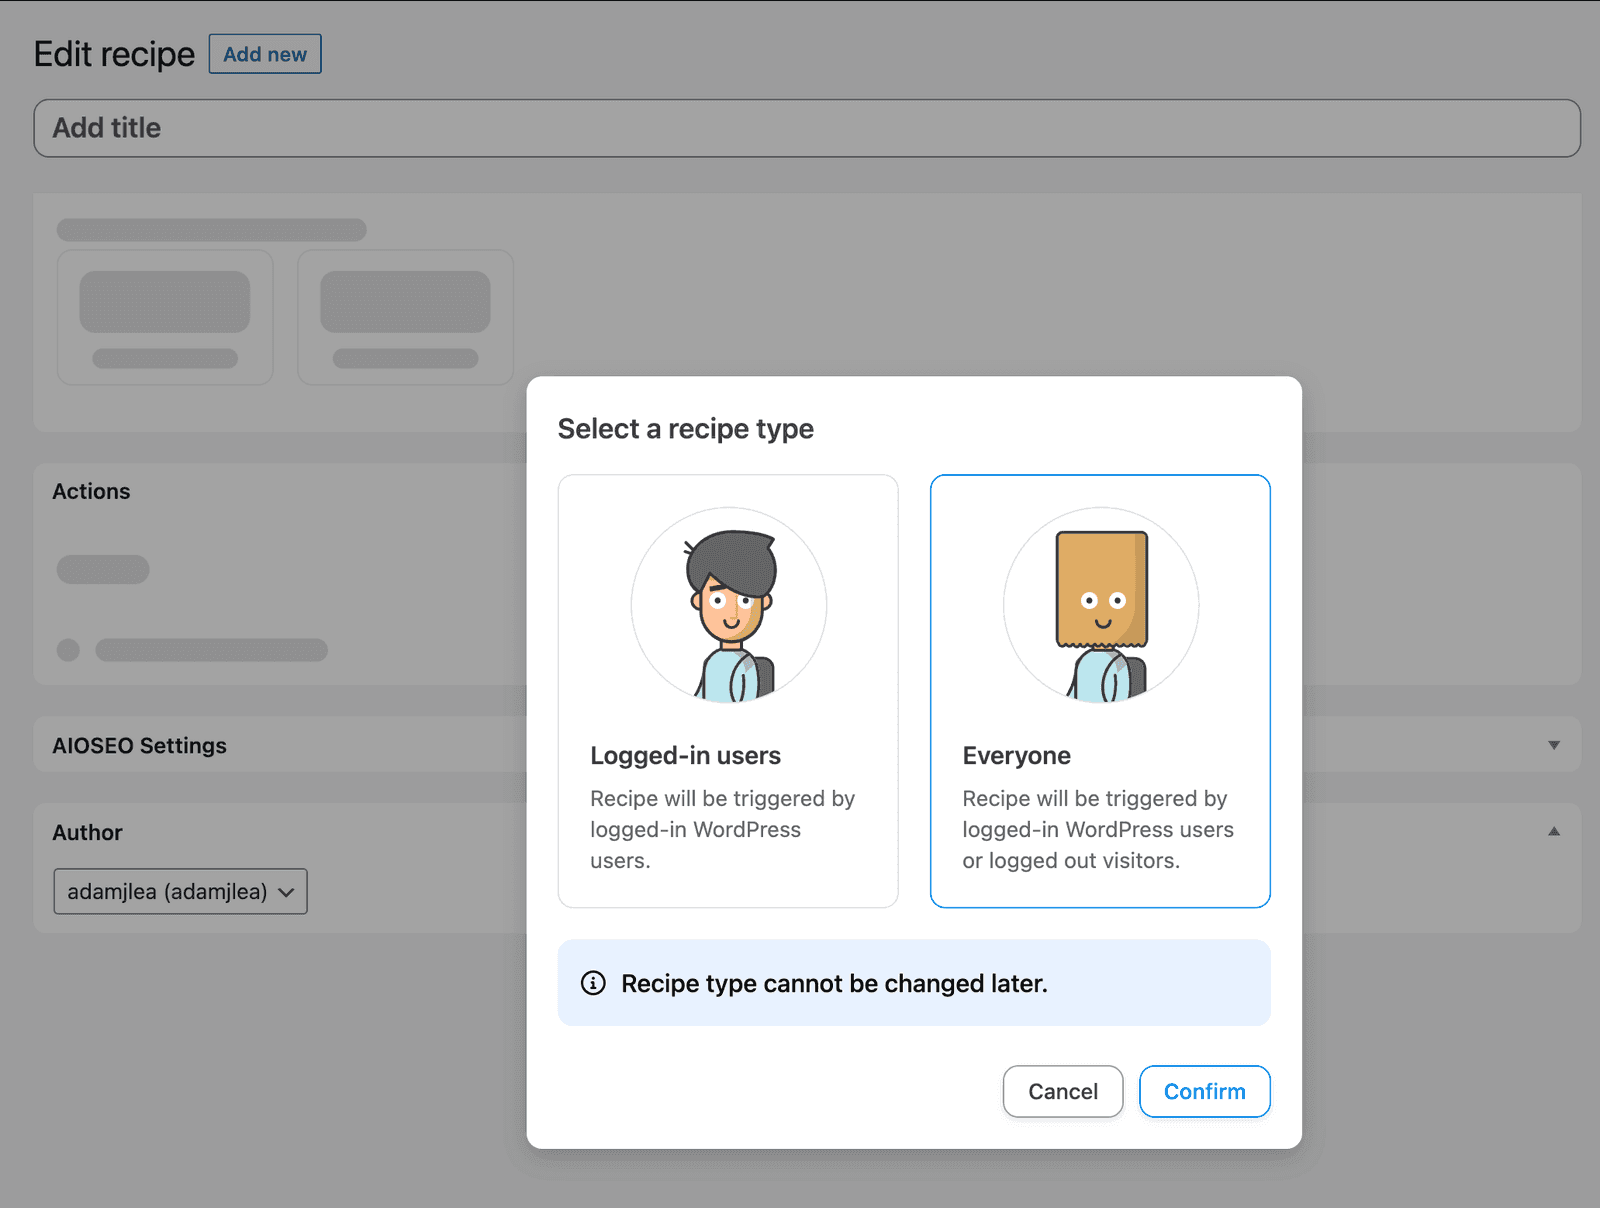
Ti verrà chiesto se la tua ricetta è per Utenti connessi o per Tutti. Per questo esempio scegliamo Tutti e facciamo clic su conferma.
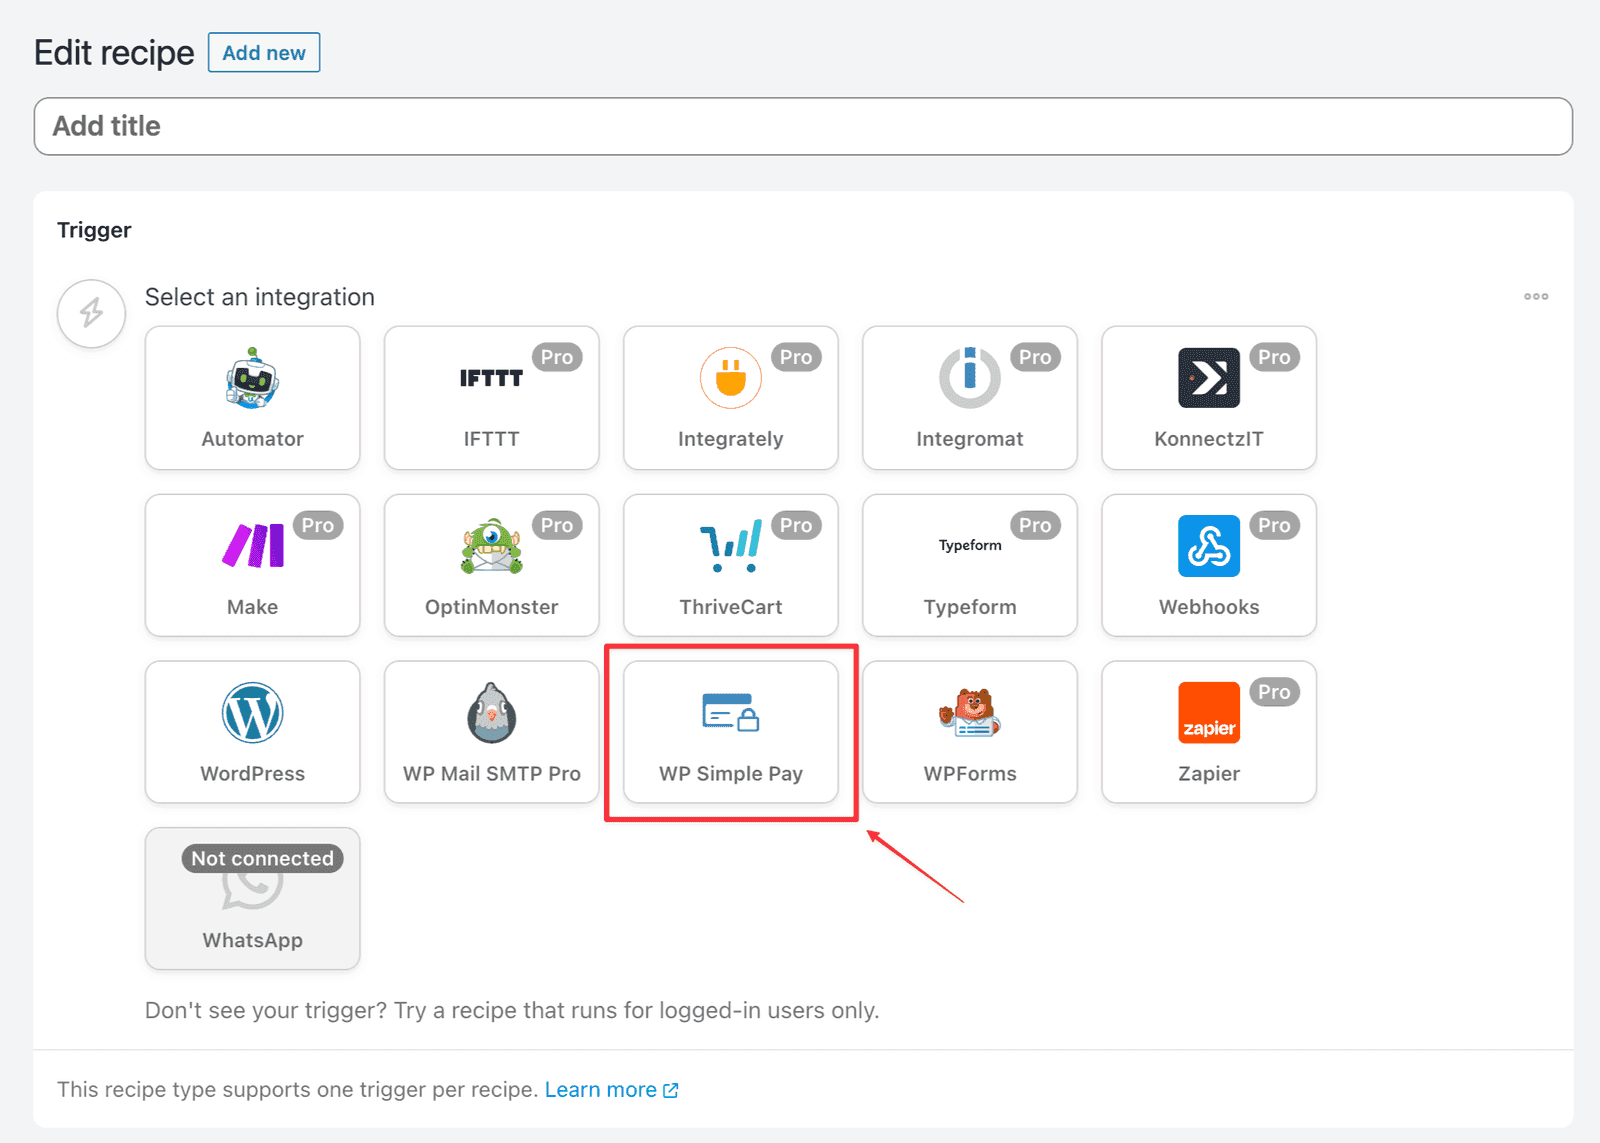
Ti verrà presentato un elenco di integrazioni connesse da cui scegliere i tuoi Trigger. Scegli WP Simple Pay tra le opzioni disponibili.
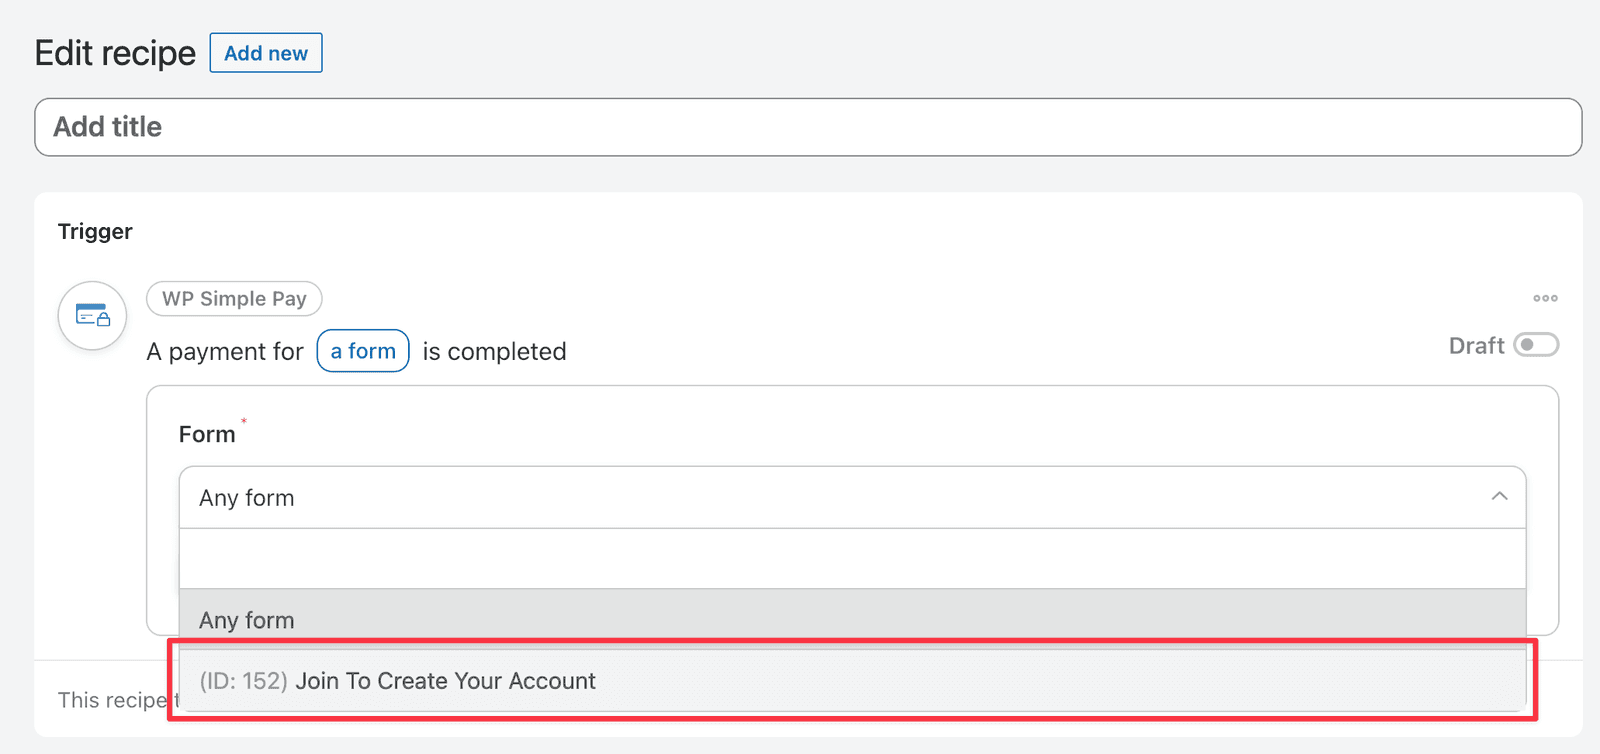
Dopo aver selezionato WP Simple Pay, ti verrà presentato un elenco di Trigger. Per questo esempio scegli Un modulo di pagamento è stato completato.
Ti verrà quindi presentato un menu a discesa per selezionare il modulo a cui desideri applicare questo Trigger. Scegli il modulo appropriato dal menu a discesa e quindi fai clic sul pulsante Salva.
Imposta la tua Azione
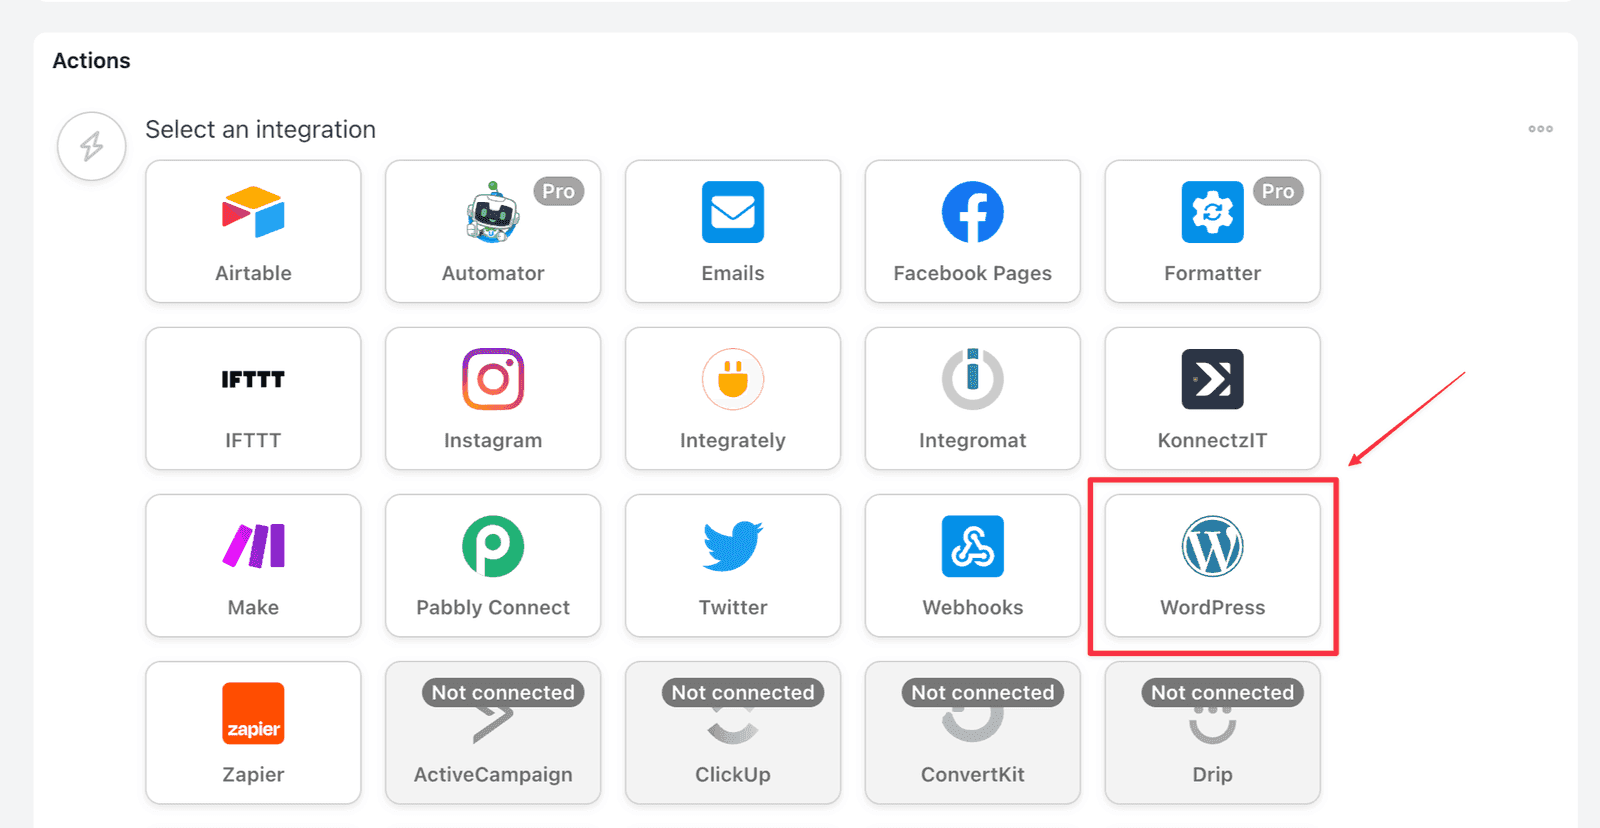
Sotto la sezione Trigger, vedrai la sezione Azione. Fai clic sul pulsante Aggiungi azione e vedrai un elenco di integrazioni connesse da cui scegliere la tua Azione. Scegli WordPress tra le opzioni disponibili.
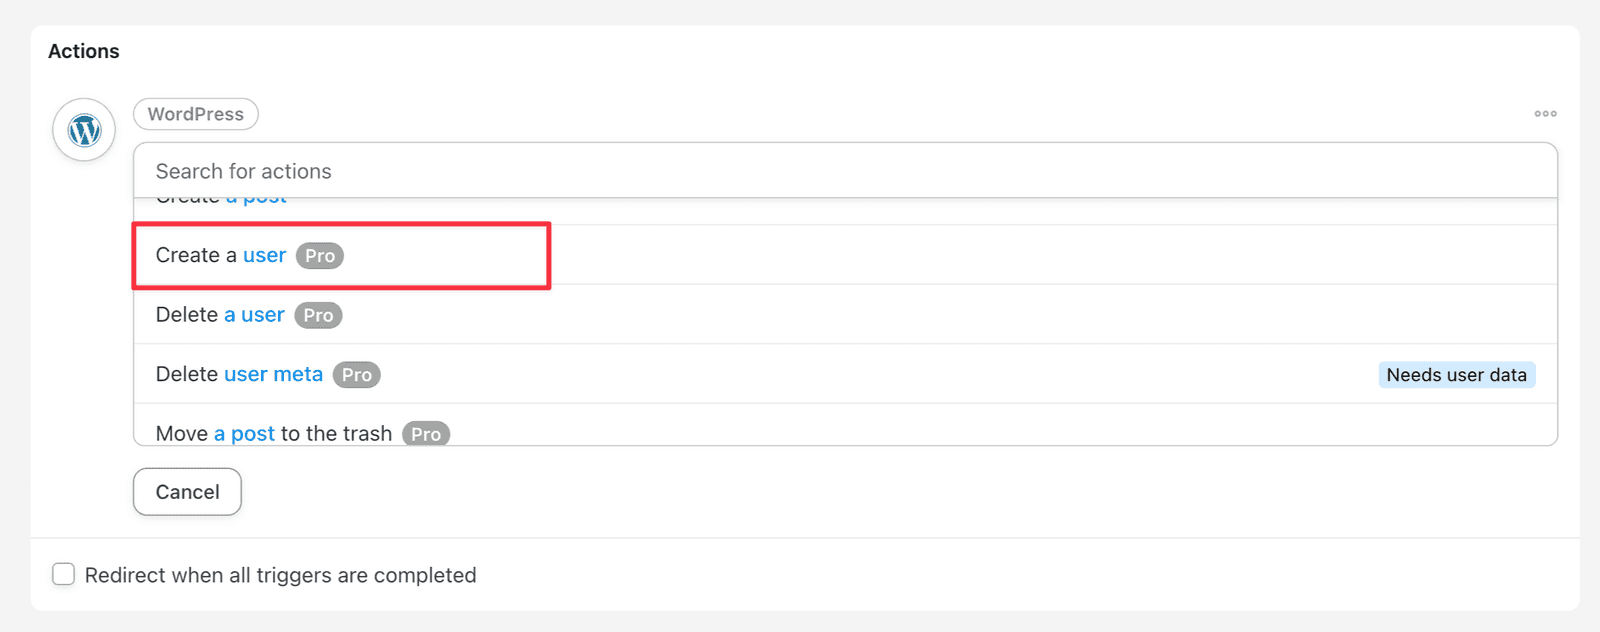
Scorri l'elenco delle azioni disponibili finché non vedi Crea un utente, quindi fai clic su di esso per selezionarlo.
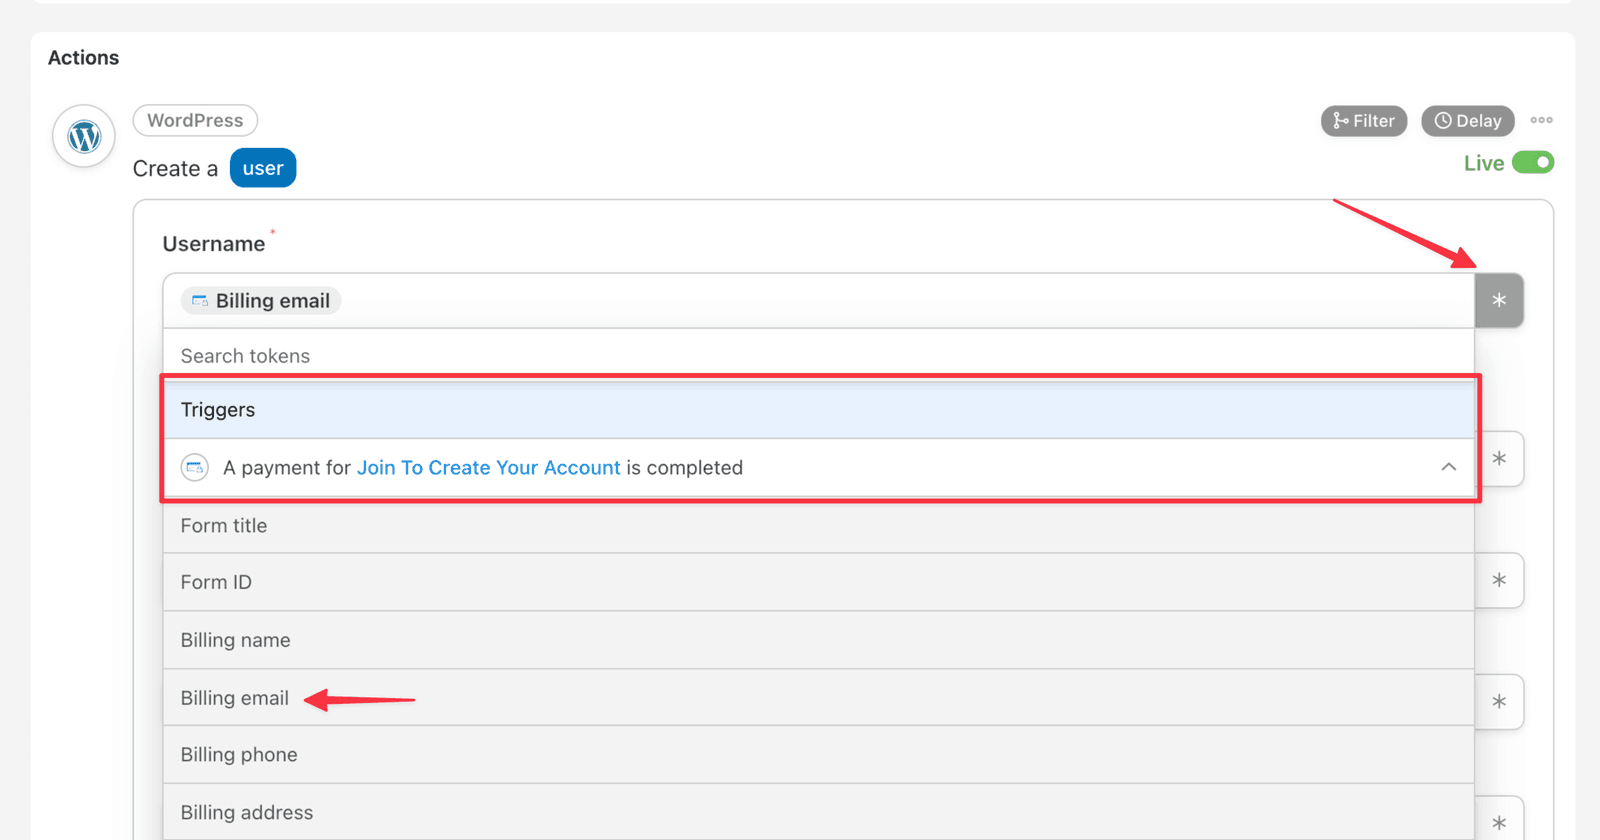
Dovrai quindi selezionare i campi utilizzati per creare l'account utente WordPress. I campi Nome utente ed Email sono gli unici due campi richiesti e, per mantenere questo esempio breve, utilizzeremo solo questi due.
Fai clic sull'asterisco (*) sul lato destro del campo Nome utente. Questo aprirà un menu a discesa da cui dovresti selezionare Email di fatturazione. Ripeti questo processo per il campo Email.
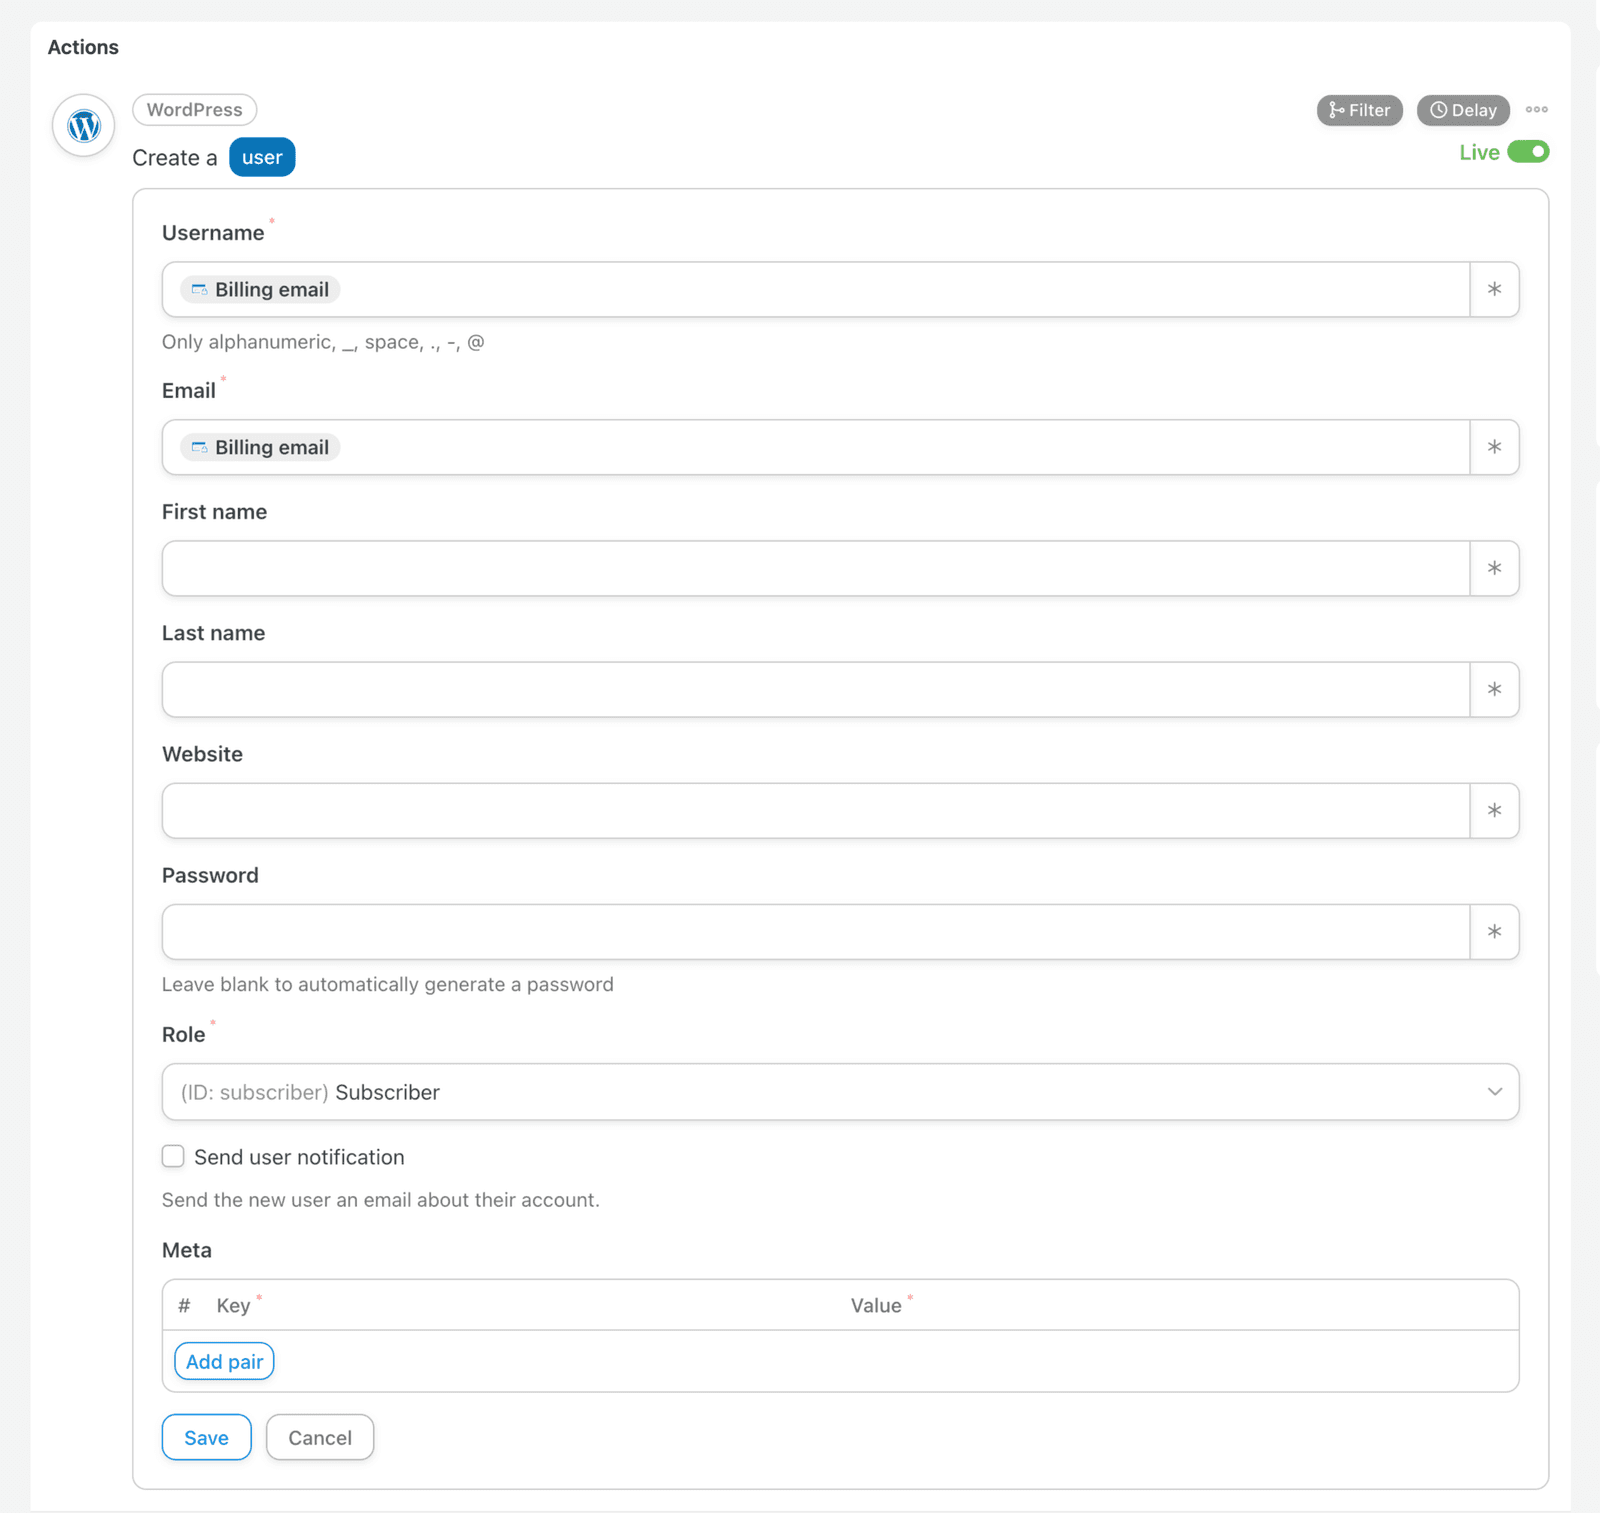
Dopo aver configurato entrambi i campi, fai clic sul pulsante Salva in fondo alla sezione Azione.
A seconda del follow-up che hai predisposto per i tuoi clienti, potresti voler selezionare o meno la casella di controllo 'Invia notifica utente' mostrata di seguito per inviare automaticamente un'e-mail al cliente riguardo al suo nuovo account, fornire le sue informazioni di accesso, ecc.
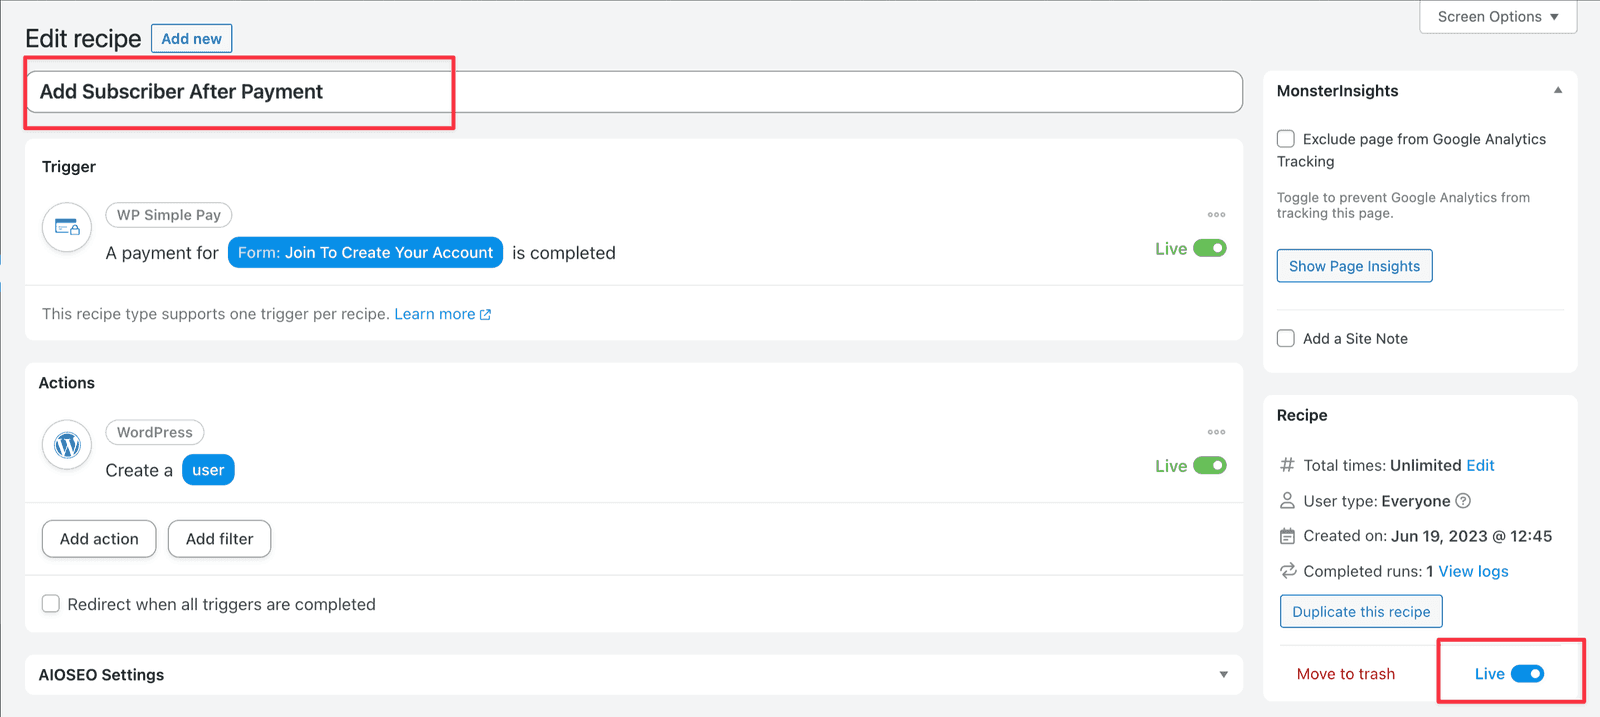
Dopo aver fatto clic su Salva, è un buon momento per verificare che tutto sia corretto e che tu abbia dato un nome alla tua Ricetta e l'abbia impostata su Live se sei pronto per usarla.
Completa un pagamento utilizzando il tuo nuovo modulo
Utilizzando il modulo di pagamento selezionato nella sezione di configurazione del Trigger, invia un pagamento.

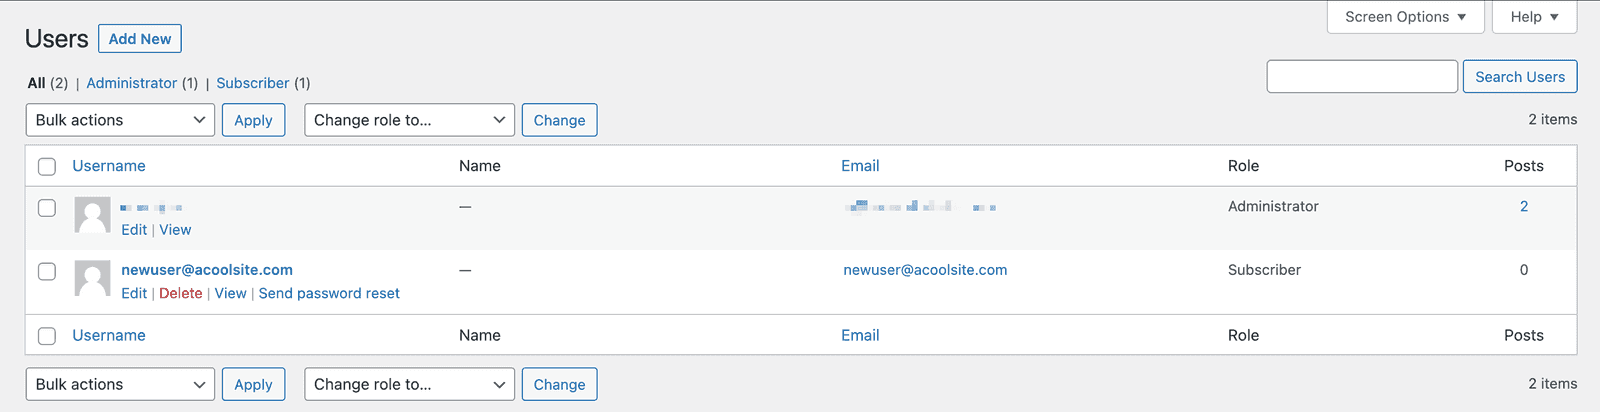
Verifica la creazione dell'account WordPress
Ora dovresti vedere l'utente creato nell'amministrazione Utenti di WordPress.
Hai ancora domande? Siamo qui per aiutarti!
Ultima modifica: