Connect WP Simple Pay to Google Sheets With Uncanny Automator
In This Document
Integrating WP Simple Pay with an automation tool can streamline your after-payment processes and enhance user engagement on your website. In this guide, we will walk you through the process of automatically creating a row containing payment and customer information in Google Sheets after payment has been made using WP Simple Pay – without writing any code.
What is Uncanny Automator?
Uncanny Automator is a powerful automation plugin for WordPress that simplifies and streamlines website workflows. With Uncanny Automator, you can easily create automated sequences called recipes by linking triggers, actions, and conditions. Uncanny Automator seamlessly integrates with other popular plugins and services, enabling you to automate tasks like form submissions, email marketing, user role updates, and more.
Connect a Google Account
To get started with Google Sheets, connect Uncanny Automator to your Google account:
- Visit Automator > App Integrations in the WordPress admin.
- In the Google Sheets tab, click Sign in with Google.
- In the list of required permissions, make sure everything is checked off. Sometimes the last 2 checkboxes are unchecked by default.
- Click Allow to let Automator access your Google Drive files and spreadsheets.
Once this is done, a success message will be displayed on your website and the Google Sheets actions will be available. Once set up, Automator can be used to add new records to a Google Sheet and/or update existing records.
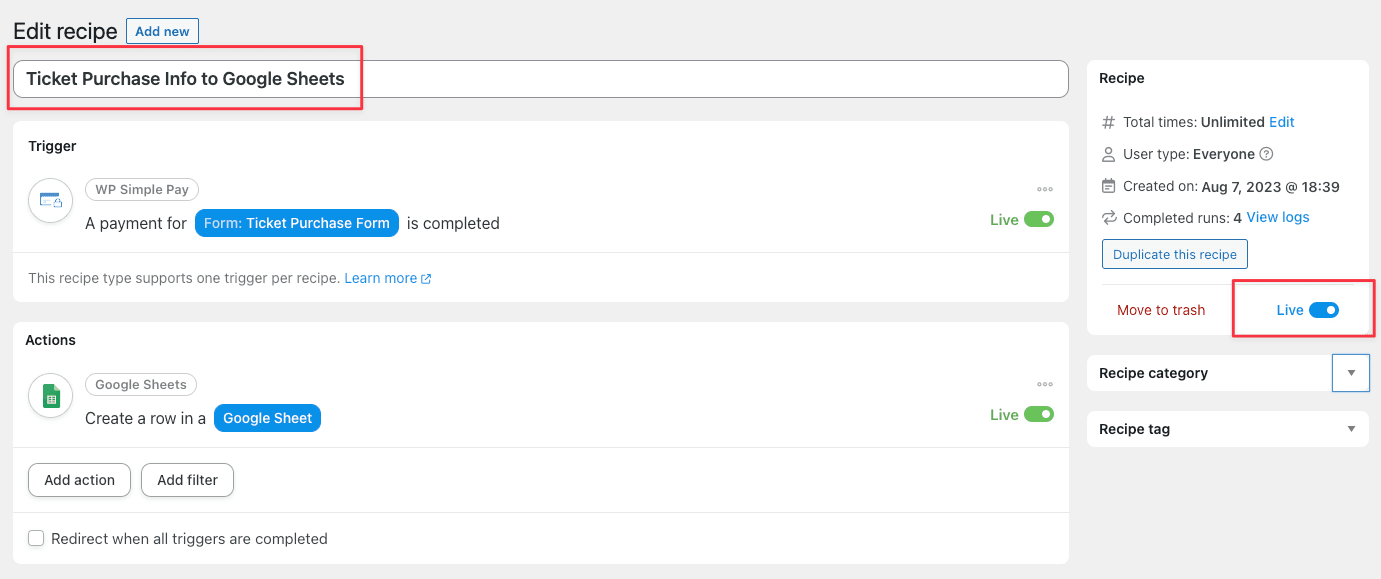
Create a new Uncanny Automator recipe
From the Automator menu, select Automator > Add new to create a new recipe. You’ll then create your Trigger and its associated Action(s).
Set up your Trigger
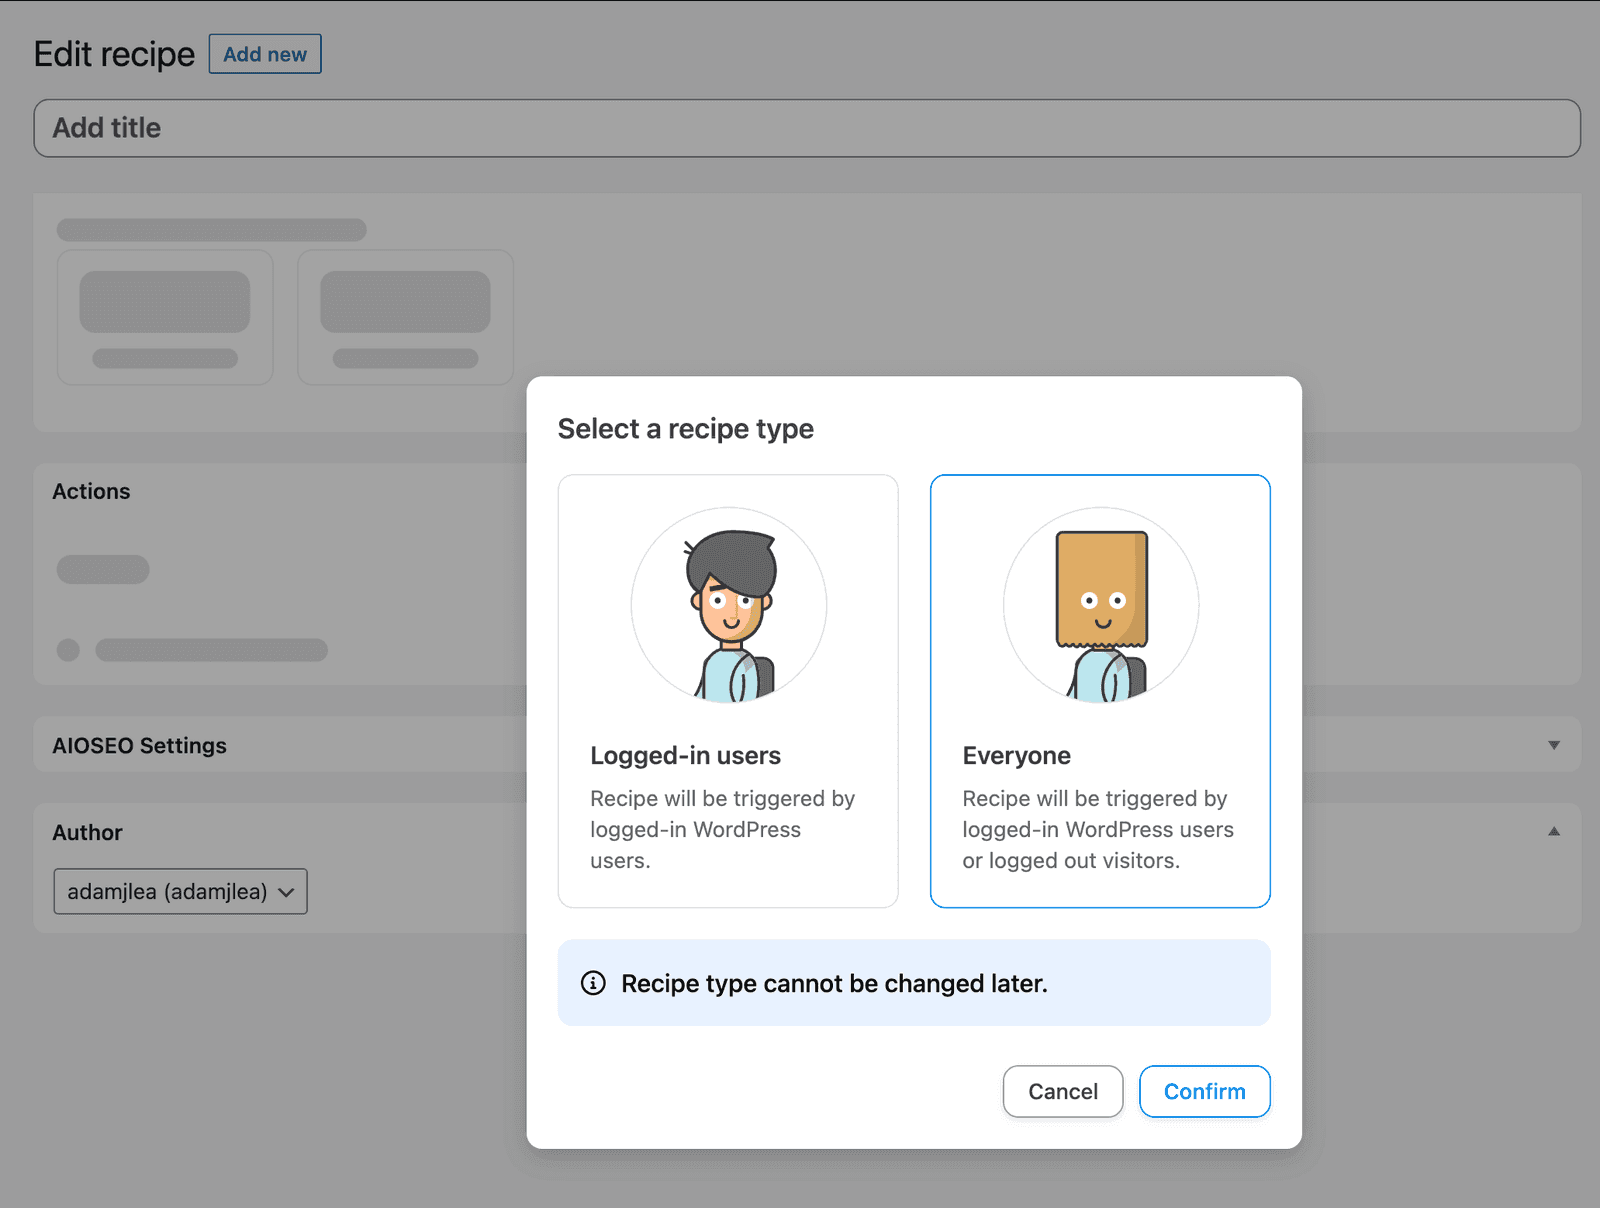
You’ll be asked whether your recipe is for Logged-in users or Everyone. For this example let’s choose Everyone and click confirm.
You’ll be presented with a list of connected integrations to choose your Triggers. Choose WP Simple Pay from the available options.
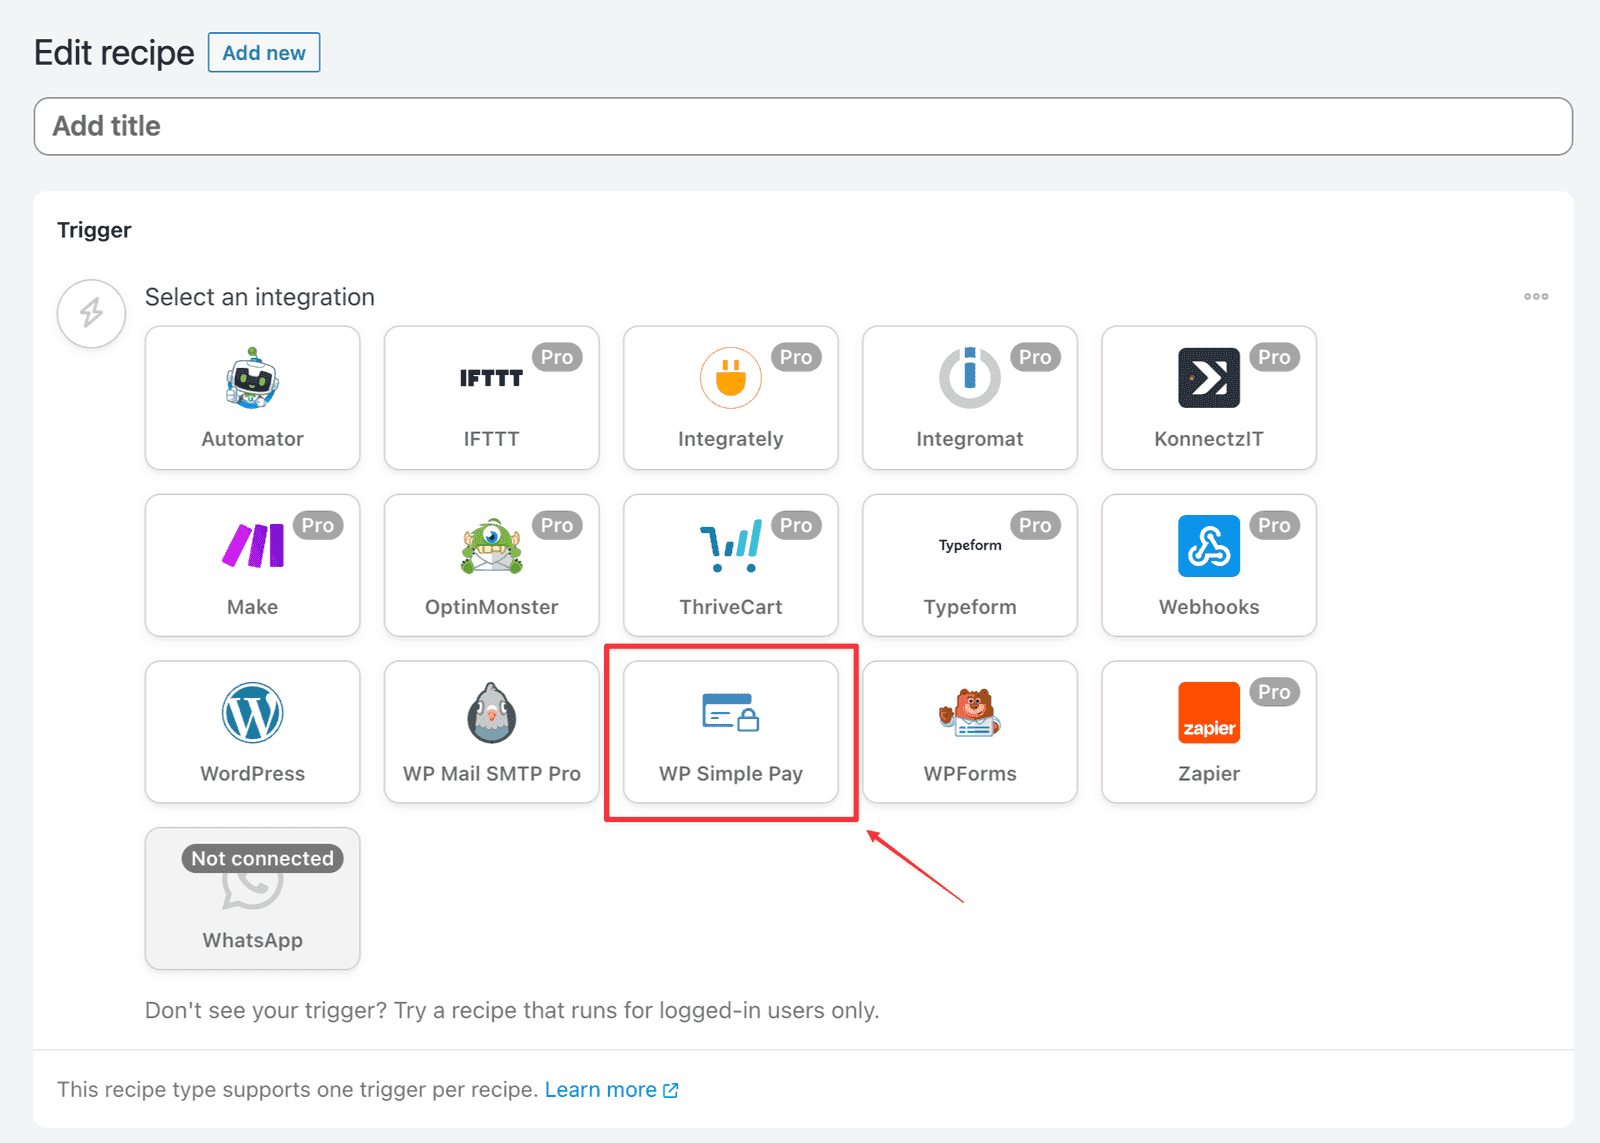
After selecting WP Simple Pay, you be presented with a list of Triggers. For this example choose A payment form is completed.
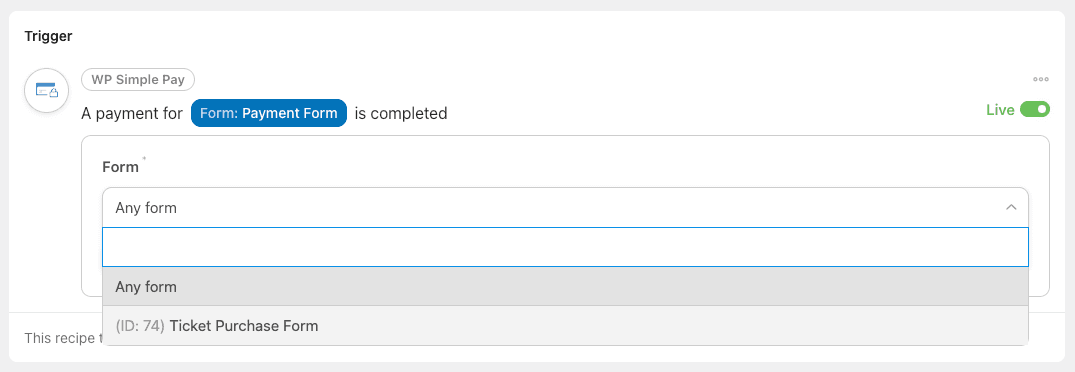
You will then be presented with a dropdown to select the form you wish this Trigger to apply to. Choose the appropriate form from the dropdown and then click the Save button.
Set up your Action
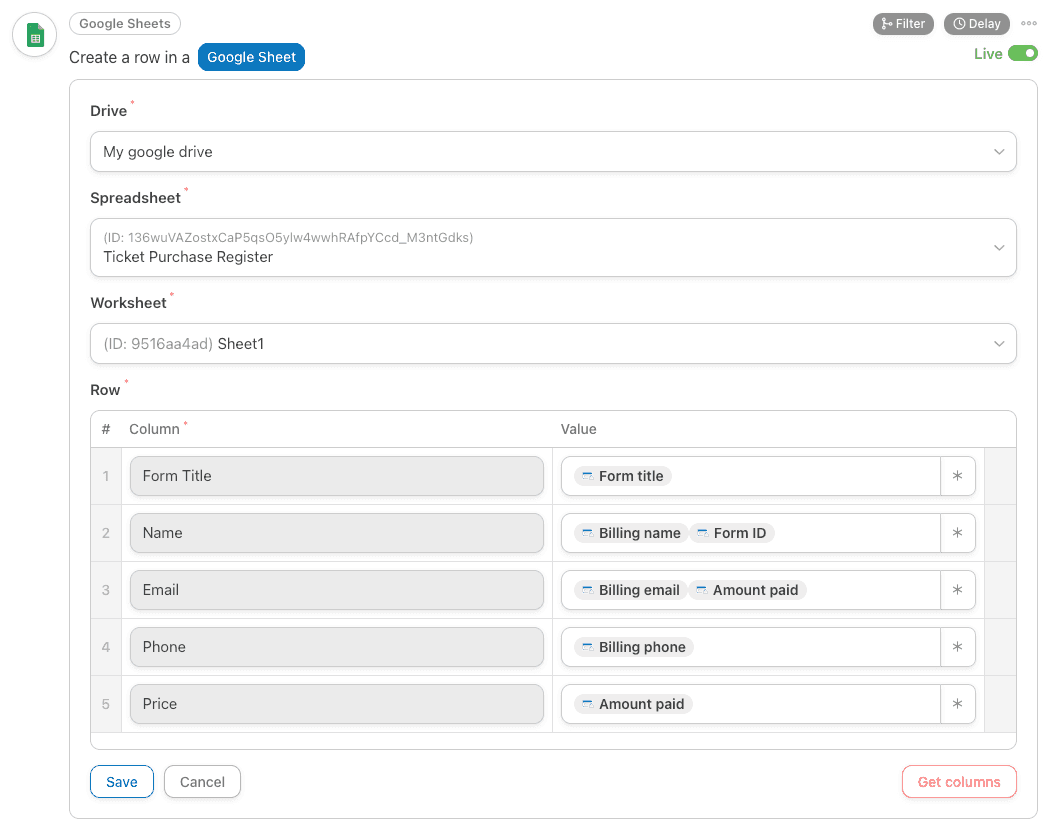
Create a row in a Google Sheet
To configure the Create a row action in Google Sheets:
- Choose the Google Sheets integration in the Actions list.
- Choose the Create a row in a Google Sheet action.
- Make selections for the Drive, Spreadsheet, and Worksheet for your account. These values determine where the rows will be added and what columns will be available.
- After clicking the Get Columns button, you will see a list of columns for your worksheet on the left and a list of values on the right.
- For each row, populate the Value that you want to add. In most cases, you will want to choose tokens from the triggers or the system by choosing the * icon to the right of the field.
- Save your updates and make sure the triggers, actions, and recipe are all live.
You cannot add or remove columns from the Google Sheet, you can only add rows for the existing columns. If you add or remove columns in Google Sheets itself, make sure you click Get Columns again.
After clicking save, it is a good time to verify that everything looks correct and you’ve given your Recipe a name and toggled it Live if you are ready to use it.
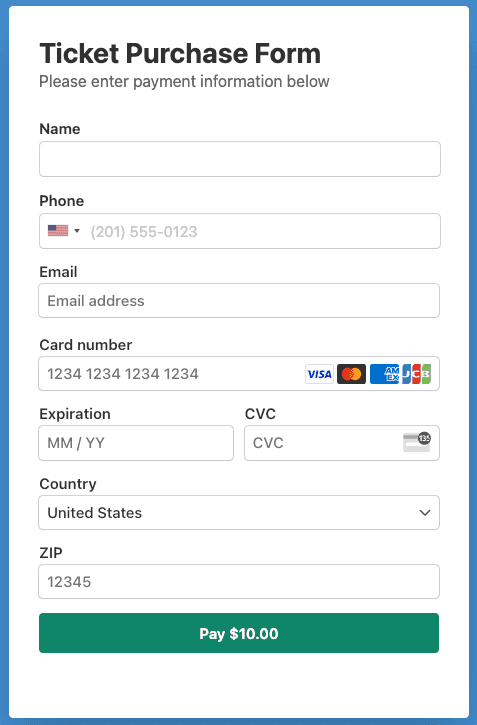
Complete a payment using your new form
Using the payment form you selected in the Trigger setup section, submit a payment.
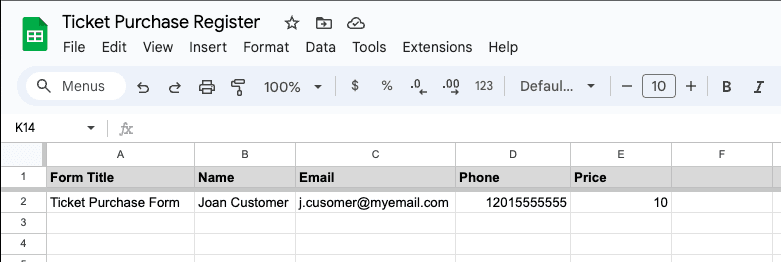
Verify Google Sheet Row creation
You should now see the user row in Google Sheets.
Still have questions? We're here to help!
Last Modified: