
How to Easily Collect Przelewy24 Payments in WordPress
Last updated on

Do you want to collect payments online from your customers based in Poland?
Then you might want to start accepting Przelewy24 on your site.
Przelewy24 is the most popular bank transfer method in Poland. It allows customers to complete transactions online using bank transfers and other methods.
In this article, we’ll show you how to collect payments on your WordPress site via Przelewy24.
Accepting Przelewy24 Payments in WordPress
Using a WordPress Stripe plugin like WP Simple Pay is the easiest way to accept Przelewy24 payments on your site. WP Simple Pay is not just limited to accepting Przelewy24 payments. With it, you can accept payments through 10+ Stripe-supported payment methods, including Apple Pay / Google Pay, credit card, ACH payments, and more.
With WP Simple Pay, you can allow users to choose from payment methods that are available on your site.
Step 1: Install WP Simple Pay in WordPress
If you haven’t already, your first step is to install WP Simple Pay Pro on your WordPress website, activate your license, and connect your Stripe account. That sounds like a lot of work, but it’s actually quite fast. Read our Getting Started Guide for instructions.
Remove the additional 3% fee!
Most Stripe plugins charge an additional 3% fee for EVERY transaction
…not WP Simple Pay Pro!

If you didn’t see the setup wizard, simply head over to WP Simple Pay » Settings » Advanced tab and click the Launch Setup Wizard button.
2: Connect WordPress to Stripe
To connect your WordPress site to Stripe, click on Connect with Stripe.

Next up, enter the email address you use for your Stripe account and connect it to your site. If you don’t have a Stripe account, you can easily create one by entering your email address and completing the registration.
Upon completing this process, you’ll be shown a success page that says, “Setup Complete.” Next, click on Create a Payment Form.

Step 3: Create a Przelewy24 Payment Form
To start accepting payments via Przelewy24, you’ll need to create a payment form.
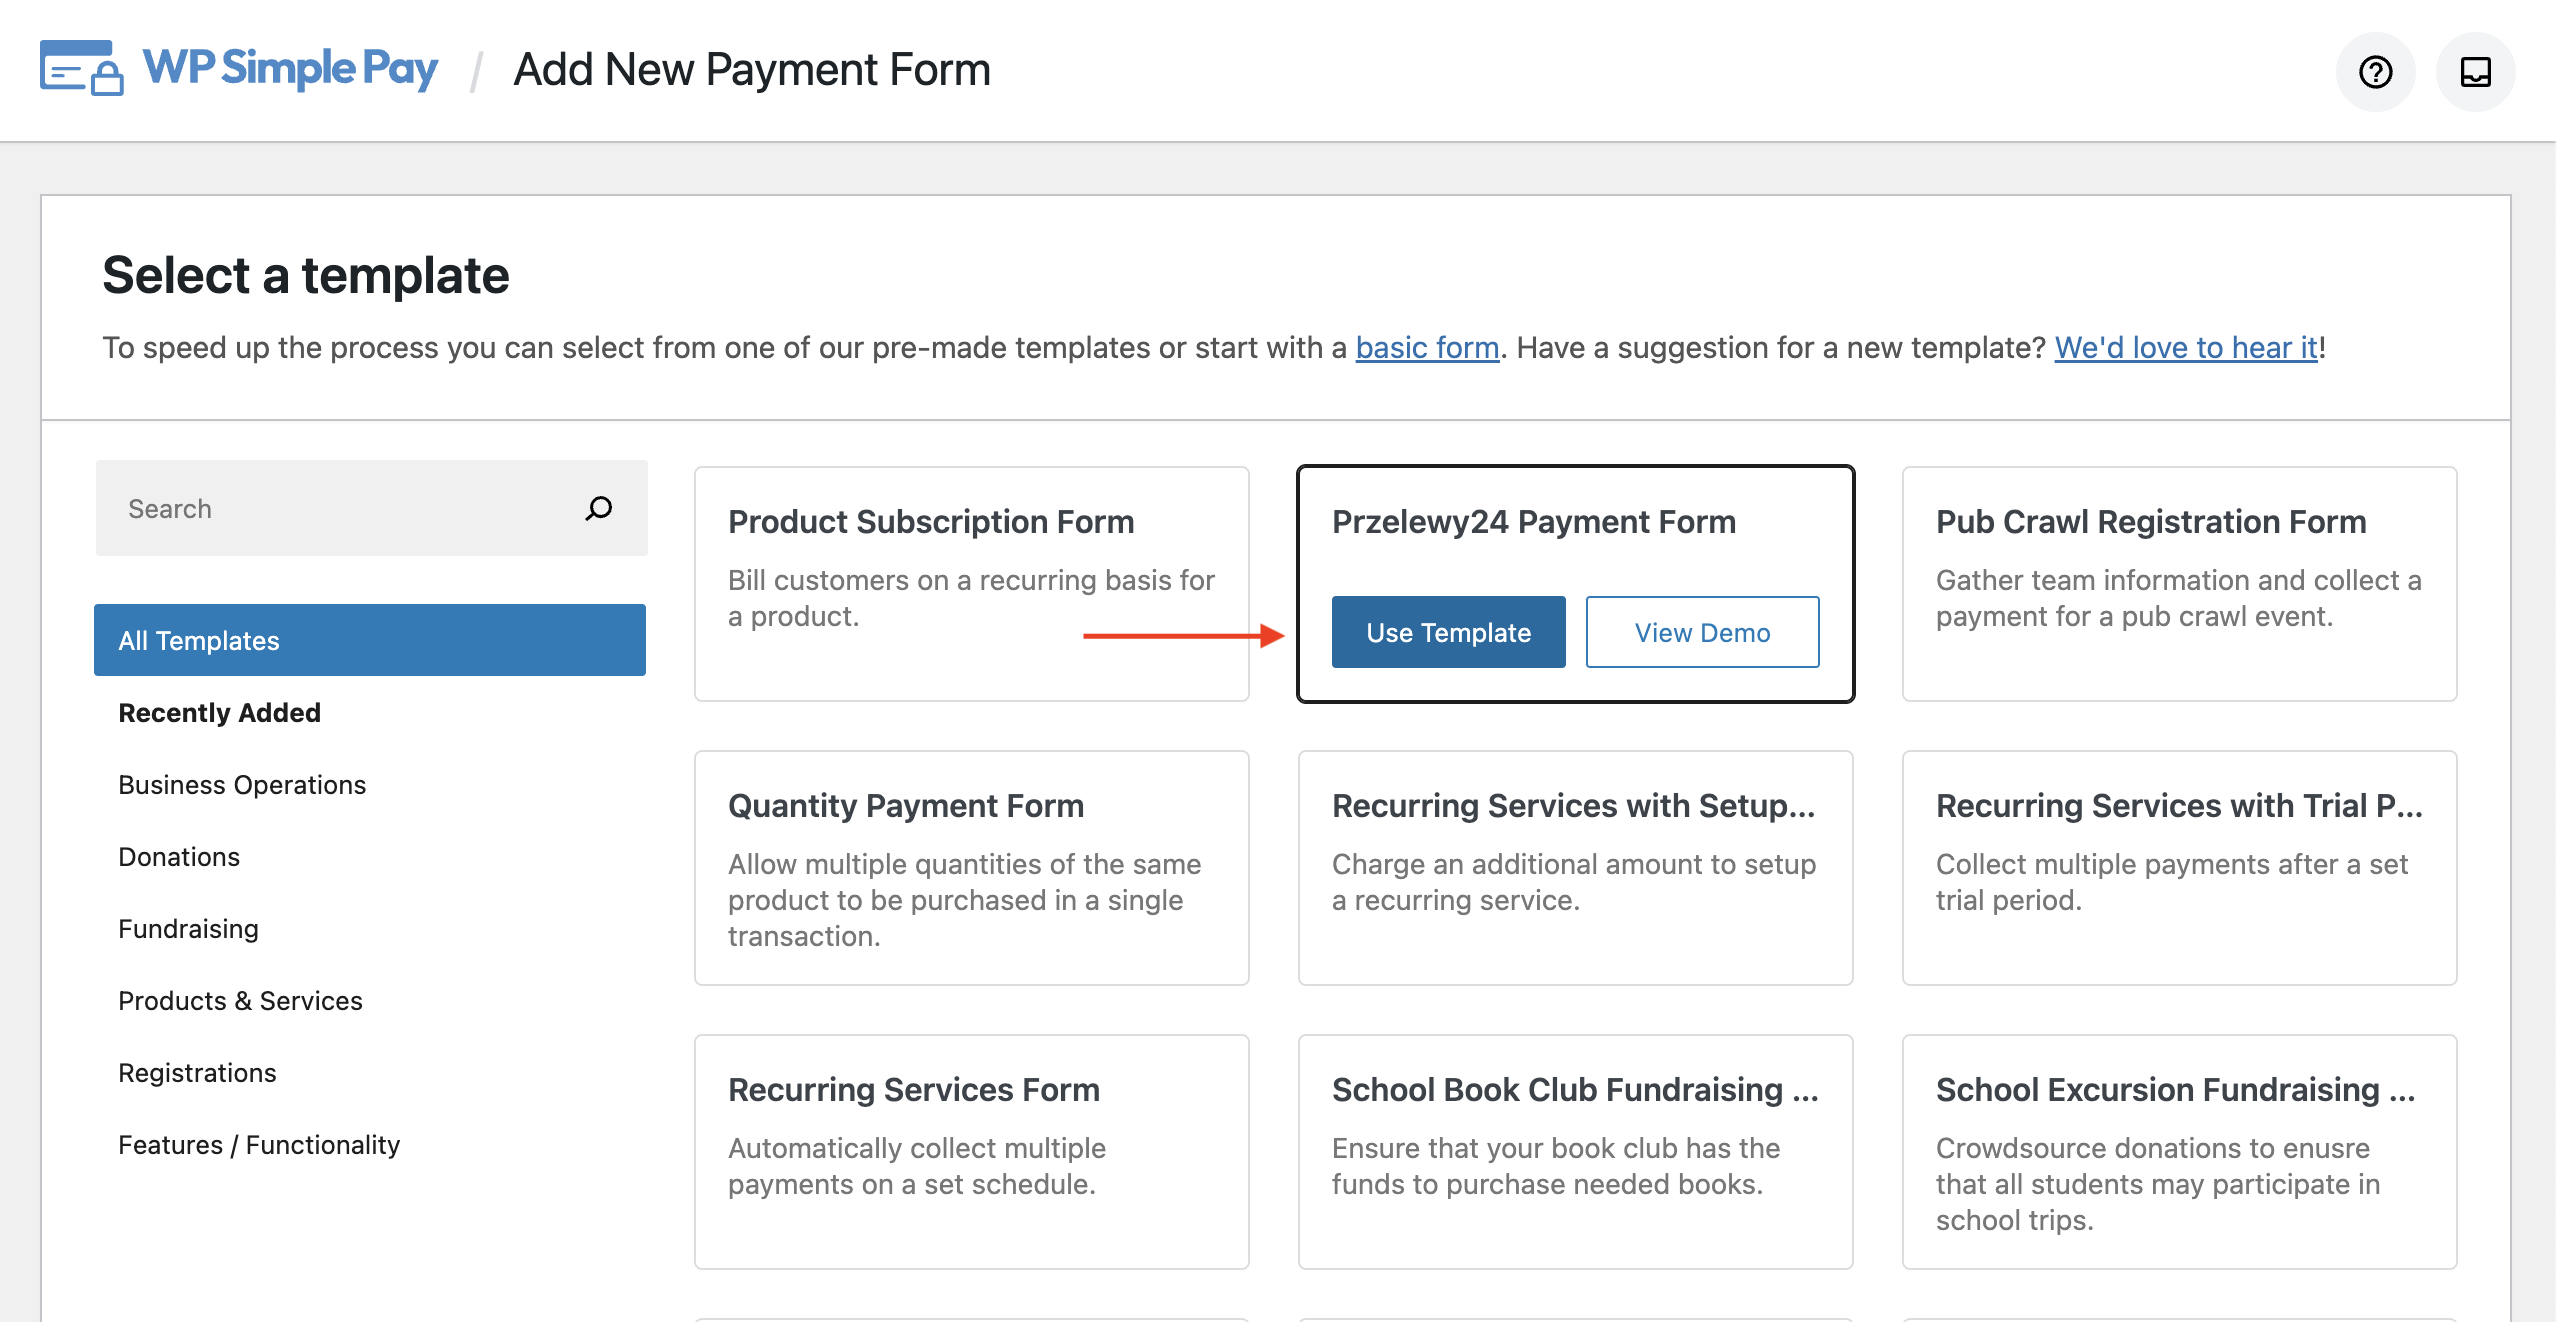
To create it, start by choosing one of the payment form templates from the templates library.
If you don’t see the template library, then you might have closed the setup wizard already. In that case, you can click on the left-hand menu, and click on WP Simple Pay » Add New to create a payment form.
You’ll see lots of different payment form templates. WP Simple Pay comes bundled with a Przelewy24 Payment Form template. While you can choose any template to accept Przelewy24 payments, this template we’ve chosen preselects Przelewy24 payments right away without any further configuration. Simply use the search bar to find the that template.
You should now be in the payment form editor. You can start by giving your form a Title and a Description.
Select either on-site payment form or off-site Stripe checkout form under Type. For more details on choosing a form type, check out the complete guide to setting up a Stripe checkout form.

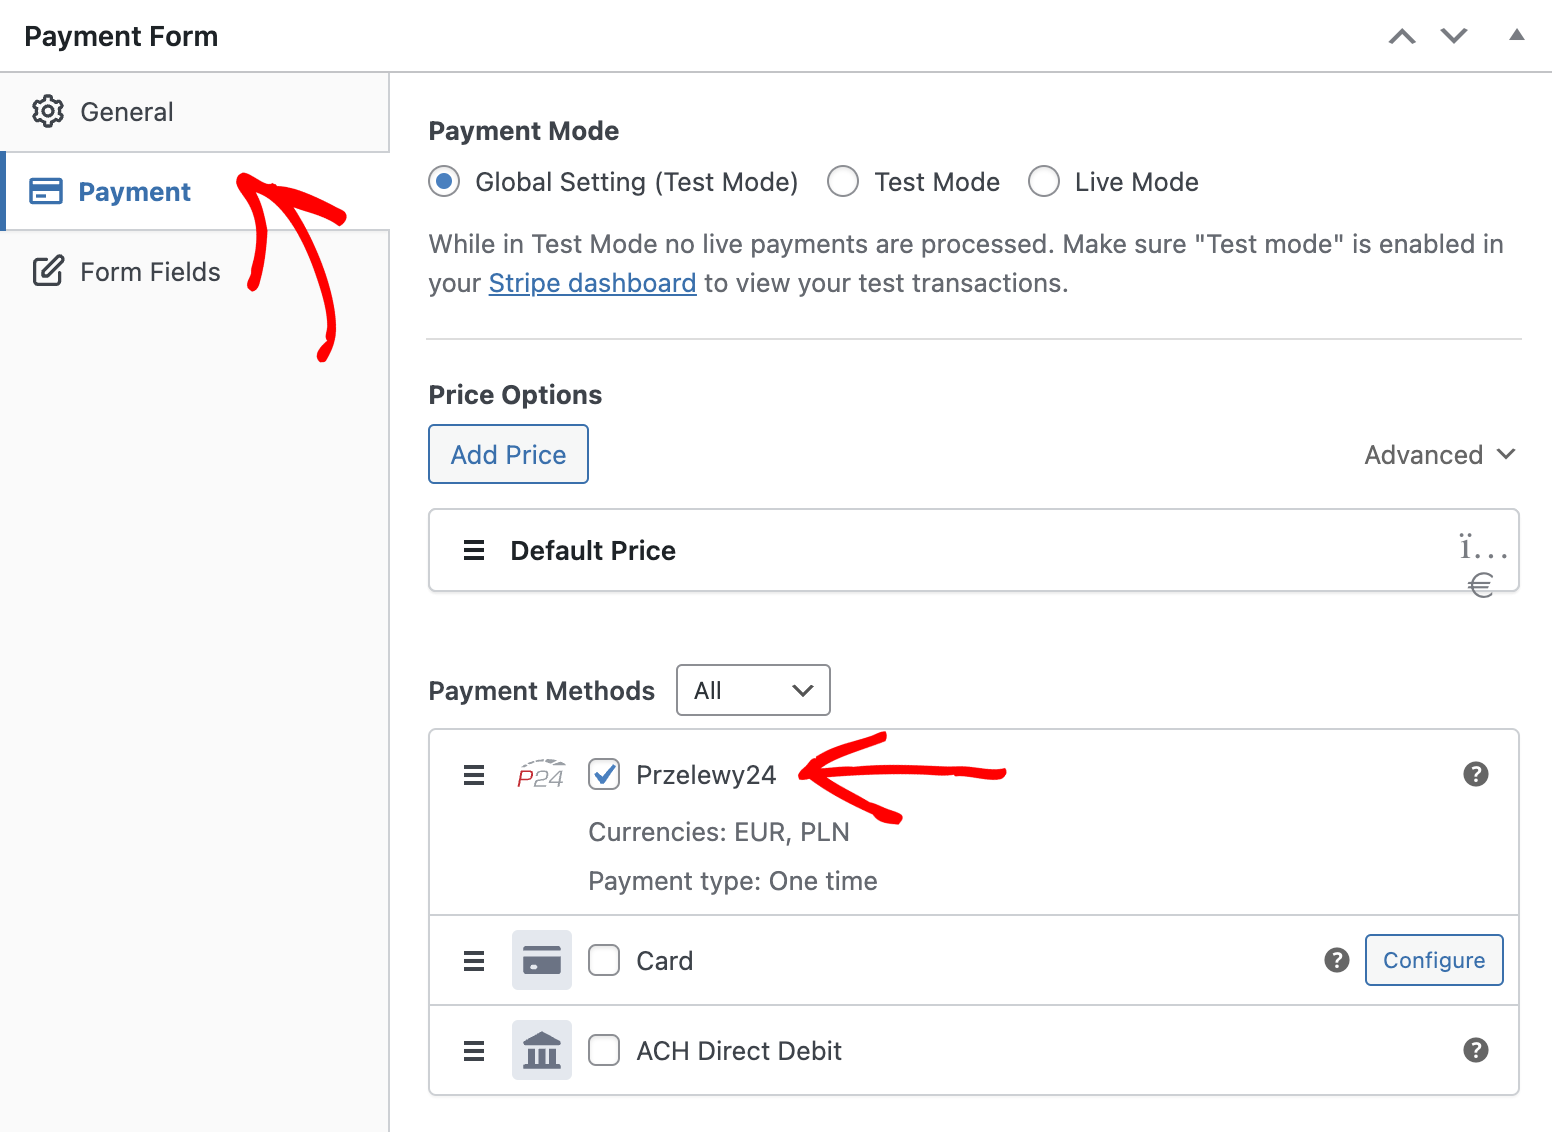
Next up, click the Payment tab. In the Payment tab, you can choose between test mode or live mode. We recommend using the test mode until you completely set up the form and process some test payments. After testing, f the form functions the way you want, you can move it to the Live mode.
Feel free to change the currency and other pricing options on this page. Make sure Przelewy24 has been selected under Payment Methods. If you want, you can also enable other payment methods for this form.
For more details, check out how to allow multiple payment methods in WordPress.
If you want to make any modifications to the form fields, you can go to the Form Fields tab.
There you have it!
Now you can preview your form and publish it.
Don’t forget to make some test payments to verify if the form is working the way you want (read more about Test mode).
Step 4: Embed the Przelewy24 Form
Now that you’ve published the form and made some test payments, it’s time to embed it on your site so you can start accepting payments from your customers.
To embed the form on one of your posts or pages, go to the edit screen of the post or page, then click on the plus (+) sign at the top, find the WP Simple Pay block, and then select it to add this block to the WordPress block editor.
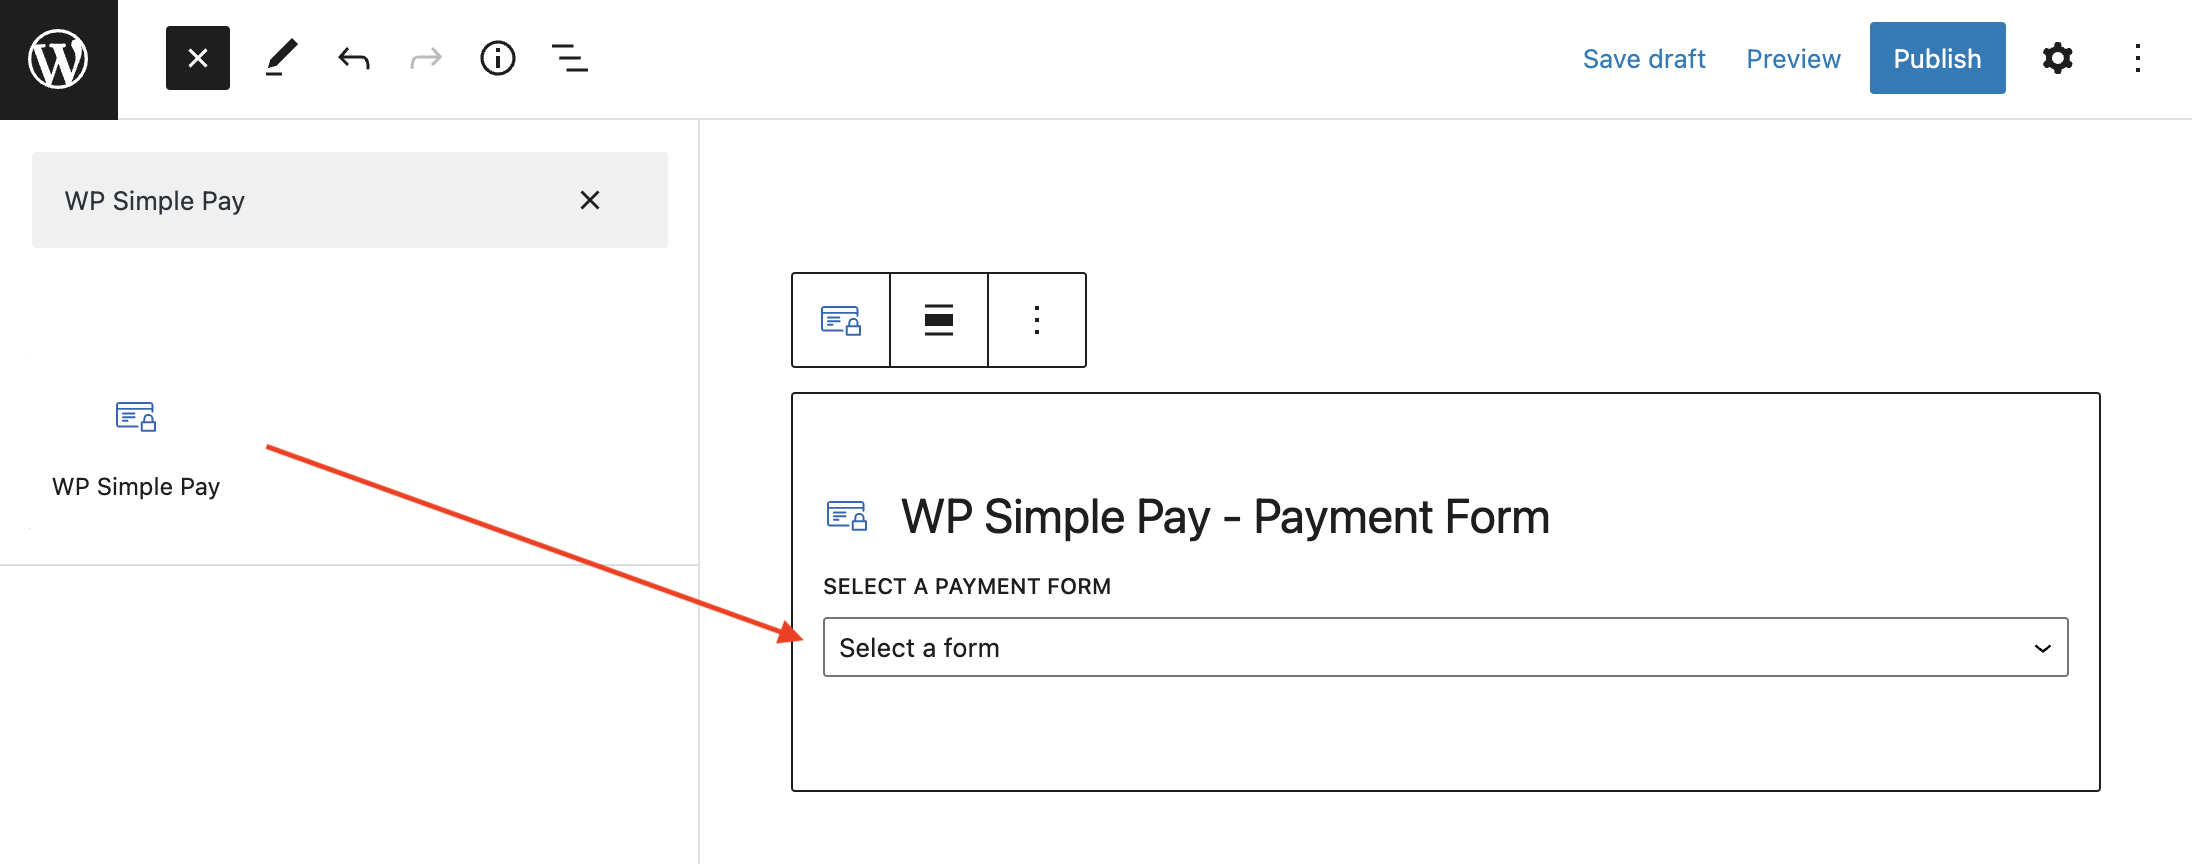
After that, select your payment form from the block’s dropdown menu. Next, you can preview your form, publish it, then visit your page to see it in action.
That’s it!
We hope this article helped you learn how to easily collect Przelewy24 payments in WordPress.
Start using WP Simple Pay today and enable all the advanced Stripe features on your site.
To read more articles like this, follow us on Facebook and Twitter.
Disclosure: Our content is reader-supported. This means if you click on some of our links, then we may earn a commission. We only recommend products that we believe will add value to our readers.


Leave a Reply